How to Use Photo Stacking in Different Genres
Photo stacking, the process of integrating many photographs into a single composite, has become a valuable tool for improving images in various genres. Photographers and artists can use this approach to transcend the limits of a single shot by combining many exposures, focus areas, or moments into a single cohesive composition. Photo stacking expands the creative options and improves the final image quality by combining these various aspects. This blog addresses photo stacking in various genres, where you can effectively utilize photo stacking to enhance your photographs and create stunning compositions.
Portraits:
In portrait photography, photo stacking can create striking depth of field effects. By blending images with different focal points, photographers can achieve a greater range of sharpness, emphasizing specific facial features or creating a dreamy bokeh background.
Step 1: Set up your portrait scene with the desired lighting and composition.
Step 2: Position your subject and adjust the camera settings for optimal exposure.
Step 3: Capture a series of images while adjusting the focus slightly with each shot.
Step 4: Transfer the images to your computer and open them in a photo editing software like Photoshop.
Step 5: Align the images using the software’s alignment tools to ensure proper blending.
Step 6: Use the stacking or blending feature in the software to merge the images.
Step 7: Adjust the opacity or masking of the stacked layers to achieve the desired depth of field effect.
Step 8: Fine-tune the overall image using post-processing techniques such as adjusting contrast, brightness, and colour.
Landscapes:
By capturing multiple shots with varying focus points and blending them, artists can achieve sharpness throughout the scene, from the foreground to the background, resulting in breathtaking landscape images.
Step 1: Choose a captivating landscape scene and set up your camera on a tripod for stability.
Step 2: Determine the desired depth of field and compose your shot accordingly.
Step 3: Adjust the camera settings for proper exposure and capture images, varying the focus point from foreground to background.
Step 4: Import the images into photo editing software.
Step 5: Align the images using the alignment tools to ensure proper blending.
Step 6: Utilize the stacking or blending function to merge the images, creating a single composite image with enhanced depth of field.
Step 7: Adjust the opacity or masking of the stacked layers as needed.
Step 8: Apply post-processing techniques to enhance the overall image, such as adjusting contrast, saturation, and sharpness.
Wildlife:
Photo stacking can be a valuable technique in wildlife photography, particularly when dealing with subjects in motion. Photographers can capture various movements and actions, creating a composite image showcasing wildlife’s dynamic nature.
Step 1: Find a suitable location for wildlife photography and position yourself safely from the subject.
Step 2: Set up your camera and lens for optimal focal length and exposure settings.
Step 3: Capture a series of shots as the wildlife subject moves or exhibits different behaviours.
Step 4: Transfer the images to your computer and import them into photo editing software.
Step 5: Align the images using the software’s alignment tools to compensate for slight movement.
Step 6: Utilize the stacking or blending feature to merge the images, highlighting the various movements or actions of the wildlife subject.
Step 7: Adjust the opacity or masking of the stacked layers to achieve the desired effect.
Step 8: Apply post-processing techniques to enhance the image, such as adjusting colours, sharpness, and noise reduction.
Macro:
In macro photography, photo stacking becomes essential when capturing fine details is crucial. Photographers can stack images to achieve an extended depth of field, revealing intricate details that would be impossible to capture in a single shot.
Step 1: Choose a macro subject with intricate details and textures.
Step 2: Set up your camera and macro lens, ensuring proper lighting and stability.
Step 3: Capture a series of images, adjusting the focus point slightly for each shot to cover the desired depth of field.
Step 4: Transfer the images to your computer and open them in photo editing software.
Step 5: Align the images using the alignment tools in the software.
Step 6: Utilize the stacking or blending function to merge the images, revealing the fine details throughout the subject.
Step 7: Adjust the opacity or masking of the stacked layers to achieve a seamless and well-focused image.
Step 8: Apply post-processing techniques to enhance the image, such as sharpening details and adjusting colours.
Product Photography:
In product photography, photo stacking can showcase products in sharp focus, highlighting every detail and texture. Blending multiple images with different focus points creates crisp, well-defined product shots that captivate viewers.
Step 1: Set up your product with appropriate lighting and background.
Step 2: Position your camera and adjust the exposure settings for accurate product representation.
Step 3: Capture a series of images, adjusting the focus point to cover the key details of the product.
Step 4: Transfer the images to your computer and import them into photo editing software.
Step 5: Align the images using the alignment tools provided.
Step 6: Utilize the stacking or blending function to merge the images, creating a final composite image with enhanced focus and sharpness.
Step 7: Adjust the opacity or masking of the stacked layers to achieve the desired effect.
Step 8: Apply post-processing techniques to refine the image, such as colour correction and retouching.
Architecture:
Photo stacking can also be applied to architectural photography to achieve balanced exposures and improved dynamic range. Multiple images with different exposure settings can capture the highlights and shadows of architectural structures, resulting in well-exposed images with a wide tonal range.
Step 1: Select an architectural subject with interesting details and structures.
Step 2: Set your camera on a tripod to ensure stability and precise composition.
Step 3: Determine the desired exposure and capture a series of images, bracketing the shots with different ones.
Step 4: Transfer the images to your computer and import them into photo editing software.
Step 5: Align the images using the alignment tools in the software to compensate for any slight movement.
Step 6: Utilize the stacking or blending function to merge the images, combining the properly exposed areas from each shot.
Step 7: Adjust the opacity or masking of the stacked layers to achieve a seamless and balanced exposure throughout the architectural structure.
Step 8: Apply post-processing techniques to refine the image, such as adjusting perspective distortion and enhancing details.
Night Photography:
In night photography, photo stacking comes to the rescue by capturing multiple shorter exposures and blending them, reducing noise and retaining details in low-light scenes.
Step 1: Find a suitable night scene with interesting lighting or subjects.
Step 2: Set your camera on a tripod to avoid camera shaking during long exposures.
Step 3: Determine the desired exposure and capture images, to capture different light intensities.
Step 4: Transfer the images to your computer and import them into photo editing software.
Step 5: Align the images to ensure proper merging.
Step 6: Utilize the stacking or blending function to merge the images, reducing noise and enhancing overall image quality.
Step 7: Adjust the opacity or masking of the stacked layers to balance the overall exposure and retain details in both the highlights and shadows.
Step 8: Apply post-processing techniques to fine-tune the image, such as adjusting contrast and colour balance and adding additional effects if desired.
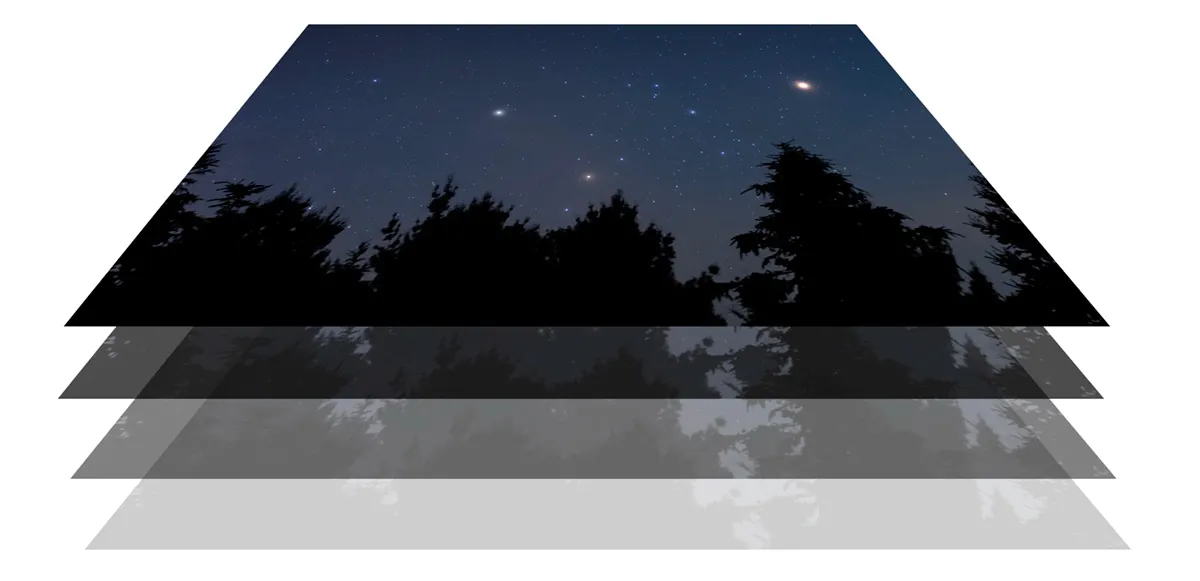
Astrophotography:
Photo stacking plays a significant role in astrophotography, allowing photographers to capture the beauty of the night sky. It can reveal intricate details of stars, galaxies, and nebulae while minimizing noise and emphasizing the cosmic elements.
Step 1: Find a location with minimal light pollution and a clear night sky view.
Step 2: Set up your camera on a stable tripod and attach a suitable lens for astrophotography.
Step 3: Determine the desired exposure and capture long-exposure images.
Step 4: Transfer the images to your computer and import them into photo editing software.
Step 5: Align the images using the alignment tools to compensate for any star movement during long exposures.
Step 6: Utilize the stacking or blending function to merge the images, revealing more stars and reducing noise.
Step 7: Adjust the opacity or masking of the stacked layers to retain the natural appearance of the stars and maintain a balanced exposure.
Step 8: Apply post-processing techniques specific to astrophotography, such as enhancing star colours, reducing noise further, and adjusting overall tonality.
Street Photography:
In street photography, photo stacking can be used creatively to capture the essence of a busy urban environment. Combining multiple shots taken at different moments can create a composite image that conveys the liveliness and movement of the streets.
Step 1: Explore an urban environment with interesting street scenes and dynamic elements.
Step 2: Set up your camera to capture fast-paced moments.
Step 3: Capture images as the scene unfolds, focusing on different subjects or actions.
Step 4: Transfer the images to your computer and import them into photo editing software.
Step 5: Select the best images that convey the story.
Step 6: Align the selected images using the alignment tools.
Step 7: Utilize the stacking or blending function to merge the images.
Step 8: Adjust the opacity or masking of the stacked layers to create a cohesive composition.
Conclusion:
To summarize, photo stacking is a versatile technique that crosses boundaries and expands creative potential in various photographic genres. It enables us to stretch our creative boundaries, overcome technical limitations, and generate photos that stand out, from portraits to landscapes, wildlife to product photography.
