How To Use Fusion 360 For Product Design
Fusion 360 is a powerful and versatile 3D modeling software that has become increasingly popular among designers and engineers. It offers a comprehensive set of tools for product design, from sketching and modeling to simulation and manufacturing. Fusion 360 is cloud-based, allowing collaboration and easy access from anywhere, making it an ideal choice for teams working remotely. However, its vast array of features can be overwhelming for beginners. In this blog post, we will guide you through the process of using Fusion 360 for product design. We will cover the basics of sketching and modeling, as well as advanced features such as simulation and rendering. Whether you’re new to Fusion 360 or looking to improve your skills, this guide will provide you with a step-by-step approach to creating your next product design using this powerful software. So, whether you are a beginner or an experienced designer, this guide will provide you with a comprehensive approach to using Fusion 360 for product design.
The Basics of Sketching and Rendering Using Fusion 360:
Sketching and rendering are two fundamental aspects of product design, and Fusion 360 offers a variety of powerful tools and features for both. By mastering the sketching and rendering capabilities of Fusion 360, you can create accurate and visually appealing product designs.
Sketching in Fusion 360:
The sketching environment in Fusion 360 allows you to create 2D sketches that can be extruded into 3D models. To get started with sketching, select the “Sketch” button in the toolbar and choose the plane you want to sketch on. You can then use various sketching tools, such as lines, circles, and splines, to create your sketch.
Once you have created your sketch, you can add constraints to ensure that it is dimensionally accurate and stable. Fusion 360 offers a variety of constraint types, such as coincident, parallel, and perpendicular, which you can apply to your sketch entities. You can also use dimensions to specify specific sizes and distances for your sketch entities.
When you are finished with your sketch, you can use the “Extrude” tool to extrude it into a 3D model. This model can then be further modified and refined using additional modeling tools in Fusion 360.
Rendering in Fusion 360:
Fusion 360 offers a powerful rendering environment that allows you to create stunning images and animations of your product designs.
To get started with rendering, switch to the “Render” environment in Fusion 360. You can then create a new rendering and choose the settings for your rendering, such as lighting, materials, and camera angle.
Fusion 360 offers a variety of lighting options, including point lights, directional lights, and ambient lights, which can be adjusted to create the desired effect. You can also choose from a variety of materials, such as plastic, metal, and glass, to apply to your model.
Once you have set up your rendering, you can render your image or animation. The rendering environment offers a variety of options for outputting your rendering, such as image files or video files. You can also adjust the rendering settings to achieve the desired quality and resolution for your output.
Advanced Features of Fusion 360
Fusion 360 offers a variety of advanced features that can take your product design to the next level. Some of the most useful and powerful advanced features of Fusion 360 areas the following:
Simulation:
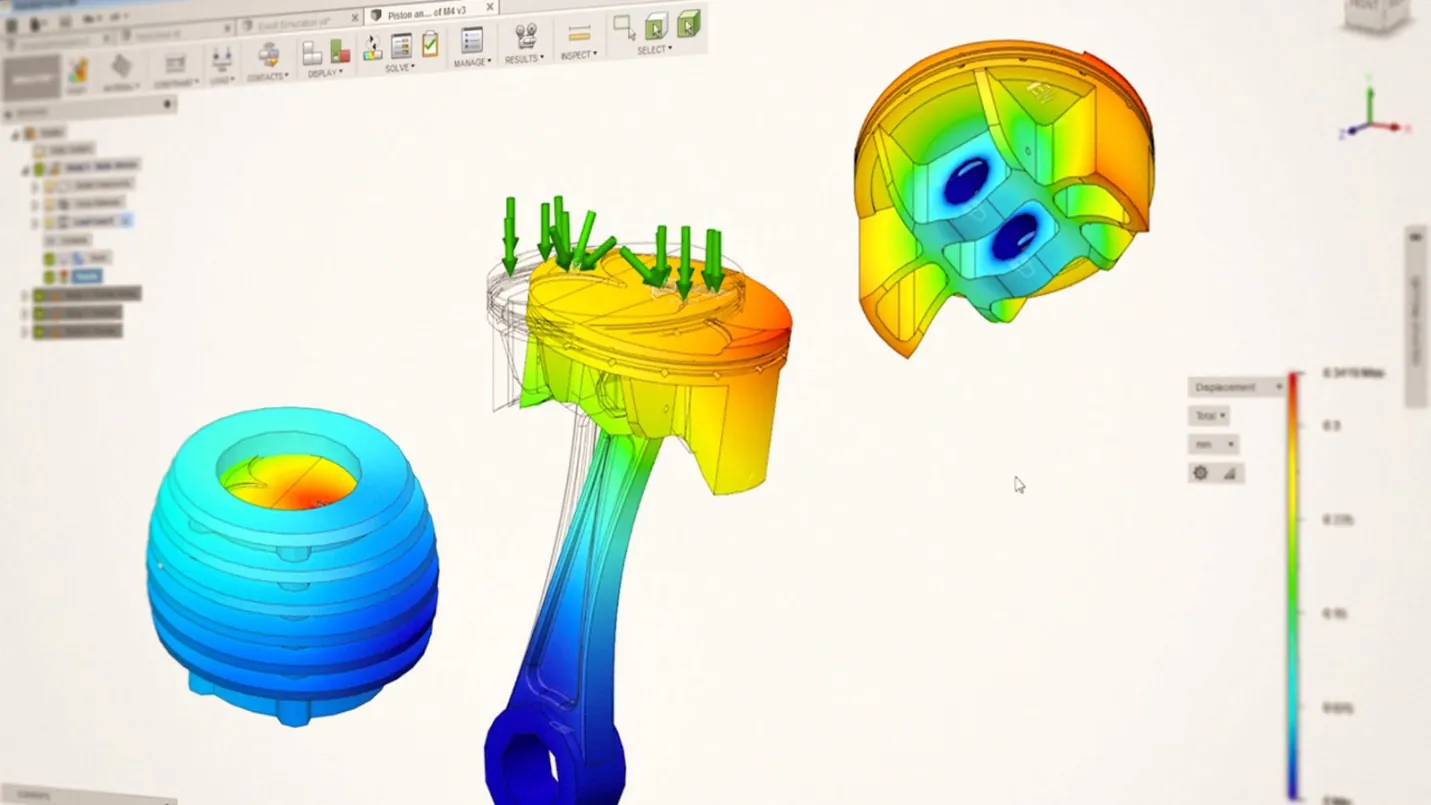
Simulation is the process of testing a product design to ensure that it will perform as expected under various conditions. Fusion 360 offers a variety of simulation tools to test your product design for mechanical stress, thermal performance, and other factors.
The simulation environment in Fusion 360 allows you to set up simulations for your product designs using a variety of inputs, such as forces, temperatures, and materials. You can then run the simulation and analyze the results to identify potential issues or areas for improvement.
CAM (Computer-Aided Manufacturing):
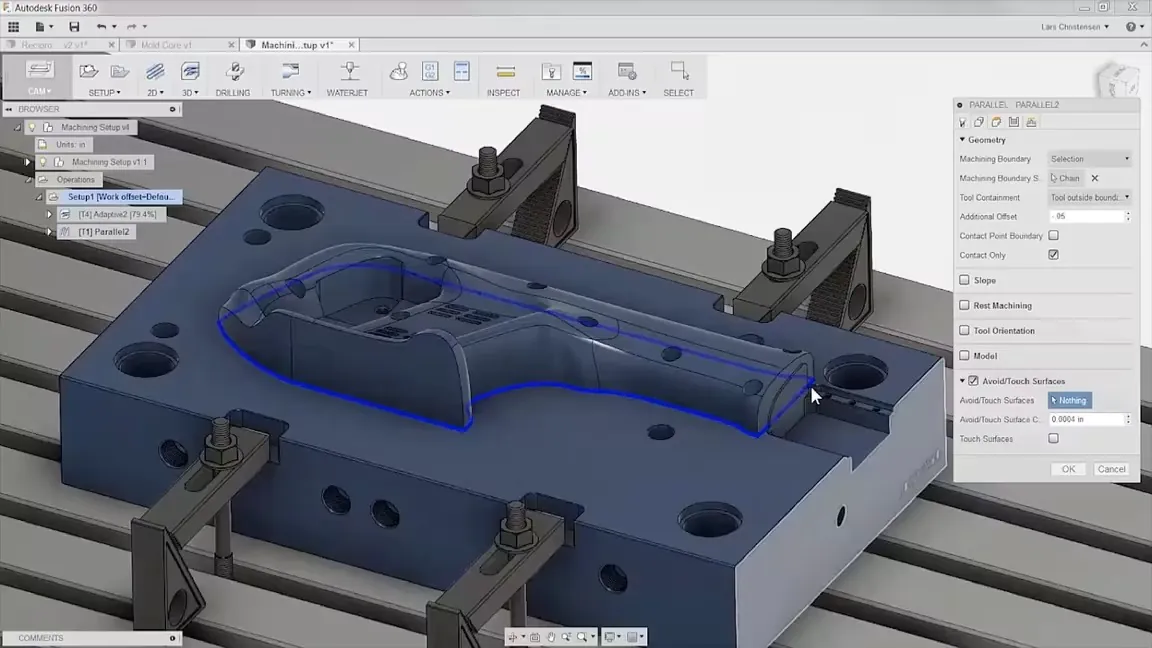
CAM is the process of using software to automate the manufacturing process for a product design. Fusion 360 offers a variety of CAM tools that allow you to generate toolpaths for CNC (computer numerical control) machines, 3D printers, and other manufacturing equipment.
The CAM environment in Fusion 360 allows you to set up toolpaths for your product designs using a variety of inputs, such as cutting parameters, tool selection, and stock dimensions. You can then generate the toolpaths and export them to your manufacturing equipment for production.
Generative Design:
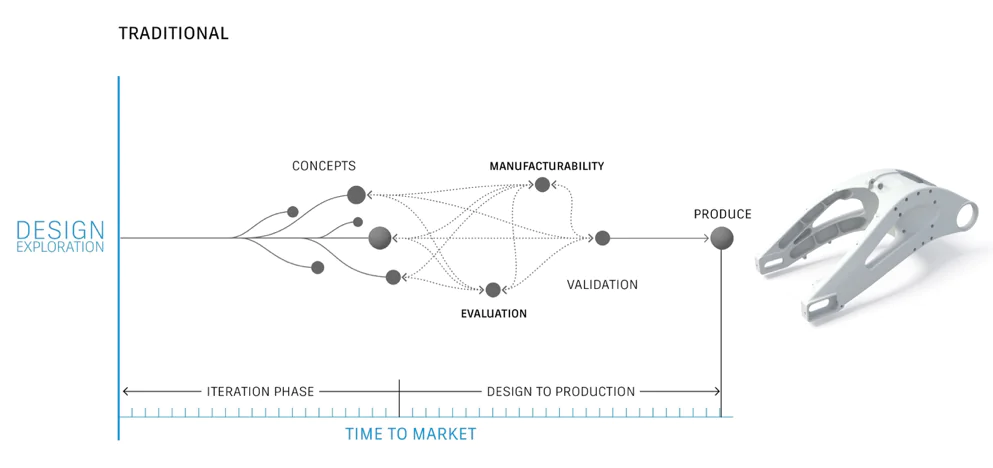
The generative design includes using algorithms to generate and optimize product designs based on a set of constraints and objectives. Fusion 360 offers a generative design tool that allows you to generate and explore multiple design options for a product.
The generative design environment in Fusion 360 allows you to specify the design goals and constraints for your product, such as weight, strength, and manufacturing constraints. You can then run the generative design tool to generate multiple design options based on these inputs. You can explore and refine these design options to find the best solution for your product.
Collaboration:
Collaboration is an essential aspect of product design, and Fusion 360 offers a variety of tools to facilitate collaboration between team members. Fusion 360 allows you to share your product designs with others, collaborate in real time, and manage project workflows.
The collaboration tools in Fusion 360 allow you to invite team members to your project and control their access and permissions. You can also use the commenting and markup tools to provide feedback and collaborate on design changes.
Mastering Product Design with Fusion 360: A Step-by-Step Guide
Step 1: Set up a new project
The first step is to set up a new project in Fusion 360. To do this, open the software and select “New Design” from the home screen. You will then be prompted to select a template or create a new one. Choose a template that best suits your product design needs, or create a new one from scratch.
Step 2: Sketch your design
Once you have set up a new project, the next step is to sketch your product design. The sketching tools in Fusion 360 are intuitive and easy to use. You can create 2D sketches and then extrude them into 3D models.
To start, click on the “Sketch” icon in the toolbar. Then, choose a sketch plane and begin drawing your design using the various sketching tools, such as lines, circles, and arcs. You can also add dimensions and constraints to ensure that your sketch is accurate and precise.
Step 3: Create a 3D model
After you have sketched your design, the next step is to create a 3D model. To do this, click on the “Model” icon in the toolbar. Then, select the sketch you just created and use the various modeling tools to extrude, revolve, and loft your 2D sketch into a 3D model.
You can also use the “Sculpt” tool to create organic shapes and the “Sheet Metal” tool to create sheet metal parts. Fusion 360 offers a variety of modeling tools that allow you to create complex geometries and detailed product designs.
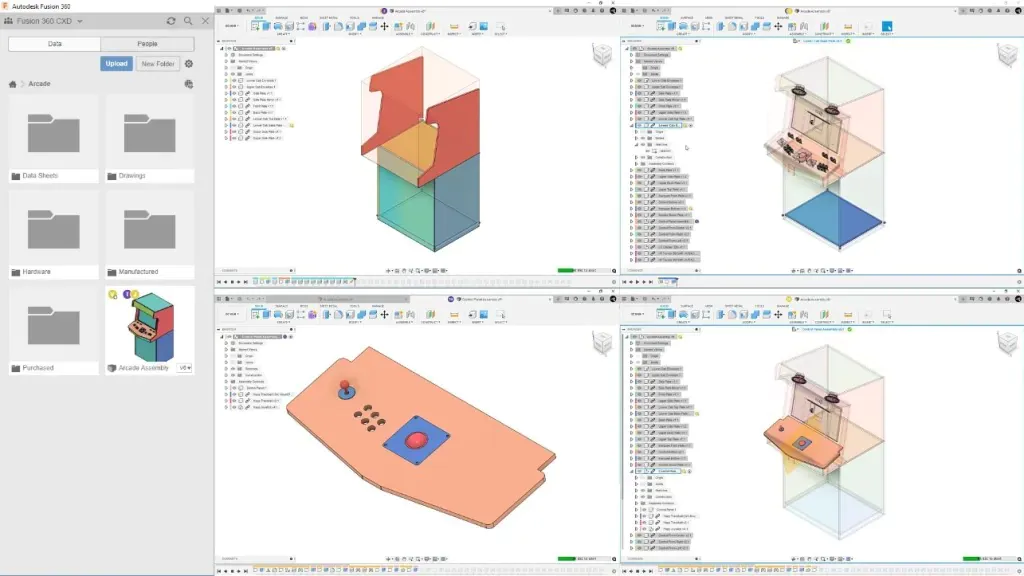
Step 4: Add joints and assemblies
Once you have created your 3D model, the next step is to add joints and assemblies. Joints allow you to define how different parts of your product design move and interact with each other. Assemblies combine multiple parts into a single product design.
To add joints, click on the “Joint” icon in the toolbar. Then, select the two parts you want to join and choose the type of joint you want to create, such as the revolute, slider, or ball joint. You can also add constraints to ensure that your joints move in a specific way.
To create assemblies, click on the “Assemble” icon in the toolbar. Then, select the parts you want to assemble and use the various assembly tools to position and orient them. You can also use the “Motion” tool to simulate how your product design moves and interacts with the environment.
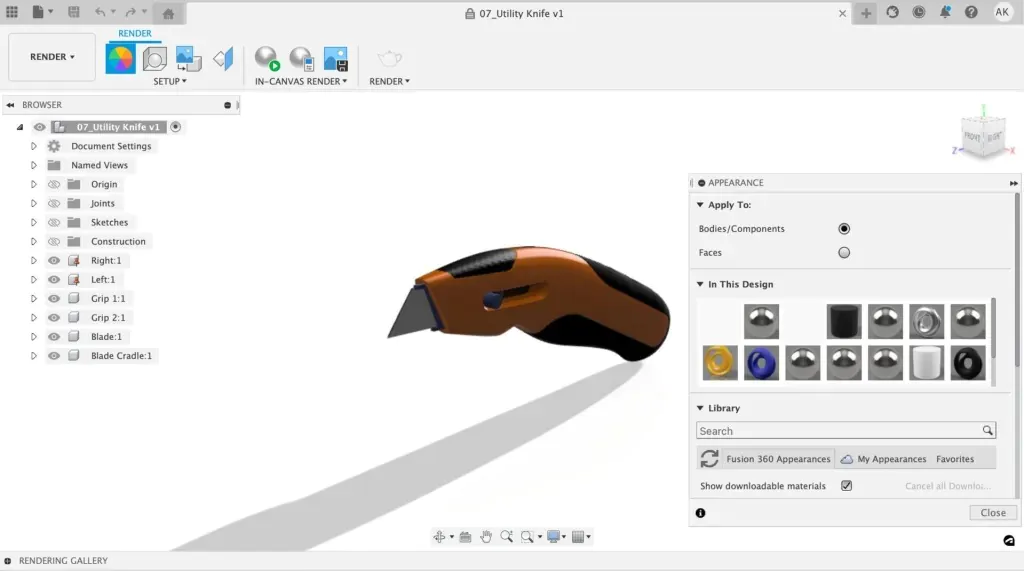
Step 5: Add materials and textures
After you have created your product design, you can add materials and textures to make it more realistic and visually appealing. Click on the “Materials” icon in the toolbar. Then, select the parts you want to apply materials and textures to and choose from the various options available.
You can also import materials and textures from external sources or create your own using Fusion 360’s texture editor. Adding materials and textures can greatly enhance the visualization of your product design and make it look more professional.
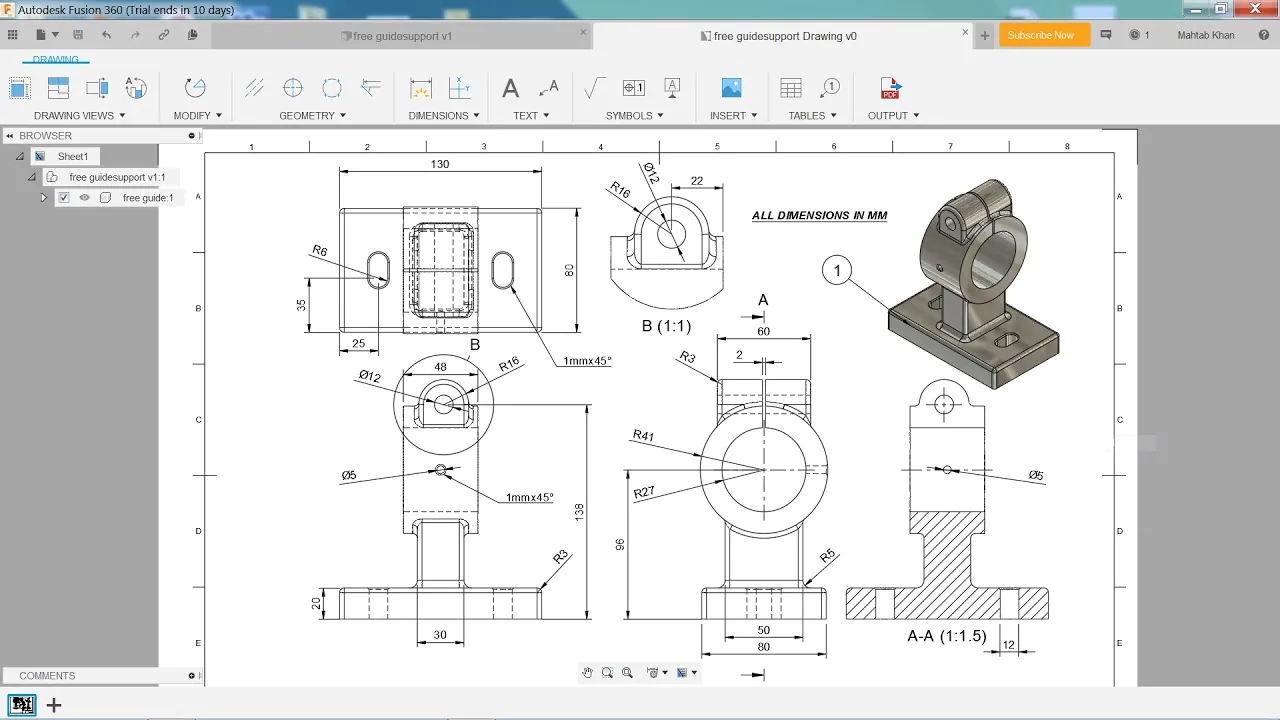
Step 6: Create drawings and documentation
The final step in the product design process is to create drawings and documentation. This is important for communicating your design to others and for manufacturing your product.
To create drawings, click on the “Drawing” icon in the toolbar. Then, select the views you want to include and use the various drawing tools to annotate and dimension your product design. You can also create exploded views and bills of materials to help with manufacturing.
Fusion 360 also creates documentation such as assembly instructions and technical manuals. You can do this by using the “Technical Documentation” tool, which allows you to create step-by-step instructions and interactive 3D animations.
Conclusion
In conclusion, Fusion 360 is an excellent tool for product designers of all skill levels. By following the step-by-step guide outlined in this article, you can confidently navigate the software and create professional-quality product designs. With its advanced features and intuitive interface, Fusion 360 is sure to become an invaluable asset in your product design toolbox.
