How To Turn An Image Into A Diorama
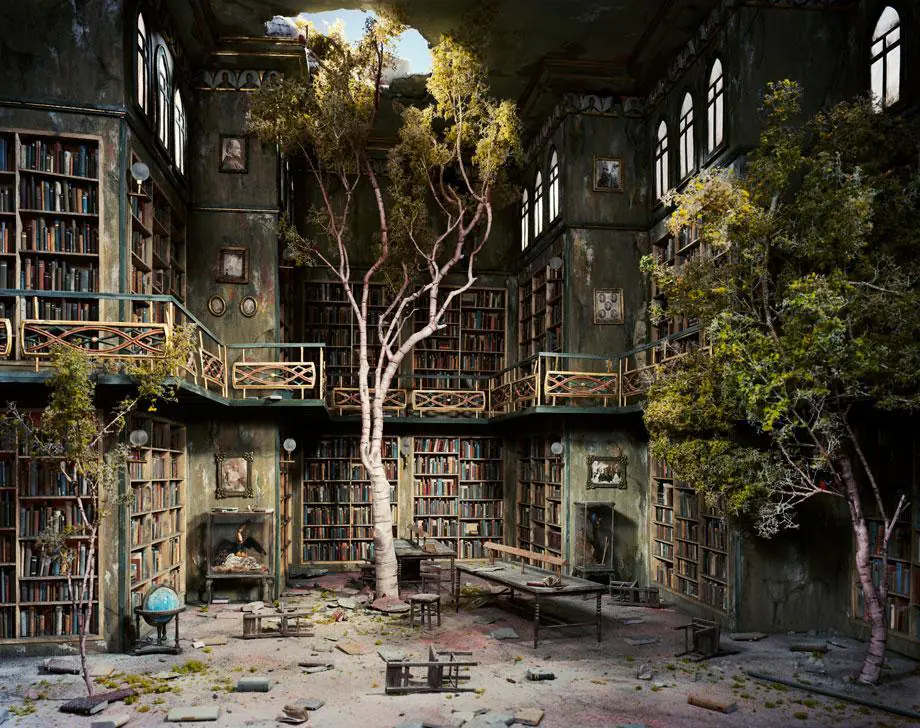
The typical diorama represents a realistic three dimensional appearance of a scene worthwhile for product designs in different technological vocations. The broadly used dioramas are the physical ones in which materials like boxes, cardboard, mini LED lights, glues, paints, adhesive tapes, etc, are used to construct the model. Such models depict details and prospects, including figures, objects, and structures representing an environment as natural as real life. On the other hand, digital dioramas stand upon the availability and proficiency of software like SketchUp, Blender, or Photoshop. Dioramas, mainly digital ones, are closely relevant to digital images, paving the way for their application in image manipulation and correction. You can either create a diorama illustration or modify your photographs into a diorama using techniques like thoughtful manipulation of the depth of field, lighting, shadows, contrasts and colour balance. This blog will represent the steps and techniques to turn your image into a diorama. Let us use Adobe Photoshop as our primary tool for a simplified workflow.
Step 1: The Scene Selection
Choose a photo as an establishment for your diorama project. The chosen shot ought to have particular highlights, clear subject matter, and a foundation that adjusts with the imagined diorama scene.
Guarantee that the chosen photo resounds with the general theme or story you want to communicate through the diorama. Consider aspects like lighting, composition, and central focus essential to the harmony of the picture.
Assess the photo’s composition to decide how it can be modified into a three-dimensional diorama layout. Monitor the arrangement of critical features inside the frame, including foreground, centre ground, and foundation segments.
Confirm that the photo’s subject is distinct and readily perceivable because it will be a central point inside the diorama. Clarity and definition of the subject will inspire the ensuing steps of the transformation.
Affirm that the photo has characteristics facilitative to converting into a diorama, considering details such as resolution, picture quality, and visual enticement. Guarantee that the photo adapts to your inventive vision and project targets.
Step 2: Depth Enhancements

Start by partitioning the photo into layers specifying foreground, centre ground, and background components. This division leads to the development of depth and perspective inside the diorama.
Distinguish noticeable components within the photo’s foreground, like things or figures nearest to the viewer. These components will bind the viewer’s engagement and add to the essence of profundity within the diorama.
Evaluate the mid-ground of the photo, which retains accessory components that include the prevalent scene. See how these features commune with the foreground and background layers to set up spatial connections.
Observe the photo’s backdrop, which gives context and profundity to the scene. Assess the situation of foundation components and their part in setting up perspective inside the diorama.
Utilize perspective tools and procedures in Photoshop to alter the scale and situating of components inside each layer. This alteration results in profoundness and immersion, emulating the pictorial viewpoint of a physical diorama.
Step 3: Extracting Foreground Elements
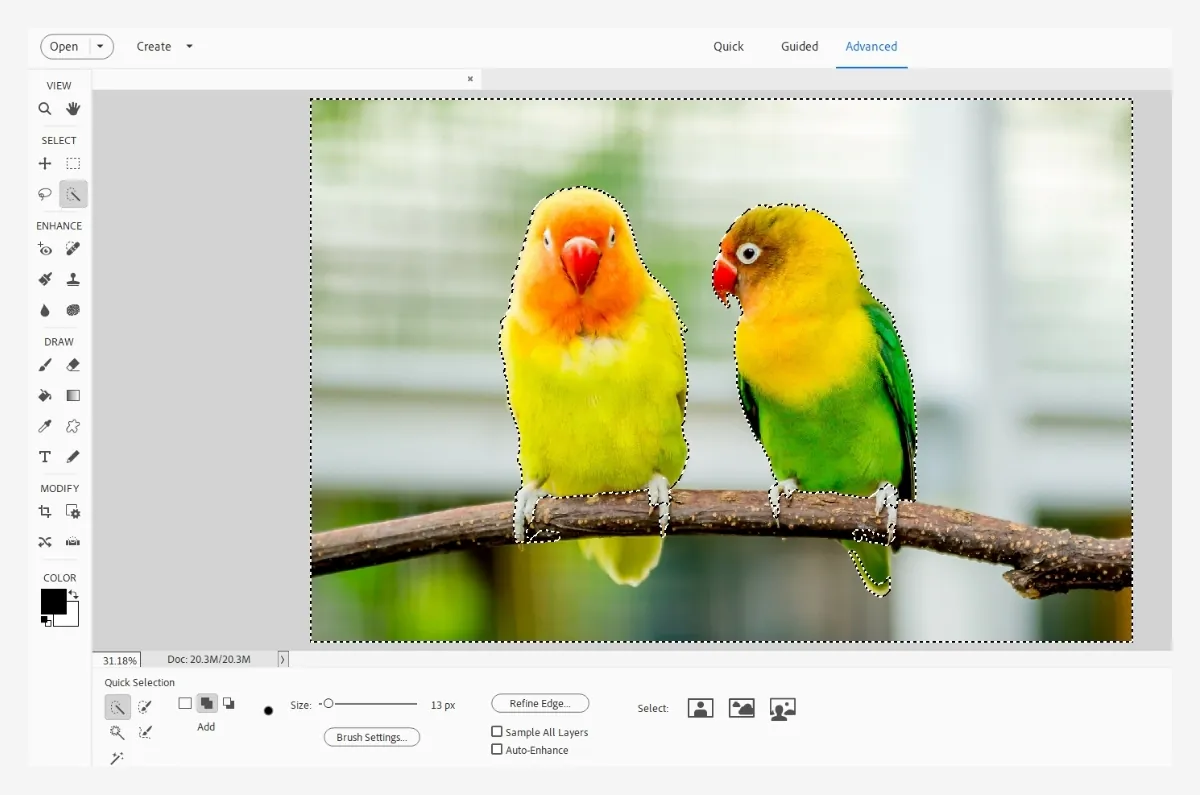
Pick proper selection tools such as theconsidering options like Pen Tool or the Quick Selection Tool to carefully layout the closer view components within the photo.
Utilize refinement strategies to guarantee precise selection edges, for instance, feathering or refining edges utilizing Photoshop’s Select and Mask workspace.
Next to the foreground components being chosen, make layer masks for each piece to separate them from the backdrop. Layer masks permit non-destructive editing and consistently unify foreground components into the diorama composition.
Tune the layer masks to attain smooth moves between closer-view components and the encompassing environment. Employ brush tools with differing opacity and hardness to consistently touch up mask edges and fuse components.
Intermittently audit the masked frontal area components against the foundation for consistency and orientation with the specified diorama composition. Make any essential alterations to the layer masks to preserve visual coherence and authenticity.
Step 4: Copying the Background

Copy the initial background layer of the photo to form numerous layers referring to distinctive depths inside the diorama scene.
Arrange the duplicated layers according to their planned position within the diorama, with the first background layer working as the most distant layer from the viewer.
Alter each copied layer’s opacity and blending modes to mimic distance and profundity discernment inside the diorama. Expand opacity for frontal area layers and lower opacity for foundation layers to form a substance of profundity.
Scale and position copied layers to orient with the viewpoint and composition of the initial photo. Assess the influence of each layer’s things and components on the diorama scene’s across-the-board spatial configuration.
Make smooth moves between duplicated layers to preserve visual progression and coherence. Utilize blending and masking procedures to invariably coordinate the closer view, centre ground, and background components inside the diorama work.
Step 5: Including the Dimensionality

Employ adjustment layers such as Brightness/Contrast, Levels, and Curves to amplify the dimensionality of each layer inside the diorama composition.
Add adjustment layers selectively to closer view components to emphasize subtle elements and make central points inside the scene. Alter brightness, contrast, and colour balance to make frontal area components more compelling.
Create alteration layers for centre ground components to guarantee concordant integration with closer view and foundation layers. Supervise evenness in lighting and tonal values over the diorama composition.
Utilize adjustment layers to polish the look of background components, enriching atmospheric perspective and making a feel of spread. Alter levels and curves to simulate atmospheric effects and profundity signals.
Operate layer masking and blending procedures to direct the effect of adjustment layers on particular regions of the diorama composition. Employ gradients and brushes to fuse adjustments and consistently keep natural stirs between layers.
Step 6: Including Realistic Details
Include texture overlays onto different components inside the diorama to bring authenticity and material attraction. Try out surfaces like grass, soil, wood, or stone to fit in the environment portrayed within the scene.
Apply the Brush Tool with changing opacities and sizes to paint subtle elements onto distinctive layers of the diorama. Include highlights, shadows, and pleasing factors to elevate the visual abundance of frontal area components.
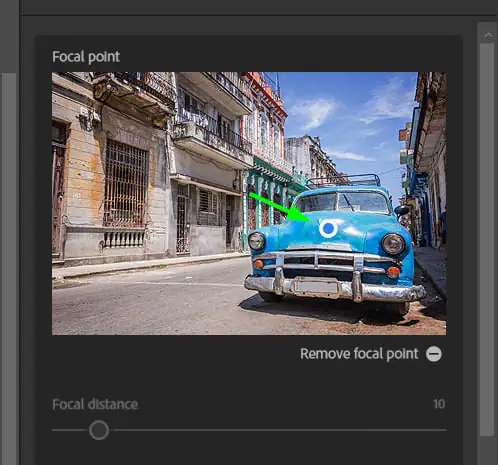
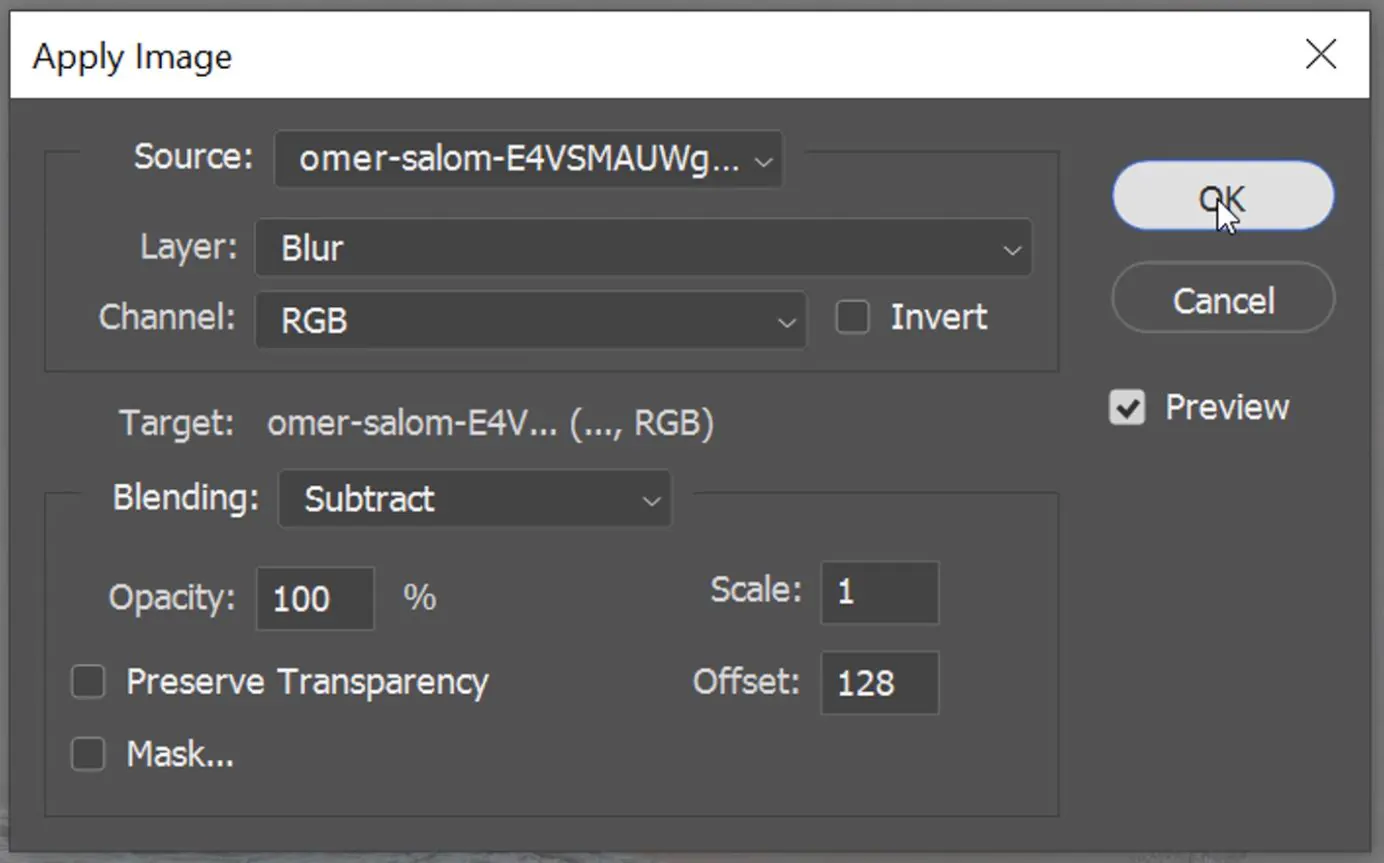
Recreate depth of field effects by selectively blurring foundation components to make sense of emphasis on the subject or focal point inside the diorama. Get to Photoshop’s blur filters or masking strategies to attain true-to-life profundity impacts.
Address the lighting and shadow rendering to form inside the diorama composition. Utilize strategies such as Dodge and Burn to include highlights and shadows, maximizing the discernment of magnitude and form.
Persistently audit and refine subtle elements and textures all through the diorama composition process. Play with manifold strategies and adjustments to reach the required level of authenticity and visual effect within the ultimate photo.
Step 7: Concluding Touch-Ups
Conduct a careful audit of the whole diorama composition, attending to subtle elements, proportions, and general soundness.
Keep up a steady visual style for all of the diorama’s layers and components. Confirm that lighting, viewpoint, and colours are proportional all through the composition.
Peek each component inside the diorama for exactness and authenticity. Address any inconsistencies or irregularities that will degrade from the prevalent visual influence of the composition.
Make concluding alterations to separate components, layers, or alteration layers as required to refine the visual captivation of the diorama. Amend blending, lighting, and texture details for a cleaned and proficient wrap up.
Preserve your assembled diorama composition in a high-resolution format to shield picture quality. Give a thought to exporting the picture in different file groups to conform to other displays and sharing inclinations.
Conclusion:
In conclusion, the diorama effect enriches details and embellishes naturalism when included in your photos. The technique offers impressive potential for creative expressions to deepen the narrative elements and heighten the viewer’s attention. Your dioramas can relate to various visual outcomes like creating a natural scene, any historical event or describing surreal imagery. In every context of your composition, the results will always have maximum detail and dimension added to your shots. Ultimately, you can optimize the theme or ideas intended to be expressed through your image more effectively and interactively.
