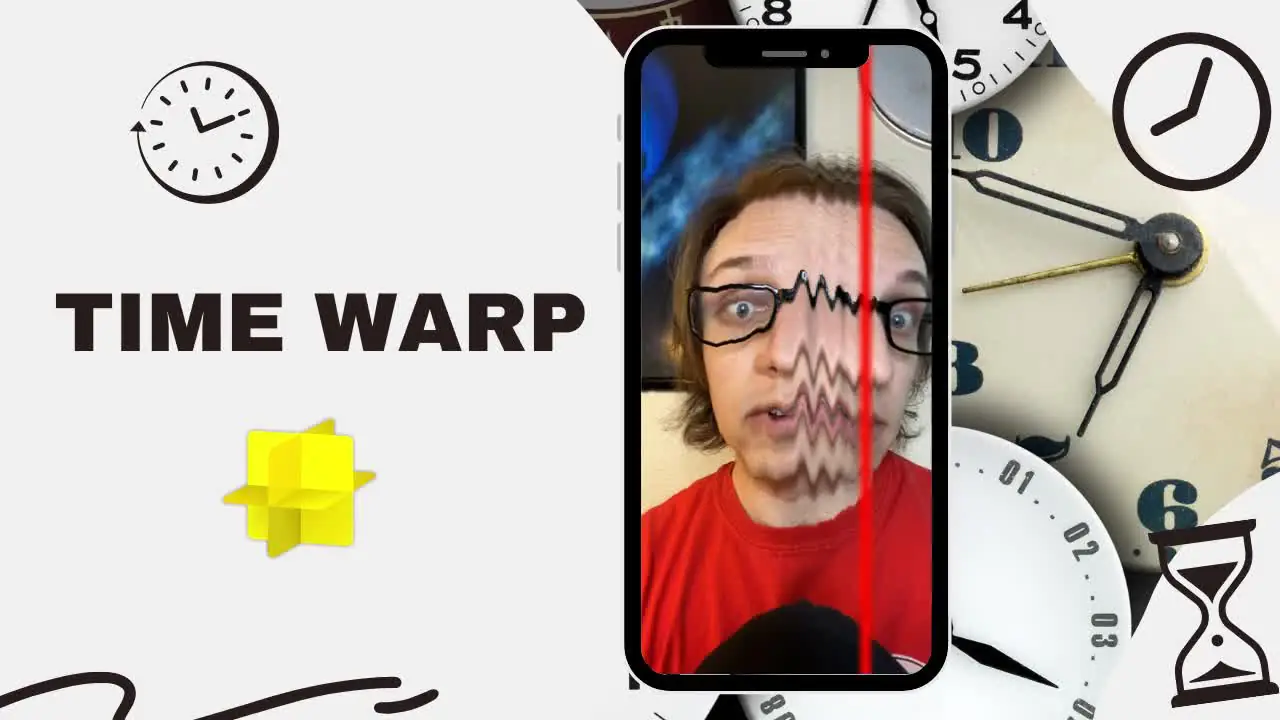
How To Do Time Warping Of Images
The time-warping technique works on a series of images that are coordinated in a unique sequence for distinct visual effects. Unlike the static setting of images in common editing approaches, time-warping offers a dynamic and kinetic show, transforming your pictures into a short-story film of your memorable life experiences. This collection of your life’s progressive events goes beyond mere memorial keepsakes when publicized, as you can enhance the effects by turning the real into a dreamy, surreal situation. You can bend reality, distort shapes, and mix numerous moments into a single frame to create appealing-looking and stimulating pictures. With the exponential growth of social media, where visuals rule, time-warped photographs can help you get to the phenomenon and receive more likes, shares, and comments. Time-warping can make complex concepts more approachable and entertaining when implemented in tutorials or instructional materials. It aids learners in fittingly visualizing processes and transformations. This blog addresses the strategies used to do time warping of your images and get an intriguingly unified album-like version of your scattered digital photographs.
Step 1: Open Adobe Photoshop and import your image sequence
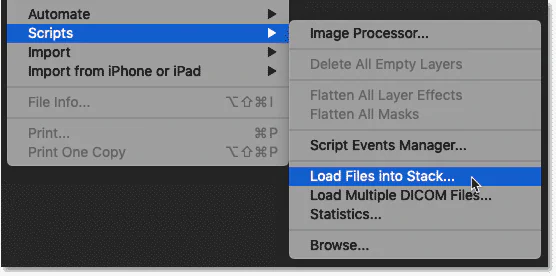
Adobe Photoshop, famed for its fantastic picture editing capabilities, is our creative medium for time-warping photographs. You must launch Adobe Photoshop and import your image sequence in this step.
You can take advantage of its simple interface and vast toolset, making it a handy option for complex undertakings like time-warping.
To begin, launch Adobe Photoshop and explore its remarkable capabilities. Select “File” > “Scripts” > “Load Files into Stack.” You can import the photographs that comprise your image sequence as individual layers here.
This step sets the tone for the coming editing phases, in which we’ll continue working to combine these photographs into a dynamic sequence.
Step 2: Order and structure your image layers
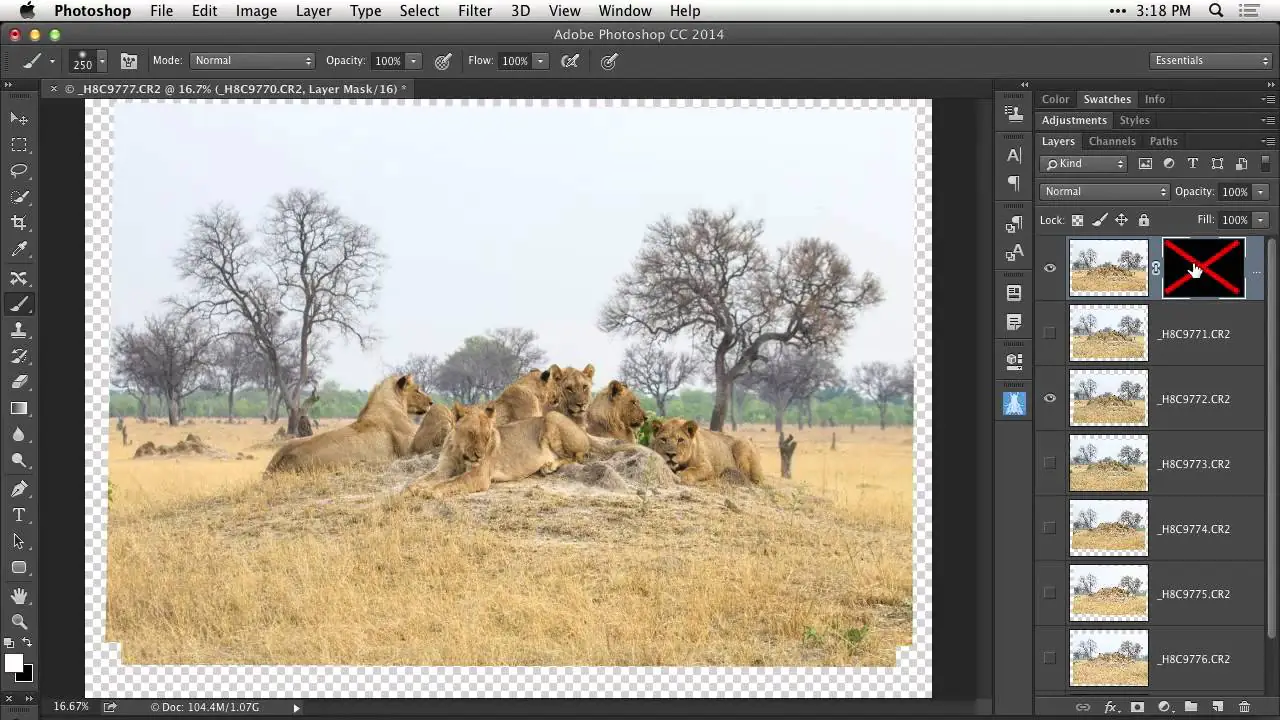
Now that your image sequence has been imported into Adobe Photoshop start to order and arrange the layers efficiently. This stage helps in your time warping project go as planned.
Your imported photos will be shown as individual layers in the Layers panel.
Spend a moment to arrange them in the preferred sequence, mirroring the timeline of your time-traveling story.
This thorough arrangement develops the foundation for your creative process by determining how your images will transition and transform.
You build a clear path for your time-warping project in Adobe Photoshop by carefully organizing your layers. It will make working with keyframes and intermediate frames easier in the following steps.
Step 3: Set keyframes and frame order
Observe your image sequence and mark the frames where major shifts or transitions occur. These keyframes act as anchor points for your time-warping effects. If you’re time-warping a sunrise scenario, keyframes may designate the sunrise’s beginning, middle, and conclusion.
Strive to organize and label your keyframes to make things clear and tidy. It is done by right-clicking a layer and selecting “Layer Properties.” Name them appropriately to show their position in the sequence.
After concluding and labelling your keyframes, arrange your layers in Photoshop’s Layers panel to match the sequencing sequence. Check that the layers are well aligned with the timing of your time warp.
Step 4: Make intermediate frames to connect the dots
Choose keyframes by pinpointing the keyframes you’ve set in your sequence. These represent the tectonic moments in your time-warping chronicle.
The next phase is frame interpolation. To create intermediate frames, select the layers corresponding to two neighboring keyframes.
Then, go to “Edit” > “Auto-Align Layers.” This step conforms to the selected layers for polished transitions.
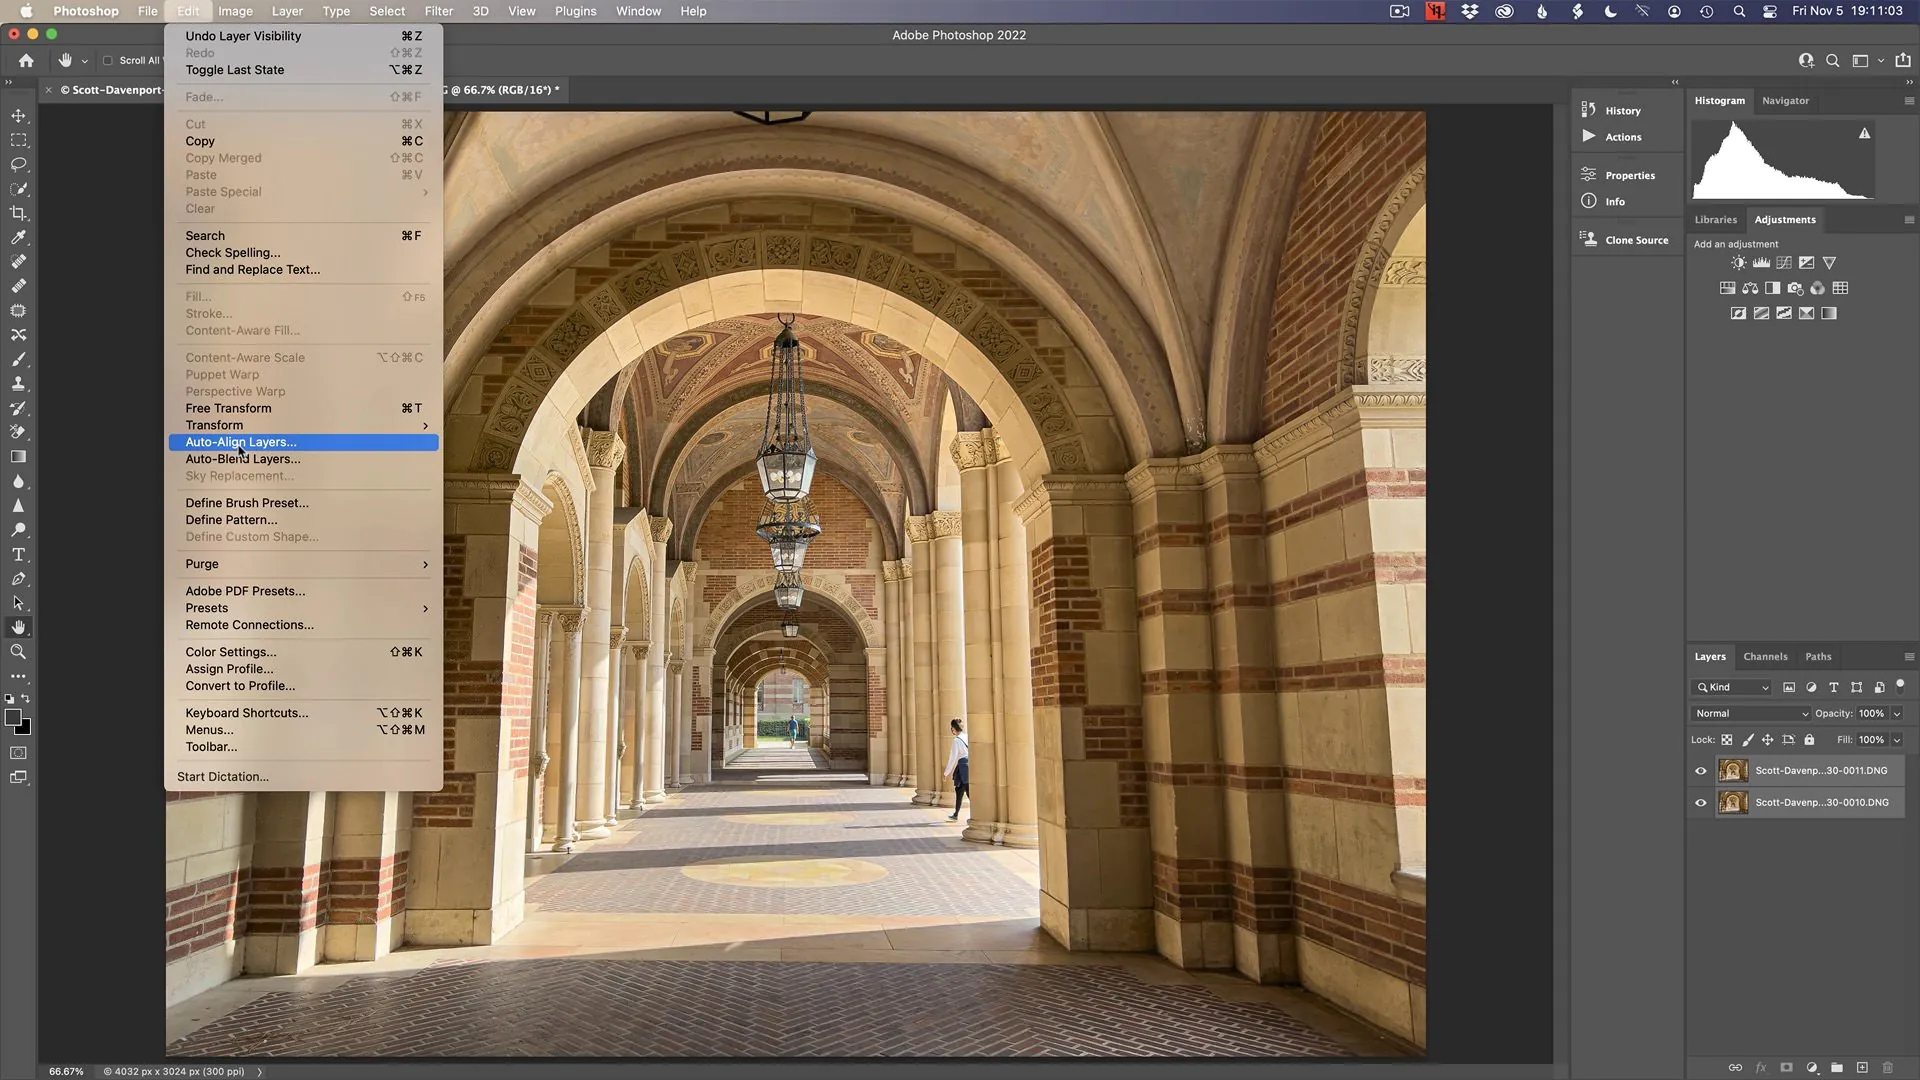
Set the opacity and blending modes of the aligned layers to blend them smoothly. It creates a chimaera of gradual change between keyframes.
Revise the process for all keyframes in your sequence. You’ll notice your time-warping effect coming into form as you create intermediate frames.
Step 5: Use the Warp Tool to add distortion
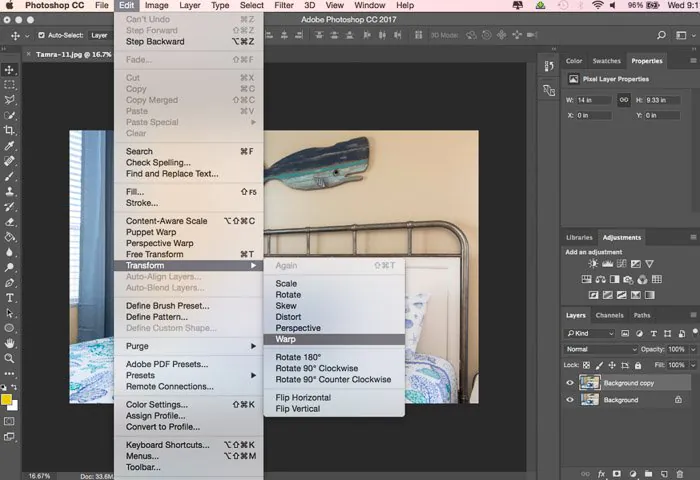
Select the layer in your image sequence to which you want to add the distortion effect. To activate a specific layer, click on it.
Open Photoshop and navigate to “Edit” > “Transform” > “Warp.” This tool is the key to creating hypnotic distortions.
You’ll see control points and handles on the selected layer when you activate the Warp tool. Use them to deform and transform the image precisely. By dragging these control points, you can change the strength of the distortion.
Play with different control points and handles to create an ideal distortion effect. Depending on your task, you can make moderate to extensive modifications between frames.
Repeat this practice for many layers to generate different distortions within your sequence while adhering to your defined timing and keyframes.
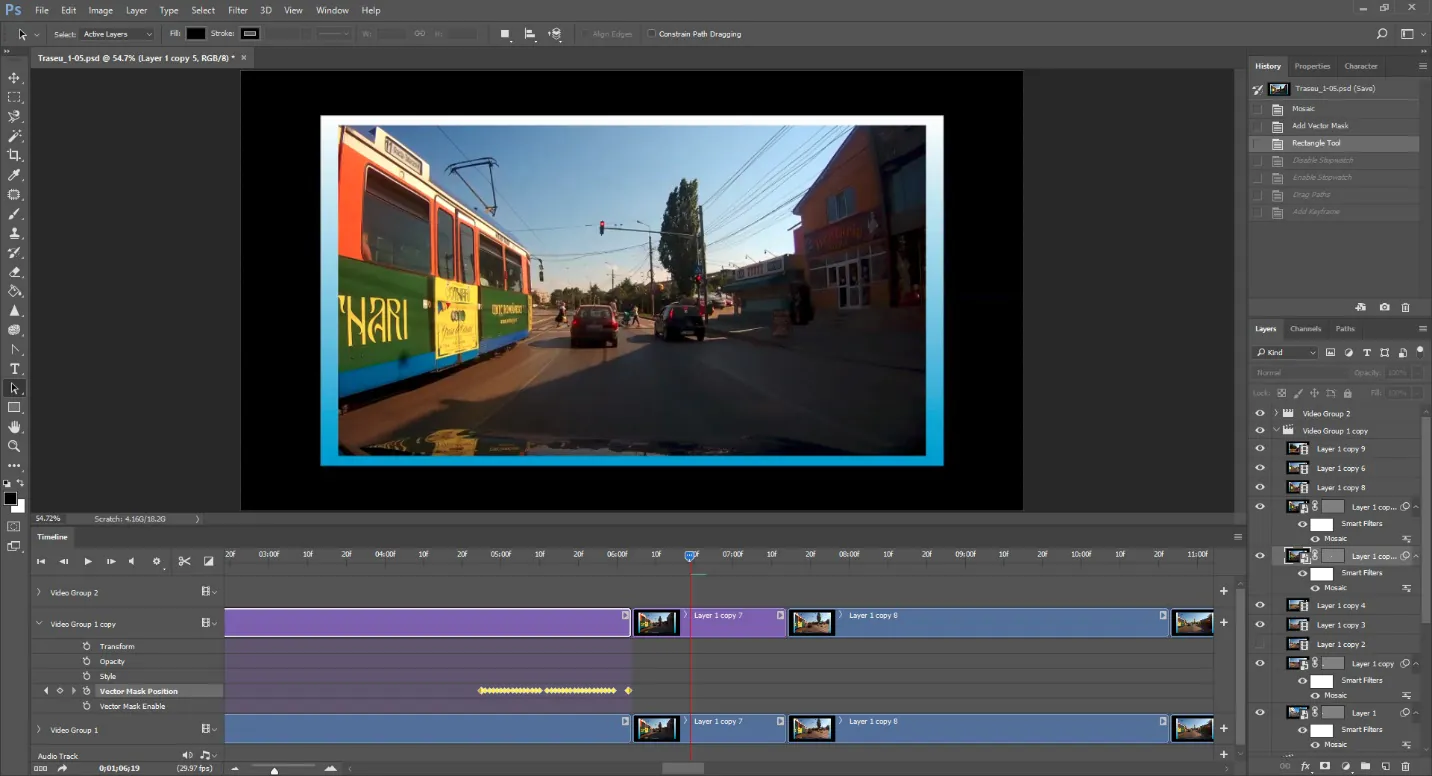
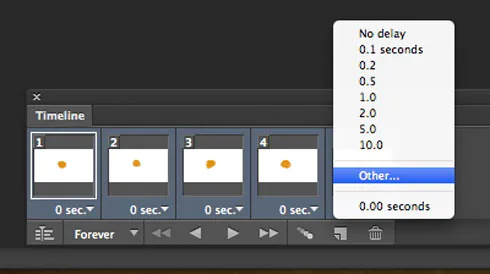
Step 6: Reconsider your time-warped animation
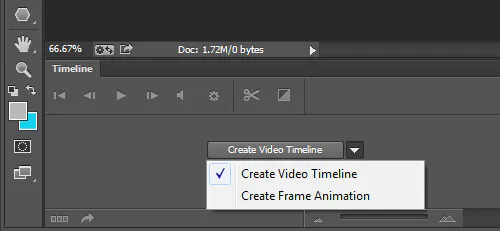
Click “Window” > “Timeline” to open the timeline panel. Here, you will create your animation.
Next, select “Create Video Timeline” in the timeline panel to create dynamic video frames of your layers.
Customize the duration of each frame in the timeline. That determines the speed of your time-warping animation. You can set a constant frame rate or modify it for different effects.
For a preview of your time-warped animation, click the play button on the timeline. Assess the shifts in the effects of distortion and transformation over time.
To further customize your time-warping effects in case of previously unnoticed flaws, go back to the previous steps.
Save your time-warped animation in your choice of video format and settings if you’re satisfied with the preview.
Step 7: Download and save your time-warped animation
Confirm that your time-warped animation is finished and that you are happy with the end effect.
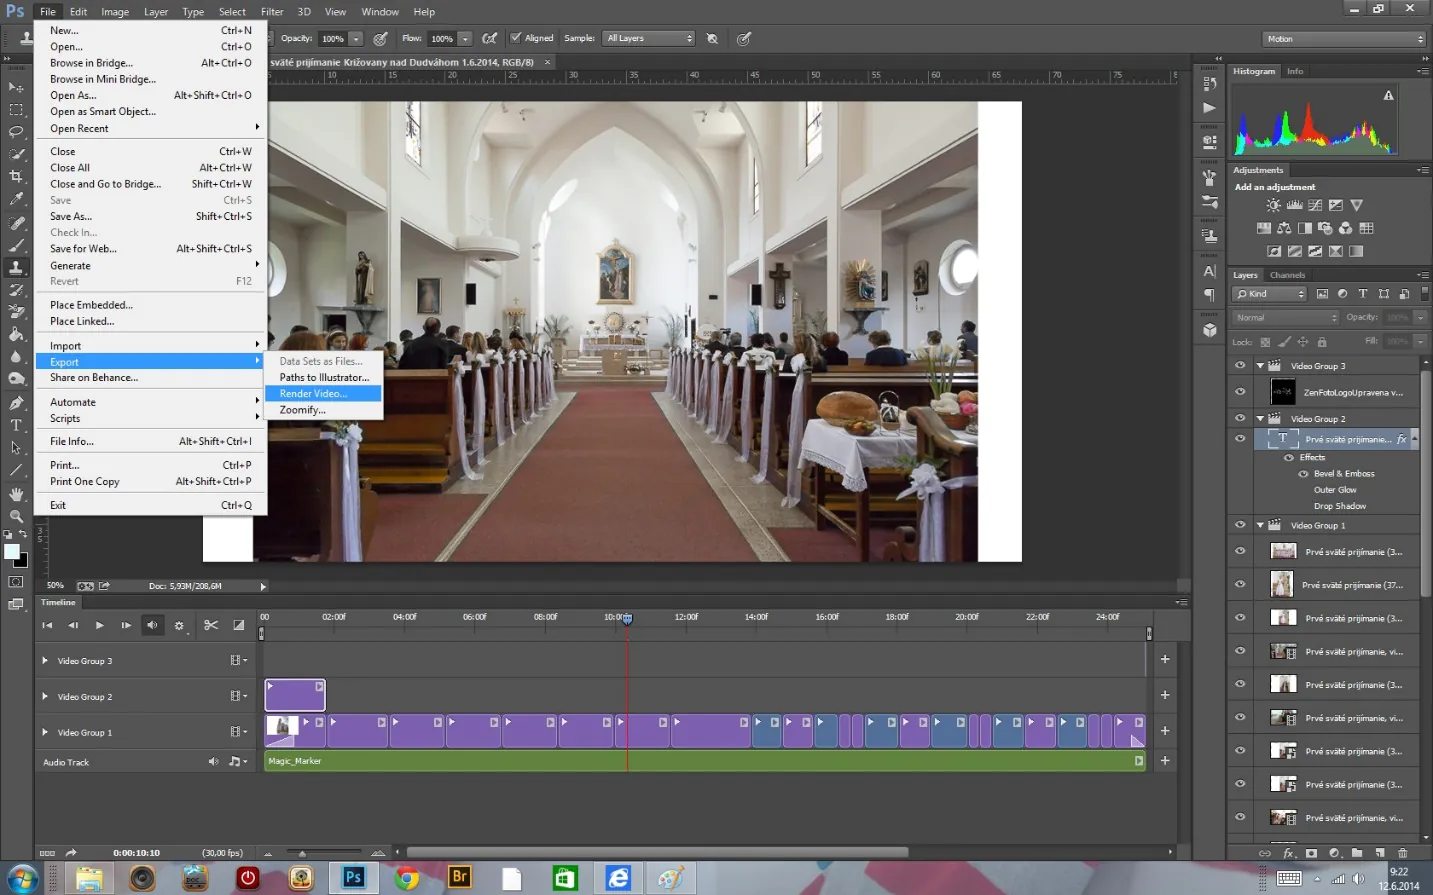
To view the export settings, go to “File” > “Export” > “Render Video.”
Select the output choices for your video in the “Render Video” dialogue. You can select the format, like MP4 or AVI, codec, suitable quality, and resolution.
Click “Browse” and navigate where you wish to save your exported video.
Give your video a title that fits its content.
Set the number of frames to render. It can be the whole timeframe or only a section if necessary.
To begin the export process, select the “Render” option. Adobe Photoshop will process and save your animation as a video file.
When the rendering is finished, double-check your exported time-warped animation.
Step 8: Show off your time-warped animation
Choose the platform to exhibit your time-traveling creation. Think of social media, your blog, video-sharing websites, or even presentations as platforms.
Write a catchy caption to describe the context and invite viewers to interact with your time-warped animation.
Each platform may have different video upload criteria. Check that your video format, quality, and aspect ratio comply with the platform’s specifications.
Monitor audience engagement through comments, likes, and shares, and actively respond to build a community around your creative work.
You can also get help from the analytics tools platforms provide to track the performance of your time-warped animations and tailor future content accordingly.
Conclusion
In conclusion, time-warping of images creates a descriptive sequence of your photos in the form of a mini-video. By arranging a few pictures in a time-warp technique, you can pictorially narrate an entire event from the duration of minutes to days or even years. It saves time and sums up all critical aspects in a single animation album. The onlookers cannot help but keep watching the whole animation till the end, interestingly and profoundly. As per how skillfully you deal with your time-warping process, viewers even watch your composition repeatedly.
