How To Do Photo Retouching Using Frequency Separation In Photoshop
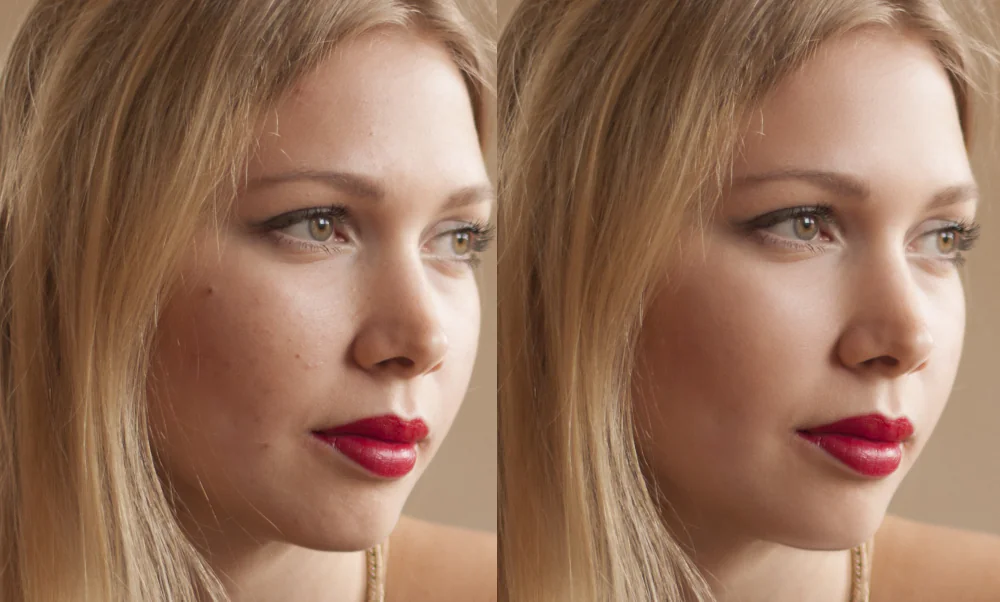
Photo retouching is a widely used photo enhancement aspect, and Adobe Photo Shop’s frequency separation feature can significantly assist in the improvement of the visual aesthetic of your images with a sustained natural appearance. Frequency separation techniques function by separating the textures and colours of the photograph into separate layers. That is best for retouching, perfecting skin texture, and diminishing flaws like pimples, freckles, and blemishes. Likewise, texture enhancement focuses on other ornamental details like hair, clothes, and surrounding elements in a portrait. The approach works on the overall perfection of a visual, making the slightest and unnoticeable modifications that are close to realism. Colour adjustment is an additional aspect of using frequency separation in Photoshop that can upgrade the skin tone, hair colour, eye colour, and other elements like clothing, footwear, jewellery, etc. Still, realism overshadows the rest of the adjustments made using frequency separation manipulations that prevent an exaggerated look in your portrait or any other genera of the photographs.
Image Preparation
Step 1: Select the image you want to use for frequency separation. You must create a well-prepared image to move on to the subsequent phases.
Step 2: Choose a high-resolution image with proper lighting for quality results. Retouching effects are incredibly impactful on quality and high-resolution photos. This approach also helps in the comparison of before and after results.
Step 3: Concentrate on adjustment layers and smart objects to create a non-destructive process to change or reverse adjustments without affecting the original file.
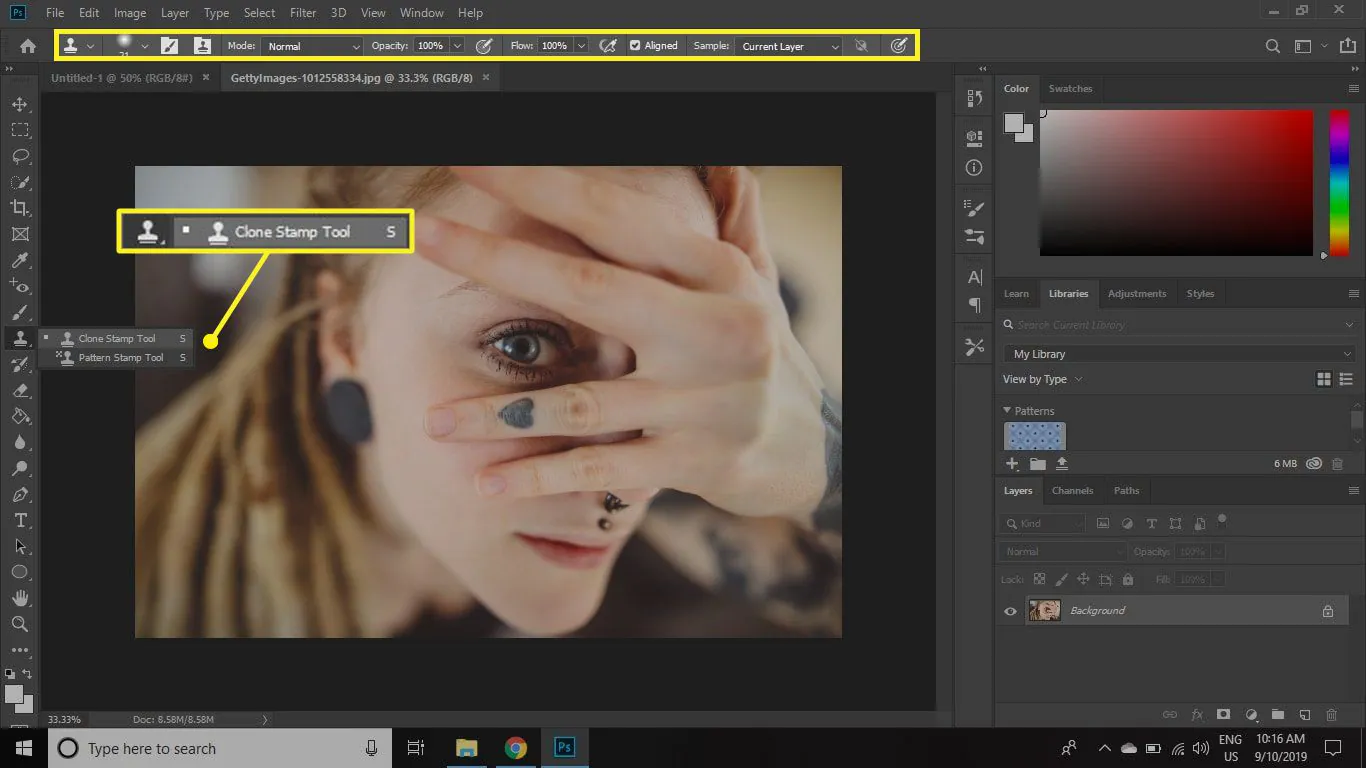
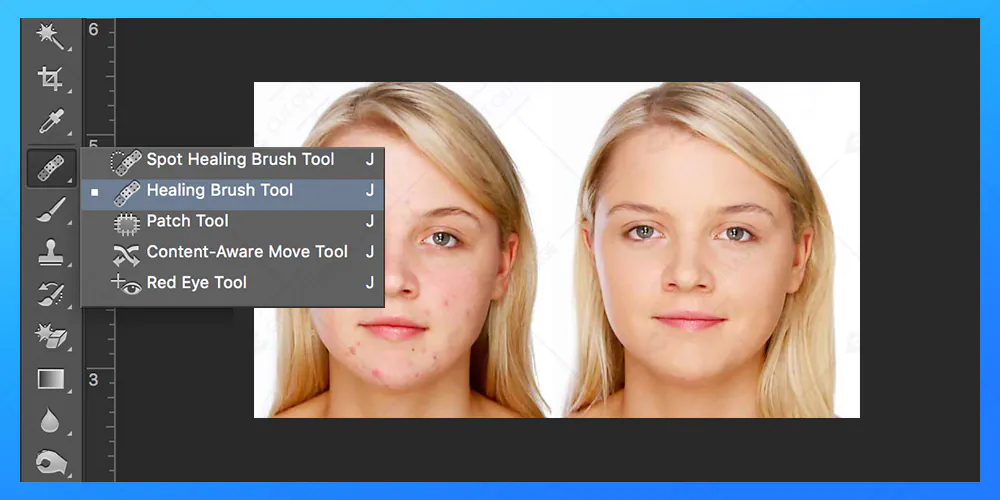
Step 4: Use the healing brush or clone stamp tool for touch-ups to address minor distractions such as dust spots or minor defects.
Step 5: Save your alterations periodically to avoid losing progress due to unforeseen problems or crashes.
Frequency Separation Adjustments
Step 1: Generate two more layers of your duplicated image for texture and colour manipulations. The colour layer will include colour modifications, and the texture layer will have finer details.
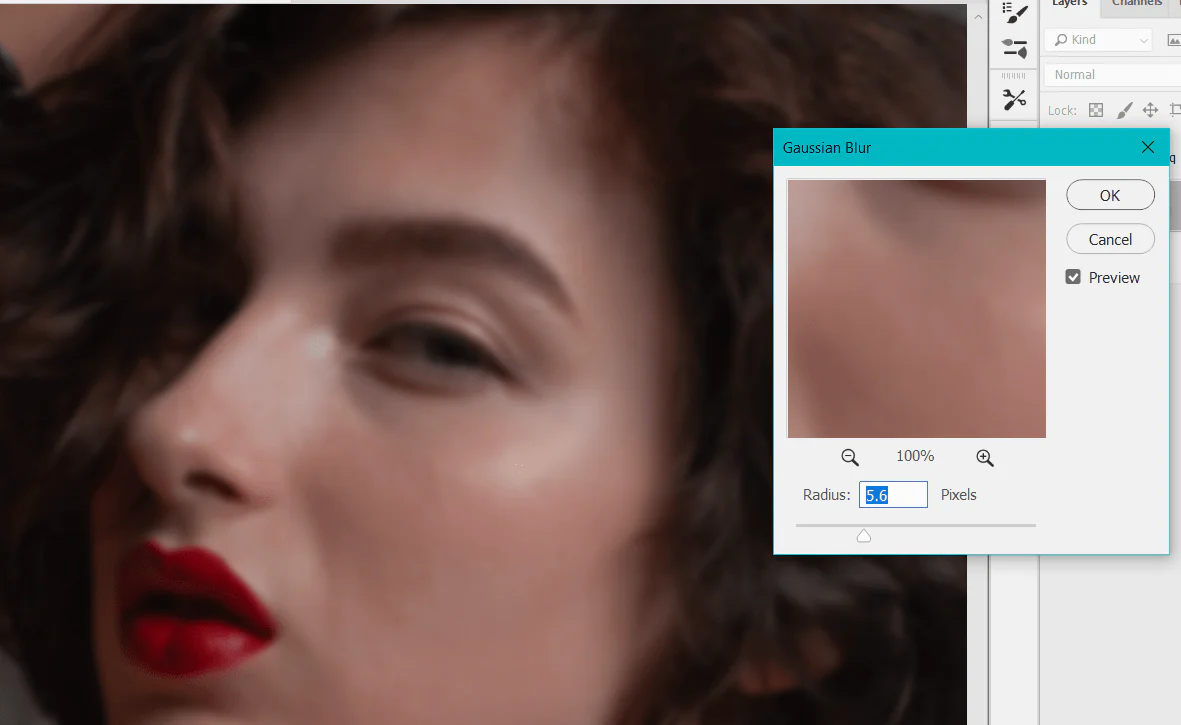
Step 2: Apply a Gaussian Blur filter to the “Texture” layer. The degree of blur alters with the resolution and detail level of the image. Begin with a radius that smoothes out defects while preserving important texture.
Step 3: Update the “Colour” layer’s blending mode to “Linear Light.” This mode combines colour and texture information to alter them individually later.
Step 4: Insert a mask into the group folder. This mask will let you selectively apply frequency separation changes to particular image sections—paint on the mask with black and white brushes, disclosing or covering the effect as appropriate.
Layer Separation for Targeted Retouching
Step 1: Duplicate the group that contains your “Colour” and “Texture” layers to freely work on a new set of layers while retaining your original frequency separation configuration.
Step 2: Move to the “Colour” layer within the duplicated group. Use adjustment layers such as “Curves” or “Hue/Saturation” to tailor the colours in your image. Adjust skin tones, clothing colours, and other elements that need improvement.
Step 3: Switch to the “Texture” layer in the duplicated group. Use tools like the “Clone Stamp” and “Spot Healing Brush” to target texture flaws such as spots, wrinkles, or scattered hairs. Retain the natural texture of the skin or other aspects with care.
Step 4: Zoom in on your image for specific details, assuring slight retouching that is invisible to the viewer and a factual appearance.
Step 5: Periodically swap the visibility of the duplicated group to analyse how your retouching work affects the overall image.
Skin Retouching
Step 1: Select the “Texture” layer from your duplicated group as a canvas to work on the skin’s texture while preserving the underlying colour.
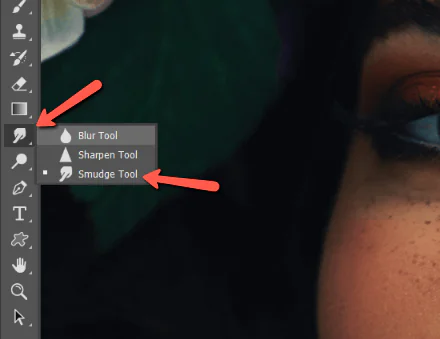
Step 2: Apply softening techniques like “Blur” and “Smudge” to gently smooth out skin blemishes. Use it sparingly; the target is natural-looking skin, not plastic-like.
Step 3: Maintain the skin’s texture and prevent over-smoothing while retouching. For instance, maintain features like pores and small wrinkles because entirely removing them can result in an artificial appearance.
Step 4: Concentrate on problem areas, such as acne scars or big pimples. Set the brush size and opacity to match the size of the flaw.
Step 5: To compare your retouched skin to the original, alter the visibility of the duplicated set. that tracks your progress and guarantees that you’re reaching the ideal level of smoothness.
Step 6: Be focused on finesse, as it is essential to improve the skin’s texture without appearing too edited. Aim for a balanced, flawless complexion that exudes natural beauty.
Texture Brilliance
Step 1: Begin refining the texture layer by selecting the “Texture” layer in your duplicated group. This layer contains the delicate features of your image, which we will enhance.
Step 2: Use the “Dodge” and “Burn” brushes for better textures and details. The “Dodge” tool lightens while the “Burn” tool darkens different spots. These tools are particularly effective for highlighting features in hair, clothing, or elaborate background elements.
Step 3: Adjust the brush opacity to manage the intensity of your improvements to obtain a natural look. Subtlety is vital for achieving realistic texture.
Step 4: Focus on the precise areas you want to improve. Considering these aspects lets you proceed carefully and confirms that the textures are brought out without overdone.
Step 5: Establish a balance between improving details and maintaining realism. Avoid over-enhancing your image; it may make it appear unnatural.
Step 6: Practice frequent checks to compare your modifications to the original and maintain natural and pleasing effects.
Colour-Boosting
Step 1: Fix colours by selecting the “Colour” layer in your duplicated group. This layer contains your image’s colour information, and colour tweaks will bring it to life.
Step 2: Use “Curves,” “Hue/Saturation,” and “Colour Balance” tools to regulate and improve the colours in your image.
Step 3: When altering colours, preserve the delicate harmony for realism by ensuring naturalism in skin tones, clothing colours, and other aspects.
Step 4: Use selective colour adjustments employing masks to foreground attention to specific regions of your image. It effectively targets particular areas such as skin, background, or objects.
Step 5: Like the prior phases, frequently compare the original and updated versions to guarantee subtlety. Additionally, boost colours to make them pop but avoid oversaturation.
Finalizing the Details
Step 1: Examine the overall appearance of your image for finishing touches to measure the necessity of global adjustments. That entails changes to brightness, contrast, or colour balance overall. To fine-tune these elements, use adjustment layers.
Step 2: Close up on specific areas that need to be addressed. Look for any remaining flaws or locations that could benefit from minor improvements. Cover the specifics in the image, such as eyes, lips, or specific objects.
Step 3: Consider selective sharpening for regions that require more excellent definition, such as eyes, hair, or essential aspects in your picture. To avoid over-sharpening, heedfully use the “Sharpen” or “Unsharp Mask” filters.
Step 4: Inspect your entire image for consistency to maintain a uniform look. Look for any colour, texture, or lighting differences that may have occurred throughout the retouching process and conduct any required adjustments.
Step 5: Model your masks to ensure all alterations are blended smoothly into the image. Use even transitions between restored and original regions for a more coherent effect.
Step 6: Before finalizing your image, make sure it’s set to the proper size and colour profile for the output you want, whether for print or digital display.
Step 7: Duplicate your modified image that includes all layers so you can return and make changes later.
Saving and Exporting
Step 1: Save your retouched image as a master copy with all layers intact before continuing.
Step 2: Think about the purpose of your image. Print formats like TIFF or PSD provide high-quality and encrypted compression. JPEG is a ubiquitous web format that offers a decent mix of quality and file size.
Step 3: Set the image to the appropriate resolution. That is typically 300 DPI for print, while web images are usually 72 DPI. Adjust the image size as needed.
Step 4: Specify the appropriate colour profile for your output. Prevalent profiles include sRGB for web and, for print, Adobe RGB or CMYK.
Step 5: Create a consistent file naming convention with essential info such as the project name, date, and version number. It simplifies the management of your image files.
Step 6: Generate backups of your retouched image after saving and exporting. Keep backups on various discs or in the cloud to avoid data loss.
Conclusion
In conclusion, using Adobe Photoshop’s frequency separation feature, you can turn casual portraits or other images into elegant and pristine visuals worth seeing. As even the minute flaws are precisely modulated in the process, your photo retouching effects get so massive. The most highlighted aspect of this approach is the essence of reality and natural touch in the final compositions. Viewers can hardly distinguish between pre-existing natural features and manipulated ones. By completing the steps mentioned earlier to do photo retouching using frequency separation in Photoshop, you can elevate your images’ aesthetics while exhibiting the potency of your editing skills.


