
How To Do Monetization Of Images
Regarding photography and image enhancement, everyone has different goals. While some pursue it as a hobby, others give it a go as a full-time employment. Nevertheless, most of us wouldn’t mind earning additional money from our photography and image editing skills, enough to cover the cost of some new supplies and expeditions. Although supporting yourself full-time as an image creator or enhancer can be challenging, there are several ways to make money from devotion. Monetization, therefore, implies converting a thing that does not generate revenue into cash. Often, monetization looks for creative ways to generate income from fresh sources. Similarly, Picture monetization alludes to the procedure of acquiring revenue or generating income from images. That can incorporate tactics such as offering stock photographs, licensing pictures for commercial applications, showing advertisements alongside images on websites or social media stages, consolidating sponsored content inside pictures, or advertising services related to picture creation and altering for an expense. It includes manipulating snapshots to produce budgetary returns either specifically or indirectly. The following blog highlights the approaches that can vividly help you monetize your images.
Step 1: Exceptional Editing
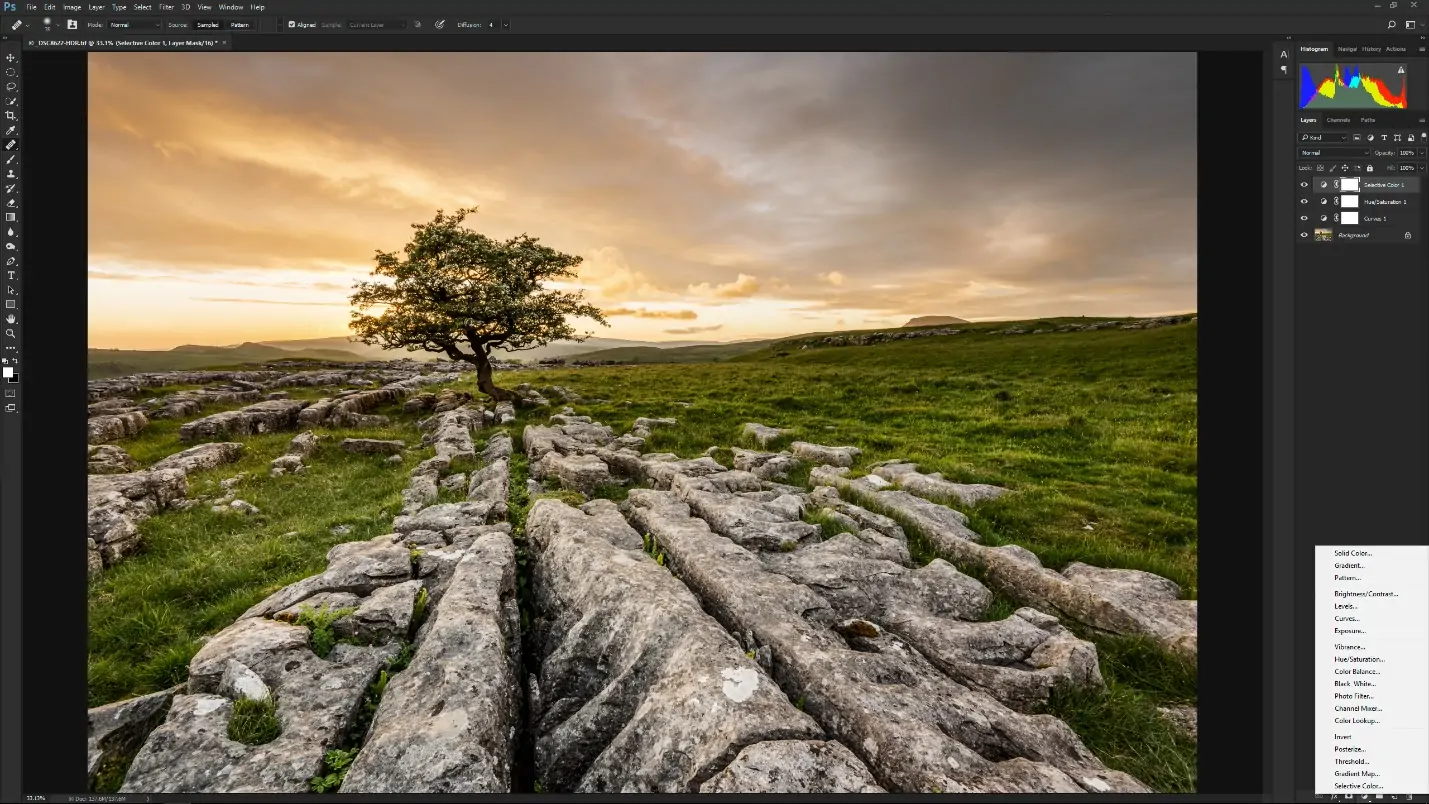
Utilize Photoshop’s colour adjustment tools to adjust hues, saturation, and contrast. Modify levels and curves to improve the image’s prevalent colour symmetry and energy.
Utilize retouching highlights to expel imperfections, diversions, and defects from the image. That can include strategies like spot healing, clone stamping, and content-aware fill.
Add selective sharpening to enrich points of interest and progress the across-the-board transparency of the picture. Operate the Unsharp Mask or Smart Sharpen filters to bring out more pleasing textures without presenting noise.
Decrease noise within the picture utilizing Photoshop’s noise reduction filters or plugins. That can be especially advantageous for images shot in low-light situations or with elevated ISO settings.
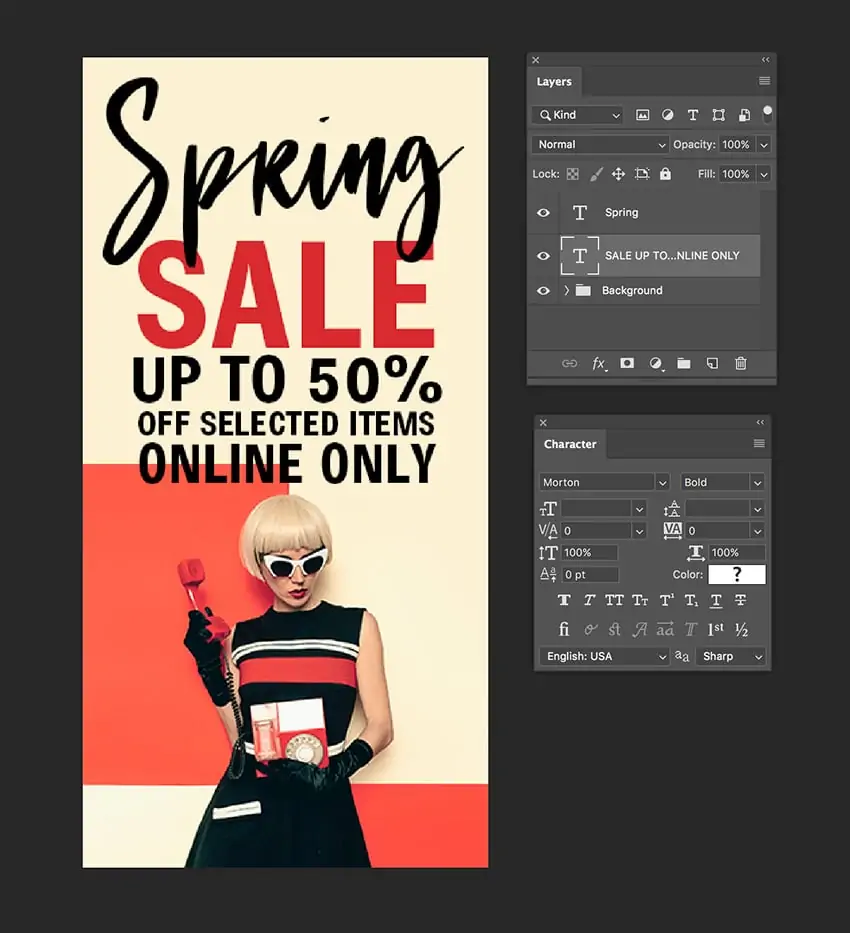
Vary the arrangement and frame of the image utilizing Photoshop’s crop function. Try mixed aspect ratios to make a more persuasive visual description.
Preserve the edited picture in a high-resolution format appropriate for printing and additional processing. Regard employing lossless file formats like TIFF or PSD to protect picture quality.
Step 2: Inputting Relevant Metadata
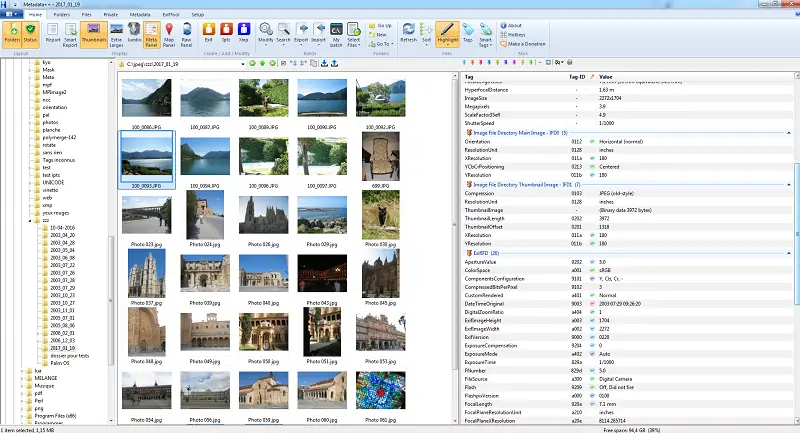
Input related metadata like title, depiction, and copyright data into the image file. Utilize Photoshop’s File Information highlight to insert this information specifically into the image file.
Ponder and assemble a list of keywords that precisely define the picture’s substance, theme, and setting. Consider variables like subject matter, area, feelings, and ideas portrayed within the shot.
Execute chosen keywords into the image metadata and file properties. That upgrades searchability and discoverability, making it simpler for potential buyers to discover your images.
Keep up consistency and pertinence in keyword utilization throughout your image portfolio. Utilize terms that precisely reflect the content and setting of each image to draw in the proper group of onlookers.
Conduct searches about well-known keywords and patterns within your speciality or industry. Analyze competitor keywords and look at layouts to optimize your metadata technique for maximum exposure and engagement.
Review and upgrade your metadata and keywords on a standard interval to recall modifications in content, audience tendencies, and advertising trends. Stay assertive in refining your metadata methodology to preserve visibility and significance within the marketplace.
Step 3: Including Watermarks

See into watermarking your images to prevent unauthorized use and secure your intellectual property rights. Watermarks can integrate your symbol, signature, or copyright notice, deliberately set to be obvious but not diverting.
Make a fascinating watermark that encapsulates your brand personality by utilizing Photoshop’s text and shape tools. Play with distinctive textual styles, sizes, and opacities to attain the specified proportion between visibility and nuance.
Select a placement for the watermark that does not degrade from the picture’s subject while still carrying out its aim of assurance. Standard choices include Corner placements or diagonal overlays.
Utilize Photoshop’s layer opacity settings to alter the transparency of the watermark. Hold conformity between visibility and interruption so that the watermark is recognizable but does not dominate the picture essence.
Ease the watermarking phase for numerous pictures by making a Photoshop activity or utilizing batch processing highlights. That permits you to apply the watermark over your whole picture library productively.
See into various plans of picture assurance, such as inserting metadata or utilizing (digital rights management) DRM arrangements. Determine the sufficiency of each strategy based on your particular conditions and preferences.
Step 4: Saving Various Formats
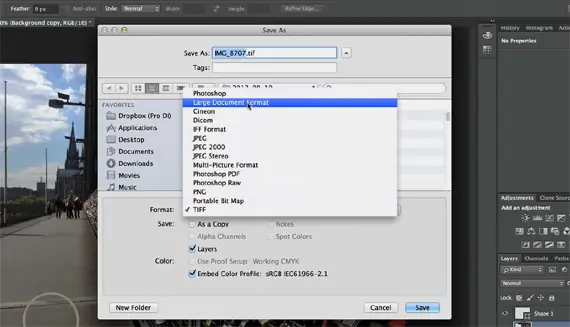
Select suitable file formats for distinctive purposes and stages. Consider components like picture quality, compression, and compatibility with different gadgets and software.
Save a high-resolution form of your image in a substantial format such as TIFF or PSD to protect picture quality for printing and additional editing. That guarantees the most extreme adaptability and constancy in post-processing.
Make web-optimized forms of your pictures utilizing formats like JPEG or PNG. Vary compression settings to adjust picture quality with file measurements, optimizing loading durations and execution for online utilization.
Produce different adaptations of your pictures custom fitted to particular prerequisites. For instance, make thumbnails, previews, and full-size pictures optimized for distinctive viewing settings and gadgets.
To speed up the transformation and enhancement process for numerous images, operate Photoshop’s batch processing highlights. Depict presets and automate dreary errands to save time and keep up consistency.
Organize and name distinctive adaptations of your pictures methodically to encourage simple retrieval and administration. Keep up clear documentation of file formats and specifications to avoid perplexity and guarantee platform compatibility.
Step 5: The Platform Identification
Select an appropriate stage for displaying your images, for instance, a portfolio site, web journal, or online exhibition. Assess components like customization choices, ease of utilization, and compatibility with your branding and objectives.
Plan a natural and tempting design for your portfolio or site utilizing Photoshop’s design apparatuses. Join components like navigation menus, image galleries, and contact shapes to improve user encounter and engagement.
Organize your pictures into cohesive collections or categories dependent on concepts, subjects, or ventures. Utilize Photoshop to make custom thumbnails, banners, and headers that echo your style and branding.
Show your images reliably and proficiently, assuming picture quality, resolution, and aspect proportion. Utilize Photoshop to optimize picture display and guarantee compatibility over distinctive gadgets and screen sizes.
Advance your portfolio or site for search engines by joining important keywords, meta labels, and graphic captions for your pictures. Use Photoshop to implant metadata and improve discoverability for your online presence.
Present monetization tools and highlights into your portfolio or site, such as e-commerce plugins, promoting networks, or associate marketing programs. Adjust payment gateways and pricing configurations to monetize your images successfully.
Step 6: Enhancing Promotional Aspect
Create a comprehensive promotion procedure laying out your objectives, target audience, and critical communication. Represent particular strategies and channels for coming to your audience viably.
Utilize Photoshop to form outwardly thrilling exceptional materials such as banners, social media illustrations, and promotions. Bind your pictures inventively to exhibit their quality and charm.
Take advantage of social media stages, including Instagram, Facebook, and Twitter, to flaunt your images and interact with your audience. Share backstage tales, tips, and experiences to construct compatibility and cultivate community.
Produce partnerships and collaborations with influencers, speciality or industry.
Create targeted mail-promoting campaigns to support relationships with your audience and advance your most recent work. Utilize Photoshop to plan visually attractive e-mail layouts and newsletters that propel engagement and transformations.
Screen the execution of your promotional endeavours utilizing analytics tools and metrics. Track key performance indicators such as site activity engagement rates, change metrics to a degree of adequacy, and refine your procedure appropriately.
Conclusion
Photographers, artists, and content creators can reap lots of benefits from mass distribution and monetization. First of all, it reduces distribution costs by offering a substitute for pricey printing and delivery techniques. That makes it easier for content providers to reach a larger audience. Second, it provides a means for artists to make a consistent income by allowing them to create a platform on which they can sell their photos at the rates they choose. In addition to offering a more sustainable economic model that enables content creators to concentrate on expanding their audience and producing more material, this encourages content creators to generate high-quality work. To proactively promote your work and engage with your audience, you can rely on this blog’s steps and editing techniques to increase your images’ visibility, credibility, and monetization opportunities.
