How To Do Image Interpolation In 6 Easy Steps
For presenting your digital images on various platforms or for printing, post-processing is always recommended, as that enhances the aesthetic appeal and eliminates any distracting elements. However, the aesthetic enhancements of the images are not the only requirement to make them accommodating; instead, certain other aspects are equally compulsory to be considered for various purposes. Image measurement is one of those aspects that is achieved by advanced editing techniques like image interpolation. Image interpolation functions on enlarging or cropping image sizes according to the requirement without negatively affecting image quality or causing distortions. It manipulates the pixel grids that the image contains, resulting in a resized image with new pixels and color intensities. That interpolated image will be flawless without any broken or congested pixels, which is the case if existing pixels are stretched or compressed in common resizing ways. This blog article includes six comprehensive steps for image interpolation, which are as follows:
Step 1: Specify the suitable interpolation technique
There are many interpolation strategies, and making the correct choice can affect the final image’s quality and visual temptations.
Start by pondering the goal of your picture modification. Are you broadening a photo, lessening its estimate, or upgrading a low-resolution picture?
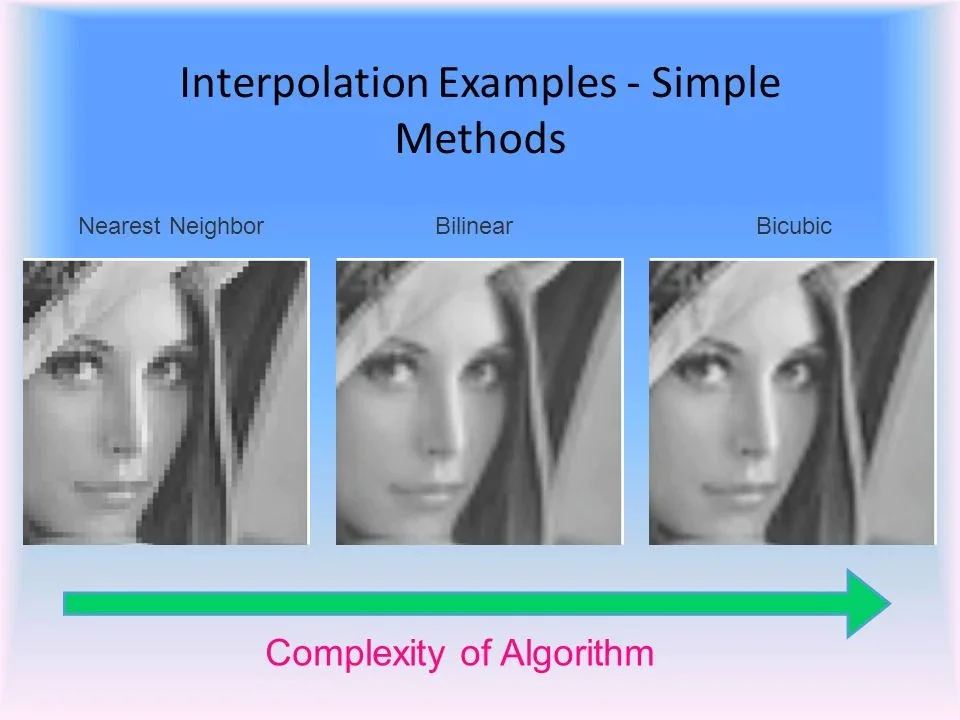
The simplest and fastest interpolation technique is near-neighbor. It copies the nearest pixel’s color to add in fresh pixels. It’s appropriate for basic resizing tasks, but it may cause spiked edges and a blocky look.
The second kind of interpolation is bilinear, which works on the values of the four closest pixels and mixes them to determine the new pixel’s color. It’s an excellent option for common resizing and gives intact outcomes.
Bicubic interpolation is more complex and covers a 4×4 grid of encompassing pixels. This approach is great for high-quality extensions and decreases because it gives a smoother and more authentic appearance.
You can also customize interpolation settings in some advanced applications. They also offer adjustments that can allow you to do multiple kinds of interpolation at once.
Once you have decided the kind of interpolation you need for your image, you can continue to the next steps.
Step 2: Prepare your image
After choosing the proper interpolation strategy, the next step is to plan your image for the interpolation process.
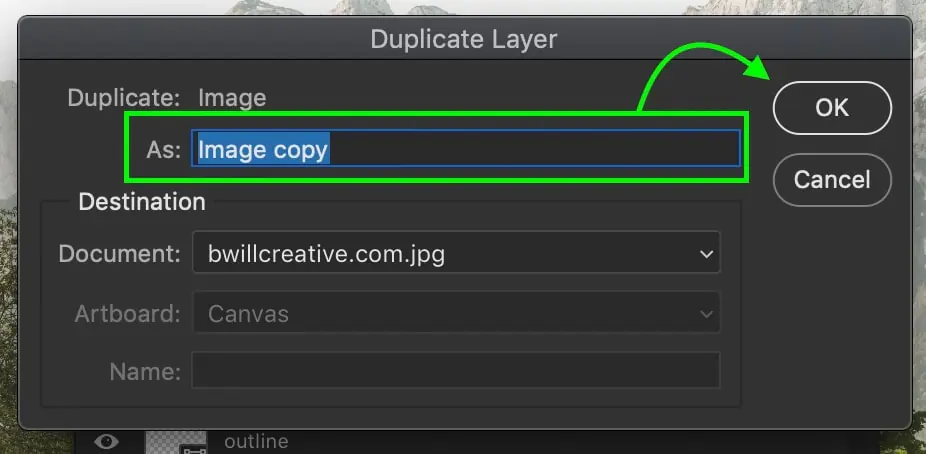
Before manipulating the image, copy it using the duplicate layer feature in your software. You can then continue the process on the duplicated image, and the original will remain intact.
Look at the resolution of your image to check that it’s within the required units (PPI or DPI) for your venture. Resolution reset image options are available in various software programs, like Photoshop.
Confirm that your picture has the proper color profile for your intended use. As for web graphics, sRGB is frequently adopted; likewise, CMYK is preferred for print. Make the essential alterations as required.
Spend some time observing your image to see any imperfections or noises. Upgrade the levels of contrast, brightness, and sharpness to provide the most possible clean version of your image for interpolation.
To preserve the quality, save your prepped picture in formats like TIFF or PNG to avoid compression and quality misfortune amid the altering activity.
If you’re planning to create a significant large-sized image, think about setting a reference point or focus area. That can keep up the imperative details during the interpolation.
A well-adjusted image will generate a pristine interpolation and a cleaner composition.
Step 3: Decide your image size and units
After readying your image, you need to decide what new size or measurements you want for your final composition.
Begin by recognizing the aim of resizing your picture. Are you enlarging the estimate for printing, decreasing it for web use, or any other purpose? This reasoning phase will direct your choice on the new measurements.
Keep up the original aspect ratio of the image if possible because any changes can distort your image.
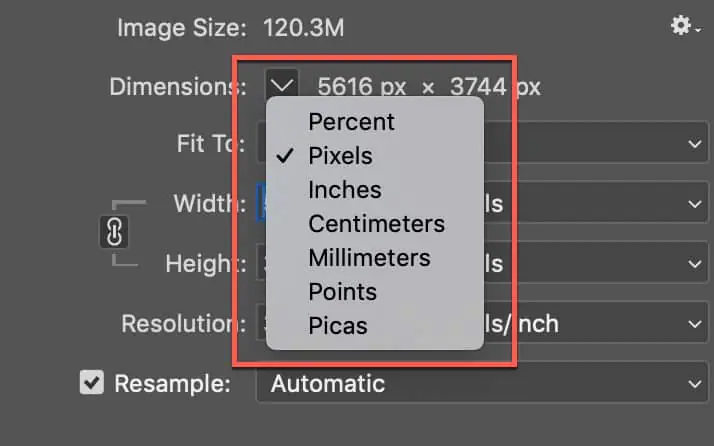
Select the suitable measuring units for your new size. It can be in pixels, inches, centimeters, or any other unit you prefer.
Calculate the new dimensions for your image based on the aspect ratio and aimed application. For example, if your original image pixel size is 1200 x 800 and you are enlarging it for printing, for a new pixel size, you can decide 2400 x 1600 pixels for a 200% extension.
Remodel the document size settings in your image editing software to synchronize the new dimensions. This step lets you maintain uniformity between the picture and document sizes.
To ensure exact resizing, take advantage of the measurement and calculation features given by your software. It confirms that your image measurements are precise for your expected use.
Step 4: Let your image undergo interpolation
Once you have perfectly prepared your image and determined its new size and dimensions, apply interpolation.
Open the image in your editing application. Double-check that you selected the duplicate and not the original.
Navigate to the tool menu of your software and access the scaling or resizing options. After that, you can specify the new measurements for your image.
Insert the new size you decided in Step 3. Carefully choose suitable measuring units (pixels, inches, etc.) and keep up the aspect ratio.
Select the introduction strategy you chose in Step 1. Bilinear and bicubic insertion are commonly utilized strategies. Your software may permit you to tailor interpolation settings; in that case, set them as per your preference.
Specify the resizing operation, and the software will use the selected interpolation method to create new pixels and conform the image to the prescribed dimensions.
After resizing, check the image carefully. Zoom in to check for imperfections, loss of detail, or blur. You can also use additional post-processing to enrich image quality.
During image resizing, you should move from a smaller size to a larger dimension rather than being haphazard. Enlarging an image may reduce quality slightly, so starting with a larger image and reducing its size provides better results.
Step 5: Use filters for enhancement and refinement
After you’ve resized your picture, you can do post-interpolation image improvements to touch up and progress the quality of the resized photo. You can also handle any obvious issues caused amid the resizing, assuring that your picture looks its best.
Attentively look at the resized image at 100% zoom or higher to recognize defects or drops of detail, which often happens in interpolation.
Use sharpening filters or tools to improve the image’s sharpness. But be aware not to over-sharp because it can create noise or halos.
Assess the color precision and consistency. Reset the color balance, contrast, and saturation, as required, to confirm the visual appearance of the composition.
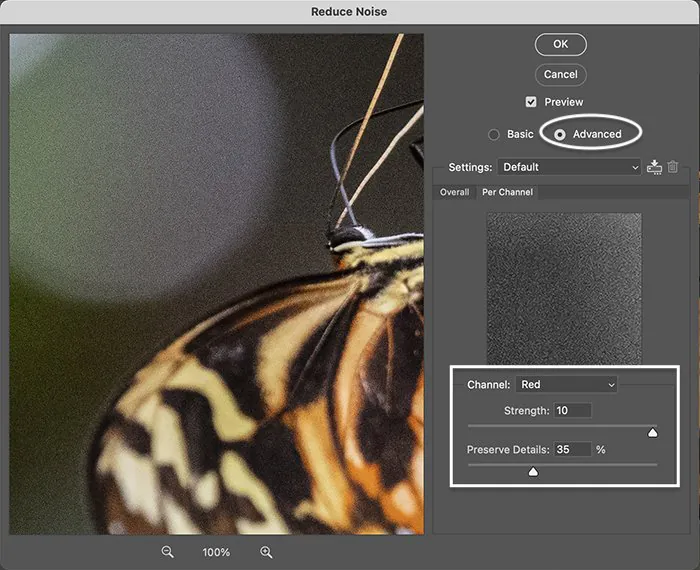
Utilize noise reduction tools to dispose of any noise or clamor that might have become more discernible after resizing.
Retouch in case of defects or diversions that may have gotten clearer within the resized picture.
Once content with the enhanced photograph, save it in a suitable format like TIFF or PNG for the finest quality, or select one that suits your final application.
Take a zoom-in and out view while improving your picture to induce a sense of how it’ll show up to viewers at different levels of modifications.
Step 6: Make your image ready for presentation
In the last step of the image interpolation process, you can save and export your interpolated image. Typically, it is a pivotal step to guarantee that your image is all set for its aimed use while protecting the quality you’ve strived to attain.
As the best hone, save a copy of your interpolated image before you navigate to export so that you have the original edited record in case you would like to make advanced changes.
Set up the file format that’s fitting for your particular usage. Standard formats are JPEG, PNG, and TIFF. Check out the harmony between file size and picture quality when selecting.
To save in a format like JPEG, be careful of the compression settings. Higher compression levels diminish file size but may result in a loss of picture quality. Alter the settings agreeing to your quality needs.
Reevaluate the resolution settings. In case you intend the image for print, it should have a higher resolution, like 300 DPI, whereas web illustrations can have a lower resolution, around 72 DPI.
Check that the color profile is suitable for your yield. SRGB could be a standard choice for web utilization, whereas CMYK is common for print. Utilize the proper profile to preserve color exactness.
Assign a significant and expressive filename for your image. Sort out your files in a logical catalog structure to keep your project organized.
Give thought to including metadata in your image, counting copyright data, and other critical subtle elements. That will preserve your work when information is public to viewers.
Finally, to display your interpolated composition online, consider making distinctive versions with shifting compression levels to adjust quality and loading speed.
Conclusion
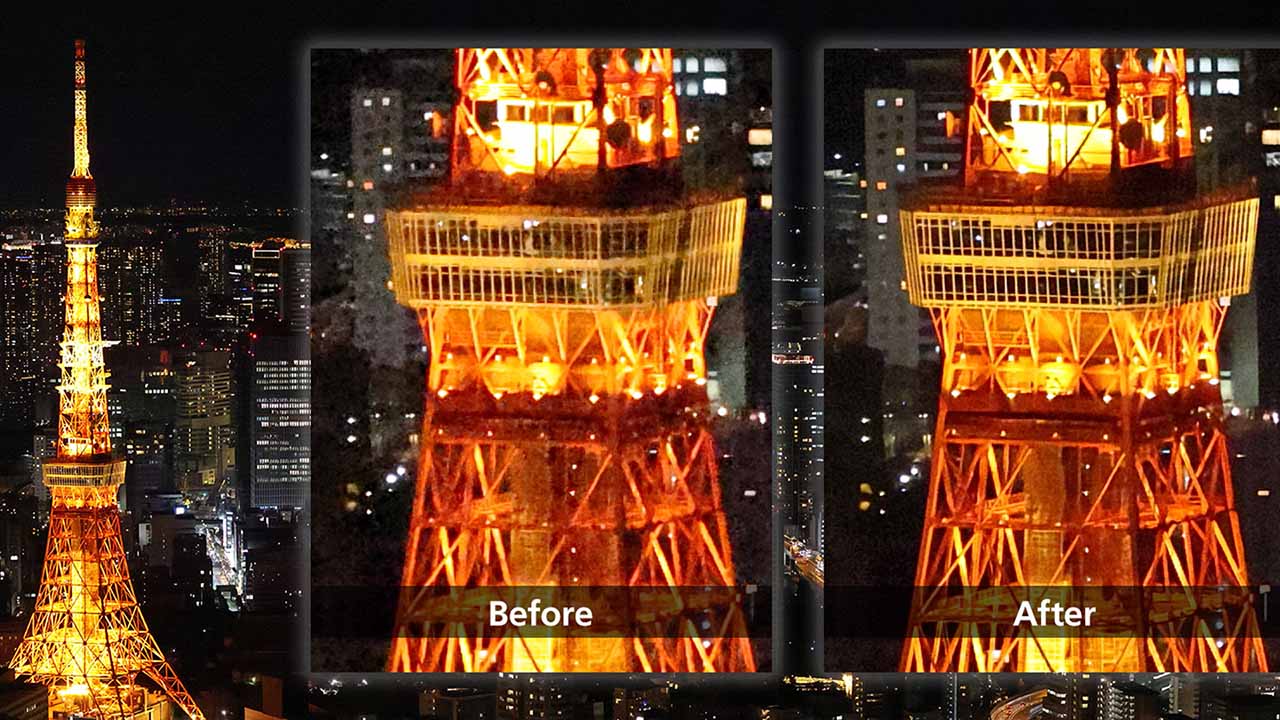
To conclude, image interpolation is a worthwhile approach to resizing images without compromising their quality. It can decrease or increase image dimensions using a pixel algorithm that designs new pixels that do not cause any broken or mosaic-like displays. The resultant images are of comparatively better quality and resolution than ones resized with common resizing options, provoking viewers’ appreciation. The quality assurance aspect of interpolated images makes them well-suited to various use cases where resizing the image is essential or specific regions of an image are meant to be present as separate images.
