How To De-Noise An Image
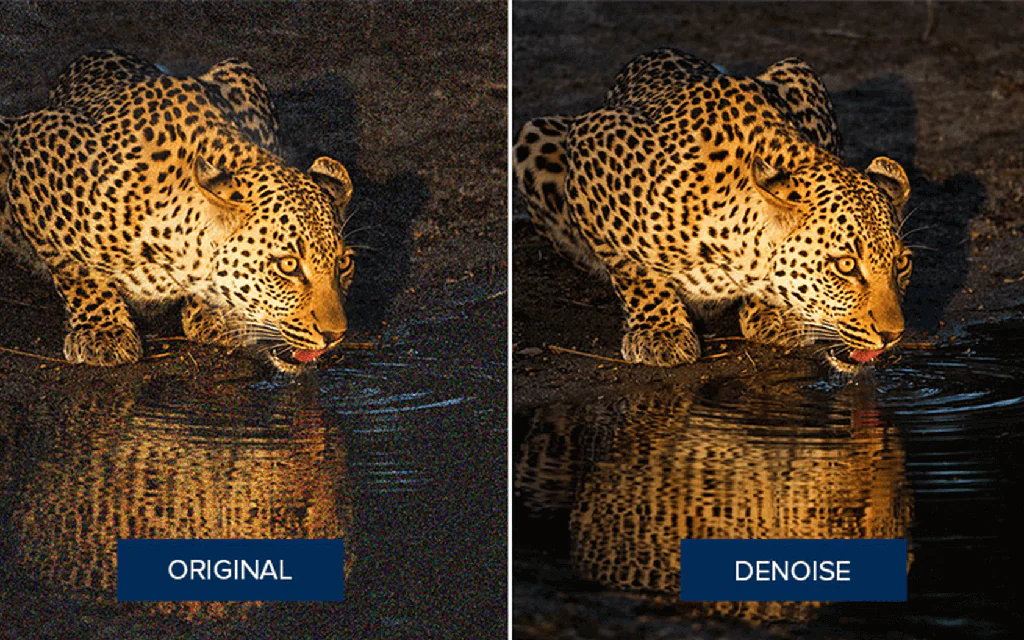
In the realm of contemporary digital photography, noise serves as an inescapable byproduct that accompanies the process of capturing images. Its presence can be attributed to an amalgamation of factors, encompassing the characteristics of the camera’s sensor, ambient lighting conditions, and the ISO settings employed. Although noise can occasionally imbue an image with a distinct ambiance and textural allure, it often proves to be a distractive element, compromising the overall caliber of the photograph. Thus, acquiring the knowledge and proficiency to effectively denoise an image is paramount. In this blog, we shall delve into various distinctive techniques and tools employed for noise reduction, thereby enhancing the quality of digital imagery.
Understanding Image Noise
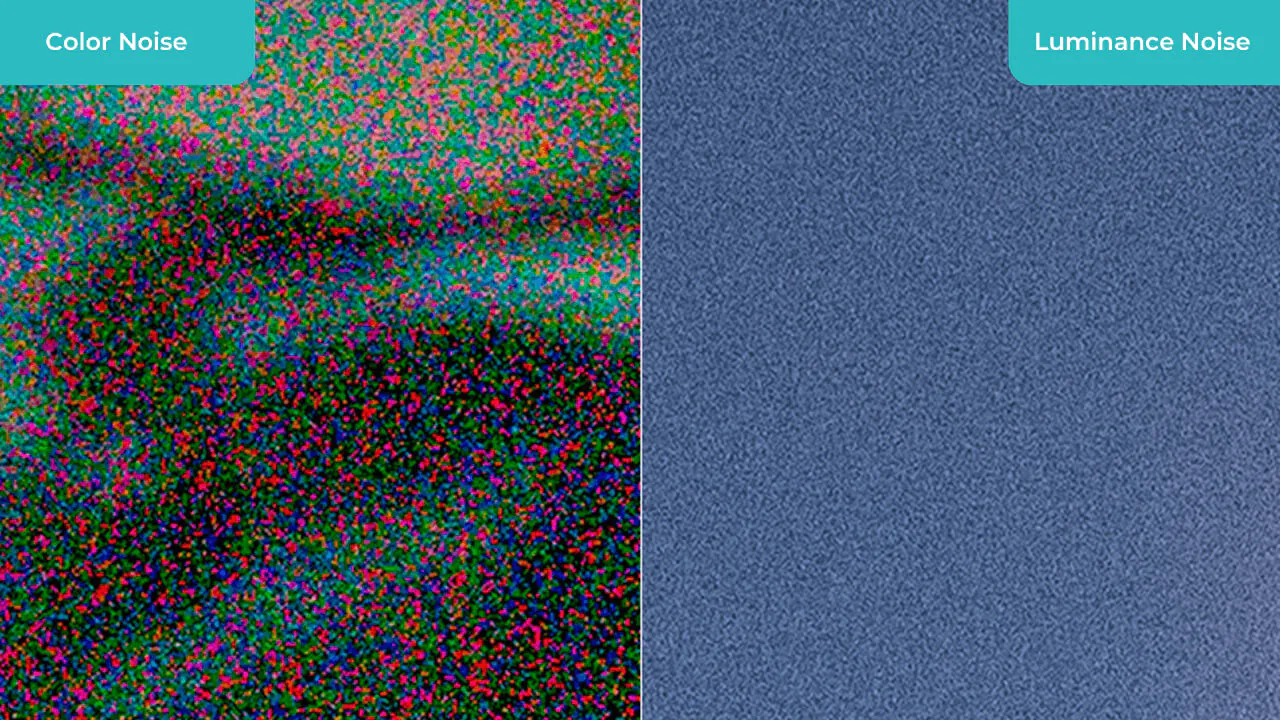
Image noise refers to random variations in brightness or color that deviate from the actual scene being photographed. It appears as unwanted grain-like artifacts or speckles, diminishing the clarity and sharpness of the image. Noise is primarily influenced by factors such as the camera’s sensor, lighting conditions, and the ISO setting used.
There are two main types of image noise: luminance noise and color noise. Luminance noise affects the brightness levels of the image, while color noise alters the fidelity of colors. Both types of noise can co-occur in an image, and their intensity is often more pronounced in low-light or high-ISO environments.
Understanding image noise is crucial for photographers as it enables them to implement effective noise reduction techniques during image capture or post-processing. By comprehending the causes and characteristics of noise, photographers can take preventive measures and make informed decisions to produce high-quality images with minimal noise.
Preventing Noise at the Source
Preventing noise at the source is crucial in achieving high-quality images with minimal noise. Taking appropriate measures during image capture can significantly reduce the need for extensive noise reduction in post-processing. Here are some effective techniques to prevent noise at the source:
Optimal Exposure: Maintaining proper exposure is vital for minimizing noise. Underexposed images tend to have more noise, as increasing the brightness during post-processing amplifies the noise. Overexposing, on the other hand, can lead to blown-out highlights and loss of detail. Finding the right balance and ensuring that the image is correctly exposed to reduce noise.
Lower ISO Settings: The ISO setting determines the sensitivity of the camera’s sensor to light. Higher ISO values amplify the signal from the sensor, including noise. Choose the lowest ISO setting that captures the desired brightness level whenever possible. Lower ISO settings result in cleaner images with less noise.
Proper Lighting: Adequate lighting is crucial in minimizing noise. Shooting in well-lit environments reduces the need for high ISO settings and longer exposures, which can introduce more noise. Natural light is often the preferred choice. However, if shooting in low-light conditions, consider using external lighting sources like flash or continuous lights to ensure optimal exposure without resorting to high ISO settings.
Use a Tripod: Camera shake can contribute to image noise, especially when using longer exposures in low-light situations. Using a tripod helps stabilize the camera, eliminating the risk of unintentional movement and resulting in sharper, noise-free images. Always use a tripod to maintain stability while shooting in low light or using longer exposures.
Noise Reduction in-camera: Many cameras offer built-in noise reduction features to help reduce noise at the source. These features typically apply noise reduction algorithms to the image during image processing in-camera. Experiment with the noise reduction settings on your camera to find the optimal balance between noise reduction and preserving image details.
Shoot in Raw Format: Shooting in the Raw format provides greater post-processing and noise reduction flexibility. Raw files retain more image data, allowing for more effective noise reduction without sacrificing image quality. By capturing images in Raw format, you have more control over noise reduction during post-processing compared to shooting in compressed formats like JPEG.
Avoid Extreme Post-processing: Aggressive post-processing, such as heavy-handed sharpening or excessive contrast adjustments, can amplify noise in an image. It’s crucial to apply post-processing techniques judiciously and avoid pushing the image beyond its limits. Use subtle adjustments to enhance the image without introducing additional noise.
Clean Camera Sensor: Dust or debris on the camera sensor can lead to visible spots and artifacts in your images, often resembling noise. Regularly clean your camera sensor using appropriate sensor cleaning tools or consult a professional service to ensure a clean sensor surface.
By implementing these preventive measures during image capture, you can significantly reduce noise in your images and minimize the need for extensive noise reduction in post-processing. Remember that each shooting situation is unique and may require experimentation to find the best settings and techniques for your specific equipment and shooting conditions.
Post-processing Techniques for Denoising

Post-processing techniques play a crucial role in denoising an image. While it’s best to prevent noise at the source, noise can still be present in certain images due to various factors. Fortunately, several effective post-processing techniques are available to help reduce noise and improve the overall quality of your images. Let’s explore some commonly used methods:
Gaussian Blur: One of the simplest techniques to reduce noise is applying a Gaussian blur filter to the image. This filter works by averaging the pixel values in the neighborhood of each pixel, effectively smoothing out variations and reducing noise. However, using this technique cautiously is essential, as excessive blur can result in losing image details and a softened appearance.
You can choose image editing software like Adobe Photoshop or GIMP to apply Gaussian blur. Select the desired level of blur and apply it to the image. Previewing the changes and fine-tuning the settings to balance noise reduction and preserving details is recommended.
Median Filter: The median filter is a powerful denoising tool that replaces each pixel’s value with the median value of its neighboring pixels. This technique is effective in preserving edges and fine details while reducing noise. The median filter is particularly useful when dealing with salt-and-pepper noise, which appears as isolated white and black pixels in the image.
Most image editing software offers a median filter tool or plugin that allows you to adjust the filter radius or strength. Apply the median filter to the image and observe the results. Fine-tuning the settings can help strike the right balance between noise reduction and maintaining image sharpness.
Noise Reduction Plugins/Software: Specialized noise reduction plugins and software are available to tackle noise-related issues effectively. Popular software like Adobe Photoshop, Lightroom, DxO PhotoLab, and Topaz DeNoise offer powerful noise reduction capabilities, utilizing advanced algorithms and machine learning techniques to identify and reduce noise while preserving image details.
These plugins often provide a range of adjustment sliders, allowing you to fine-tune noise reduction parameters such as luminance noise, color noise, and detail preservation. The noise reduction process can be applied globally to the entire image or selectively to specific areas using masking techniques.
When using noise reduction plugins, balancing noise reduction and maintaining image sharpness and fine details is essential. Overapplication of noise reduction can result in a loss of texture and a plastic-like appearance. Preview the changes at 100% zoom level and make adjustments accordingly.
Wavelet Transform Denoising: Wavelet transform denoising is a sophisticated technique that analyzes images at different scales, making it an effective method for balancing noise reduction and preserving image quality. It decomposes the image into different frequency bands or scales and selectively applies denoising to each scale.
Several software tools and plugins, such as Wavelet Denoise in GIMP or the Denoise module in Darktable, utilize wavelet transform denoising algorithms. These tools allow you to adjust parameters like thresholding and strength to control the noise reduction applied to each frequency scale.
Wavelet transform denoising is particularly useful when dealing with noise that varies across different frequencies, as it can target specific noise components while preserving important image details.
Image Stacking: Image stacking is a technique that combines multiple images of the same scene to reduce noise. The random noise is effectively canceled by aligning and averaging the pixel values across the images, resulting in a cleaner and less noisy final image.
To perform image stacking for noise reduction, capture a series of images of the same scene with the same exposure settings, preferably using a tripod to ensure alignment. Use image stacking software like Adobe Photoshop, Starry Landscape Stacker (for astrophotography), or specialized focus stacking tools. These software tools align and blend the images, emphasizing consistent pixel values across the stack while minimizing the noise.
Image stacking is particularly effective in reducing noise in low-light or high-ISO images, where noise is more prevalent. It also allows you to retain more image details than noise reduction techniques. Experiment with different stacking methods and the number of images to stack to achieve the desired level of noise reduction while maintaining image sharpness and clarity.
Conclusion
In conclusion, post-processing techniques provide a range of options to effectively denoise your images. The choice of technique depends on the nature and severity of the noise, as well as your desired level of image quality and artistic intent. Experimenting with these techniques and finding the right balance can significantly reduce noise, resulting in visually pleasing and professional-looking images. Remember to always work on a copy of your original image and keep backups to preserve the integrity of your photographs.
