How To Create A Prisma Effect
There are various digital tools and techniques employed by image editors and artists nowadays to enhance digital images and artworks. The adoption of such strategies can verily transform ordinary images into aesthetically inviting art pieces. Furthermore, various image enhancement applications also support to creation of characteristic climates in images, such as a warm or cool style or a sense of depth. Prisma app is one such app that offers various features, including brushstrokes, texture options, and artistic filters to turn images into painterly works. Nevertheless, though the Prisma app offers some free tools, one needs to go through a subscription to thoroughly access its premium features. To get Prisma’s signature effects, various other image editing software can also facilitate with relevant tool choices. The Prisma effects are now acknowledged as a standalone editing approach that is applied to images while considering a precise set of characteristics. In this blog, we will go through the step-by-step process of editing images by adding a Prisma effect. We will use Adobe Photoshop for its versatility and user-friendly features.
Step 1: Image Import And Preparation
Initiate Photoshop and import the picture you need to transform by attending to File > Open or dragging the photograph into the workspace.
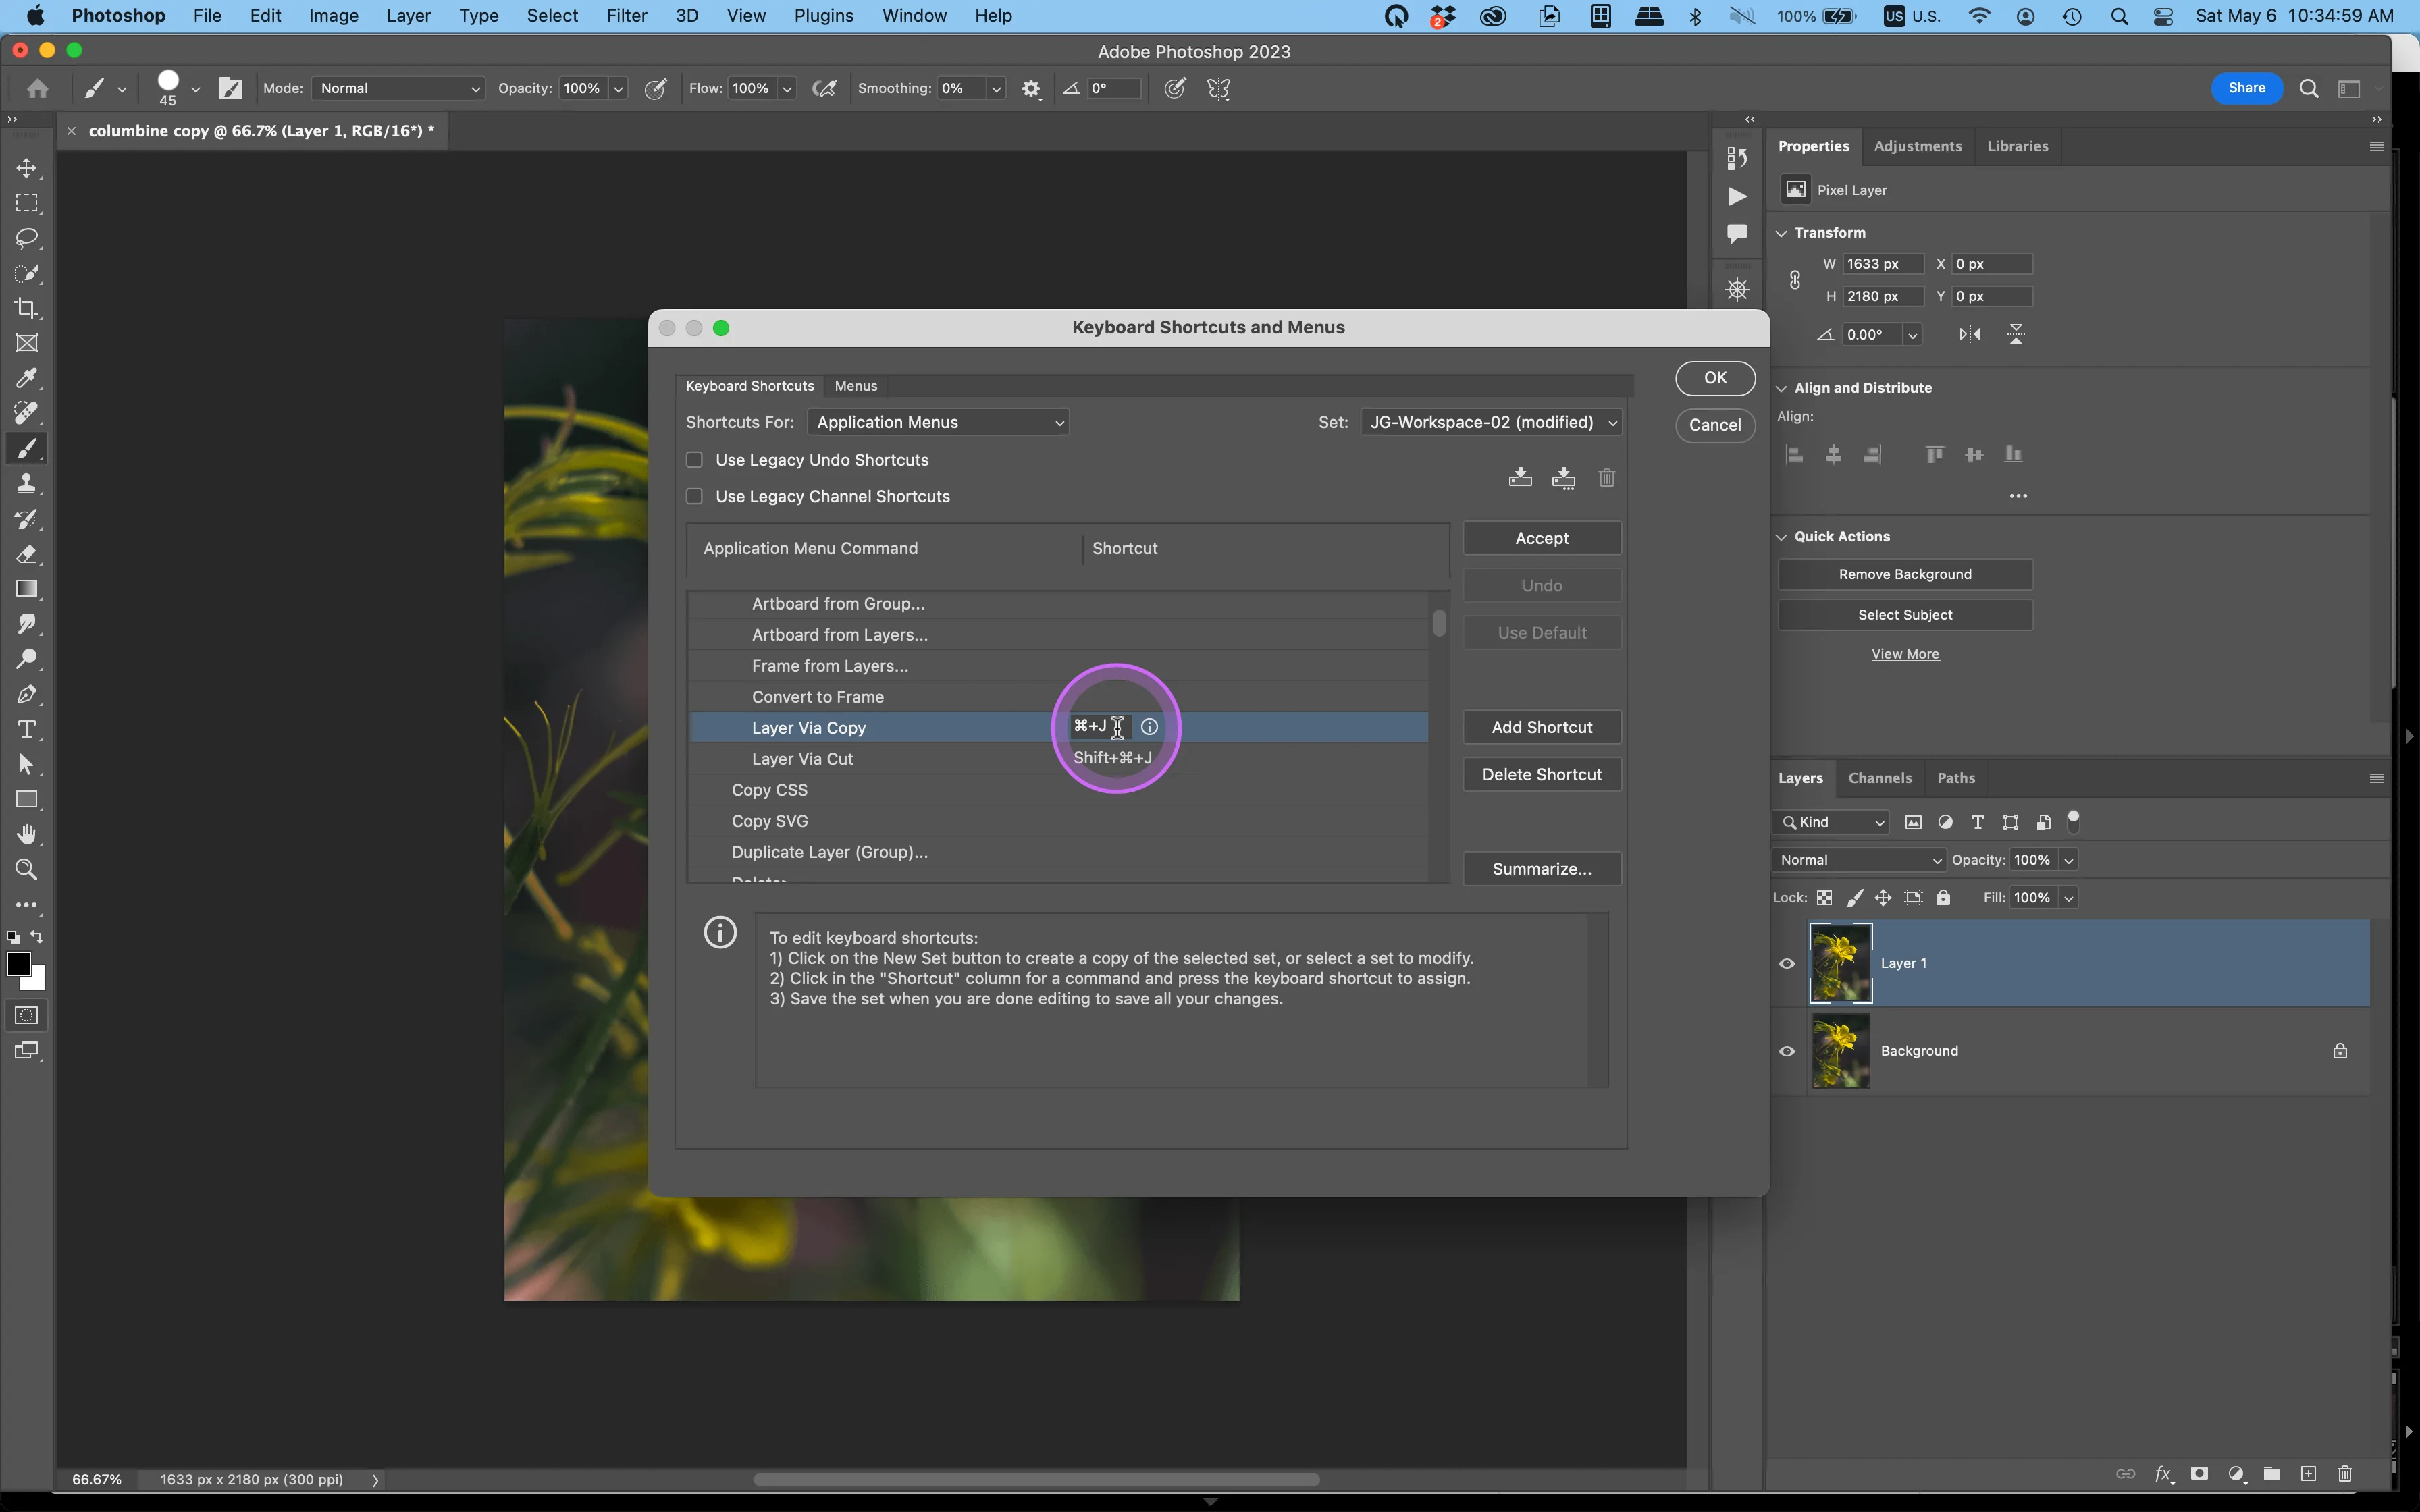
Tap Ctrl+J to get a duplicate of the initial layer. This step guarantees that you still have an untouched version of your photo to get back on as required.
Retitle the new layer, naming it as Working Layer, by double-clicking on its title within the Layers panel. It will help to organize your workspace for simpler editing.
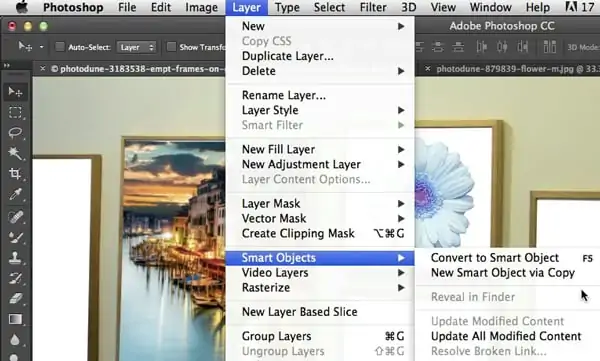
Right-click on the duplicated layer and choose Convert to Smart Object. This permits you to apply filters non-destructively so you can alter them afterward.
Save the file in PSD format by using File > Save As; it will retain all layers and modifications as you work.
Step 2: Artistic Filters Application
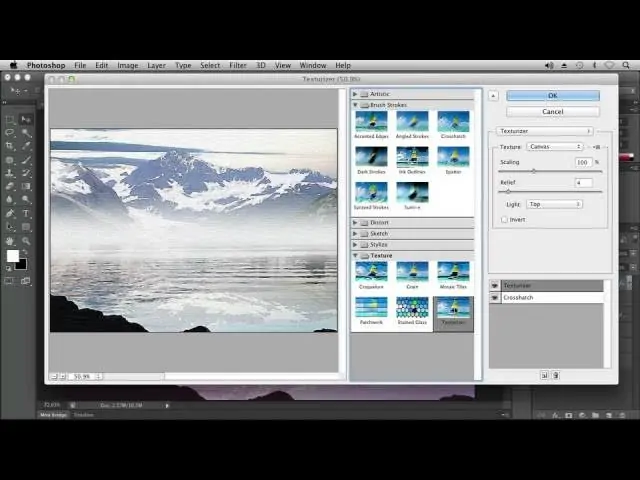
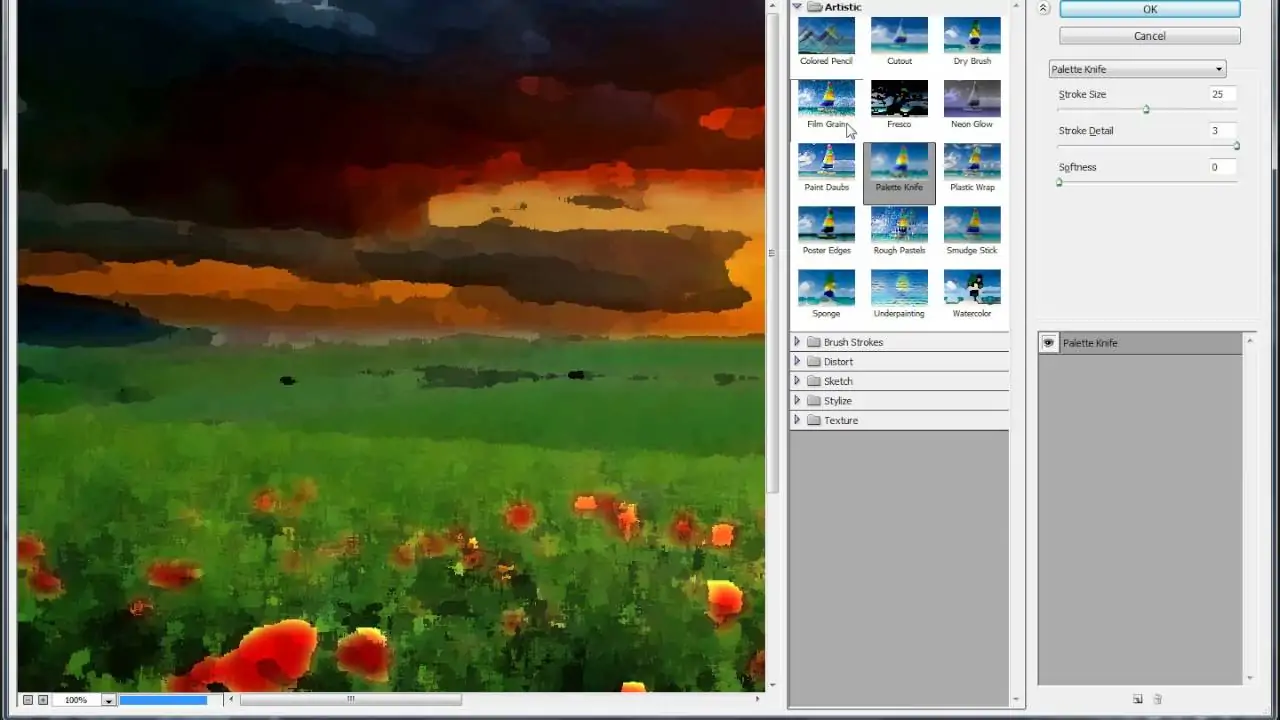
With the duplicated layer chosen, proceed to Filter > Filter Gallery. It opens a range of aesthetic impacts to play with.
Investigate filters such as Cutout for striking shapes, Dry Brush for finished impacts, or Poster Edges for sensational outlines. Each filter gives special painterly styles.
Alter the sliders within the selected filter to manage parameters such as edge clarity, surface intensity, or saturation. Opt for a proportion between abstraction and recognizability.
You can apply numerous filters together by clicking New Effect Layer inside the Filter Gallery. It permits layering diverse effects for a more affluent result.
Utilize the preview choice to witness the changes in real-time. Alter settings as required before applying.
Tap Ok to finalize the selected filter and return to the main workspace with the updated layer.
Step 3: Making Colors More Eminent
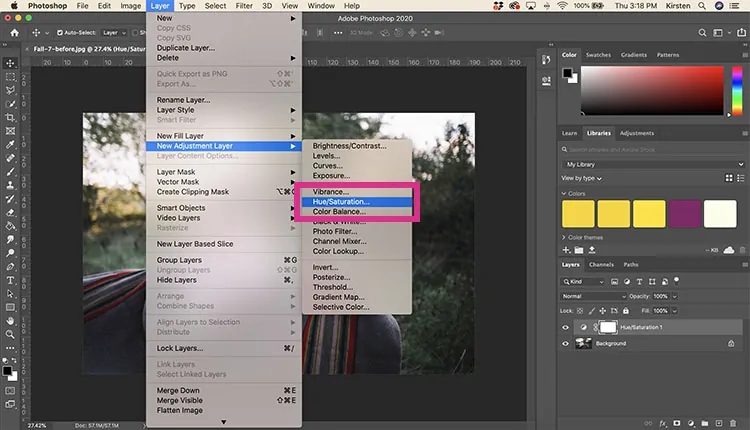
Move to Image > Adjustments > Hue/Saturation or use Ctrl+U to approach the adjustment panel.
Expand the saturation slider to make the colors more distinctive and vibrant, upgrading the aesthetic impact. Prevent over-saturating to avoid colors from emerging unnatural.
Utilize the dropdown menu options Master, Reds, and Blues to selectively alter particular color ranges, making certain tones more noticeable.
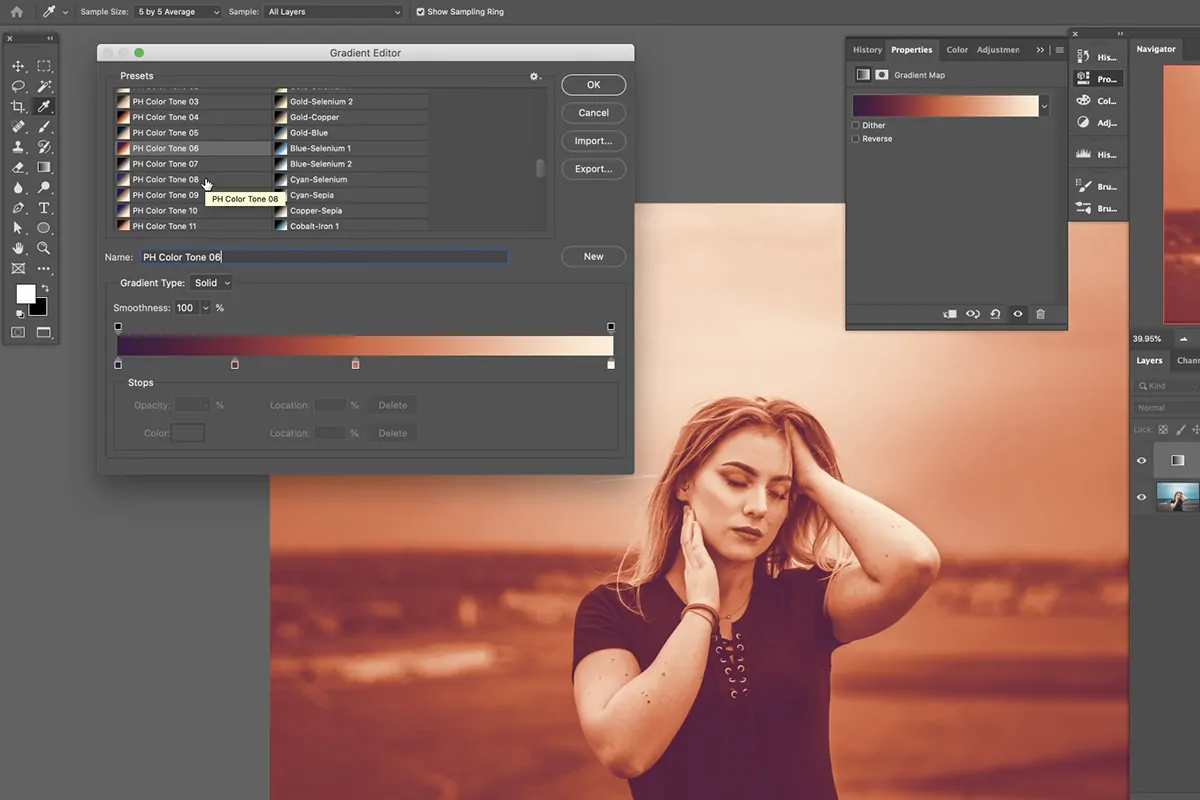
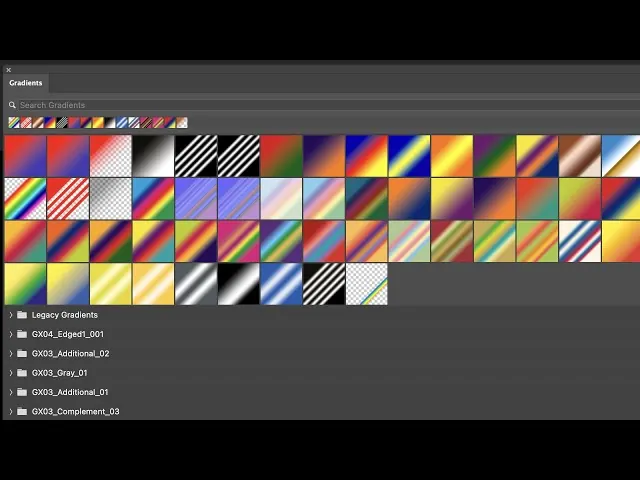
Include a Gradient Map Adjustment Layer from the Layers panel. That tool maps colors to the light and dark regions of the photograph, making striking, creative tones. Try gradient presets or make custom gradients.
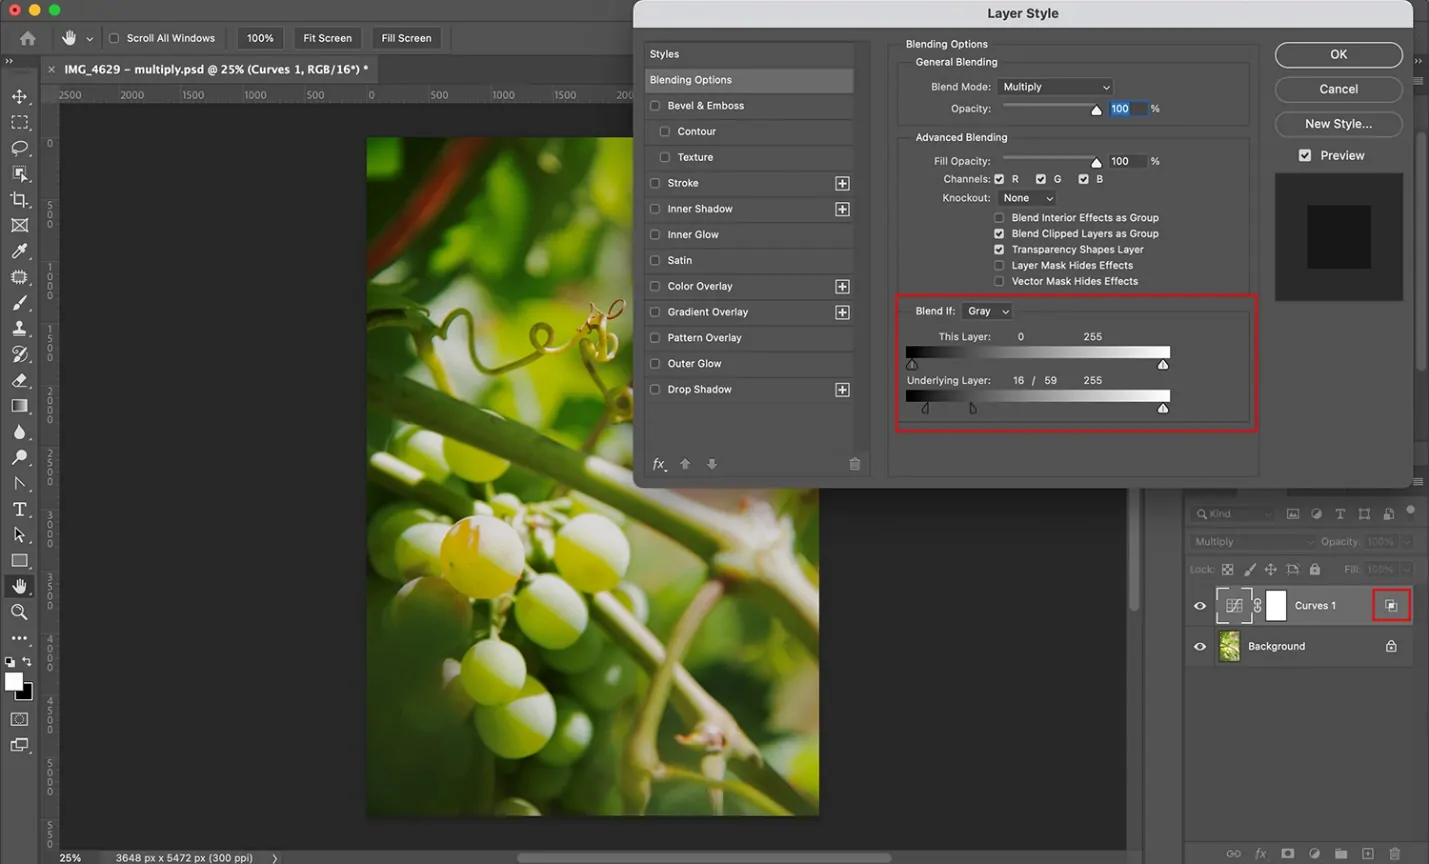
Shift the Blending Mode of the Gradient Map layer to Overlay, Soft Light, or other modes for inventive impacts. Vary the opacity to possess intensity.
Utilize Image > Adjustments > Color Balance to enhance shadows, midtones, and highlights for a cohesive and dynamic appearance. Save the adaptations.
Step 4: Using Textures And Brushwork
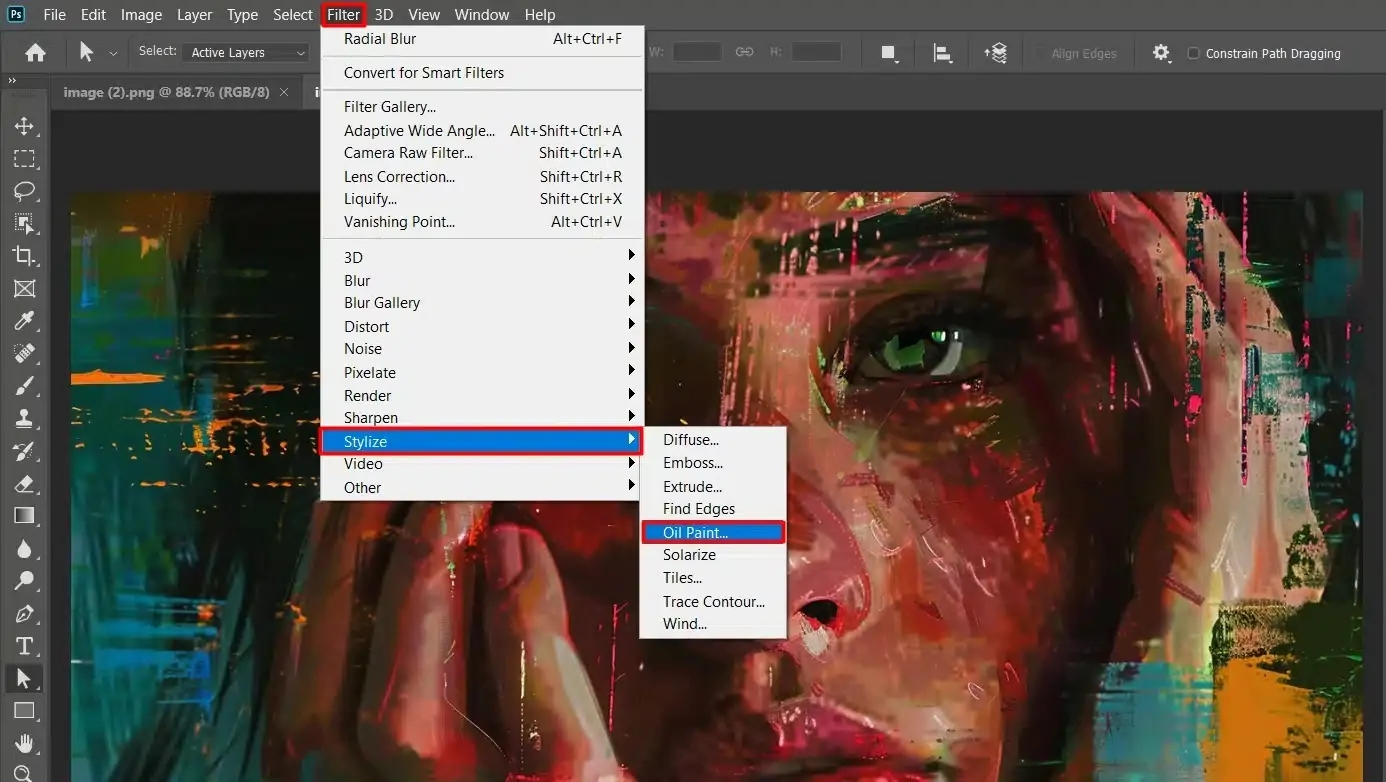
Select the layer you are working on and proceed to Filter > Stylize > Oil Paint.
Adjust the sliders for Stylization to manage the smoothness of the strokes, Cleanliness to define the sharpness or surface of the brushstrokes and Lighting to alter the depth and detail of Angle and Shine.
At last, Preview the effect and press Ok to execute.
Make a new layer over your working layer. Utilize Photoshop’s custom brushes to paint over particular zones for more detailed, hand-drawn effects. Alter the size, opacity and flow of the brush to acquire a natural blend.
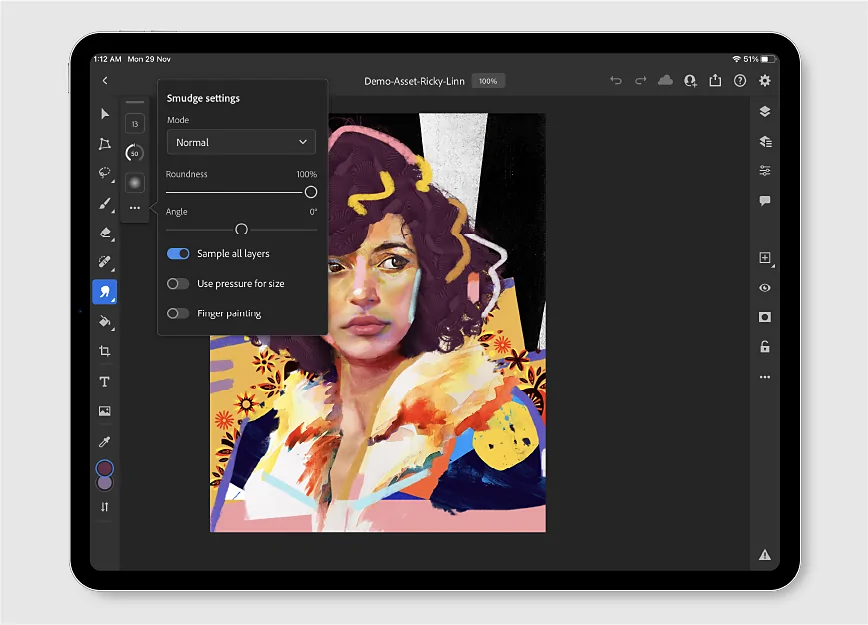
Choose the Smudge Tool and delicately drag over edges or details to relax or blend brush-like surfaces additionally.
Spread manual brushstrokes utilizing the Oil Paint filter to blend digital and aesthetic effects for a more energetic appearance.
Save your file to protect the layer adjustments and effects.
Step 5: Using Suitable Blending Modes
Import a texture file, like mimicking a canvas, paper grain, or brush patterns, and put it over your active layer. Adjust its size to wrap the whole canvas if required.
After the texture layer is chosen, move to the Blend Mode dropdown within the Layers panel. Play with modes such as Overlay, Soft Light, or Multiply to blend the texture along with your artwork.
Alter the Opacity slider to handle the noticeability of the surface appearance.
Make duplicate the surface layer and utilize various Blend Modes for enhanced depth. For instance, one layer could utilize Multiply for shadows, while another can use Screen for highlights.
Include a new layer and fill it with a gradient or solid color. Utilize a Blending Mode from options like Color or Soft Light to tactfully improve tones over the picture.
Include layer masks to texture or color layers and utilize a soft brush to specifically erase parts where the impact may be too solid, guaranteeing a proportional result.
Manage surface and effect layers into a group for simple management and potential adjustments afterward. Save your advancements.
Step 6: Sharpening The Details
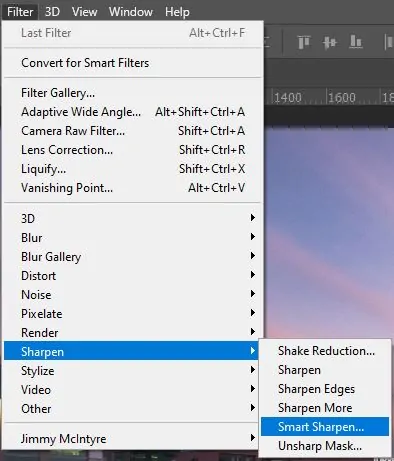
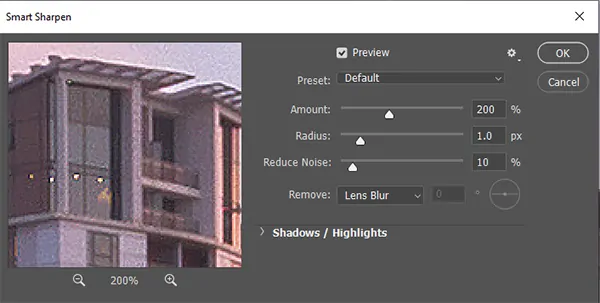
Select your working layer and go to Filter > Sharpen > Smart Sharpen.
Alter the Amount and Radius sliders to emphasize more detail in particular regions of the composition, such as on facial features or textures, without presenting too much commotion.
Utilize the Preview feature to tune the sharpening impact, concentrating on details that ought to pop up.
Make a copy of the active layer and use the options Filter > Other > High Pass. Put the radius to a value that underscores edge details without over-sharpening.
Put the duplicated layer’s Blend Mode to Overlay or Soft Light for a subtle, focused transformation of minute details.
Activate the Dodge Tool or Burn Tool for a selective enhancement of highlights or shadows, including depth to your picture.
Use these tools carefully on a new layer with a Soft Light mode to keep adjustments non-destructive and effectively adjustable.
As required, utilize Layer Masks to erase regions of inflated sharpening or detail improvement. That lets you control the applied effects selectively and keep up a natural and aesthetic formation.
Step 7: The Final Adjustments
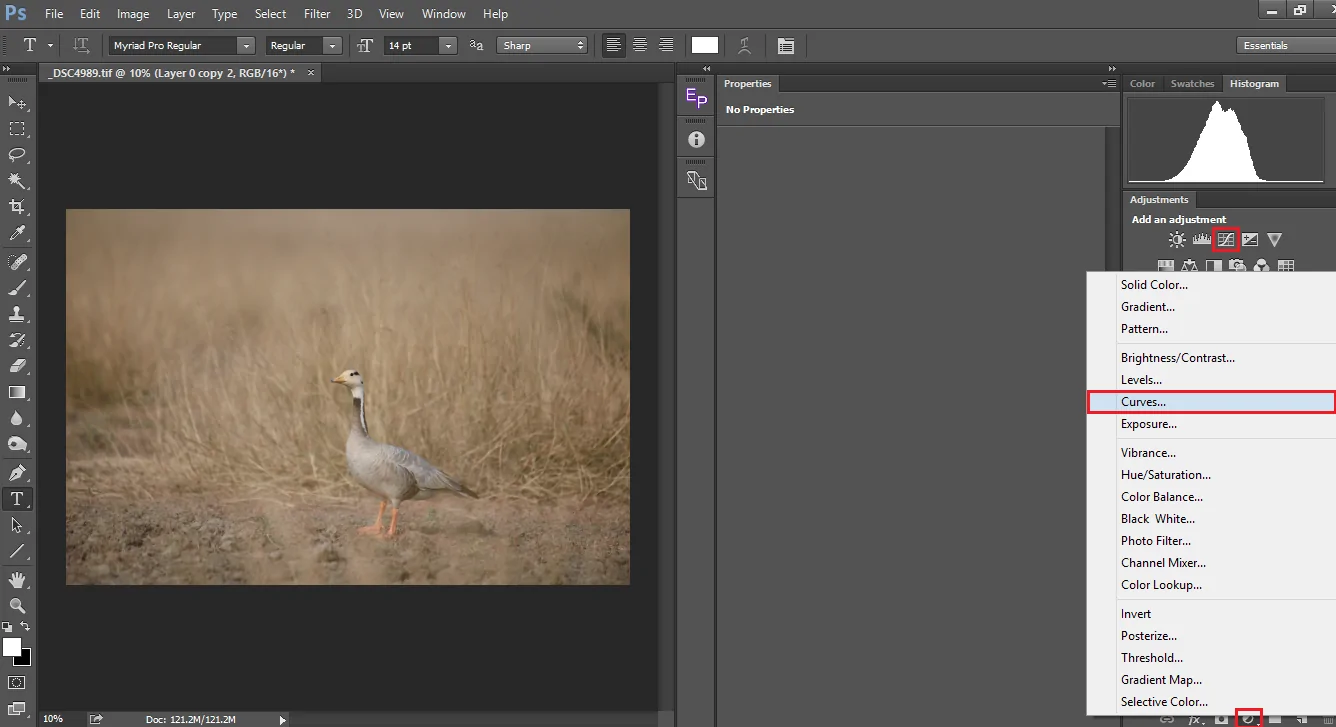
Proceed to Image > Adjustments > Curves. The Curve tool permits you to alter the brightness and contrast in your shot by handling the curve.
Improve the shadows, midtones, and highlights to allow the image a more adapted and polished appearance. Tune in to make the colors pop or to include a slight contrast augmentation.
Utilize Image > Adjustments > Color Balance to tune the picture colors. Revise the shadows, midtones, and highlights sliders to include warm or cool tones per on the artistic temperament you want to make.
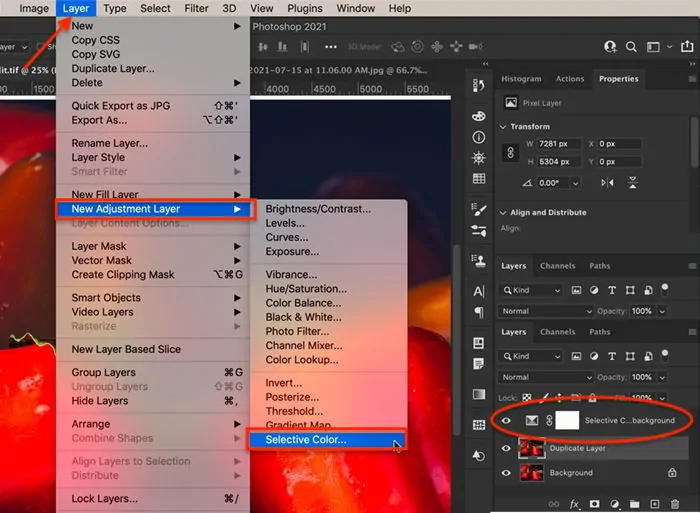
You can moreover play with the Selective Color alternative for more particular color enhacements.
Utilize the Selective Color adjustment layer to change individual colors, including reds, blues, or greens, for a more sensational or concordant impact. That can refine tones and accomplish a proficient-level wrap-up.
Use the Zoom in and out options on your picture to guarantee that the overall alterations fit the artistic look. In case any parts feel too sharp, delicately alter the opacity of particular layers or utilize layer masks to regulate.
After you are okay with the final result, save your file in Photoshop or PSD format for prospective edits. At that point, export the photo in your wanted format, such as JPEG or PNG, to share or print purposes.
Conclusion
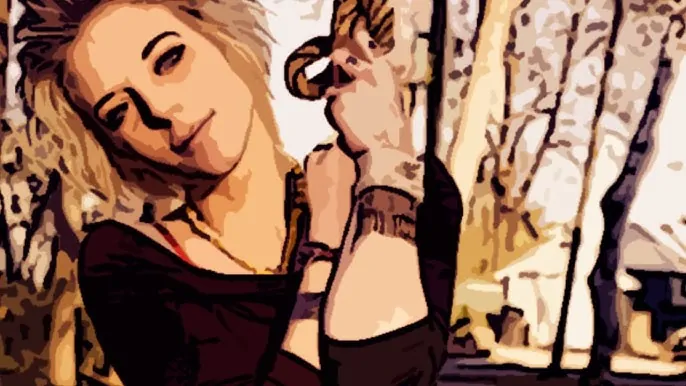
In summary, the Prisma effect is one of the most promising techniques for turning ordinary images into remarkable ones. Depending on the colors you choose and combine, how you apply them, and the image you decide to use them on, you have countless creative alternatives. Hence you can turn your photographs into dynamic paintings that bring back memories of the days when the sole way to capture the different aspects of life was via painting. You will end up with images that have a stylized and hand-painted appearance and an intensified ambiance.


