
How To Create A Parallax Effect
In contrast to their actual static nature, the illusion of activity and movement in parallax effect images makes them more tempting to viewers. This creative editing technique prompts a sense of profundity and magnitude, which includes a unique and captivating component to visual substance. The objects within the backdrop seem to move at a varying speed compared to the foregrounded subject, offering an impression of three-dimensional scenes. The parallax effect spoofs the viewer’s eye in conceiving layers of the particular photograph. This communicating side of the parallax effect renders an expanded user engagement. It makes them drawn to an unusual visual interest produced by the moving layers, making the content more pleasant to indulge in. The parallax effect technique is instrumental in web design and digital media. The key theme behind this effect is optical illusion. The layers of an image are positioned in a shifting perspective, resulting in the appearance of an in-stir background element behind a still foreground. This blog will discuss in detail the image manipulation strategies for the parallax effect inclusion within images, web designs, and animations.
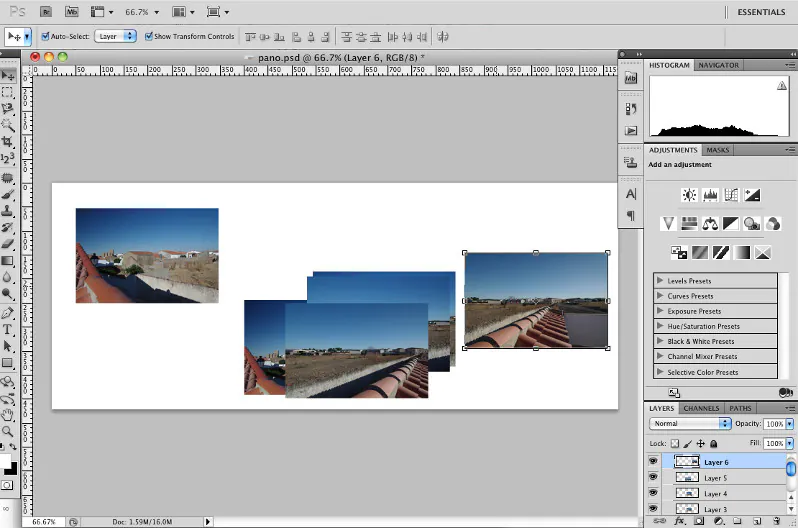
Step 1: The Base Layer Creation
Initiate your parallax effect in Adobe Photoshop, open the application, and load the photo you need to work on. Begin by exploring the “File” menu and selecting “Open” to select your image file. Also, you can drag and bring the picture into the Photoshop workspace.
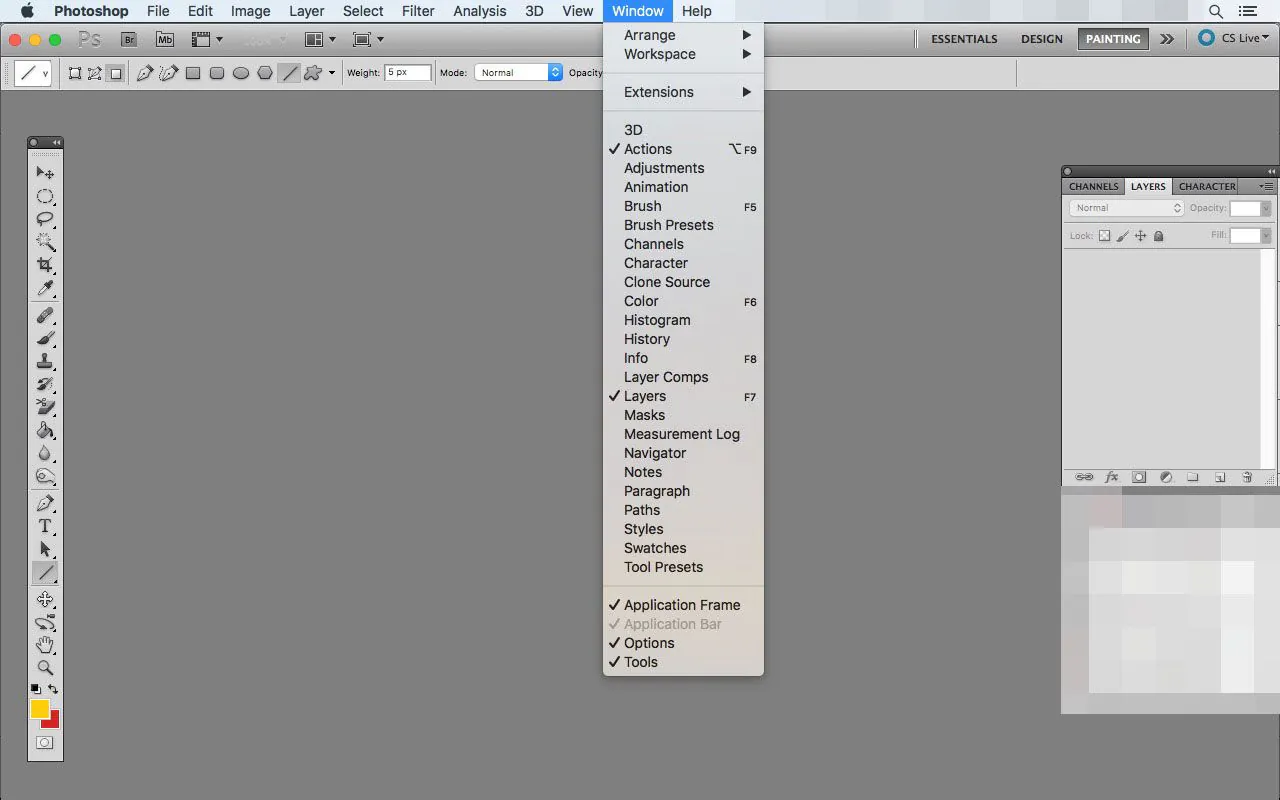
Once your photograph is loaded, familiarize yourself with the interface. If required, get to the Zoom and hand tools to explore and alter your view. Confirm that the Layers panel is visible, which you can find on the right of the screen. If it’s not apparent, go to the “Window” menu and select “Layers” to reveal it.
At the end of this step, you have the basic framework for the parallax effect by giving you an image canvas to work on. With the picture stacked and the workspace ready, you’re all set to move on to the consequent steps.
Step 2: Background Duplication
Check that the Layers panel is visible. If not, head to the “Window” menu and select “Layers” to open the panel.
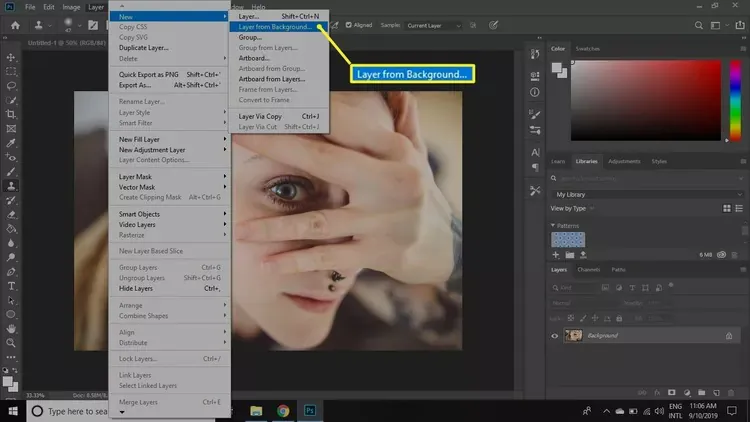
Within the Layers panel, find the background layer, which is commonly called “Background.”
Select that background layer and click the “Duplicate Layer” option from the settings menu. Also, you can pull the background layer to the “New Layer” icon at the foot of the Layers panel.
Think of assigning a name to the duplicated layer for organizational purposes. Tab on the copied layer, select “Layer Properties,” and enter a suitable title.
Confirm that you now have two similar layers within your Layers panel. The initial background layer and the copied layer can be modified to make the parallax effect.
The copied layer will be adjusted to introduce the vital visual adjustments for profundity and development within the consequent steps.
Step 3: Layer Mask Formation
Activate the initial background layer by pressing on it within the Layers panel. That can be the layer you’ll apply a layer cover to.
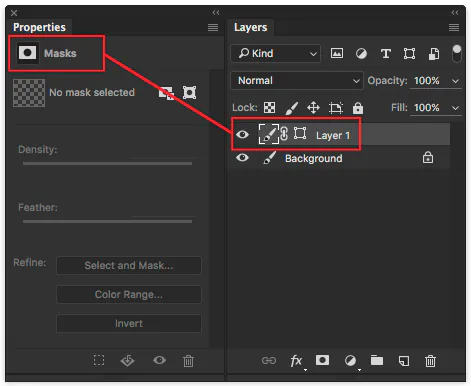
With the initial layer chosen, press on the “Add Layer Mask” icon at the ground of the Layers panel. This symbol looks like a rectangle with a circular interior.
Be sure the layer mask thumbnail on the initial layer is chosen. You can tab on it to actuate it; a border around the thumbnail shows it’s active.
Select the Brush Tool from the toolbar. Adjust the brush size and hardness as required, utilizing the choices at the top.
Ensure your foreground colour is set to dark. You can do this by tapping the ‘D’ key to modify the colours and then pressing ‘X’ to switch the foreground and backdrop colours.
After the layer mask is in action and the brush is set to dark, paint over the ranges of the picture that you need to cover up. That reveals the duplicated layer underneath, making the initial parallax effect.
Toggle the foreground colour to white if you want to uncover hidden ranges. That will be effective for exact alterations, aiding you in tuning the parallax effect.
Reprise the copied layer method by adding a mask and uncovering or stowing portions away.
Step 4: Layers Repositioning

Tab the duplicated layer within the Layers panel, then select the Move Tool from the toolbar. Ensure that the chosen layer is ready to move.
Press and drag the duplicated layer evenly or vertically, depending on your plan’s prerequisites. This development presents a counterbalance from the initial layer, contributing to the parallax effect.
While you swap the duplicated layer, assess the real-time changes on the canvas. That creates the illusion of profundity, with diverse layers moving at particular speeds.
Proceed to adjust the position until you accomplish the required parallax effect. Play with different offset values to discover the symmetry that boosts the visual appeal of your photograph.
If you want a more articulated parallax effect, consider repeating the method of including extra layers. Every duplicated layer must be moved autonomously to form changing depths of development.
Survey the overall composition to guarantee the parallax effect adjusts with your design objectives. Consider how distinctive components are associated and how the development proceeds.
Step 5: Opacity Adjustments
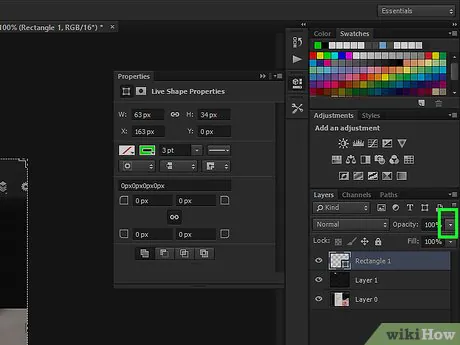
Select the duplicated layer on which you will set the intensity of the parallax effect.
Find the opacity slider within the Layers panel, or press ‘Ctrl + Shift + F10’ for Windows or ‘Command + Shift + F10’ for Mac, open the Layers Style exchange, and alter opacity there.
Steadily slide the opacity settings to the left to reduce opacity. This step is to improve the visibility of the duplicated layer, making the parallax effect more subtle.
As you alter the opacity, watch the real-time changes on the canvas. Decreased opacity will blend the duplicated layer with the initial, making a smoother move between the layers.
Point for a moderate intensity that complements the overall layout. The objective is to preserve the visual effect of the parallax impact without overwhelming the initial picture.
If you’ve got different duplicated layers, rehash the opacity alteration for each layer to control the degree of the parallax effect for each layer freely.
Take a minute to audit the general composition after altering the layer opacity.
Once you are satisfied, continue to save or export your finalized composition.
Step 6: Adding Extra Layers
Audit the current state of the parallax effect on your picture. Evaluate the profundity and development attained with the existing layers to decide if extra layers are needed.
Click on the duplicated layer you’ve worked on and select the “Duplicate Layer” option to make another duplicate.
Name the freshly duplicated layer for organization purposes. Use the “Layer Properties” option and enter a graphic title.
Access the Move Tool (V) and alter the position of the recently duplicated layer separate from the existing layers. That presents another layer of development and depth to the parallax effect.
If necessary, rehash the method by duplicating the fresh layer and altering its position. Making different layers with shifting offsets improves the complexity of the parallax effect.
After including new layers, modify the opacity of each layer exclusively utilizing the steps laid out in Step 5 to get a concordant mix of the layers.
Observe the overall design harmony. The extra layers are meant to contribute to the parallax effect without overpowering the viewer or deviating from the expected aesthetic.
Examine the photo with the included layers and make any essential alterations. Once done with the parallax effect, continue to the final step.
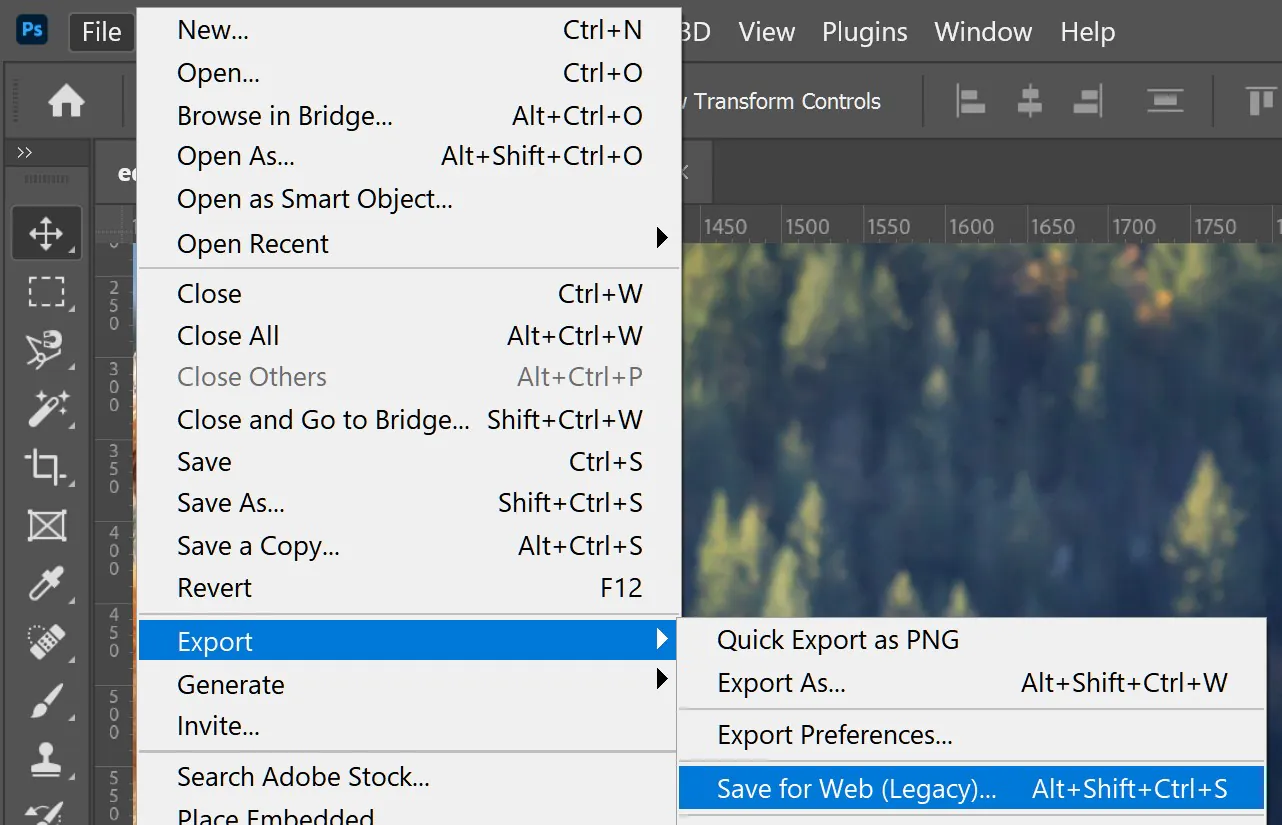
Step 7: The Final Assessment and Export
Take note of the uniformity of the whole design. The parallax effect should consistently comply with the initial photograph, providing a balanced composition.
If the parallax effect is intended for any website, you should optimize the image and layers according to that web utilization. That may include smoothing layers or exporting the photo in an appropriate format.
After you are pleased with the parallax effect, preserve your creation as a Photoshop Document (PSD) to keep layers for future alters. On the other hand, export the ultimate composition in a JPEG or PNG format.
For the parallax effect compositions aiming for a website, continue to merge the photo into your web design. Utilize HTML, CSS, or JavaScript to implement the parallax effect consistently.
Check the web execution to guarantee the parallax effect runs as aimed over distinctive devices and browsers. Fix any perspectives that will adversely affect the user encounter.
If essential, find additional user interactions or animations to complement the parallax effect, upgrading the overall participation on the site.
Conclusion
The parallax effect operates like cracking puzzles or riddles behind visual scenarios, which retains the viewer between reality and imagination. Merely working with the layers of a regular single photograph, artists can get uncommon and extraordinary outcomes, making that common shot an enigmatic piece of art. The ease of creating the parallax effect lies in its minimal requirement of editing tools and options; with a conscious focus and consistent manipulation of layers, the visual contents are entirely transformed into novel and pathbreaking compositions. You just need to be considerate and devoted to the specific editing approach, as cited in this blog, and you can remodel your designs and images into fresh creations.
