How To Apply Gradient Descent In Photoshop
Gradient descent is a vital optimization algorithm strategy broadly adopted for digital image augmentations that accelerates or alters those images. In the conventional process, the algorithm iteratively transforms the pixel values relative to the gradient of a selected objective function, indicating a less pretentious but favourable difference between the initial image and the specified outcome. Hence, you can use image editing apps like Photoshop to introduce this ingenious adjustment to your photographs. Image editing programs use different tools, adjustment layers, and filters that employ further highlights and options, including colour-contrast curves, blurring, and brush adjustments leading to gradient descent compositions. Modern software like Photoshop also includes inner-built yet less obvious algorithmic networks that manipulate parameters such as colour, contrast, brightness, and selective zone blurring and make adjustments similar to traditional algorithmic calculations. This blog article will lead you to practical strategies to introduce gradient descent modification using Photoshop in your images. The detailed step-by-step process is as follows.
Step 1: Image Loading and Initial Organization
Run the Photoshop application on your computer to initialize the photo-editing task.
Head to the “File” menu found at the top left corner of the Photoshop interface.
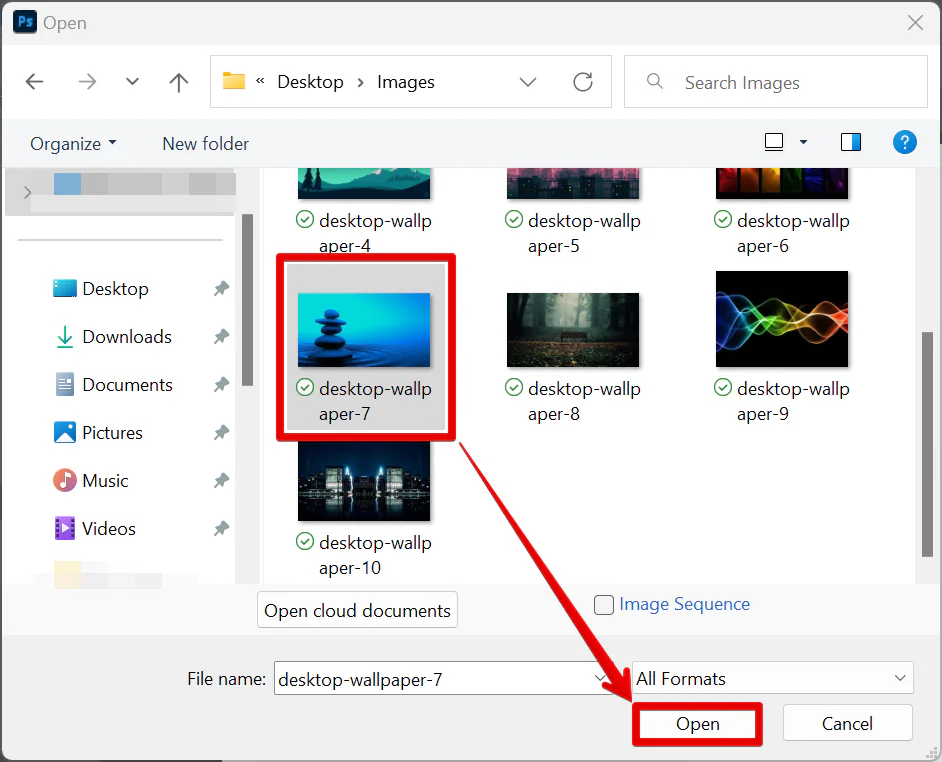
Press “Open” from the dropdown menu to incite a file explorer window.
Find and select the photo you want to alter inside the file explorer. Tap “Open” to shift the chosen photo into Photoshop.
Affirm that the imported shot shows up on the Photoshop canvas, prepared for consequent editing.
Leaning on your preference, alter the workspace or organize panels to optimize your altering environment.
As a backstop, consider saving a starting version of the photo file to protect the first state from any modifications.
Step 2: The Basic Settings
Once your photograph is loaded, steer your attention to the “Image” menu in the Photoshop interface.
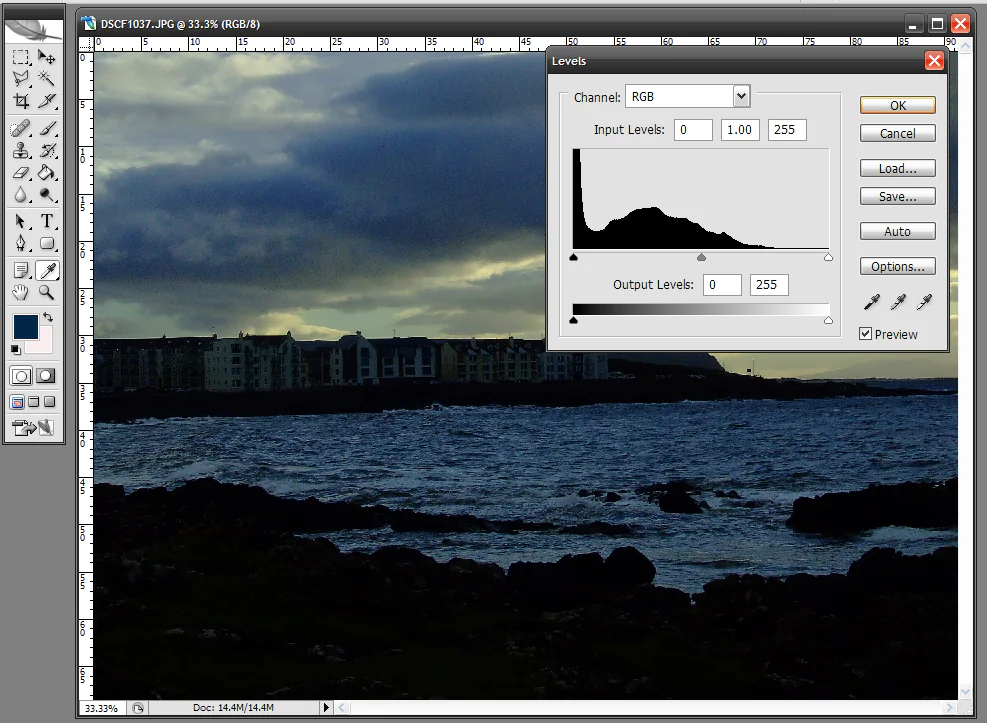
Inside this menu, find out fundamental alteration tools such as “Brightness/Contrast,” “Levels,” or “Curves.”
Relying on your altering objectives, select the foremost fitting alteration tool for your picture; you can utilize “Brightness/Contrast” for quick adjustments, “Levels” for tonal control, or “Curves” for detailed changes.
Set the parameters of the chosen tool to improve the broad brightness, contrast, and tonal range of your composition.
While you make alterations, examine the real-time changes to see how they influence the appearance of your photo.
Shift the settings until you accomplish the required visual result, harmonizing the different components inside the image.
Save your advances at this step to preserve an adaptation with fundamental alterations before moving on to more particular alters.
Step 3: Color Balance Tweaking
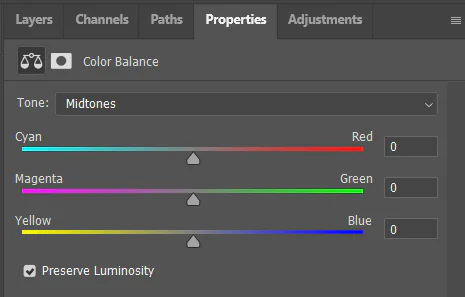
Move to the “Image” menu and get to colour adjustment tools, like “Color Balance” and “Hue/Saturation.”
You can also apply global colour adjustments by selecting “Color Balance.” This feature lets you regulate the general colour tones in your photo.
For more particular colour modifications, prefer “Hue/Saturation.” This tool gives control over each colour channel and saturation level individually.
Inside the selected tool, tune the colour sliders to attain the specified colour evenness or saturation.
Access the image preview highlight to watch how the colour alterations affect the appearance thoroughly. That helps you make informed choices.
Persistently refine the colour alterations until you accomplish your photo’s required colour equilibrium and energy.
Save this intermediate version of your composition to protect advance before continuing to extra editing steps.
Step 4: General Sharpness Enhancement
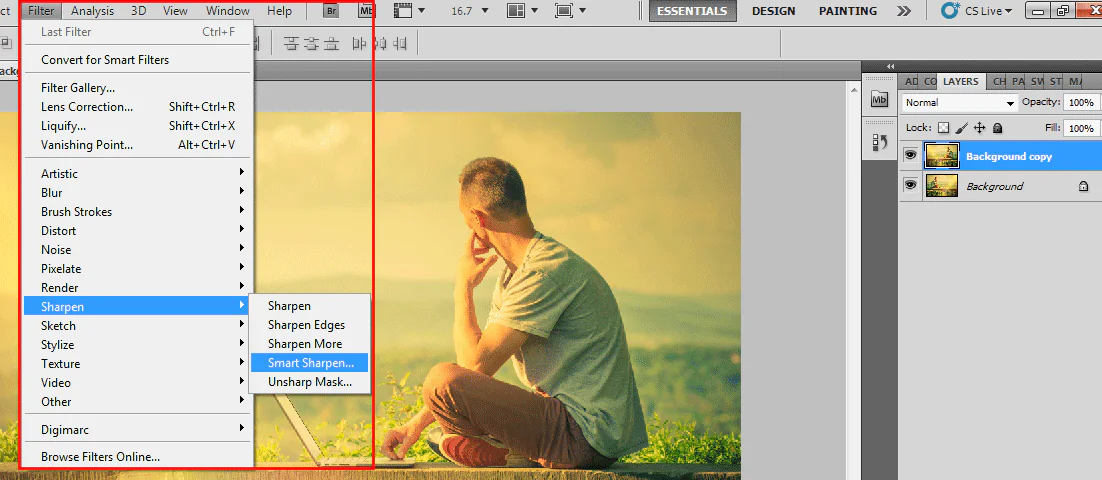
Head to the “Filter” menu in Photoshop, where a run of filters is accessible for image alterations.
Centred on your objective, select an appropriate filter, like “Sharpen” for improving details or “Gaussian Blur” for softening particular regions.
Change the settings of the selected filter to control the value and scope of the sharpening or obscuring effect so that the alteration aligns with your editing objectives.
Implement selection tools or masks to apply the filter specifically to particular image regions, centring on areas where upgraded sharpness or subtle blurring is wanted.
While you make alterations, survey the real-time changes to guarantee they adjust with your vision for the photo.
If essential, repeat the application of the filter, altering settings and explicitly applying it until the specified level of sharpness or blurring is accomplished.
At the conclusion, save your changes to preserve progress with sharpening or blurring alterations before continuing to the next step.
Step 5: Noise Filters Specifications
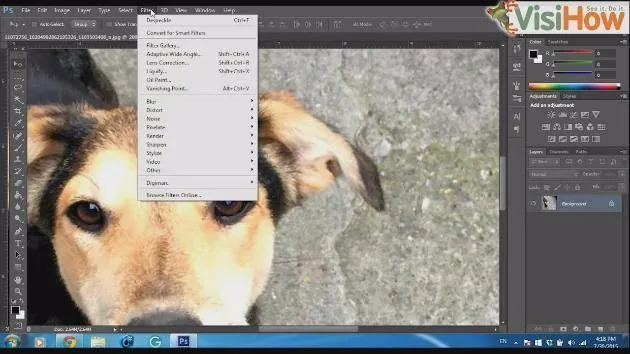
Move to the “Filter” menu once more, this time centering on filters outlined for noise lessening, such as “Noise Reduction” or “Despeckle.”
Choose the filter that best suits your composition. Alter settings per the sort and level of the noise present, whether it’s luminance or colour noise.
Alter the chosen filter’s features to control the noise reduction level. Adjusting noise reduction while retaining subtle elements of the image is vital.
Choose if you have to apply the filter consistently to the complete photo or specifically to selected zones where noise is more articulated.
Screen the image in real-time as you tweak it so that noise reduction is viable without compromising picture quality.
If fundamental, revise the application of the filter and its settings to attain the ideal equilibrium between noise reduction and picture clarity.
Step 6: Refining Selective Zones
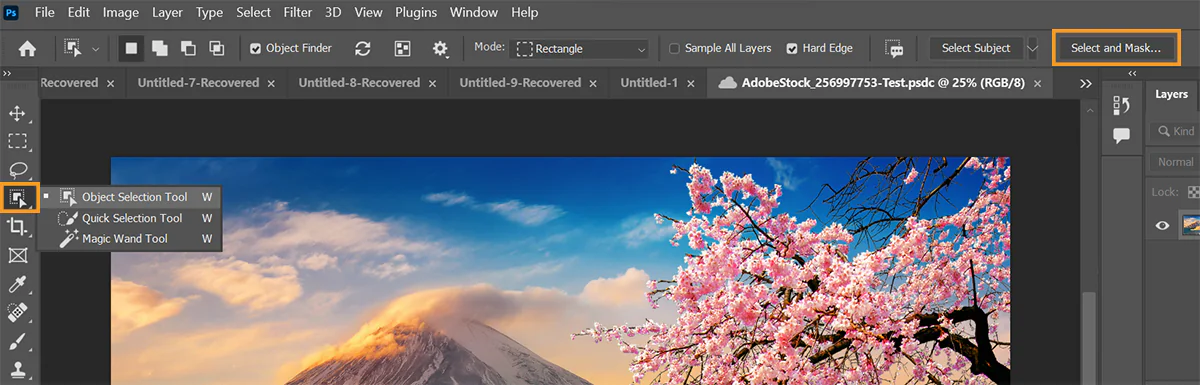
Get to Photoshop’s selection tools, such as the Marquee, Lasso, or Magic Wand, to characterize particular regions for focus on alters.
Utilize layer masks to confine the chosen ranges, permitting for non-destructive alters. It confirms that alterations can be refined or turned around as required.
Work with the standard Brush or Healing Brush tool to create detailed and localized alterations inside the chosen regions. That is often especially compelling for modifying particular zones.
Change your brush’s opacity and stream settings to manipulate the degree of your alters, achieving smooth integration with the surrounding regions.
Try varying blending modes for your alteration layers to get different visual impacts while maintaining a natural display within the altered zones.
Routinely evaluate the real-time effect of your specific modifications, guaranteeing they settle along with your overall vision for the photograph.
Step 7: Image Size Finalizing
![]()
Use the Crop highlight in Photoshop, usually found within the left toolbar, or press “C” to enable it.
Regulate the cropping perimeters to refine the composition. Consider perspectives like framing, symmetry, and central focus to maximize visual appeal.
Position key components with the rule of thirds, setting critical subjects or points along the crossing lines for an even composition.
Edit out undesirable or diverting components to streamline the focus of the photo. That aids in a polished and more powerful composition.
Play with distinctive aspect proportions amid the cropping process to discover the most appropriate surroundings for your picture.
Alter the general measure of the image utilizing the Image Size option on the off chance that resizing is a portion of your composition strategy.
See the trimmed and resized image to check that the composition balances with your inventive vision before affirming the changes.
Step 8: The Ultimate Examination
Conduct a careful survey of all your edits, checking that each alteration complies with your vision for the ultimate image.
In case any viewpoint requires more refinement, take advantage of this stage to create extra alterations to better the general quality of the photo.
Save the ultimate altered version of your photograph, confirming that all changes are protected.
Select the suitable file format and settings for trading your picture. Standard options incorporate JPEG for photos and PNG for images with transparency.
Select the saving folder where you opt to save or export the ultimate work.
Allot a significant title to your picture, following any naming traditions you prefer.
Recheck export settings, counting resolution, and compression to meet your necessities.
Execute the exporting, saving the ultimate altered image to the destination folder with the chosen settings.
Conclusion
In conclusion, though Photoshop does not display the detailed algorithm values executed during editing, it is an effective and user-friendly platform to streamline your image editing. By experimenting with its multitude of features, tools, and options, you can get results that are precisely similar to the standard gradient descent application. Moreover, the interactive aspect of Photoshop, like other advanced image manipulation tools, eases the complications found within automated gradient descent algorithms. You are fully conscious of and have complete control over various dimensions of your image settings so that you can fix each element according to your desired degree of visual outcome.
