How To Create A Holocaust Effect
A holocaust effect suggests an atmosphere that brings forth the emotions of horror, solemnity, and desperation. This visual approach in image editing can create a solid and impactful environment that is incredibly visually arresting for the viewers. They are reminded of the worst periods of social isolation and warfare that humans of targeted groups have experienced in history. Because of its historical and emotive weightage, the holocaust approach can create a meaningful composition and significantly enhance the narrative of the images that have gone through holocaust edits. Different editing strategies like color manipulation, contrast settings, use of gritty textures, lighting adjustments, and integration of symbolic elements can lead to the image transformation into a holocaust environment. All these techniques contribute together and recreate a chronological impression and the frantic state of the targeted groups in history. In this blog, we will go through the steps and tools that are required to create an impressive and inexplicable holocaust effect in your everyday shots.
Step 1: Initial Image Selection
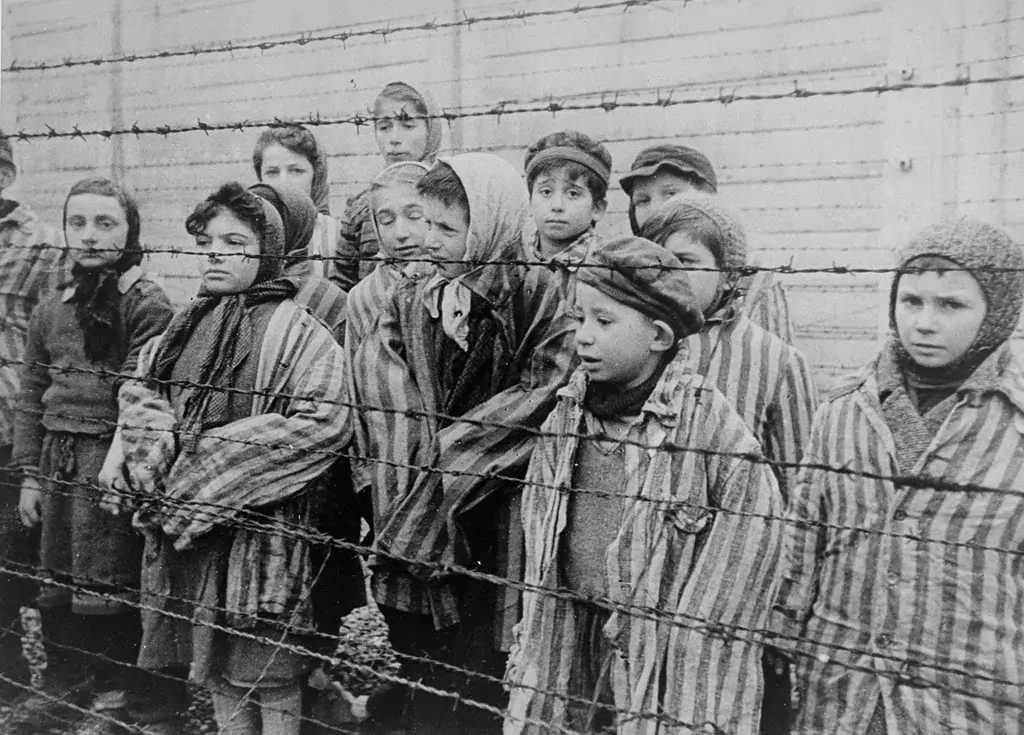
Decide on the specific photo you want to use to create the Holocaust effect on. This starting phase is crucial because it establishes the whole editing process. Look for pictures that bring out historical settings or subjects related to the Holocaust, like documented photographs of concentration camps, authentic landmarks, or typical presentations such as barbed wire fences or yellow stars.
Check that the image accommodates the envisioned passionate and chronicled style. Seek for settings that permit important additions or alterations without diminishing the integrity of the initial scene. Emphasize pictures that pass on a sense of gravity, recognition, or historical noteworthiness, as these segments will be improved through ensuing editing steps.
Select pictures with sufficient resolution and clarity to back detailed editing forms like texture overlays and typical additions. High-quality images give more adaptability in modifying colors and contrasts and joining extra components to acquire an irresistible visual account.
Determine the reason for the edited picture, whether it’s for educational ambitions, imaginative expression, or historical documentation. Think about what your audiences aspire for and be conscious when selecting and planning the base image for a sound ultimate result.
Step 2: Desaturating The Image
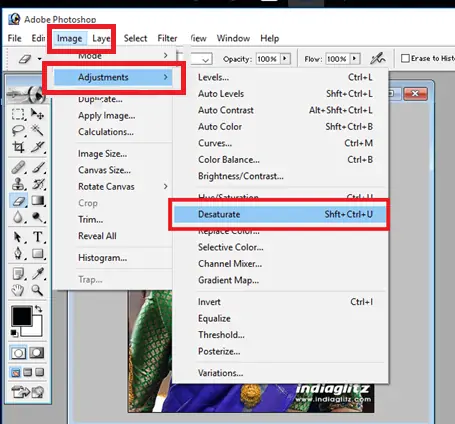
Next, after deciding on the base image, move on to the desaturation process to decrease the color intensity and create a muted, melancholic tone. Begin by getting to the saturation or vibrance setting highlights in your editing program.
Lower the saturation steadily until the colors show up stifled but still hold a few levels of tonal separation. This step points to dismissing dynamic colors that might divert from the historical or enthusiastic effect of the photograph.
Try to keep up a consonance between desaturation and protecting basic details within the picture. Address the ranges where color plays a critical part in storytelling or imagery, like uniforms, natural scenes, or typical components.
Attend to the historical setting of the picture and assume the improvement that desaturation can bring to its account.in creating a holocaust effect, desaturation can inspire a sense of historical genuineness and regard for the subject matter.
Persistently preview the picture as you adjust the saturation levels to keep in check the general tone alignment with the intended enthusiastic reverberation. Keep tuning the settings until the desaturation viably supports the visual story and does not cause a loss of clarity or critical detail.
Step 3: Modifying The Contrast
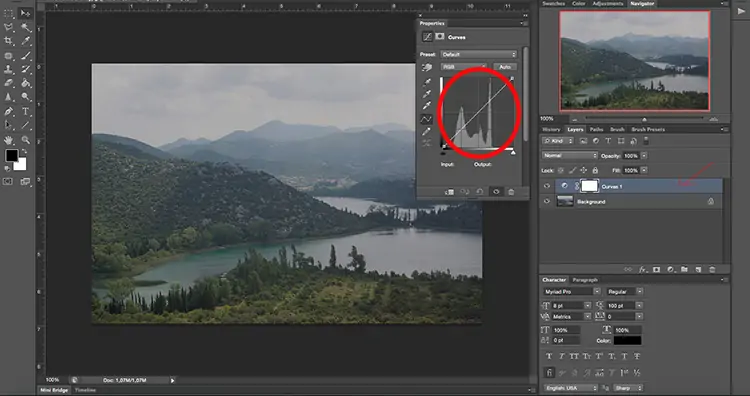
Taking after desaturation, alter the contrast to improve the visual mark and sensational impact of the composition. Work on the contrast adjustment setting accessible in your image editing app.
Start by expanding the contrast continuously to heighten the contrasts between light and dull ranges inside the image. This way, you can create a more articulate visual depth and highlight key components.
Be considerate of protecting critical elements when you are indulged in improving the overall clarity and sharpness of the picture. Confirm that zones of interest, like suggestive components or historical highlights, stand out conspicuously.
Check out the effect of contrast variation on the different parts of the photograph. Persist for a proportional contrast that keeps up a natural formation while upgrading the general temperament and air.
Regard the passionate harmony you have planned for the picture. Alter contrast levels to bring out pertinent feelings, including sobriety, reflection, or historical centrality, depending on the setting.
Keep examining the image transformation as you make adjustments to contrast levels. Revise the settings until you accomplish a balance that improves the specified visual narrative without relinquishing vital detail or clarity.
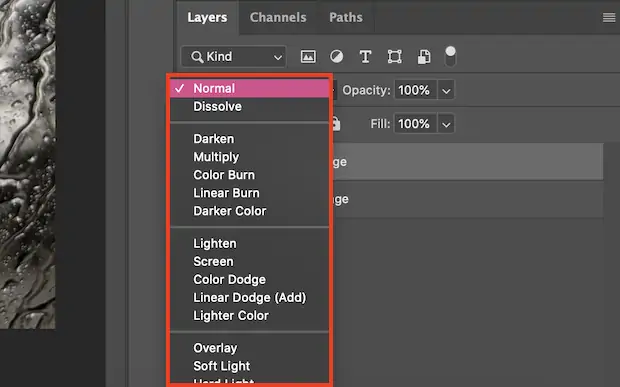
Step 4: Texture Overlays Application
Include a texture or grain overlay to confer a gritty, ripened impression suggestive of historical photos. This action will glorify the realness and passionate effect of the illustration.
Select a surface or grain overlay that benefits the chronicled setting and improves the required visual story. Think about surfaces that mirror film grain or aged materials to bring out the essence of historical documentation.
Utilize layering strategies in your editing program to spread the chosen surface or grain overlay. Remake the opacity and blending modes to coordinate the overlay consistently with the base picture.
Adjust settings like scale, orientation, and intensity of the overlay to attain a suitable and outwardly attractive development. Make sure that the overlay uprises the overall disposition and climate without devastating the picture.
With texture overlays, you can include depth and dimensionality to the picture and emphasize its authentic or narrative style. Give attention to regions where the surface can complement details or highlight symbolic components related to the Holocaust or historical subjects.
Step 5: Switching To Sepia Tones
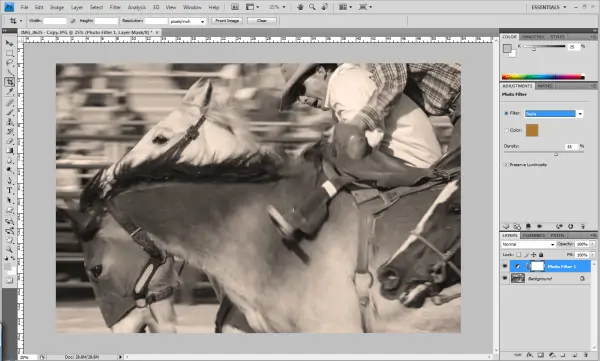
Alternatively, apply sepia tones or switch the photograph to a monochrome shade to improve its chronicled or narrative touch.
Contemplate whether sepia tones or monochrome best suits the planning temperament and setting of the picture. Adding Sepia tones can inspire a vintage or matured impression; at the same time, monochrome highlights contrast as well as clarity.
Utilize color adjustment apparatuses in your image editing program to change the shot to sepia or monochrome. Alter hue, saturation, and lightness settings to accomplish the specified tonal range and balance.
Confirm that critical details and typical components inside the image are protected and enhanced through the tonal transformation process.
Observe how sepia or monochrome tones come up with an emotional echo of the picture. The addition of these tones can illuminate a sense of historical realness and extend the viewer’s association with the subject matter.
Step 6: Chipping In Symbolic Components

Chip in symbolic components related to the Holocaust or chronicled subjects to develop the story and enthusiastic effect of the proposition.
Pick some additional symbolic components or other significant historical images that resound with the image’s subject and setting.
Utilize layering techniques in your program to join symbolic components consistently into the composition. Recast placement, size, and opacity to guarantee they augment, not overpower, the photo.
With regard to the historical noteworthiness and passionate resonance of each image, they confirm that they genuinely join the overall story and strengthen the intended message or subject.
Keep up visual accommodation and agreement inside the composition while joining symbolic components. Examine how they associate with existing components and improve the general narrating.
Assess how each symbolic component lifts the emotional influence of the image. Work to inspire sentiments of recognition, reflection, or historical implication significant to the subject matter.
Step 7: The Final Touch Ups
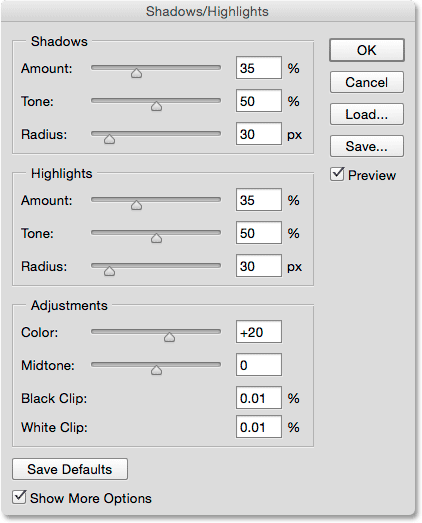
Conclude the editing process by making finishing touches to lighting, shadows, and overall composition to improve the temperament and visual outcome of the picture.
Revise lighting settings to make fitting highlights and shadows that accelerate the overall tone and environment of the picture. Look into the way lighting upgrades subtle elements and includes profundity.
Adapt shadow intensity and arrangement of key components inside the composition while keeping up an everyday and raw formation.
Confirm that critical details, like symbolic components or authentic highlights, are noticeably underlined using cautious adjustment of exposure and contrast.
Assess the composition as a whole to guarantee all components collaborate together harmoniously and communicate the expected message or evoke the required feelings.
Go through color balance and tonal range to preserve conformity and progress visual coherence all through the visual setting.
When you feel satisfied with all aspects of the edited image, you can save and export your final composition in a suitable format and resolution.
Conclusion
In short, the employment of the holocaust approach in image modification sheds light on the darkest times of human history when people were reprimanded for their fundamental rights. In a way, the resultant visuals communicate a reassurance to the viewers that they should not fall prey to any kind of hate or discrimination against their fellow beings. Holocaust images also opt to rouse feelings of dread and avoidance of wars and exploitation of innocent masses. As a result, it reinforces the aspect of human nature that bypasses violence and longs to ensure the peace and well-being of everyone.
