How to Convert A Picture to Black and White
Converting a coloured picture to black and white is a simple yet formidable technique that can transform your images, emphasizing composition, contrast, and texture. Your photos can infuse new life in simple steps, bringing nostalgia, elegance, and unbridled emotion. You can produce visually arresting, strong pictures and elicit a particular emotional response by removing colour. Black and white photography has a classic appeal, generating a feeling of nostalgia and emphasizing the beauty of light, shadow, and composition. It can be used to lend a touch of classic sophistication or to create visually stunning monochromatic masterpieces. This manual will lead you through the steps and share professional pointers and tricks to ensure your black-and-white conversions are stunningly beautiful.
A Step By Step Approach To Convert A Picture To Black And White
Step 1: Choose the Right Image
Selecting the right image is crucial when converting a picture to black and white. Not all photographs translate well into monochrome. You can ensure a successful and visually appealing conversion by carefully considering your image’s composition, subject matter, and tonal range.
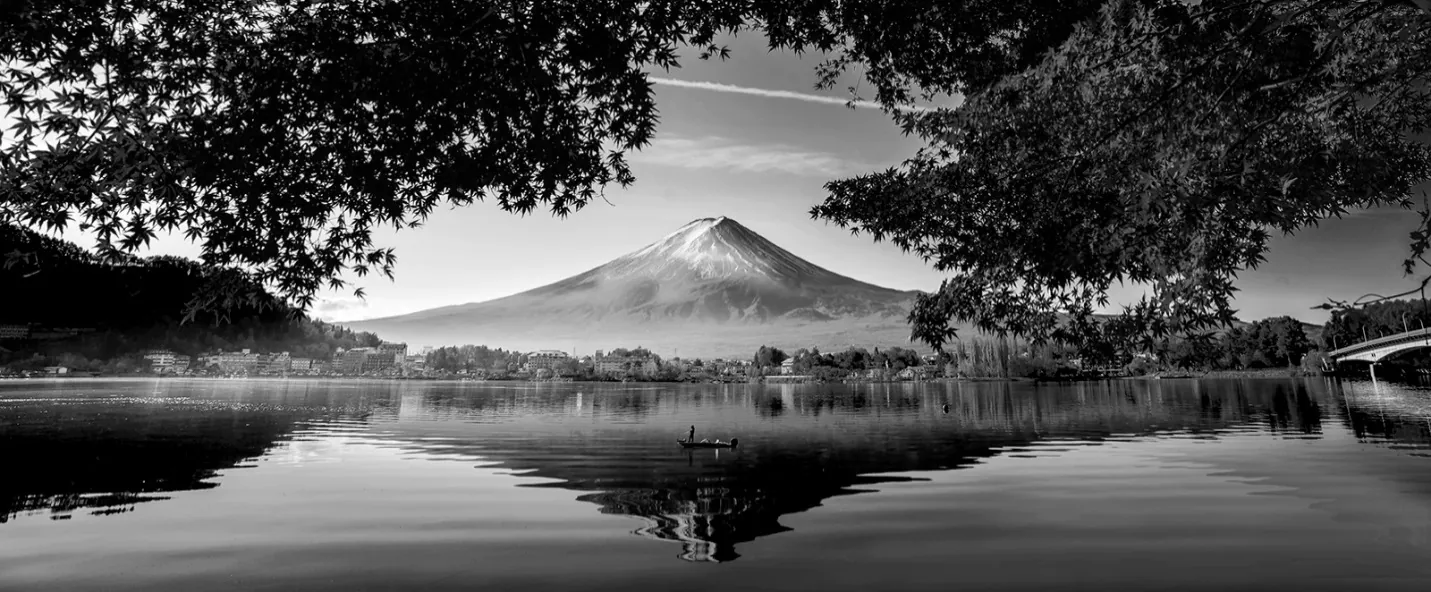
Start by looking for images with strong visual elements, such as distinct shapes, interesting textures, or contrasting elements. These characteristics tend to stand out more in black and white. Architectural shots, landscapes with dramatic skies, portraits with expressive facial features, and still-life subjects with intricate details are all great options to consider.
Additionally, images with a wide tonal range can produce stunning black-and-white conversions. Look for photographs with a good balance of highlights, midtones, and shadows, as this will contribute to your monochrome image’s overall depth and richness.
Step 2: Utilize Editing Software
Once you have chosen the right image for your black-and-white conversion, it’s time to utilize photo editing software to drive your vision to life. Several options are available, from professional programs like Adobe Photoshop and Lightroom to free alternatives like GIMP.
Start by opening your selected image in the editing software of your choice. Familiarize yourself with the various tools and adjustments specific to black-and-white conversions. Look for options like “Hue/Saturation,” “Black and White Conversion,” or dedicated black and white adjustment layers.
These editing tools allow you to control the conversion process, adjust the tonal values, and fine-tune the overall look of your black-and-white image. Experiment with different sliders and settings to achieve the desired effect.
Additionally, photo editing software provides opportunities to enhance your black-and-white image further. You can adjust contrast, brightness, and sharpness to achieve desired details. Some software even offers advanced features like selective adjustments, where you can target specific areas of your image for further refinement.
Step 3: Adjust the Saturation
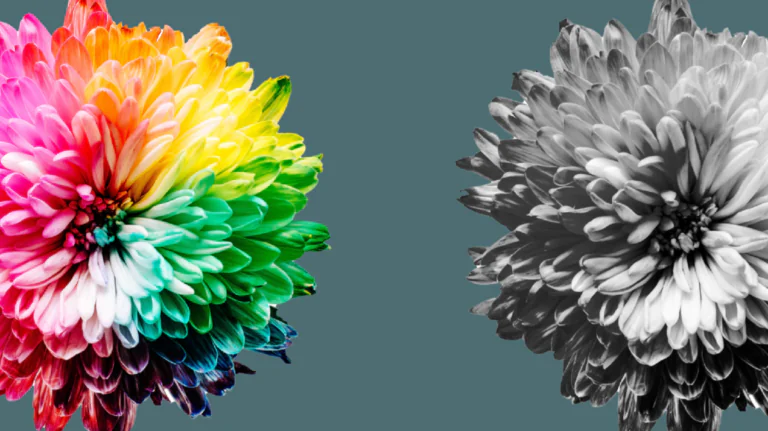
After opening your chosen image in the editing software, the first step in converting it to black and white is adjusting the saturation. Saturation is related to the intensity or vibrancy of the colours in the image. You remove all colour information by reducing the saturation to zero, leaving behind a grayscale image.
Look for the saturation adjustment tool in your editing software, typically found under settings like “Hue/Saturation” or “Color.” Slide the saturation slider to the left or input a zero value to eliminate the colours.
As you decrease the saturation, you’ll witness the transformation of your image into black and white. The vibrant hues will fade away, and the tones will become shades of grey, ranging from pure white to deep black.
Keep in mind that not all images convert to black and white equally. Some photographs may require additional adjustments later to achieve the desired contrast and tonal balance. Experimenting with different images and fine-tuning the saturation levels will help you find the optimal settings for each photograph.
By adjusting the saturation, you take the first step towards creating a captivating black-and-white image. The absence of colour allows for a focus on composition, texture, and tonal contrast, bringing forth the inherent beauty of monochrome photography.
Step 4: Enhance Contrast
Enhancing contrast is a crucial step in creating impactful black-and-white images. Contrast indicates the difference between light and dark areas in a photograph. Adjusting the contrast levels allows you to bring out the details and create depth in your black-and-white conversion.
Most photo editing software provides dedicated tools or adjustments to control contrast. Look for sliders or settings labelled “Contrast,” “Brightness/Contrast,” or “Tone Curve.”
Increasing the contrast will make the dark areas darker and the light areas lighter, resulting in a more dynamic and visually striking image. That amplifies the tonal separation and enhances the overall impact of your photograph.
However, striking a balance and avoiding overdoing the contrast adjustment is essential. Excessive contrast can lead to loss of detail in shadow or highlight areas, giving the image a harsh or unnatural appearance.
Step 5: Experiment with Tonal Adjustments
In black-and-white photography, tonal adjustments play a vital role in shaping your image’s overall look and feel. These adjustments allow you to control the distribution of tones, from shadows to midtones and highlights, creating a balanced and visually appealing composition.
Most photo editing software provides tools to fine-tune these tonal ranges. Look for settings such as “Shadows,” “Highlights,” and “Midtones,” which allow you to adjust the brightness and contrast within specific tonal areas.
By manipulating the tonal ranges, you can bring out desired details, create depth, and establish a sense of mood and atmosphere. Increasing the shadows can add a touch of mystery and drama while adjusting the highlights can enhance the brightness and luminosity of certain elements.
Experiment with different tonal adjustments to find the optimal balance that suits your artistic vision for the image. Each photograph has its unique tonal characteristics, and by exploring these adjustments, you can fine-tune the overall tonal balance, resulting in a more effective and visually engaging black-and-white conversion.
Step 6: Fine-tune with Filters
Filters can add an extra touch of creativity and refinement to your black-and-white images. They allow you to selectively manipulate the tonal values and enhance specific elements within the photograph. Experimenting with different filters can further elevate your conversion’s mood, atmosphere, and overall aesthetic.
Commonly used filters in black-and-white photography include red, orange, yellow, green, and blue. Each filter affects how different colours are rendered as shades of grey. For example, a red filter darkens blue skies, making clouds stand out more prominently.
In photo editing software, you can apply filters through adjustment layers or dedicated filter settings. Choosing the appropriate filter and adjusting its strength can create striking contrasts and tonal separation within the image.
Notably, the impact of filters may vary depending on the colours and tones present in your original photograph. Experiment with different filters to select what best enhances your image’s composition, emphasize textures or create a desired mood.
Step 7: Consider Adding Grain
Adding a touch of grain to your black-and-white image can evoke a vintage or film-like aesthetic, enhancing its overall character and visual appeal. Grain refers to the small, textured particles that appear in traditional film photography and can add a sense of nostalgia and authenticity to your digital black-and-white conversions.
Photo editing software often provides options to simulate grain. Look for settings labelled “Grain,” “Film Grain,” or “Noise.” Adjust the grain parameters to control its intensity, size, and roughness.
When applying grain, it’s crucial to strike a balance. The goal is to add just enough grain to enhance the image’s mood and aesthetics without overwhelming or distracting from the subject. Use a modest amount of grain to create a tasteful and artistic effect.
Adding grain can also help mitigate any smooth or flat areas in the image, adding texture and depth. It can enhance the perception of sharpness and detail in your black-and-white conversion, giving it a more organic and tactile feel.
As with all editing adjustments, evaluating the impact of grain on your specific image is essential. Consider the overall style, subject matter, and desired visual outcome. Experiment with different grain settings to find the perfect balance that enhances the mood and complements the overall aesthetic of your black-and-white photograph.
By considering the addition of grain, you can add an extra layer of authenticity and artistic flair to your black-and-white images, bringing them to life with a unique visual texture and character.
Step 8: Save and Share
Once you have successfully converted your picture to black and white, it’s time to save and share your masterpiece with the world. Save a high-resolution copy of your image to preserve its details and quality. Organize your files in dedicated folders or albums for easy access in the future. Consider adding a discreet watermark to protect your work and ensure proper attribution. Share your black-and-white images on social media platforms, such as Instagram or Facebook, using engaging captions and relevant hashtags. Explore printing options to display your pictures as physical artwork through professional printing services or by creating your prints.
Consider creating a portfolio or personal website to showcase your best black-and-white works. Seek feedback and inspiration from fellow photographers and engage in the photography community. By saving and sharing your black-and-white creations, you can inspire others and celebrate the beauty of monochrome photography.
Conclusion
In conclusion, converting a picture to black and white opens up artistic possibilities. By carefully selecting images, utilizing editing software, and implementing various adjustments, you can create stunning monochrome photographs that captivate viewers with their timeless beauty and expressive power.


