
How to automate data entry with MS Excel?
Data entry by hand is a thing of the past. The current trend is toward data automation. We are in the digital era right now. Computers and software frequently replace humans in routine, repetitive tasks and almost any type of difficult employment. Although you can start with the smallest firms and work your way up to multibillion-dollar giants like Google, Apple, and Microsoft, one thing is certain: all different types of businesses use data automation in some way.
There are many software available that are used by data entry services and businesses. However, the most common among them is MS Excel.
You undoubtedly already know how tedious it can seem to manually enter a lot of data into
Microsoft Excel as part of your job. Fortunately, there are various methods that can make entering data into Excel more automatic and streamlined. In this tutorial, we’ll go through how to use Excel to automate data entry.
What is data automation?
Data automation is the use of automated tools in place of manual ones to gather, handle, process, and analyze data. To put it simply, data automation is using specialized software to manage all of a business’s data instead of manual labor. It is a method that is widely employed today and is very advantageous to the company in a variety of ways.
What is MS Excel?
Excel is a software program developed by Microsoft that makes use of spreadsheets to arrange data and numbers using formulae and functions. Financial analysis is performed by companies of all sizes using Excel analysis, which is widely used worldwide.
Uses of MS Excel
You can edit, manage, and analyze data with Microsoft Excel, which can help with decision-making and provide efficiencies that will directly impact your bottom line. Microsoft Excel provides you with the necessary capabilities to meet all of your demands, whether you’re using it for work or to help manage personal databases and finances.
Excel’s primary applications include:
- Input of data
- Handling of data
- Accounting
- Analyzing finances
- Graphing and charting
- Programming
- Management of time
- Project management
- Financial simulation
- Customer Relationship Management (CRM)
In short, it is used for everything that requires planning!
How to automate data entry in MS Excel?
1 How to get Excel’s Developer Tab active?
You must enable the “Developer” option in Visual Basic Applications (VBA) before automating data entry. The majority of users typically leave the Developer option unchecked. Find out how to make the Developer Tab below.
Step 1: Right-click on Insert on a new sheet
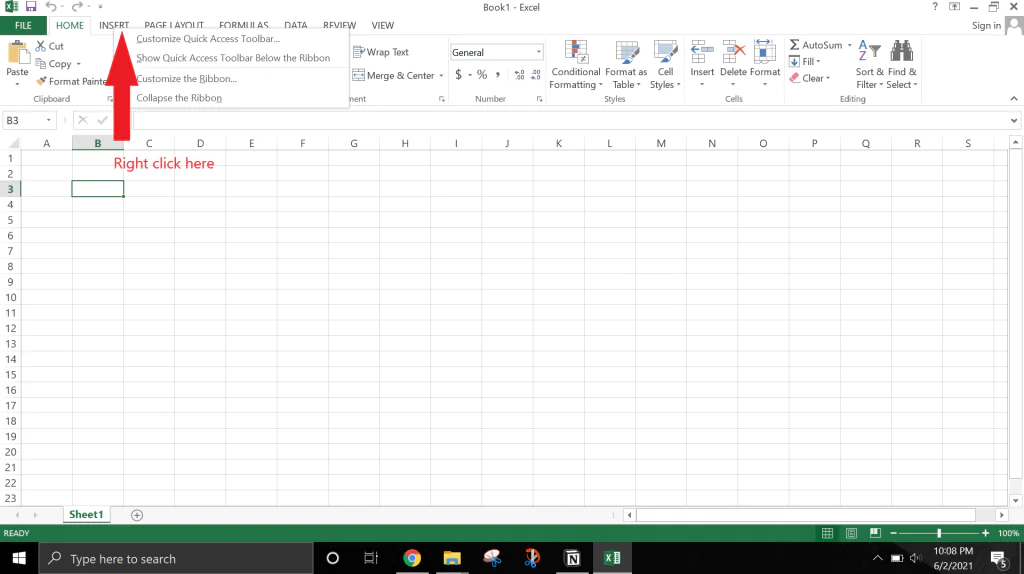
Step 2: In the Excel window’s top-right corner, right-click on the Ribbon.
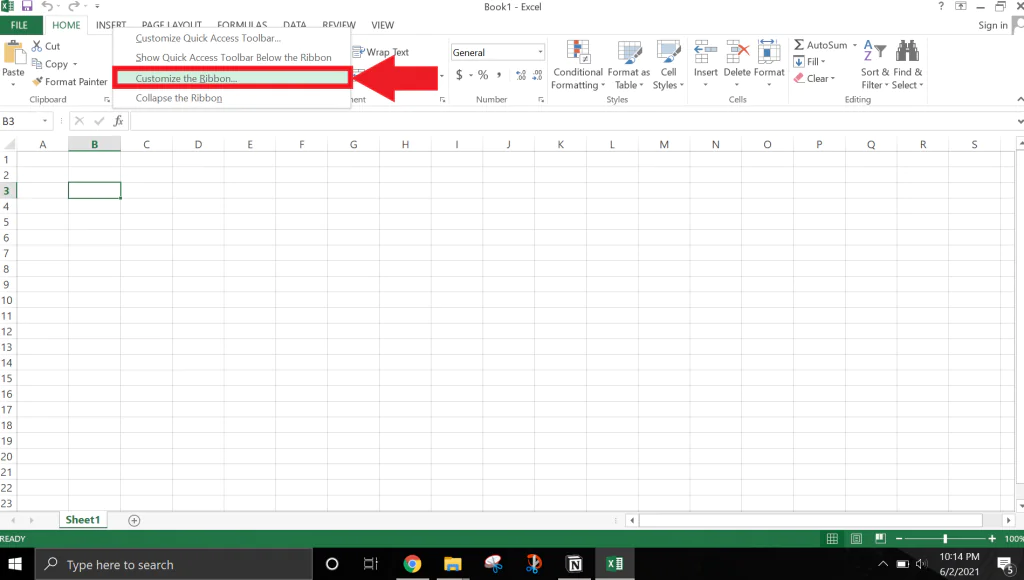
Step 3: Select “Customize the Ribbon”.
Step 4: Check the “Developer” box and click “Ok.”
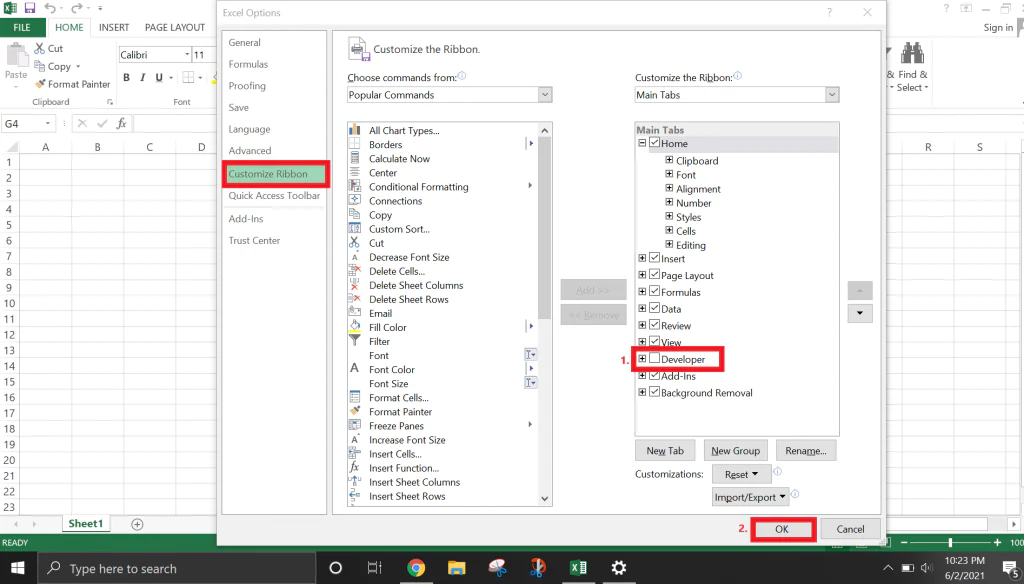
The Developer Tab on the Excel ribbon should now be visible.
How to create a fillable Excel form?
The first step towards automating the majority of data entry jobs is to create a fillable form rather than inputting data directly into Excel. The steps involved in building a fillable form can be broken down into Layout Design, Interactive Design, and Finishing.
1 Layout Design
In most cases, the data you want to gather will be visible in your form’s user interface, along with possibly even your firm name and logo.
Step 1: Find the “Page Layout” tab, then click it.
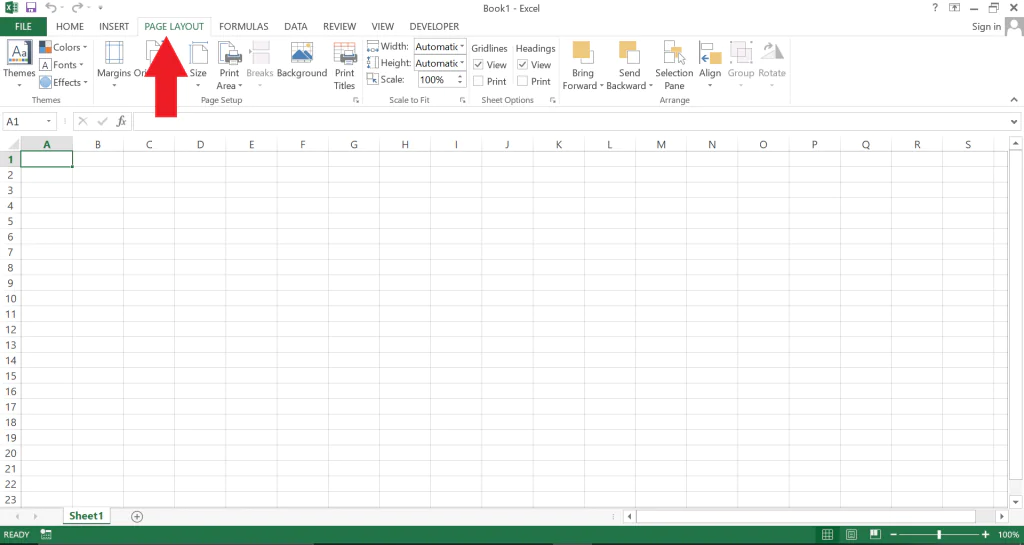
Step 2: You should be able to access “Size” under the “Page Layout” tab. Select the size you want for your layout from the drop-down menu that appears.
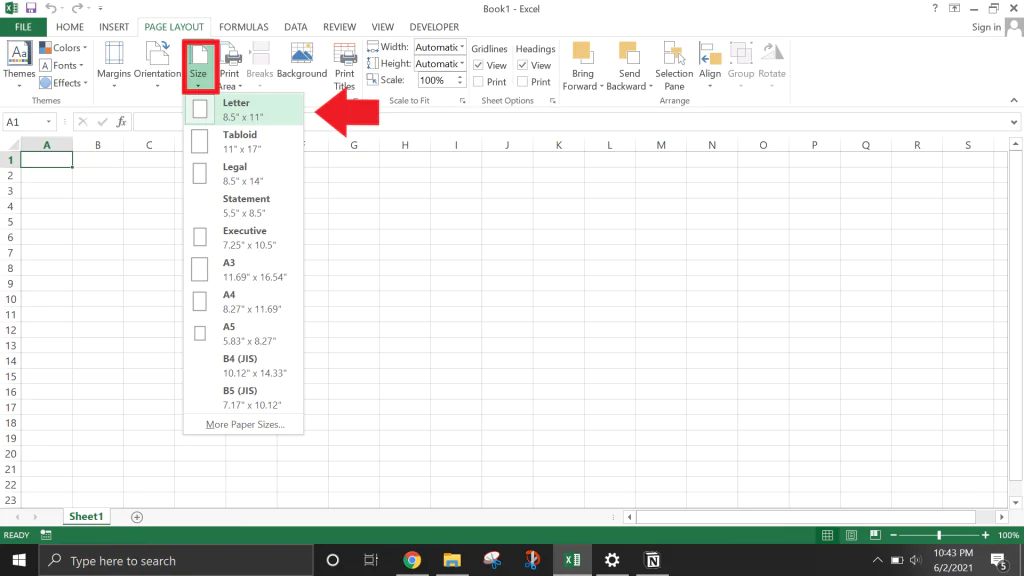
Note: If Step 2 was configured properly, dotted grids should display on your Excel sheet.
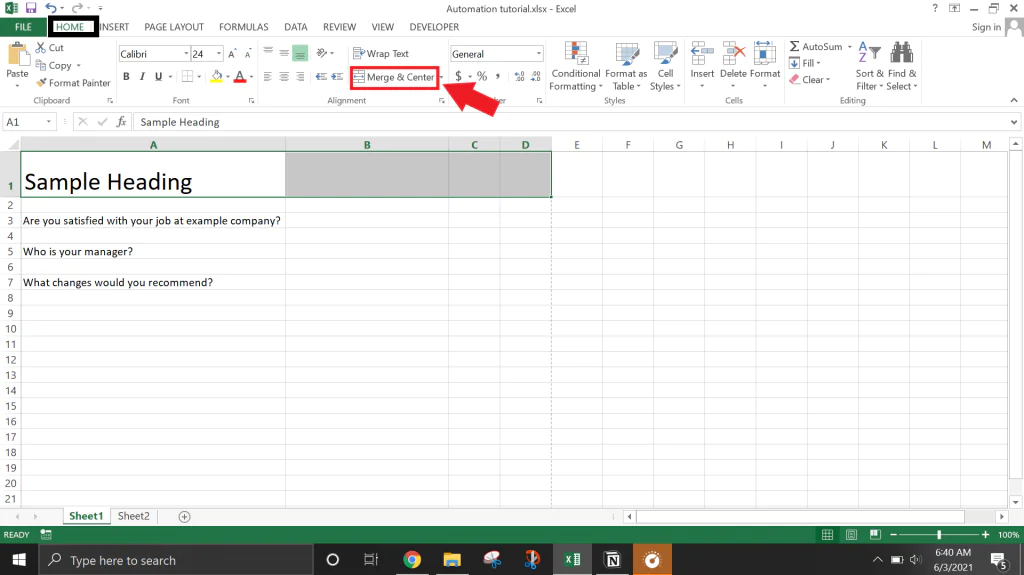
Step 3: Put a heading in. We will change the text format, alignment, and font size.
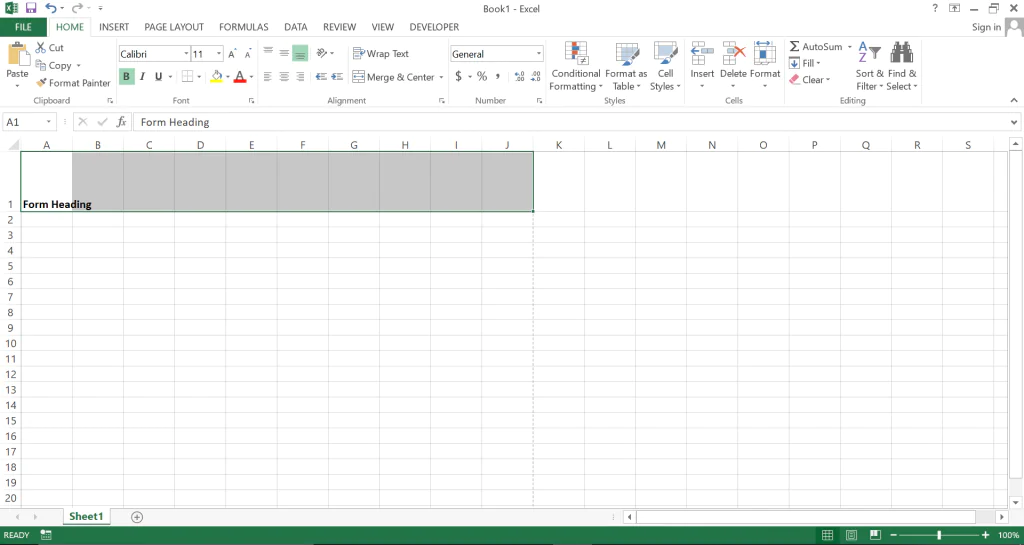
Adjust Row 1 and Column A as needed.
Increase the size and boldness of the text.
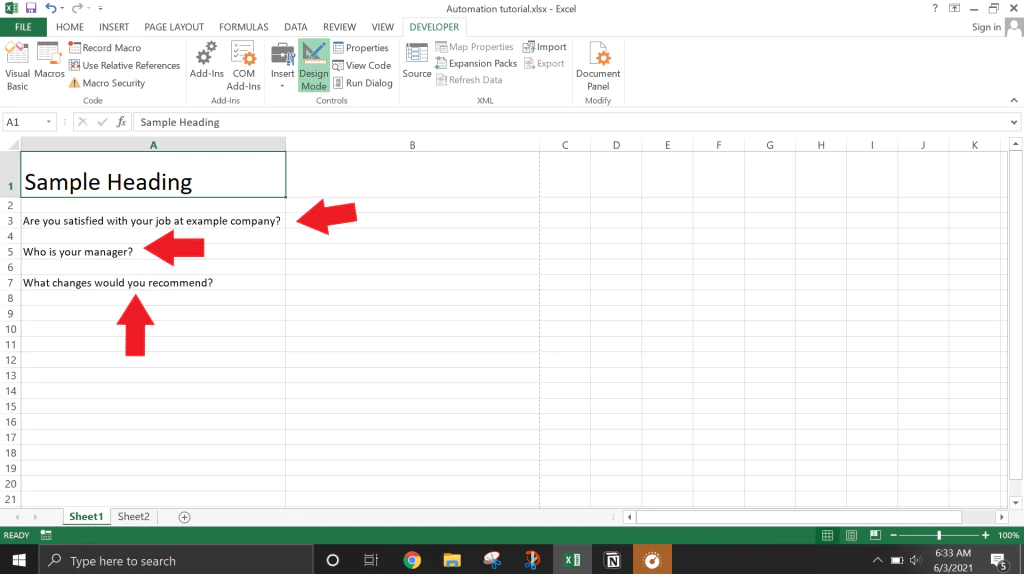
Include your checkboxes, dropdowns, and questions. Because merging and centering first will result in issues, you should add these afterward.
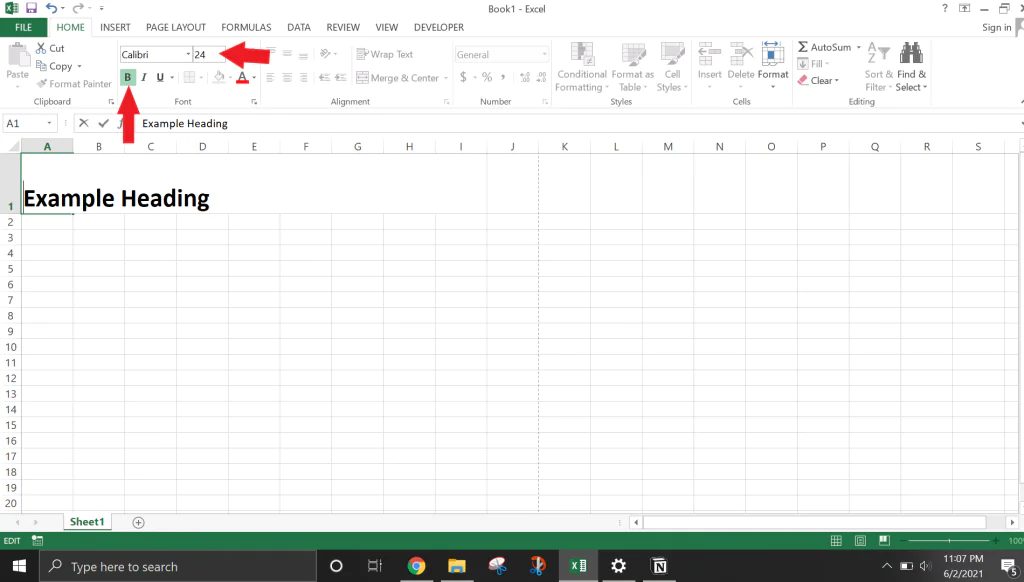
Step 4: Select your heading cells, then under the “Home” tab, choose the “Merge & Center” option. You can now align your heading as you choose.
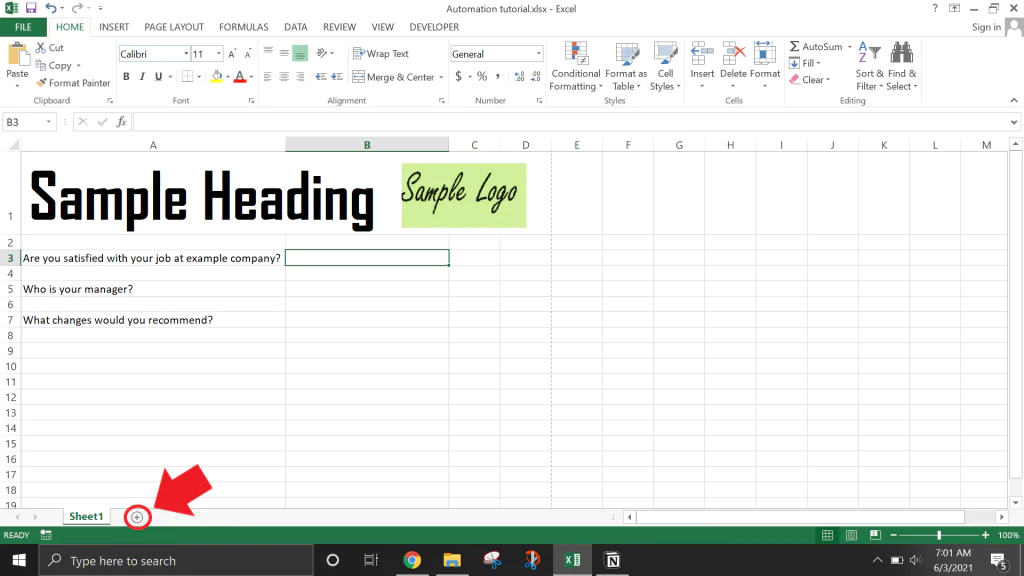
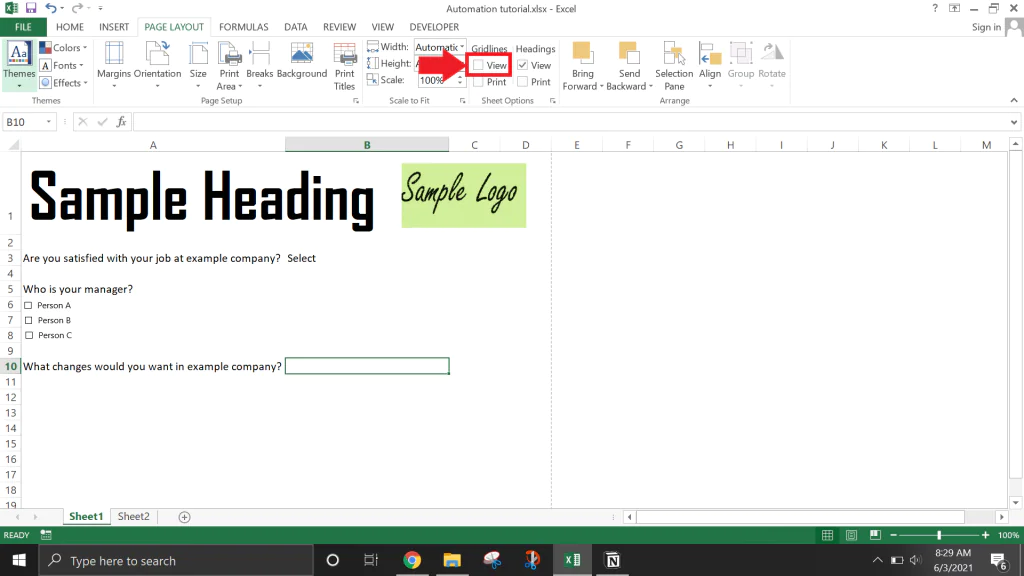
Step 5: If you want to brand your form, go to the “Insert” tab and select “Pictures” to add a logo. This step is optional.
![]()
2 Interactive design
Dropdown menus and checkboxes are typically required on forms. By including these components, we will in this section make the layout interactive.
Addition of Dropdown
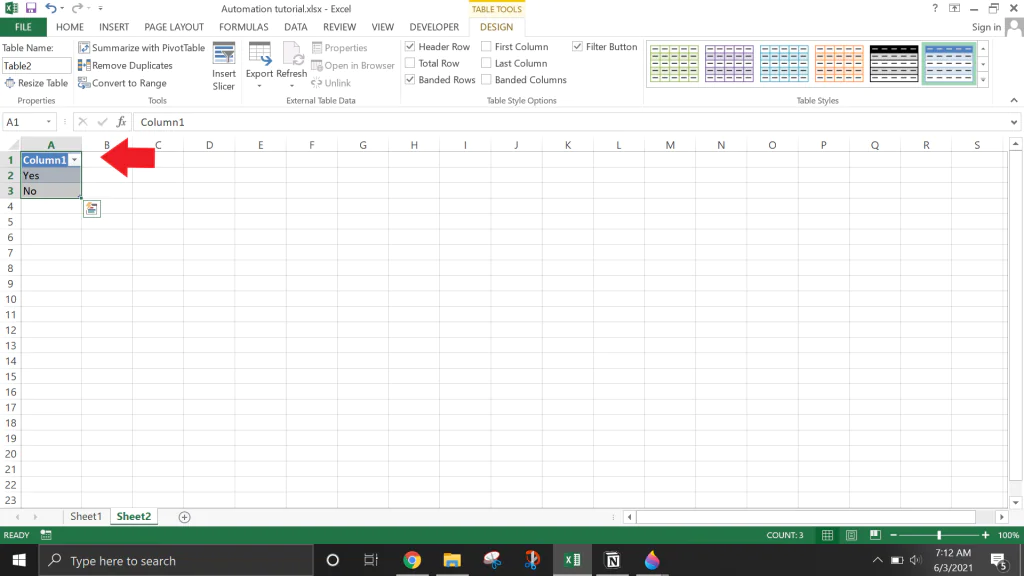
Step 1: From the bottom of the page, click the small + sign to create a “New Sheet.”
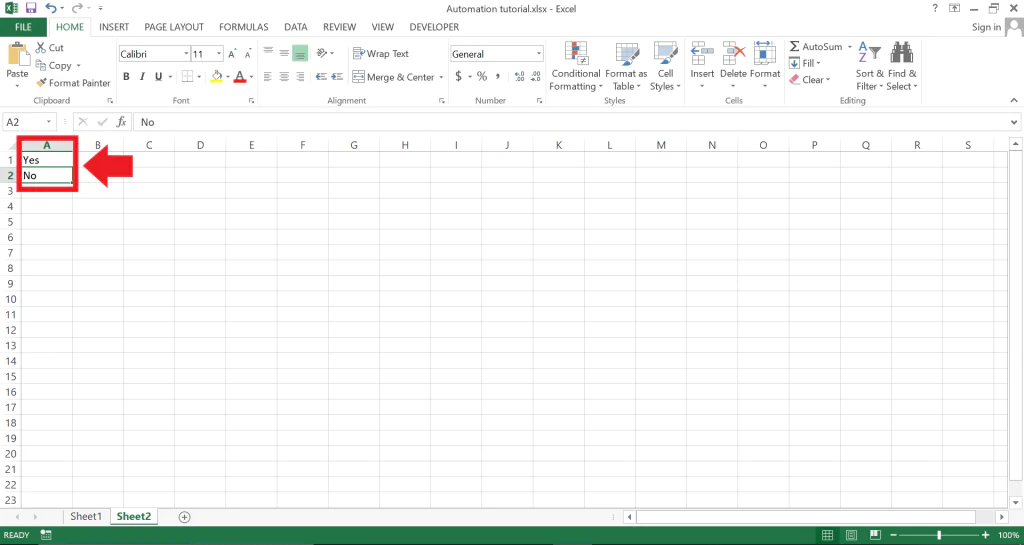
Step 2: Choose any column in the new sheet and enter your dropdown selections there. On your keyboard, choose any choice and hit “Ctrl + T.” Lastly, click “Ok.”
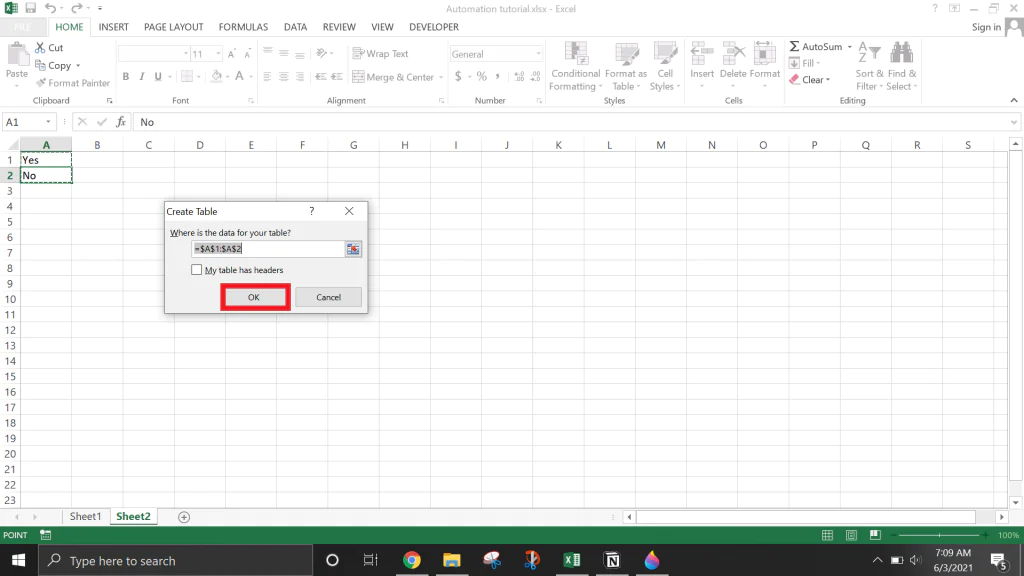
Step 3: Your list will change into a table with a heading after the second step. Customize your heading so that it appears on the layout page as the dropdown list.
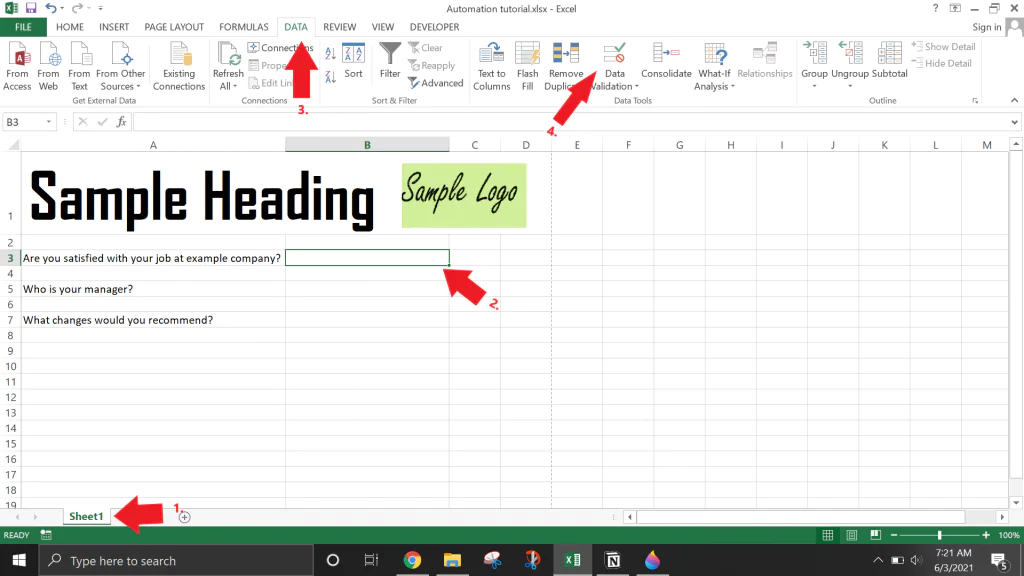
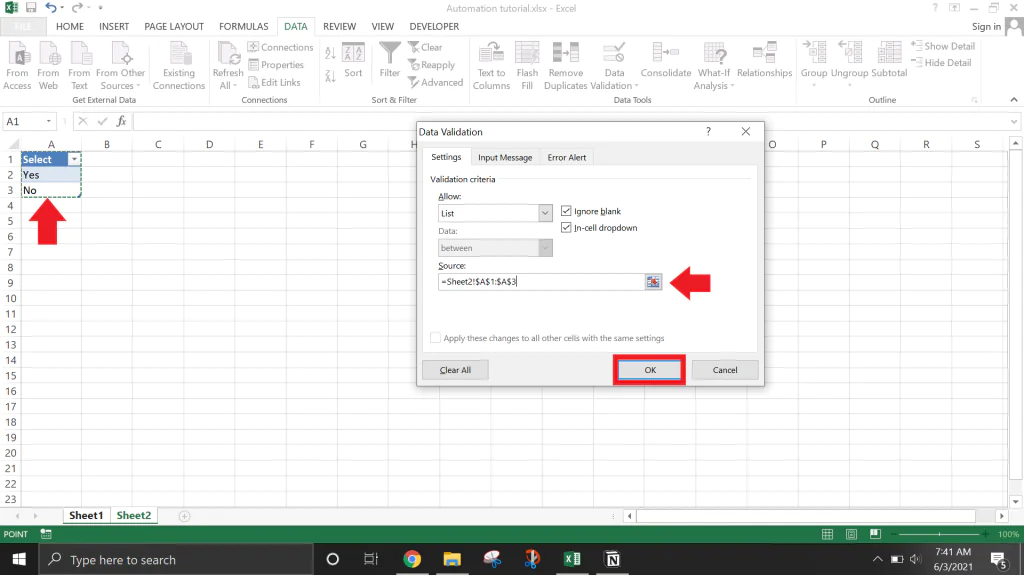
Step 4: Return to the layout sheet at the bottom of your Excel window, select the cell where you want the drop-down menu to appear and then select the “Data” tab.
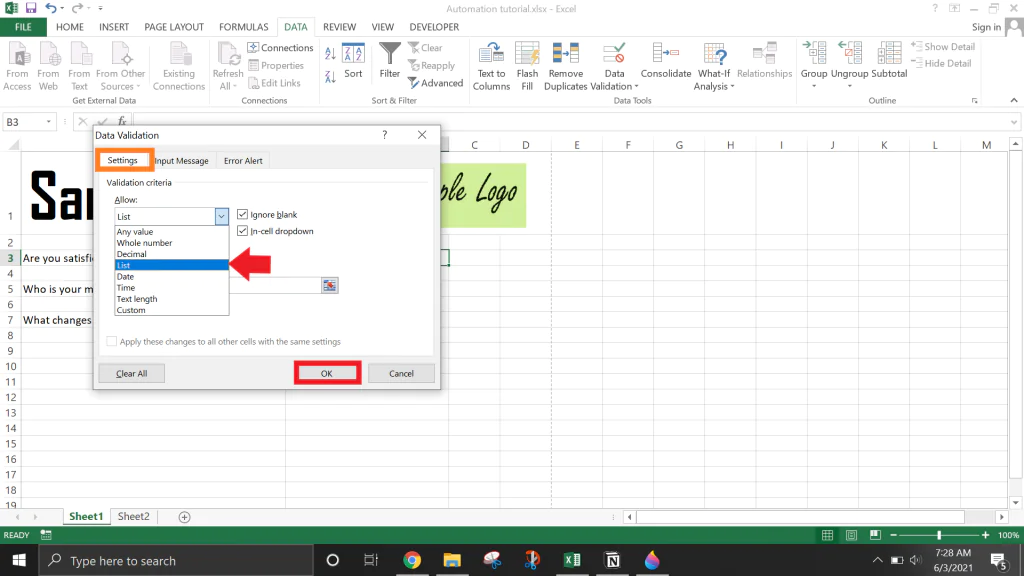
Step 5: Choose “List” from the “Allow:” dropdown under “Settings.”
Step 6: Place your cursor in the “Source” box and return to the table we previously generated.
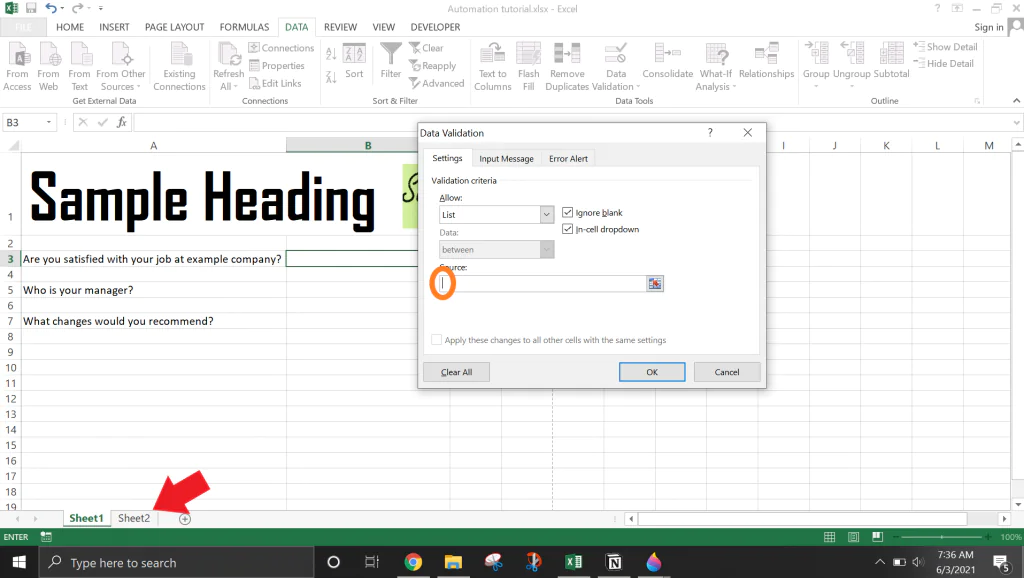
Step 7: Click “Ok” after selecting the entire table as the source.
Addition of Checkboxes
Checkboxes can be put anywhere and are located under the “Developer” menu. To add checkboxes to your form, follow these steps.
Step 1: Find “Insert” and choose the checkbox icon.
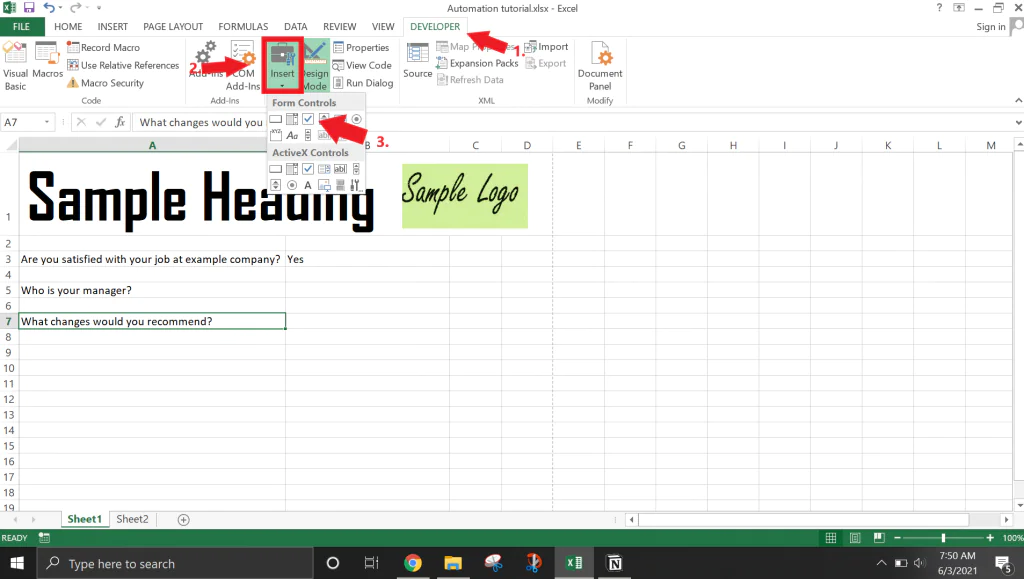
Step 2: Drag checkboxes to any location on the screen.
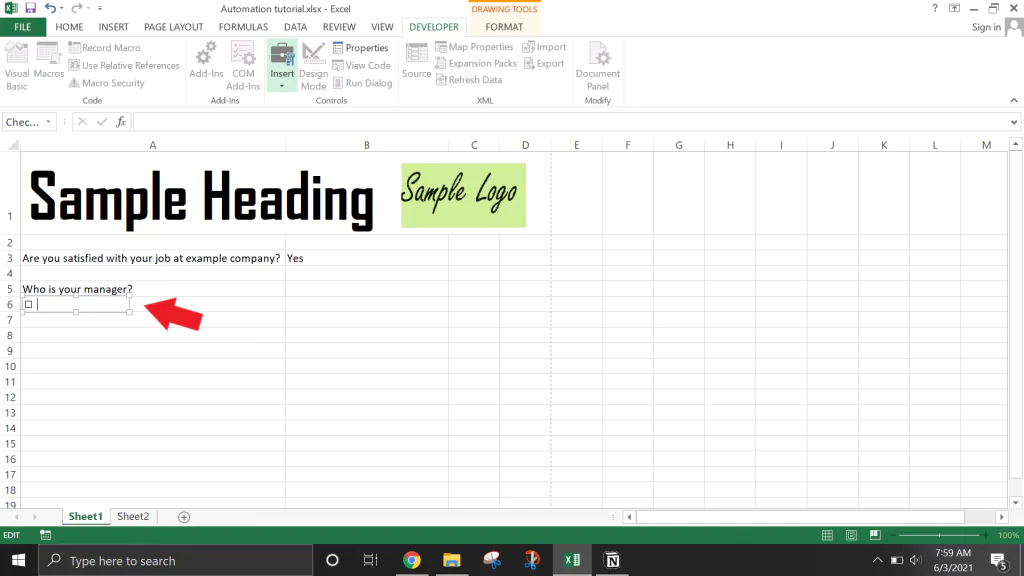
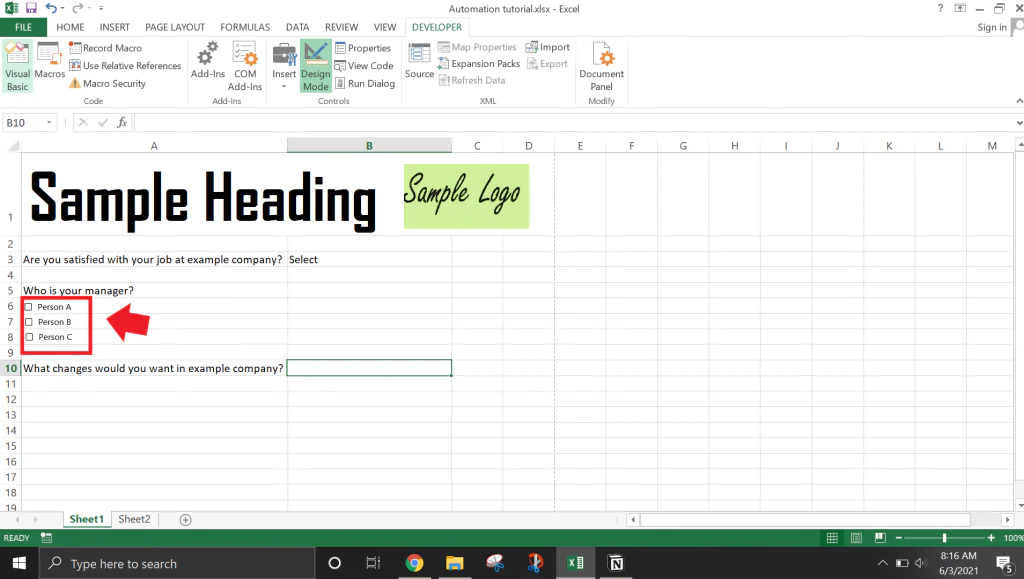
Step 3: The checkbox labels should be created.
To connect with a checkbox, you must first select the cell on which it is located and then right-click on the checkbox you wish to change.
3 Finishing
We might start by deleting the gridlines, eliminating unnecessary cells, and adding some lines around the titles in order to make the form appear cleaner.
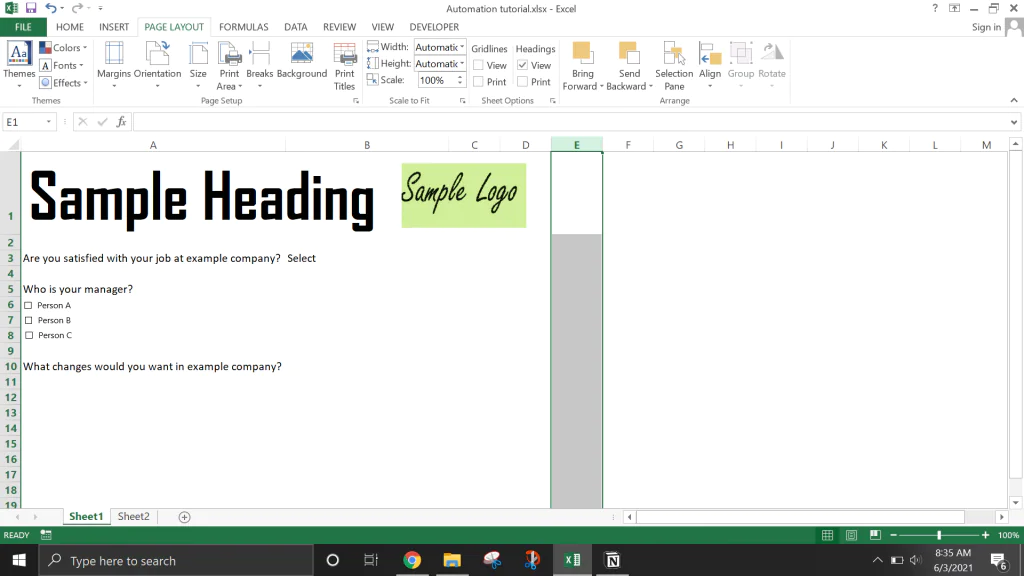
-Deleting the gridlines
Go to the “Page Layout” tab and uncheck the “View” option under “Gridlines” to get rid of the gridlines.
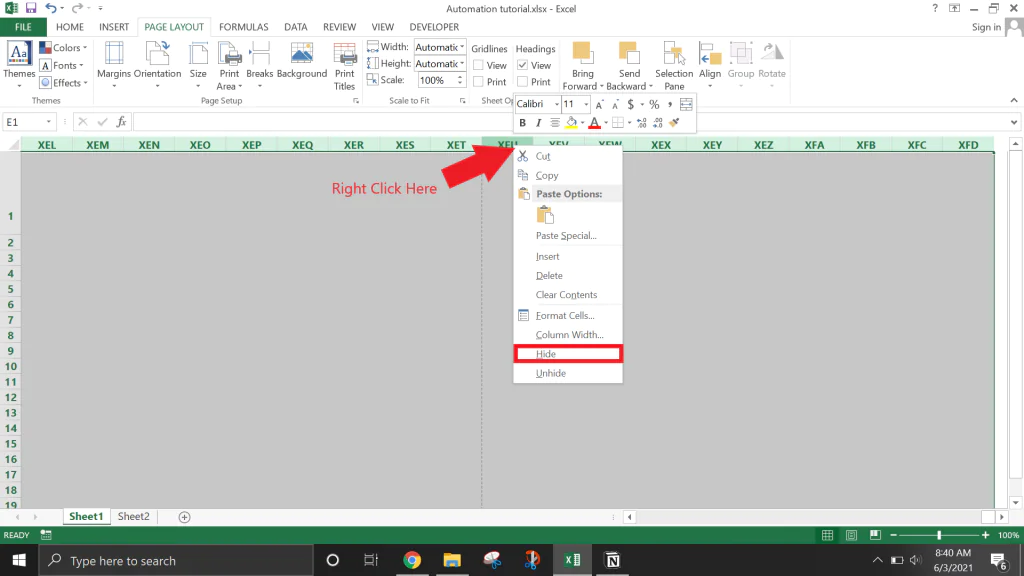
-Eliminating unnecessary cells
To make the form look cleaner, you can choose to delete any cells that extend past the dotted lines.
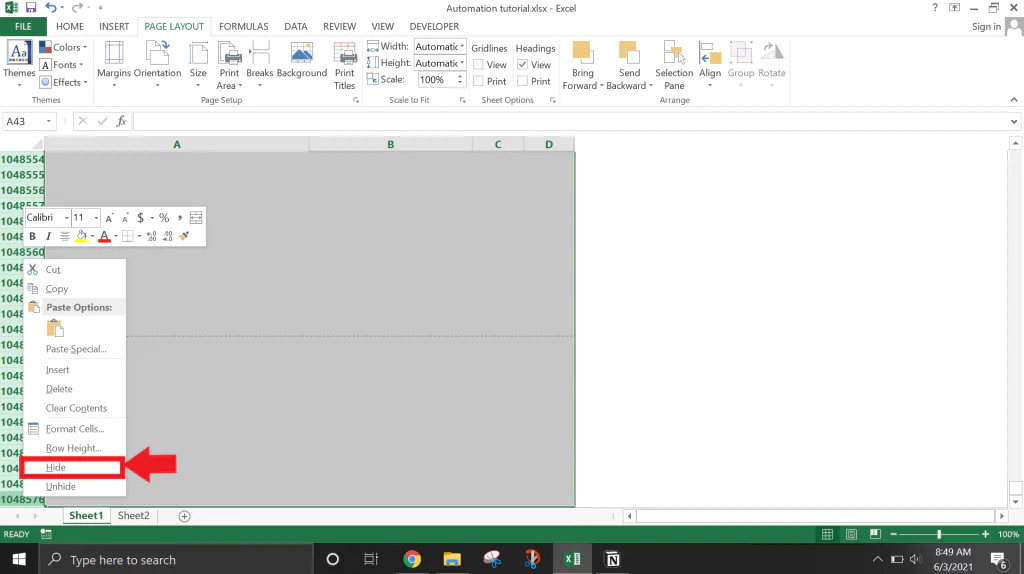
Step 1: On your keyboard, choose the column directly adjacent to the dotted line and press “Ctrl+Shift+.” This should pick every cell in your Excel sheet, all the way to the end.
Step 2: Select “Hide” by right-clicking anywhere within the highlighted bars.
Step 3: Select the row below the bottom dotted line by scrolling down to it and pressing “Ctrl+Shift+ ↓”.
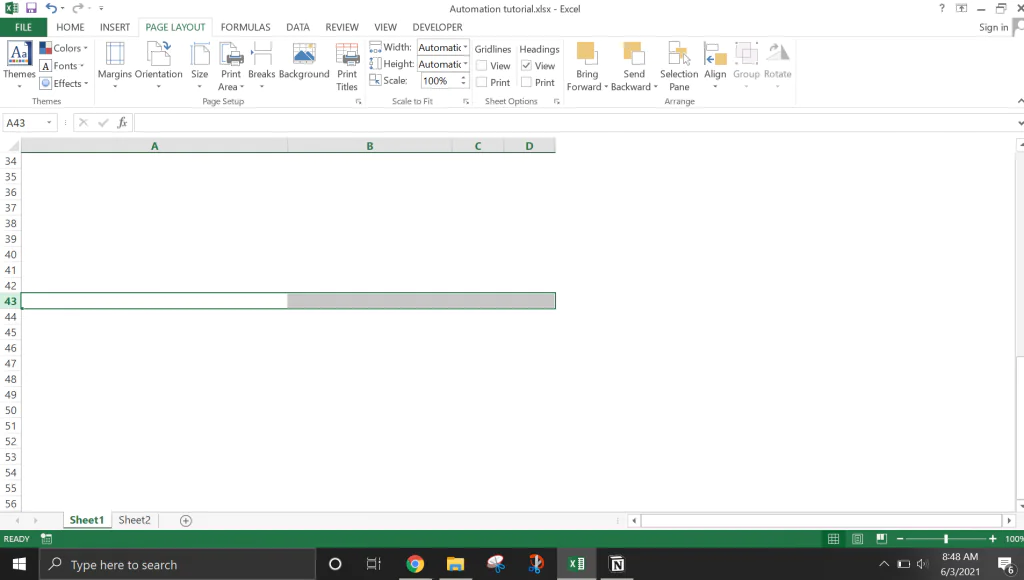
Step 4: In the highlighted bars right click anywhere, and choose “Hide” once more.
-Hiding extra sheets
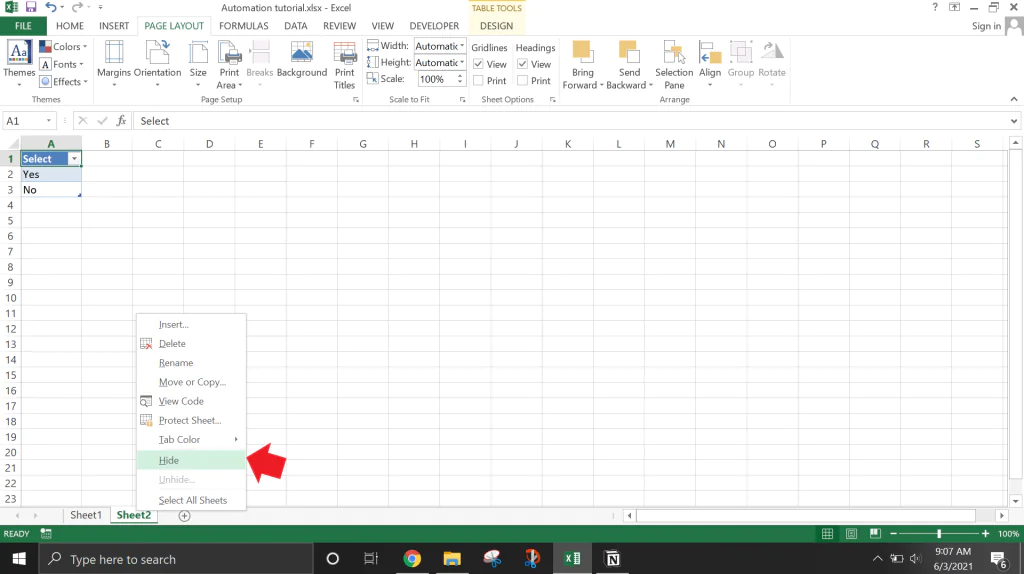
The layout page should be the only page the user sees when completing your form. The other sheets you might have linked to your layout page for dropdown options will be hidden for this.
Step 1: You can select ‘hide’ by right-clicking the sheet you want to hide.
You can now distribute your completed form to the individuals whose information you need.
How to automate data entry using VBA?
You can also use Microsoft VBA to generate “native” window forms to advance your form-creation abilities. The end-user won’t have to see open Microsoft Excel and fill out the page themselves, thanks to VBA’s native forms. It’s a sophisticated procedure, though, and calls for some fundamental VBA coding. The process is covered in the steps that follow.
You must save a new sheet in the *.xlsm format in order to use VBA.
The creation of a “database” sheet is the second step in the procedure.
Now that the VBA window is active, the form fields’ layout is specified.
Then, using VBA code, you can modify the command buttons, validations, and data entry logic.
Final Words
Data is being produced at an exponential rate as the world becomes increasingly digital. Data is being used by businesses to spot trends, forecast outcomes, and improve decision-making. One of the main factors influencing this tendency has been data automation. It has supported enterprises in their daily operations and assisted them in improving decision-making processes and gaining insights from their data.
Data automation has a lot of benefits that might increase the productivity of your company. For instance, automating tiresome chores enables you to save a ton of time and effort. It can also help your workforce operate more effectively, which will boost productivity. Lastly, it can assist you in understanding client wants and enhancing customer happiness.
Using Excel spreadsheets as data tables to hold customer information, inventory information, or other crucial data is one-way businesses and data entry services may save time and money. Numerous tools in Excel can help in automating data entry. Users can enter the relevant information into data forms without having to browse or scroll across rows and columns.
