How to Apply Stained Glass Art Effects to Your Pictures
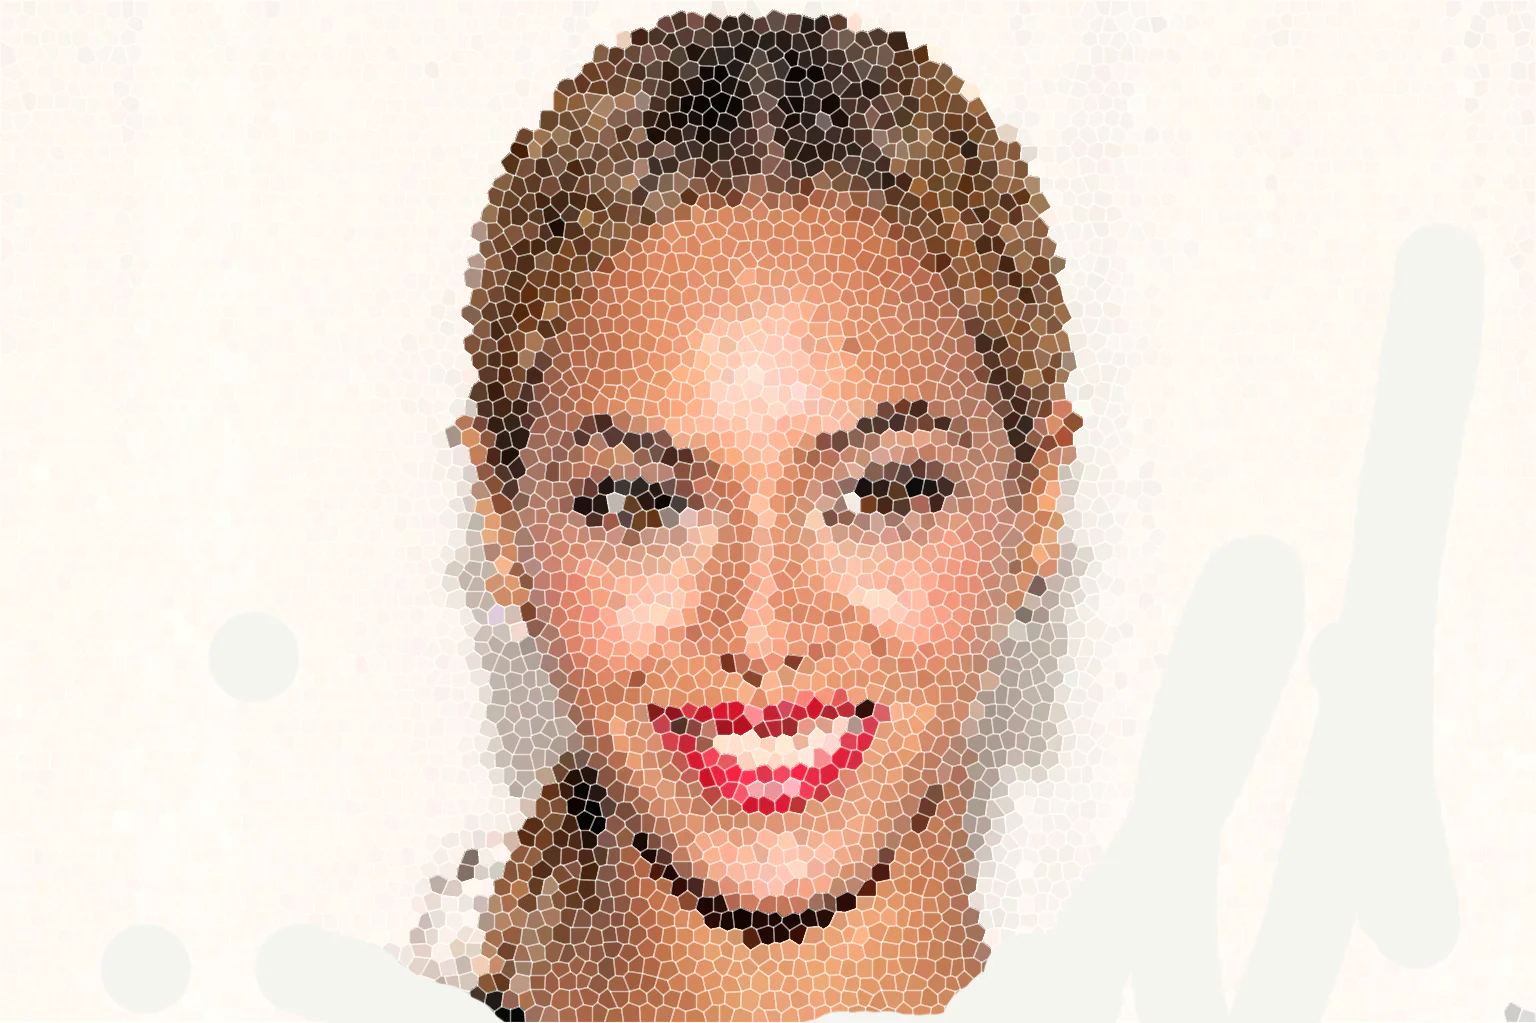
Stained glass art is a distinctive technique that draws inspiration from the age-old tradition of stained glass windows. These effects inject depth, vibrancy, and sophistication into your graphics. Stained glass, with its centuries-old history adorning cathedrals, churches, and historical structures, carries a legacy of its own. By integrating stained glass art effects into your pictures, you pay homage to this enduring art while planting a sense of historical veneration. The perfect interaction of colors in stained glass art effects mirrors the radiant shifts that happen when light filters through tinted glass, creating a captivating dance between hues and forms. This infusion of color injects liveliness and vibrancy, rendering your images visually captivating and evocatively charged. Stained glass art effects deconstruct images into colorful mosaic sections, intensifying their emotional impact and conveying spiritual significance. They can be applied to portraits, landscapes, still lives, and abstract artworks, elevating them to new artistic heights and telling stories.
Step 1: Image Selection and Preliminary Preparation
To commence the process, deliberate on an image that possesses distinctive features, well-defined shapes, and a palette of vibrant colors. Consider the subject matter’s potential for synergy with the stained glass effect. A subject with clear outlines and contrasting tones is ideal, as it will readily lend itself to the creation of individual “glass” pieces.
Moreover, the narrative embedded within your chosen image plays a role. Ponder how the stained glass effect can elevate the story or concept you wish to convey. By selecting an image with visual and emotional resonance, you lay a foundation for the forthcoming transformation that harmonizes the art of photography with the timeless allure of stained glass craftsmanship.
In this preliminary phase, your discerning eye and creative intuition guide the trajectory of your artistic endeavor. As you scrutinize images and their potential for transformation, remember that your selection is the initial brushstroke on the canvas of your creative journey – a stroke that will eventually weave into a symphony of colors, light, and innovation.
Step 2: Precise Outlining and Fragmentation
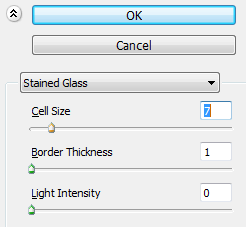
Once you’ve chosen the perfect image, embark on the intricate process of outlining and fragmenting to breathe life into your stained glass art effect. In this step, the image transforms, transitioning from a two-dimensional representation to a mosaic of vivid glass-like pieces.
Begin by importing the selected image into your chosen image editing software. Before embarking on the transformation, ensure the image is duplicated, creating a safeguard for your original work.
With the duplicated layer in focus, employ an array of selection tools at your disposal. Skillfully outline the distinct areas within the image that are destined to be transformed into captivating “glass” pieces. These selections demarcate the boundaries where colors will dance and light will play.
Expand the selections slightly, delineating delicate border-like edges for each individual “glass” fragment. This step is akin to the leading that holds traditional stained glass pieces together, framing each element and preparing the canvas for your digital masterpiece.
Step 3: Infusing Light and Depth
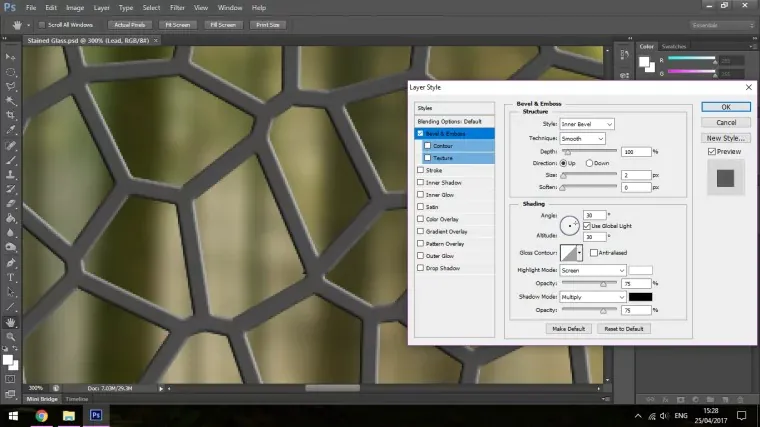
As the image takes on the semblance of divided glass fragments, it’s time to infuse it with the illusion of depth and luminosity that characterizes stained glass artistry. This step is where your digital canvas truly comes alive, with light and shadow conspiring to craft a three-dimensional spectacle that dances like captured radiance.
The first act in this symphony involves the delicate art of shadows. Apply subtle drop shadows to each “glass” fragment, akin to the play of sunlight on real glass. These shadows cast a gentle visual embrace, creating a sense of depth that entices the eye to explore the intricacies of each fragment.
Next, wield the brush of transparency. This is where the magic of light passing through stained glass comes alive. With finesse, regulate the transparency of each individual “glass” piece. Like rays of sun filtering through colored panes, this adjustment mimics the ethereal glow of light piercing through glass, casting a luminous veil that captivates the viewer’s imagination.
Harmonizing shadows and transparency is the crux of this step. Like a painter layering colors on a canvas, blend these elements together to create an orchestration of light and depth. Each “glass” piece becomes a vessel of radiance, as if imbued with the very essence of refracted light.
Step 4: Elevating Chromatic Brilliance
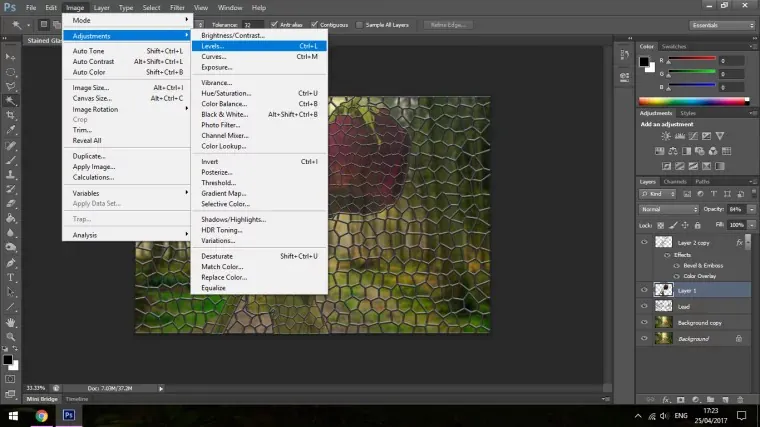
With depth and luminosity masterfully woven into your digital stained glass composition, the time has come to elevate the color palette, infusing your creation with vibrant hues that mesmerize the senses. This step accentuates the visual impact, transforming your image into a symphony of colors that dance and resonate with captivating intensity.
Begin by orchestrating a crescendo of color saturation. Enrich the hues of your “glass” fragments, intensifying their brilliance to a level that commands attention. This surge in saturation breathes life into the colors, transforming them into vivid visual notes that reverberate within the composition.
As the colors bloom, embark on a journey of harmonization. Ensure that the shades within your “glass” pieces harmonize seamlessly with the overall color palette of the image. Each hue should contribute to the symphony without disrupting the melodic unity, forging a visual tapestry where every fragment harmoniously resonates with its counterparts.
Consider your artwork a canvas of emotional expression. Adjust the color saturation to evoke the desired mood and atmosphere. Whether infusing exuberant vibrancy or subtle nostalgia, your control over color deepens the emotional connection between viewer and art, capturing hearts and imaginations.
Balance becomes your guiding principle in this phase. As each “glass” fragment becomes a radiant jewel, the overall harmony of the composition hinges on the equilibrium of colors. You orchestrate the hues, and the composition responds with an interplay that defies monotony and dazzles the senses.
With each adjustment, you wield the brush of a color virtuoso, imbuing your creation with the power to evoke emotions and stir the soul. The symphonic intermingling of vivid hues and harmonized shades transcends the ordinary and propels your artwork into a realm of vibrant, nuanced brilliance.
Step 5: Weaving Artistic Harmony
Having enriched your creation with vibrant colors, it’s time to weave a seamless artistic harmony that unifies the stained glass effect with the original image. This step is where you refine your digital masterpiece, ensuring every element converges in a symphony of cohesiveness that captivates the eye and engages the mind.
Begin by applying global adjustments that embrace the entirety of your artwork. This unifying touch harmonizes the stained glass effect with the original image, weaving them into a visual narrative that resonates effortlessly. Adjust contrasts, luminosity, and color balance to strike an equilibrium that ties the composition together.
Zoom out and embrace a panoramic view of your creation. Evaluate it as a whole, identifying any areas that require your discerning eye. This critical assessment allows you to pinpoint disparities or irregularities that might disrupt the seamless tapestry you’ve carefully constructed.
Delve into each “glass” fragment, evaluating its color consistency, shadow play, and transparency. This meticulous scrutiny ensures that each fragment contributes to the overarching harmony, creating a composition where no element is out of tune.
Like a master composer, refine the subtleties. Your attention to detail is your artistic signature – the brushstroke that elevates your composition from the ordinary to the extraordinary. Every pixel, every hue, plays its part in a grand artistic overture.
Remember that artistic harmony is more than visual aesthetics; it’s a resonant connection with the viewer’s emotions. As you orchestrate each adjustment, consider how the composition’s unity aligns with the narrative or feeling you wish to convey. By fusing stained glass’s allure with digital innovation, you’re crafting an artwork that beckons viewers to partake in a journey of beauty and imagination.
Step 6: Final Flourish and Presentation
With your stained glass digital artwork refined to perfection, the final steps encompass preserving its brilliance and sharing it with the world. These actions mark the culmination of your artistic endeavor, transforming your creation from a digital canvas into an experience that engages and inspires.
Begin by selecting the optimal format to encapsulate your masterpiece. Choose between formats like JPEG or PNG, considering factors such as image quality and compatibility with various platforms. This choice preserves the vividness of your artwork, ensuring its radiance translates seamlessly across different mediums.
Determine the resolution that best showcases your creation’s intricate details. Whether for online display or printing, your chosen resolution preserves the essence of your artistry. This decision transforms your digital image into a tangible and visual experience, enriching its impact on viewers.
Now, it’s time for the grand unveiling. Share your transformed masterpiece with the world through your preferred platforms – be it your blog, social media, or even in exhibitions. As viewers engage with your creation, they’re not just observing pixels; they’re partaking in the narrative you’ve woven, becoming participants in the journey you’ve embarked upon.
Remember, your creation is more than the sum of its digital parts. It’s an extension of your creative spirit, an offering to the world that invites wonder and conversation. As you navigate these final steps, you bridge the gap between the digital realm and human emotion, transforming your artwork into an enduring legacy that resonates in the hearts and minds of those who encounter it.
Conclusion
In conclusion, applying stained glass art effects gives your images a seductive charm representative of antique skills. The dynamic mix of brilliant colors and dazzling transitions brings images to spirit, that provide emotion and substance. Aside from aesthetics, it provides a diverse platform for cross-genre creative expression. Stained glass effects go beyond simple improvement to become a revolutionary tool for elevating your digital artworks. Blending timeless beauty with modern innovation, you create images that deeply connect with viewers, reflecting the enduring influence of stained glass art throughout history.
