How To Apply Matte Painting Effects To Your Images
Matte painting can modify images by transforming its whole setting and background and producing an entirely new composition, except for the unaltered subject, which also looks almost unrecognizable due to the new environment. Matte painting effects can also add novelty and enhancement to the pre-existing backdrop of the photograph by the augmentation of new elements, like in a nature landscape where you can add more trees, clouds, birds etc. Likewise, it operates as a robust feature for photo retouching and restoration, eliminating imperfections and renovating blurred or distorted elements of images. Matte painting’s specificative features make it qualified for the film industry to introduce an expansion of existing locations within a scene that makes them look more vast and immersive. To add matte painting adjustments to your images, you should select suitable tools and adopt appropriate practices to grasp matte painting techniques. After having a firm knowledge and experimenting with the related skills, you can create fanciful and imagination-jerking matte painting images. Consider the following steps for a proper guide map for matte painting creation.
Step 1: Choose the Right Tools
In Step 1, selecting the right tools is crucial for successful matte painting creation. The choice of software will significantly impact your workflow and the quality of the final result. Opt for powerful and versatile applications like Adobe Photoshop, Corel Painter, or specialized 3D software, depending on your specific project needs and level of expertise.
Adobe Photoshop offers a wide array of painting and compositing tools, making it a popular choice among matte painters. On the other hand, Corel Painter excels in digital painting, emulating traditional media, while 3D software like Autodesk Maya allows for intricate 3D integration in matte paintings.
Consider factors such as user-friendliness, available features, compatibility, and familiarity with the software. By choosing the right tools, you set a solid foundation for creating stunning matte paintings that captivate and inspire your audience.
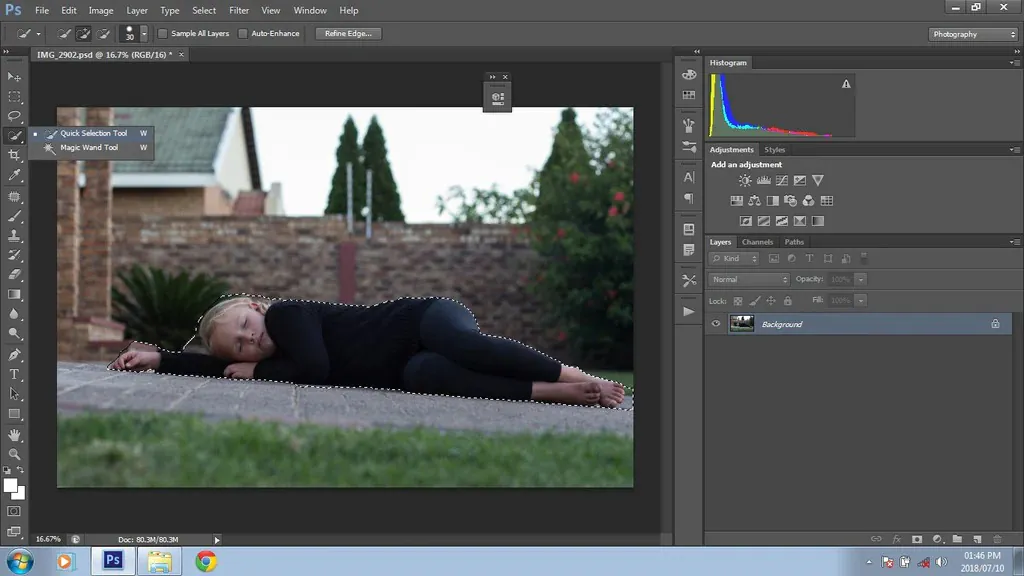
Step 2: Gather References
This step involves the task of gathering references for your matte painting creation. References serve as invaluable visual guides to ensure realism and accuracy in your artwork. Search for images, photographs, and artworks that closely match the environment or elements you wish to incorporate into your matte painting.
Look for references that showcase lighting, perspective, and details relevant to your composition. These references can come from various sources, including photography websites, art galleries, and even real-world locations.
Organize your references and keep them readily accessible during the painting process. Analyzing and studying these references will enhance your understanding of the subject matter and help you create a compelling and believable matte painting that transports viewers to a captivating new world. Remember, thorough reference gathering lays the foundation for a successful and visually striking matte painting.
Step 3: Start with a Base Image
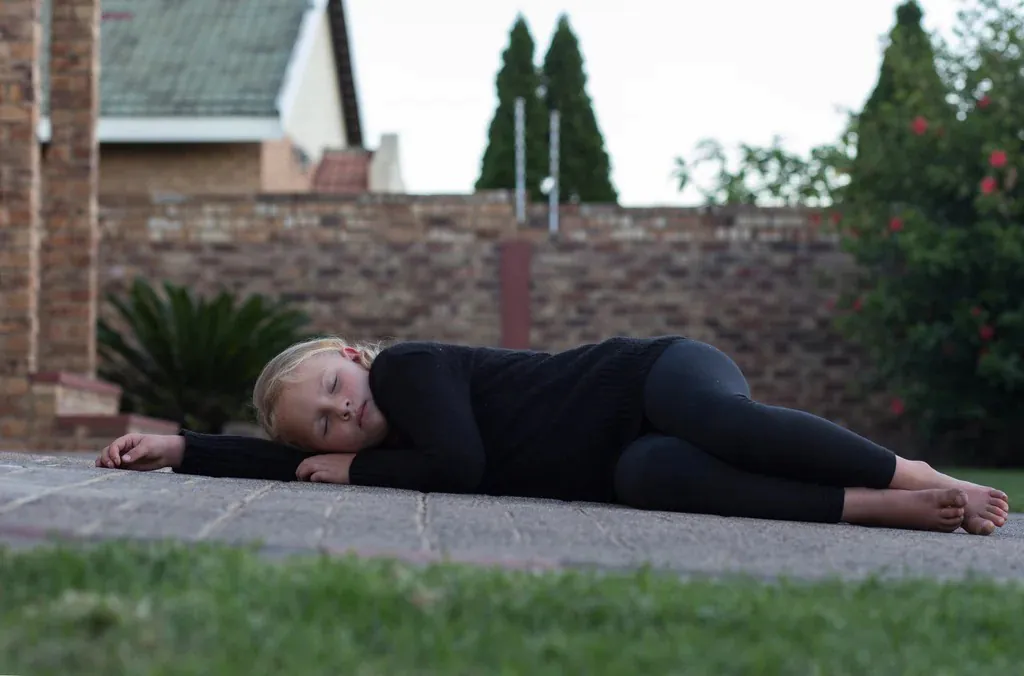
Begin your matte painting by selecting a suitable base image. This image will form the foundation of your composition and determine the subject’s placement within the new environment. Ensure the base image aligns with your creative vision and has a clear, well-defined subject.
Consider factors such as lighting, perspective, and overall aesthetics when choosing the base image. It should harmonize with the new background and elements you plan to add.
Import the base image into your chosen matte painting software and create a separate layer for further adjustments. By starting with a strong base image, you provide a solid starting point for your matte painting, streamlining the process of transforming the entire setting and background into an entirely new and captivating composition.
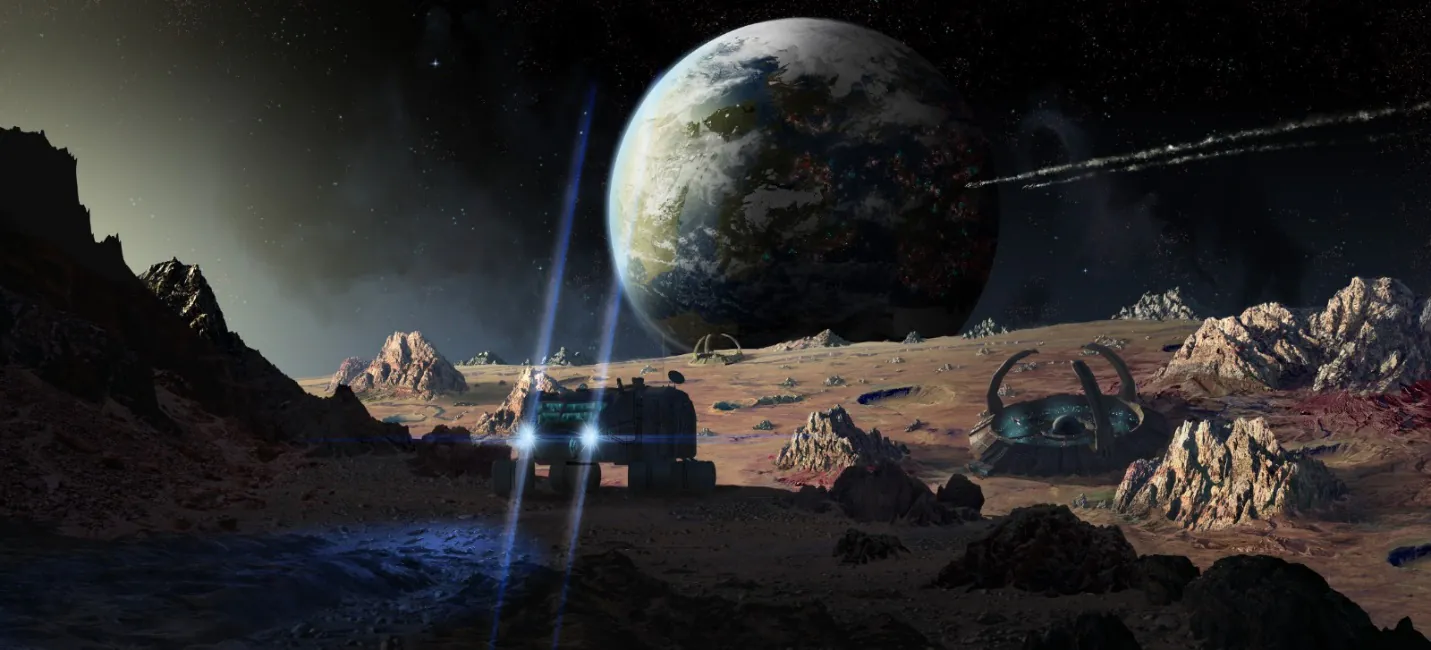
Step 4: Transform the Background
Using the painting and compositing tools in your chosen software, carefully replace the original background with the new environment or setting you have envisioned.
Ensure seamless integration of the subject into the new background by paying close attention to lighting, shadows, and perspective. This step is critical to maintain realism and make the subject appear naturally situated within the new scene.
Blend the edges of the subject with the new background, avoiding any abrupt transitions. Consider the visual flow and composition to create a harmonious and immersive environment.
The transformation of the background sets the tone and atmosphere of your matte painting, breathing life into the composition and taking viewers on a captivating visual journey.
Step 5: Add New Elements
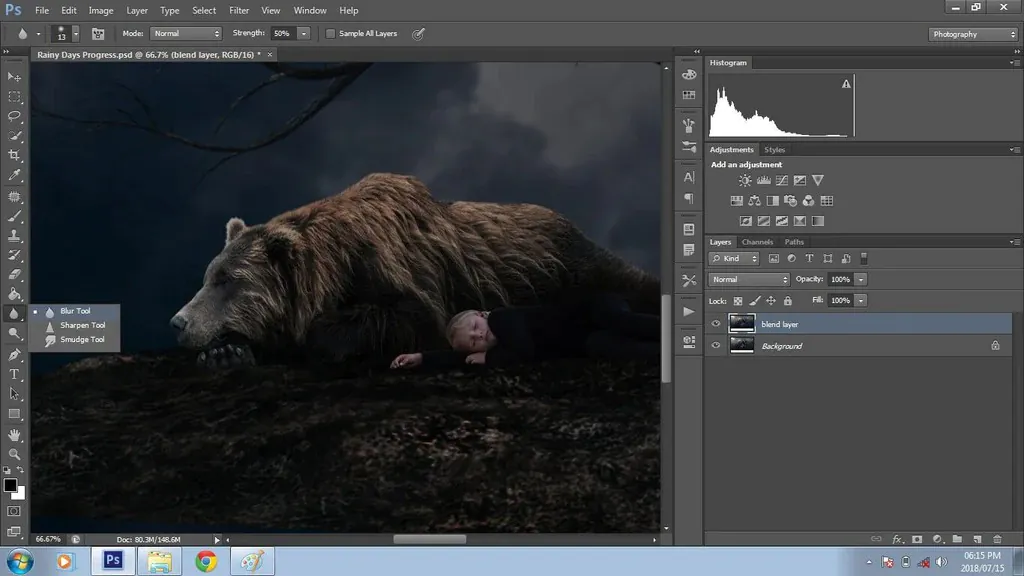
It’s time to enhance your matte painting by skillfully adding new elements to the backdrop. Whether you’re creating a nature landscape with additional trees, clouds, and birds or introducing fantastical elements to a sci-fi scene, this step allows you to unleash your creativity.
Utilize painting tools and techniques to integrate the new elements into the composition flawlessly. Pay attention to lighting, shadows, and perspective to ensure they blend naturally with the existing scene.
Consider how the added elements interact with the subject and the environment and contribute to the matte painting’s overall storytelling and visual impact.
By thoughtfully introducing new elements, you breathe life and imagination into your matte painting, creating a captivating and immersive world that captivates viewers’ attention.
Step 6: Focus on Details
Paying attention to these details is crucial for achieving a realistic and visually captivating composition.
Fine-tune the lighting and shadows to ensure consistency and coherence between the subject and the newly added elements. Adjusting highlights and reflections can add depth and dimension to your artwork.
Pay close attention to small elements, such as textures, patterns, and fine lines, as they contribute to the overall realism of the scene. Refining these details will elevate the quality of your matte painting and make it more convincing to the viewer.
Consider how the lighting interacts with each element in the composition and how it affects the overall mood and atmosphere of the scene. These subtle touches can greatly enhance the visual impact and storytelling of your matte painting.
Remember, attention to detail distinguishes a good matte painting from an exceptional one, so take the time to perfect these elements in your artwork.
Step 7: Photo Retouching and Restoration
For refining your matte painting, use retouching tools to meticulously eliminate any imperfections in the image, such as blemishes, distractions, or unwanted elements. Fixing blurry or distorted areas can enhance the overall clarity and sharpness of the artwork.
Take the time to inspect the entire composition and make necessary adjustments to ensure a polished final result. Pay attention to colour correction and consistency to integrate all elements seamlessly.
Retouching also involves blending the subject with the background seamlessly. Fine-tune edges and transitions to create a harmonious visual flow.
Additionally, consider adding subtle atmospheric effects, such as haze, fog, or glows, to enhance the realism and depth of the scene.
By skillfully applying photo retouching and restoration techniques, you refine your matte painting, resulting in captivating and professional-quality artwork that engages and mesmerizes your audience.
Step 8: Refine and Polish
Focus on refining and polishing your matte painting. Take a step back and review your artwork with a critical eye. Pay attention to details, composition, and overall coherence.
Fine-tune the lighting, shadows, and colour grading to achieve the desired atmosphere and mood. Ensure all elements blend seamlessly, creating a unified and visually appealing composition.
Consider the artwork’s visual flow and focal points to guide the viewer’s eye and enhance storytelling.
Take the time to experiment with subtle adjustments and enhancements to elevate the overall quality of your matte painting. Be meticulous in your approach, as these finishing touches can significantly affect the final result.
Once you’re satisfied with the refined matte painting, take a break before the final step to gain a fresh perspective on your artwork.
Step 9: Finalize and Present
Finally, finalize your matte painting and prepare it for presentation. Review your artwork once more and make any necessary last-minute adjustments.
Save your work in the appropriate file format and resolution, ensuring it meets the requirements of your intended use, whether for print, digital display, or other purposes.
Consider creating a before-and-after comparison to showcase the transformation from the original image to the finished matte painting.
If you plan to share your artwork online or in your portfolio, write a brief description or artist statement to provide insight into your creative process and the inspiration behind your matte painting.
Now, you’re ready to present your completed matte painting to the world, sharing your unique vision and artistic talent with others. Share it with online art communities, participate in exhibitions, or seek opportunities for exposure and recognition. Your artwork represents a fusion of imagination and skill, leaving a lasting impact on all who have the privilege to experience it.
Conclusion
To summarise, the matte painting technique revolutionizes image composition by pairing reality and creativity, okaying you to create fantastic visuals that transcend the physical world’s constraints. You can edit and restore the photographs’ backdrop and surrounding aspects using a variety of approaches, including adding new items. Keep to the accurate tools and techniques for a successful matte painting process, and you can restore and remake reality in your photographs by implementing the transforming influence of matte painting, which has the tenacity to whisk away viewers to incredibly charming illusions.
