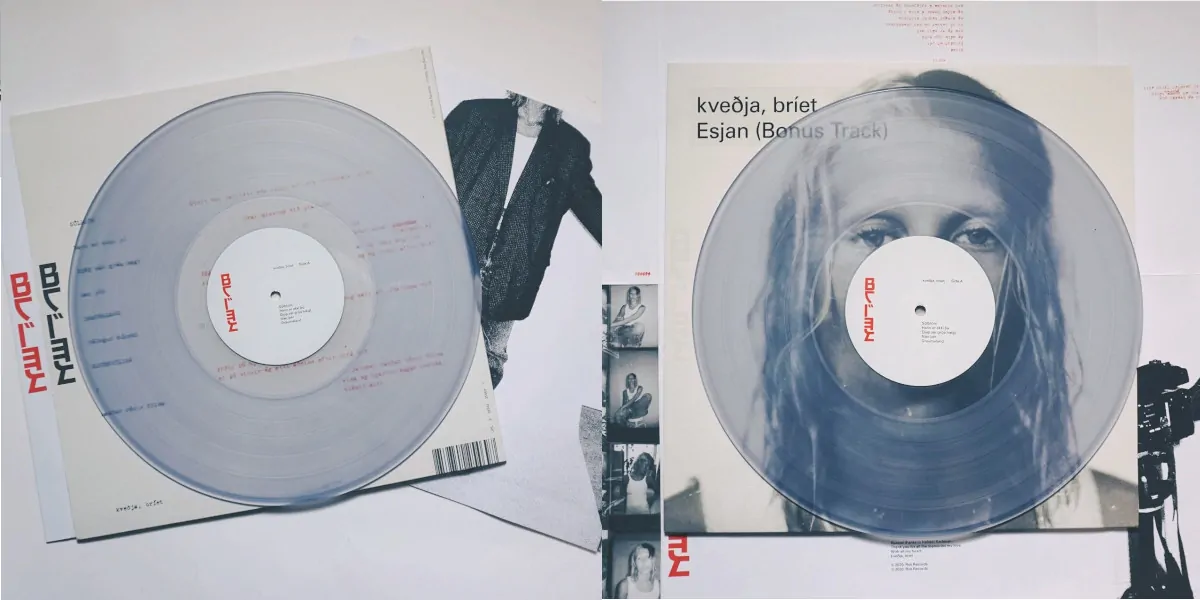
How To Add A Vinyl Record Effect To Images
The 1940s saw the rise in popularity of vinyl records, whose advancement has been crucial to the evolution of music throughout history. Vinyl records have gone through a notable resurgence in recent times, as music enthusiasts have come to appreciate the distinct pleasure that comes with listening to one of these records. A typical vinyl record is a flat disk composed of a polyvinyl chloride (PVC) compound, used as an analog sound recording medium. The audio is then pushed into a spiral groove on the disc’s surface. Vinyl records come in a variety of forms, sizes, and speeds, which affect their overall sound characteristics. Nevertheless, despite being a medium of audio-related entertainment, the visual aesthetics of a vinyl record are not alluring less than to be employed as an image enhancement approach. The vintage texture and sheen of a vinyl record are imitated into photographs with the help of digital textures either available online or created in image editing tools. Different grain filters and reflection effects further add to the realistic feel of your images. This blog will further address the techniques you can employ to add a vinyl effect to your images.
Step 1: Making A Circular Base
Initiate Photoshop and either open the picture you need to work with or make a fresh document with a blank canvas. Make sure that the size of the canvas can adapt to a vinyl record shape.
From the toolbar, click on the Elliptical Marquee Tool to permit you to make a circular choice that will create the base of the vinyl record.
Press and drag while holding the Shift key to confirm that the selection remains superbly circular. Alter the size of the circle concurring to your design essentials. In case necessary, move the circle by holding the Spacebar before unleashing the mouse.
Once the circle is selected, select a dark color, generally black or a remarkably dark gray, from the color palette. It will be the base color of your vinyl record.
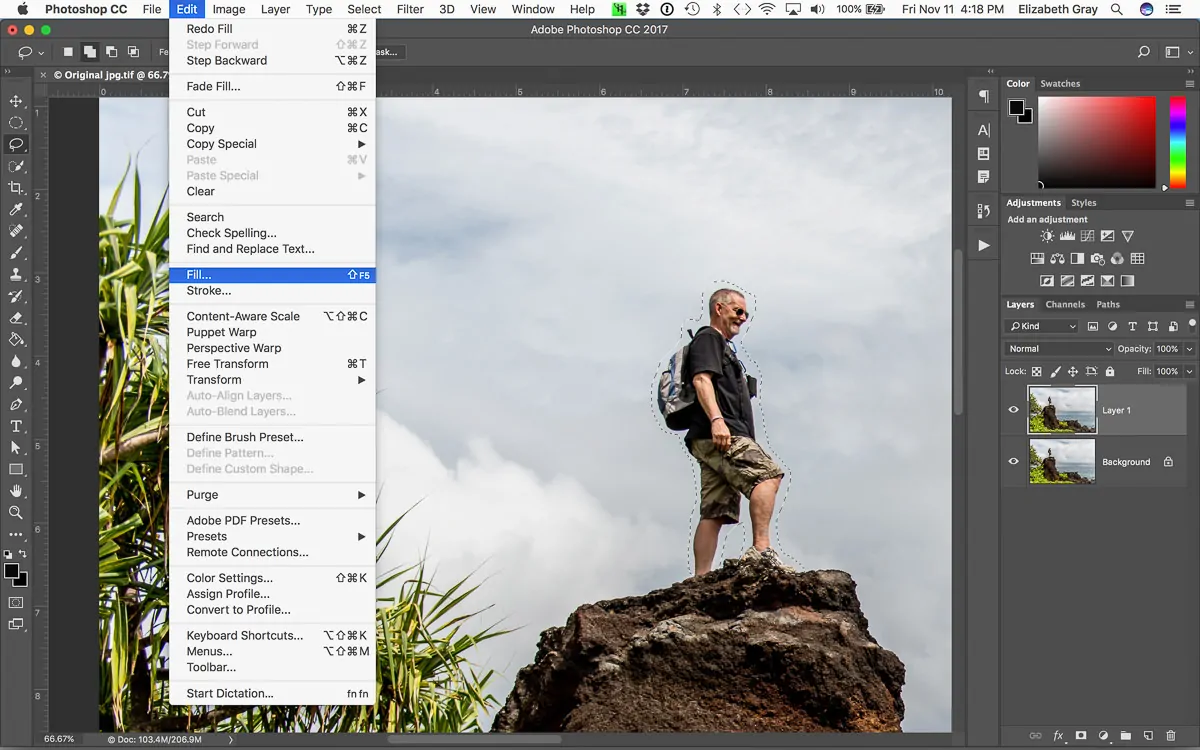
Move to Edit > Fill and select the chosen color to fill the circle.
After the circle is filled, press Ctrl + D to deselect it. It will complete the base of your vinyl record, prepared for further specification within the next steps.
Step 2: Applying Noise Filter
With the circular base still chosen, go to Filter > Noise > Add Noise. That step presents subtle grain, imitating the little grooves seen on a vinyl record.
Alter the Amount slider to around 5-10%. Be sure to select Uniform for the distribution type and inspect the Monochromatic box to avoid including colour noise. That can deliver the surface a marginally rough, textured appearance.
Presently, go to Filter > Blur > Radial Blur to convert the grainy surface into circular grooves.
Within the settings, select Spin for the blur strategy, and put the Amount to around 20-30. it will make a circular motion, taking after the grooves on a vinyl record.
If you find the grooves looking too drastic or unrealistic, decrease the opacity of the layer barely or apply another mild blur utilizing Gaussian Blur.
Step 3: Applying Lighting Effects
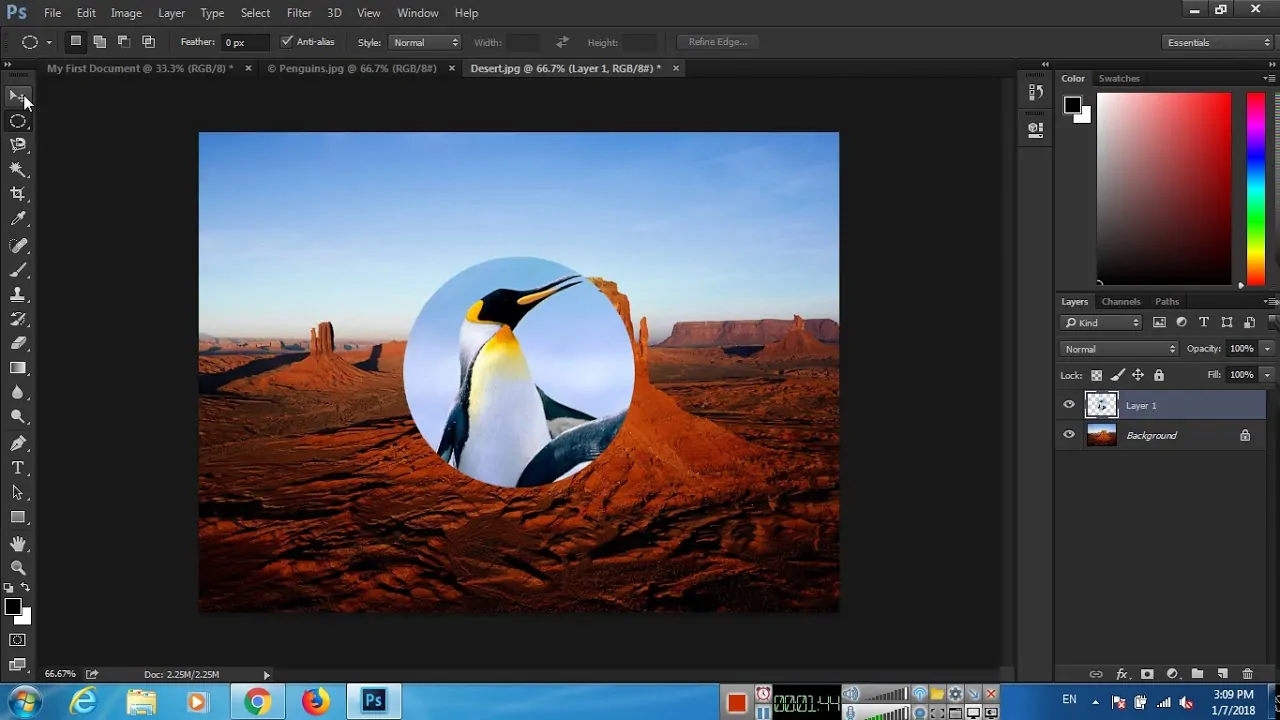
Utilize the Elliptical Marquee feature to form a smaller circle inside the vinyl record, nearer to the edge. That selection will be utilized to make a light reflection, which includes profundity and realism in the picture.
Once you have selected the circular zone, use Ctrl + J to make a new layer with just the chosen portion of the record. It permits you to control this area independently from the remainder of the vinyl base.
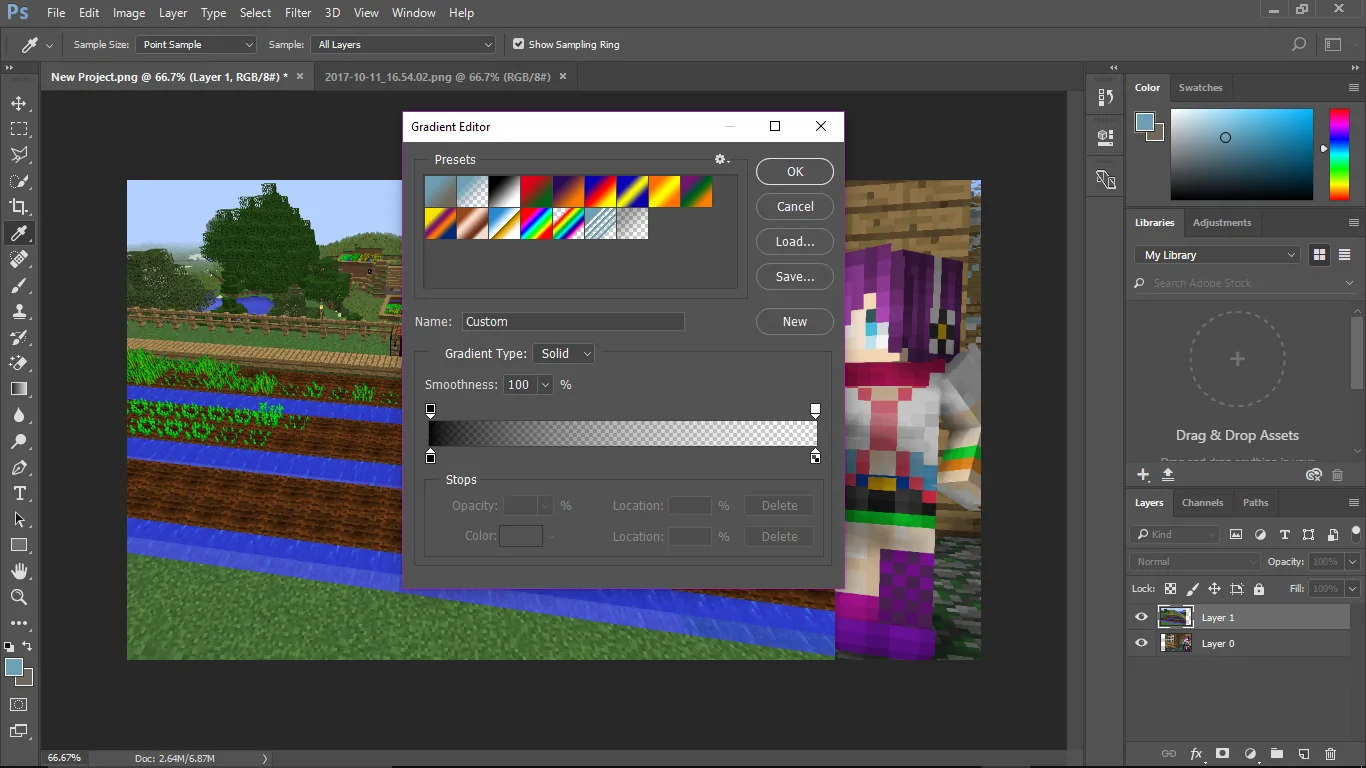
Choose the recently created layer, and then select the Gradient Tool from the toolbar. Within the options, prefer a Radial Gradient that shifts from white to transparent.
Execute the gradient beginning from the center of the chosen region, pulling outward.
Decraese the Opacity of the gradient layer to let the reflection look more nuanced. To attain a more natural impact, specify the layer’s Blend Mode to Screen or Overlay, depending on the intensity level you want to see in the light.
Utilize the Move Tool to slightly reposition the gradient as required, making sure the light reflection conforms with the natural curves and grooves of the vinyl record.
Step 4: Composing A Central Label
Access the Elliptical Marquee Tool once again to make a smaller circle within the center of the vinyl record. That will be the label area where you can include design components or content.
Press the Shift key and drag to make sure that the circle remains impeccably circular.
Select a contrasting color for the label, like a dynamic red, blue, or any color that fits your design subject.
After the circle is chosen, proceed to Edit > Fill and select your chosen color. It will fill the circular selection, making the label for the vinyl record.
Choose the Text Tool (T) and press inside the label circle to include text, like the artist’s name or collection title. Decide a textual style that goes with the retro theme.
Alternatively, you can also import artwork or logos by dragging and dropping them into the document and, after that, positioning them inside the label range.
To provide the label a 3D look, right-click on the label layer and choose Blending Alternatives. Consider the Bevel and Emboss box.
Alter the settings to make a slightly lifted effect. Put the profundity to around 10 to 20 per cent and play with the Size and Soften alternatives until you accomplish the preferred look.
Arrange the label and alter its opacity to let the vinyl surface subtly appear through.
Step 5: Texture Enhancement
To improve the realism of the vinyl record, you can apply a surface overlay. To begin with, find an appropriate vinyl surface picture online or assemble one utilizing Photoshop.
Load the prepared texture picture and duplicate it utilizing Ctrl + C. Head back to your vinyl project and paste it utilizing Ctrl + V as a new layer over the vinyl base.
Utilize Ctrl + T to convert the surface layer. Scale it to correspond to the size of the vinyl record.
On the off chance that the surface shows up too sharp or diverting, alter the layer’s Blending Mode to Multiply or Overlay to permit the vinyl color and subtle elements to show through while keeping up the texture impact.
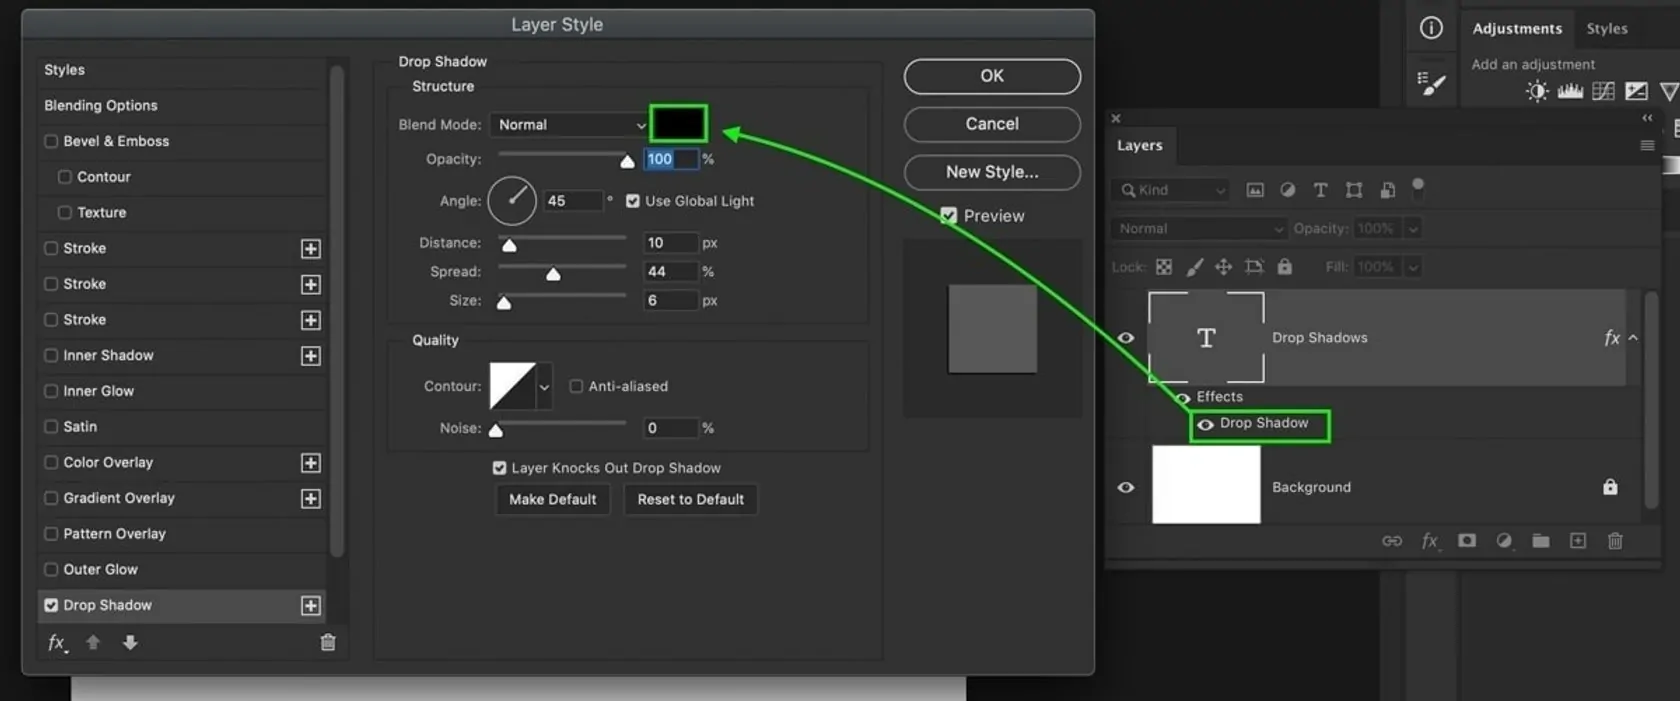
To provide the vinyl record with a 3d formation, apply a drop shadow. Right-click on the vinyl base layer and select Blending Alternatives.
Look into the Drop Shadow choice. Modify the Distance, Spread, and Size sliders until you accomplish a natural-looking shadow that presents profundity to the record.
Play with the Opacity setting to get the shadow which is not too overpowering; almost around 30 to 50 percent.
Utilize the Move Tool to reposition the drop shadow in case fundamental. Make sure it adjusts sufficiently with the light source heading to preserve realism within the lighting.
In case the texture is too pronounced or preoccupying, reduce its Opacity to blend it more smoothly with the vinyl base.
You can also employ a slight Gaussian Blur to the surface layer using Filter > Blur > Gaussian Blur to relax it, guaranteeing it enhances depth without overpowering the overall setting.
Step 6: Enhancing Realism
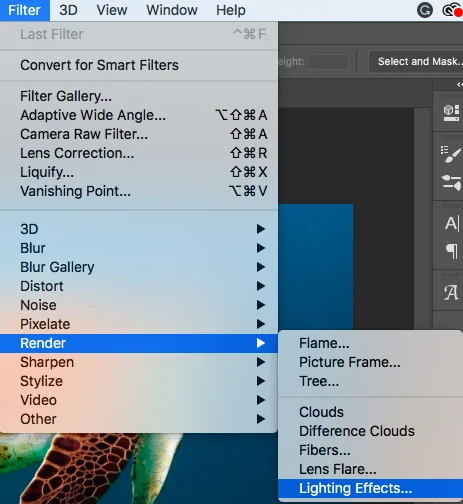
After the vinyl record layer is selected, move to Filter > Render > Lighting Effects to reenact realistic lighting. Within the dialog, select the Spotlight alternative for centered lighting that improves depth. Revise the Intensity slider to around 50 to 75% for a natural appearance.
Set the light source by pulling the light icon within the preview window, putting it at an angle specific for vinyl records, typically from the top left or right side. Adjust the Cone Point to regulate the light spread; a wider angle offers gentler lighting, whereas a smaller one produces more acute highlights.
Increment the shadow settings underneath the light options to get realistic shadows. Change the Opacity, Distance, and Softness sliders for a balanced impact. Regularly preview your moves by toggling the Preview box. Once you are done, tap Ok to apply the effects. At last, save your project via File > Save As in a fitting format.
Conclusion
To sum up, adding a vinyl record effect to an image can give rise to a distinct yet familiar nostalgic vibe, taking the viewer back to the time it emerged. Furthermore, this effect applies depth and texture, like found in classic records, which gives flat images a more realistic 3-dimensional appearance. With careful manipulation of certain aspects, including textures, graininess, digital noise, and light reflections, you can create a captivating vinyl record effect in your images that is appealing for both the viewers who are enchanted by antique artworks as well as the modern viewers who look for something unusual and different.
