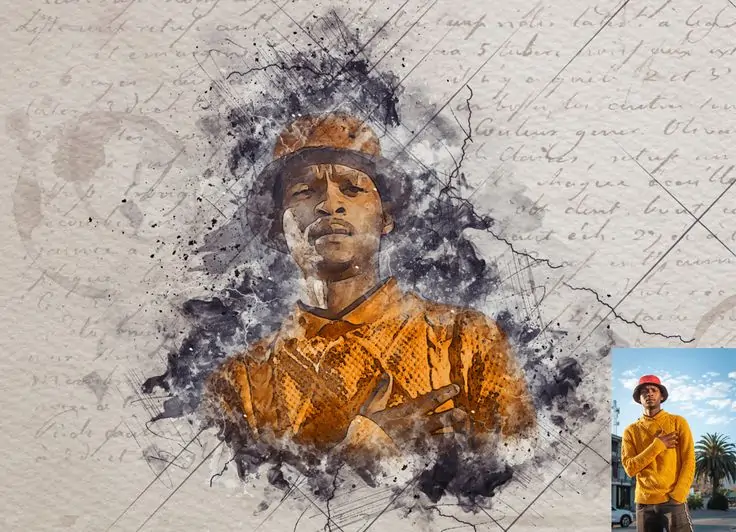
How To Edit An Image Into Mixed Media Art
Mixed media art is an energetic and all-purpose kind of artistic representation that connects different materials and techniques to compose highly pleasing artworks. In contrast to conventional artworks, which depend on a single medium, the mixed media approach adopts multiplicity that facilitates artists to discover enormous mediums and textures. They can use appealing colors, inks, paper or fabric, and even digital images and graphics to create an all-rounder piece of art that is tempting enough to charm a significant number of viewers. In image editing and manipulation, the mixed media approach is excessively recognized to induce novel effects in the photographs. The digital approach to creating mixed media art employs various digital editing tools and practices while uniting traditional artistic themes to add chasm and thrilling textures to the shots. This blog will present the step-by-step process of editing your photographs into mixed media artworks that provide a realistic feel of the tangible art.
Step 1: Determining The Theme
Decide the focus or theme of your mixed media work of art. Whether it’s a scene, portrait, still life, or theoretical concept, having a clear thought of your subject will direct your photo selection process.
Gather an assortment of photographs related to your chosen subject or theme. Search for pictures with interesting surfaces, colors, compositions, or visual components that you can control and combine in your work of art.
Contemplate the feelings or messages you need to communicate through your artwork. Select photographs that inspire the specified temperament or bolster the intended story of your piece.
Choosing high-quality pictures with great resolution and clarity guarantees that your final artwork looks proficient and outwardly amusing.
Make a folder or gallery to keep your chosen photographs organized and effectively open during editing. This can streamline your workflow and make it simpler to discover the pictures you want when you’re ready to begin editing.
Step 2: Executing Initial Settings
Start by assessing the photographs you’ve chosen for editing. Distinguish any regions requiring adjustment or enhancement, such as exposure, color balance, or sharpness.
Launch your photo editing program and import the photographs you need to work with. Prevalent choices include Adobe Photoshop, Lightroom, or free options like GIMP.
Begin by making essential alterations to your photographs, such as altering brightness, contrast, saturation, and white balance. Utilize tools like exposure, levels, curves, and color balance to tune the overall see of each picture.
If necessary, utilize retouching tools to remove any blemishes or distortions from your photographs, such as imperfections, dust spots, or undesirable objects. Avoid exaggerating, as subtle correcting can frequently yield more natural-looking results.
Once you’ve made essential alterations, play with creative impacts and filters to upgrade the temperament or atmosphere of your photographs. Attempt to include vignettes, gradients, or artistic filters to include visual interest and dramatization to your pictures.
Save your work to protect your changes. Consider saving your changes in a non-destructive format like PSD or TIFF, which permits you to retain the initial picture information and make further adjustments afterward.
Step 3: Creating New Canvas
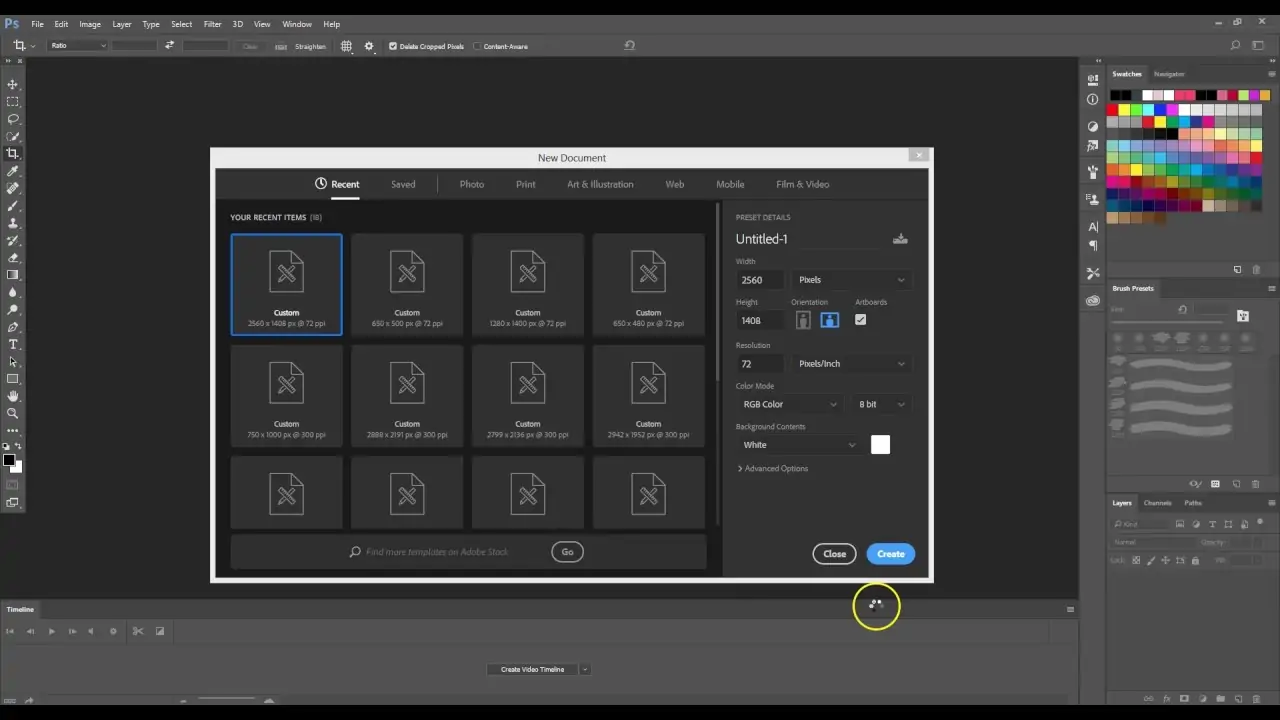
Initiate a new document or canvas in your photo editing program. Indicate the measurements and resolution based on your intended final yield size and quality.
Learn how to use the layer panel or window of your program. It is often where you’ll oversee and organize the different components of your composition.
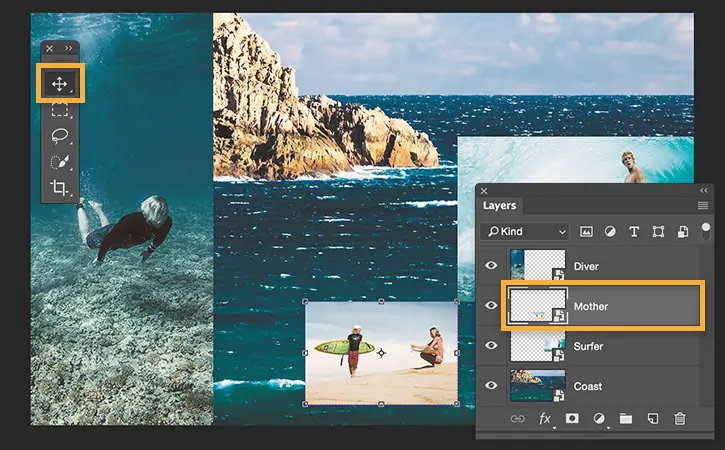
Import the altered photographs you prepared in Step 2 into your new canvas. Each photo will be set on its separate layer, permitting you to control and organize them freely.
Utilize the move tool to rearrange the layers as needed, situating them to make the required composition. Play with distinctive layer arrangements to discover the most visually engaging format.
Try using blending modes to fuse the layers and create interesting effects. Blending modes control how the pixels of one layer are associated with the pixels of the layers underneath it, permitting you to make different blending results like transparency, overlay, or color manipulation.
Gather related layers together to keep your workspace clean and organized, making it less burdensome to supervise complex compositions.
Step 4: Organizing The Images
Utilize blending modes and layer masks to blend your photographs consistently. Play with blending modes such as Multiply, Screen, Overlay, and Soft Light to attain different impacts and make a cohesive composition.
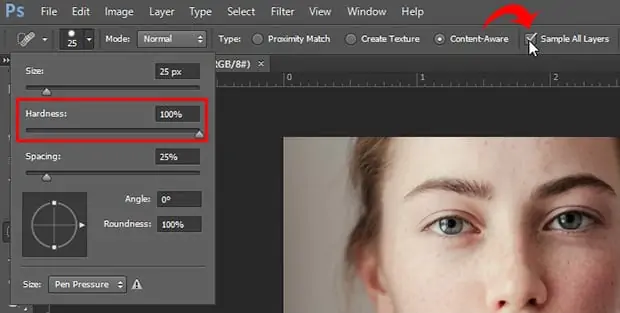
Add layer masks to reveal or conceal specific portions of each layer, permitting you to blend components together more precisely. Use a delicate brush to paint on the layer mask, steadily blending the edges and making smooth moves between diverse components.
Alter each layer’s opacity to control the images’ transparency and intensity. Bringing down the opacity of a layer can make a more subtle impact, whereas expanding it can make the picture more conspicuous within the composition.
Consolidate digital textures or designs into your composition to include profundity and visual interest. Utilize blending modes like Overlay or Soft Light to overlay textures onto your photographs.
Organize your photographs to create a sense of profundity and viewpoint within your composition. Test by layering components within the foreground, middle ground, and background to create a sense of profundity and spatial dimensionality.
Regulate the situation and arrangement of your photographs, altering their size, position, and orientation as required.
Audit your mixed media artwork’s adjustment, symmetry, and visual impact, and then proceed to the next step.
Step 5: Inclusion Of Creative Patterns
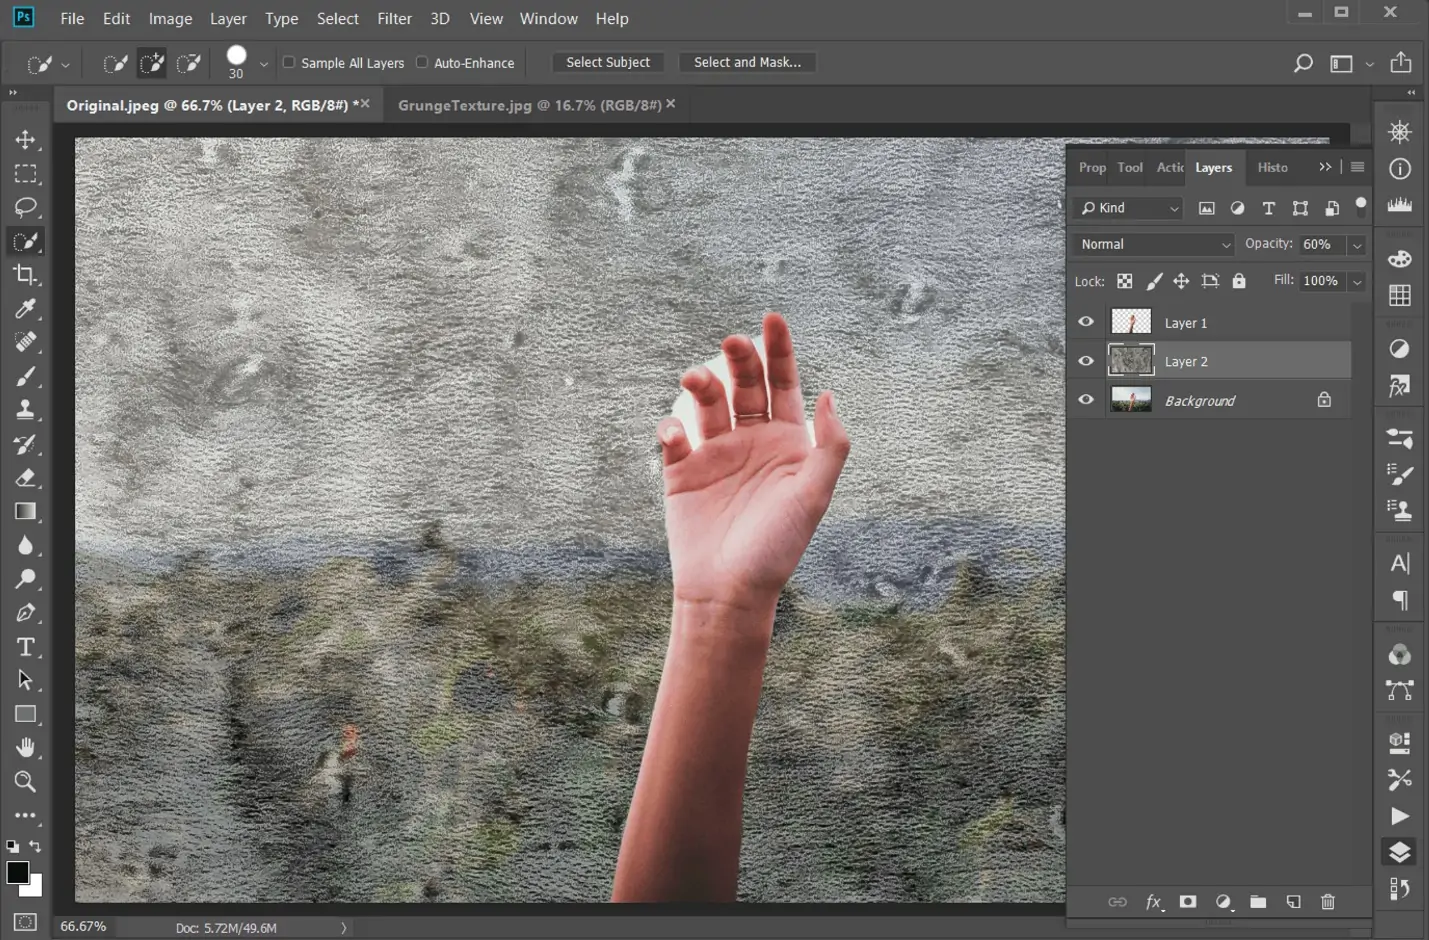
Select digital surfaces or designs that complement your composition and improve its visual appeal. Consider textures like paper, fabric, grunge, or geometric designs that include profundity and appeal in your artwork.
Import the chosen textures into your altering software and put them on partitioned layers over your photos.
To create interesting blending effects, try blending modes and opacity settings, such as Overlay, Soft Light, or Multiply.
Utilize transformation tools like scaling, rotating, or flipping to alter the situation and orientation of the textures.
Employ layer masks to uncover or conceal specific parts of the textures. A delicate brush is used to paint on the layer mask, mixing the textures with the basic photographs for a more common and cohesive look.
Layer different textures or blend distinctive textures to form one-of-a-kind and complex effects. Blend and match surfaces with shifting opacities and blending modes to attain the desired aesthetic for your work of art.
Adjust the texture placement and blending in your composition regarding your artwork’s all-around look and feel.
Step 6: Exploring Creative Effects
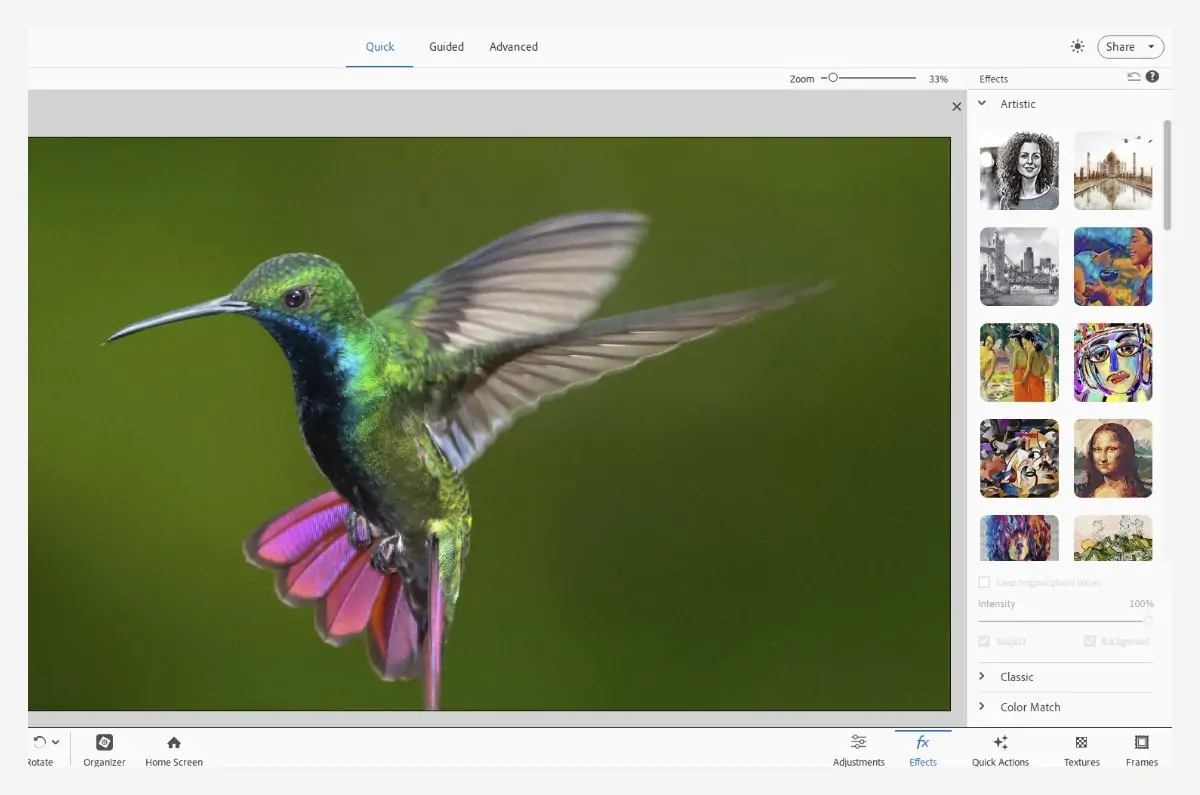
Select digital brushes that complement your aesthetic vision and include inventive touches to your artwork. Consider brushes with shifting textures, shapes, and sizes that permit flexible painting and drawing strategies.
Add custom effects and filters to imbue aesthetic energy to your composition. Investigate alternatives like blurs, distortions, stylizations, and lighting effects to upgrade the disposition and climate.
Utilize advanced painting or drawing tools to add custom components or embellishments to your photographs. Paint or draw subtle elements, textures, or highlights to enhance particular ranges of your composition and add individual touches to your artwork.
Blend your painted or drawn components consistently with your composition’s existing photographs and textures. Utilize blending modes, opacity alterations, and layer masks to conform the new components with the rest of your artwork.
Explore layer styles and effects to add profundity and dimensionality to your artwork. Use effects like shadows, glows, bevels, and embossing to form practical and energetic impacts that accelerate the overall visual effect of your mixed media artwork.
Step 7: The Final Audits

Audit your mixed media artwork thoroughly. Check the balance, agreement, and visual effect, and make any necessary alterations or refinements.
Scan your art closely by zooming in, paying attention to small details and subtleties. Make any last changes to colors, tones, textures, or composition to guarantee that each perspective of your artwork is clean and cohesive.
After you’re happy together with your composition, save your work in a high-resolution format to protect the quality of your artwork. Keep considerable versions of your file as you wish to return to a prior stage or make further alterations afterwards.
When you’re anticipating sharing or printing your work of art, export it as a high-quality picture file in a format appropriate for your intended utilization. Based on your needs, whether for online sharing, printing, or archival purposes, select the fitting file format and settings.
Conclusion
In summary, mixed-media art is an honour to liberate imagination, quest, and inventiveness. It aids artists by offering limitless creative options to voice their thoughts, feelings, and experiences in exceptionally tempting ways. For image editing and enhancement, mixed media approaches can bring forth undying visionary prospects, enabling editors to transform the images into genuinely remarkable digital art pieces. You can attain incredible results by uniting customary artistic techniques with digital editing, regardless of whether you want to wholly change your photographs or just want to add a few fresh adjustments.
