How To Turn A Photograph Into Sand Art
Sand art represents the activity of creating material artworks and patterns in which sand is the primary material to be manipulated. Sand grains are spread over surfaces, including ground, glass, or paper, to form images of natural or artificial settings. Sand art is further classified into different categories, like sand painting, which involves using colorful sand grains to create the desired image or atmosphere. Sand sculpturing is another prevalent form of sand art that is often caught on beaches, with 3D models of different entities made on the widespread sand of nearshore areas. Similarly, sand animation is a renowned genre of this art, which is influential in various fields like music or narration to produce emotional impacts. In the case of digital art, sand art is employed to create innovative effects using sand-like textures or filters to devise the illusion that the photo under-editing was actually drawn on sand. This blog will demonstrate how to transform photographs into natural-looking sand artwork using digital tools and techniques.
Step 1: Image Selection
Start by choosing an image with traits conducive to a sand art effect. Look for pictures with clear subjects and particular contrasts in colors or surfaces.
Assume whether the composition lends itself well to including sand textures. Natural scenes, portraits, or still-life scenes with characterized shapes and fascinating components are frequently perfect choices.
Guarantee that the photo has adequate resolution and clarity to preserve quality when applying digital effects. High-resolution pictures offer more adaptability in altering and giving premium results.
Assess the photo’s general temperament and environment. Decide if a sand art effect would complement the mood or improve the visual effect of the picture.
Be sure that the accomplishment of the sand art effect depends chiefly on the initial photo’s substance and composition. Select an image that rouses inventiveness and offers opportunities for creative interpretation.
Step 2: Image Import
Load Adobe Photoshop on your computer to start the editing preparation.
Head to the “File” menu at the top of the Photoshop interface and click “Open.”
Browse your image files and find the one you chose for the sand art impact.
Tap on the image file and press the “Open” button to import it into Photoshop.
After the photo is opened in Photoshop, it will emerge as a new document with a tab within the workspace.
Get the know-how of the different tools and panels within the Photoshop interface, like the Layers panel, which you’ll use to manage and alter layers.
Spend a minute to evaluate the photo and arrange the steps you’ll take to attain the required sand art effect.
Keep in mind that you can intermittently save your progress by clicking “File” > “Save” or utilizing the keyboard shortcut Ctrl + S on Windows and Command + S on Mac. That guarantees that you keep your work in case of unexpected interruptions.
Step 3: Image Duplication
Find the Background layer Within the Layers panel containing the initial photo.
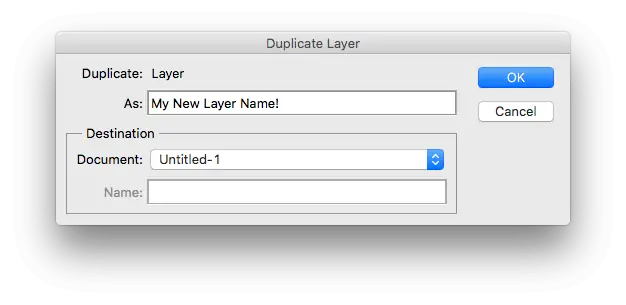
Click that layer and select “Duplicate Layer” from the menu.
The action will make a dialog box appear, cueing you to title the duplicate layer. You can either leave the default name or enter a more expressive one.
Press “Ok” to form a copy layer of the initial photo. This copy layer will be the base for applying the sand art effect, protecting the first photo on the Background layer.
The copy layer will show up over the Foundation layer within the Layers board, with the same title followed by “duplicate” or “duplicate 1,” depending on the number of duplicates made.
Double-click on the title of the copy layer to rename it, making it simpler to recognize and oversee during the editing process.
Take a minute to audit the Layers panel and confirm that the duplicate layer has been chosen and is readied for editing.
Step 4: Using Sand Textures
Get a suitable sand texture image either by making one yourself or sourcing it from online assets.
You can bring the sand texture picture to Adobe Photoshop by moving to the “File” menu, selecting “Open,” and finding the texture file on your computer.
After the sand texture picture is open, utilize the Move tool to drag and drop it onto the photo document holding your duplicated layer.
You can rescale and position the sand texture layer over the photo by clicking and dragging its corners or using the Transform tool.
Alter the blending mode of the sand texture layer to “Overlay” or “Soft Light” from the dropdown menu within the Layers panel.
If necessary, alter the sand texture layer’s opacity to regulate the texture overlay’s intensity.
Utilize layer masks or eraser tools to refine the sand texture overlay, specifically evacuating or blending zones where the effect appears too intense or unnatural.
Step 5: Levels And Curves Adjustment
Access adjustment layers to set the colors and tones of your photo and upgrade the sand art effect.
Include a “Levels” adjustment layer from the adjustment panel to alter the picture’s brightness and contrast. Move the sliders to modify the black-and-white points to amplify the tonal range.
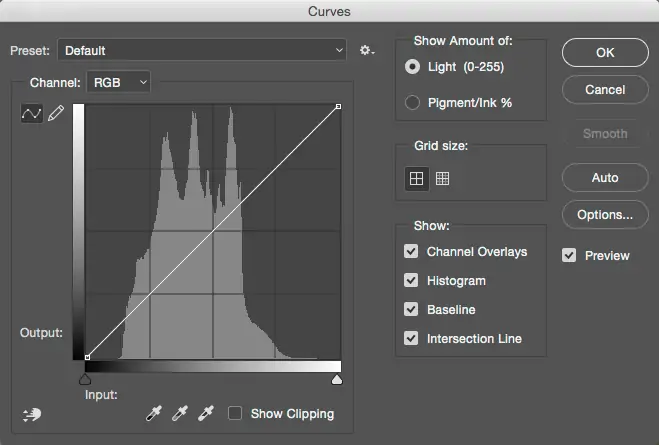
Test with a “Curves” adjustment layer to refine the picture’s contrast and tone curve. Alter the curve by clicking and dragging it to get the specified appearance.
Utilize the “Hue/Saturation” adjustment layer to change the photo’s color balance. Alter the hue, saturation, and lightness sliders to improve or adjust particular color tones in the picture.
Have an inconspicuous approach to adjustments, considering improving the general temperament and style of the photo without overwhelming the sand art effect.
Play with distinctive adjustment layers and settings until you’re pleased with the photo’s prevailing color and tone adjustments.
Step 6: Using Filters
Add filters to the sand texture layer to add authenticity and dimension. Try filters such as “Gaussian Blur” to mellow the edges of the sand grains or “Noise” to present mild texture varieties.
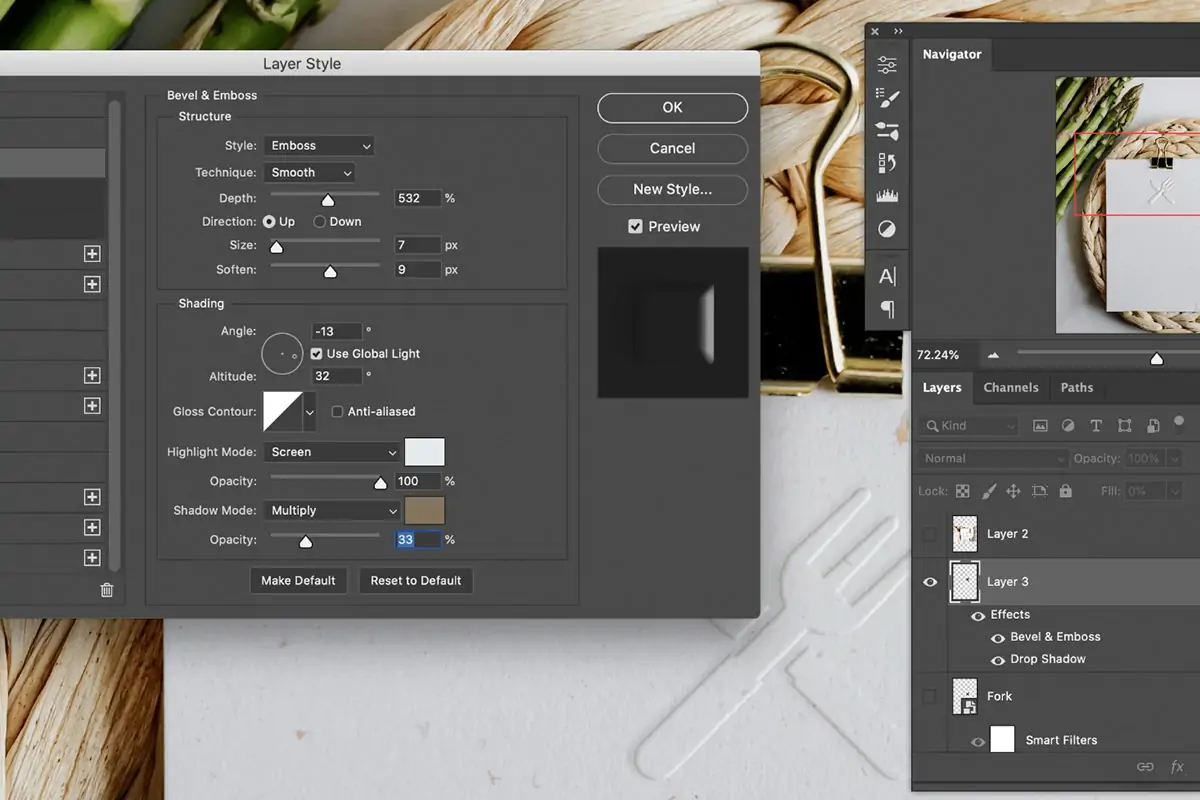
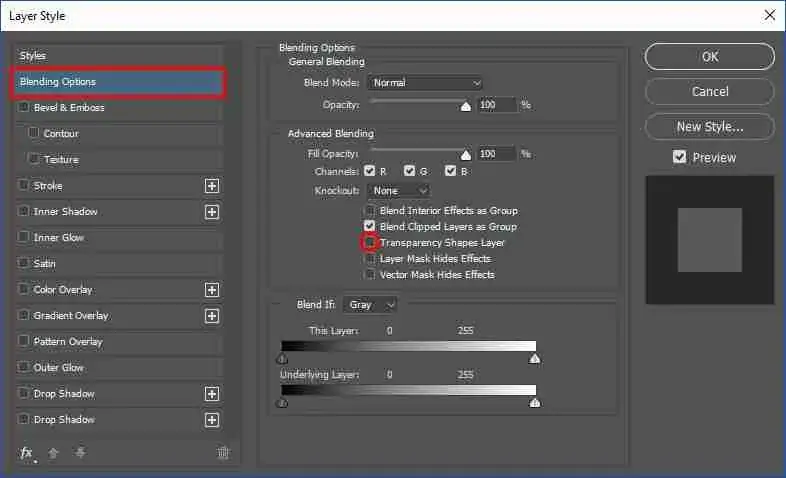
Look into utilizing layer styles such as “Bevel and Emboss” to recreate the three-dimensional appearance of raised sand grains. Tweak the settings to control the profundity and form of the embossing effect.
Try layer blending options to fuse the sand texture layer more consistently with the fundamental photo. Attempt blending modes like “Overlay,” “Soft Light,” or “Multiply” to get distinctive blending effects.
Utilize the “Brush” tool with a delicate brush tip to precisely improve the zones of the sand texture layer. Paint with shifting opacities to include highlights, shadows, or texture specifics where required.
Join stylish texture overlays or components like vignettes, scratches, or grunge surfaces to imitate the weathered appearance of genuine sand art.
Ceaselessly survey the overall formation of the photo and adjust the profundity and surface effects as required to attain a cohesive and outwardly engaging result.
Step 7: Blending Settings
Utilize masking strategies to consistently refine and mix the sand art effect with the fundamental photo.
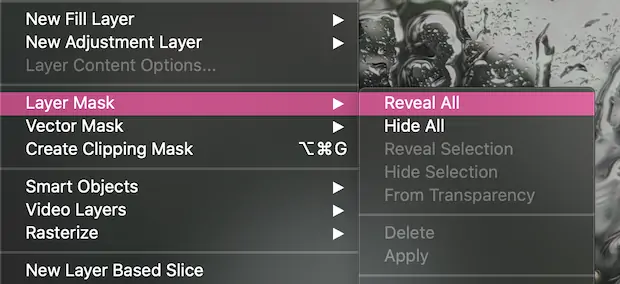
Make a layer mask for the sand texture layer by clicking on the layer mask symbol at the foot of the Layers panel.
Utilize a soft brush with changing opacity to paint on the layer mask, specifically uncovering or concealing parts of the sand texture layer.
Attend to ranges where the sand texture meets the original components of the photo, like edges or transitions between distinctive textures. Use a soft brush to feather these zones for a smoother mix.
Play with different brush sizes and opacities to attain the specified blending level and elegance. Opt for a consistent integration of the sand art effect into the photo.
Zoom in on the image to examine details closely, making alterations essential for a refined result.
Routinely save your work and consider making different adaptations or iterations to compare and select the foremost viable blending techniques.
Step 8: Final Tweaks
Weigh up the overall composition and consider whether any extra components or improvements could enhance the picture’s visual effect.
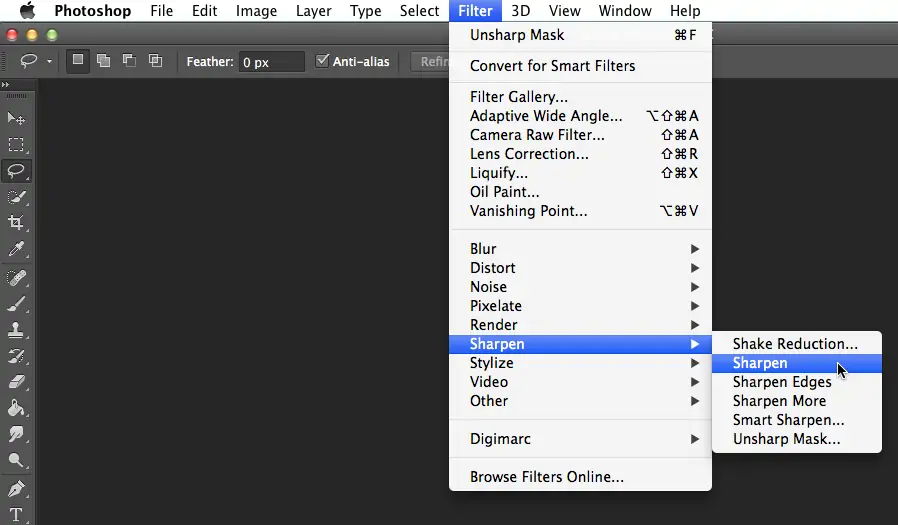
Use the “Sharpen” filter or adjustment layer to improve the clarity and definition of particular zones inside the photo, such as the focal point or critical details.
Play with adjustment layers to tune the picture’s overall contrast, saturation, or color balance, bringing a cohesive and pleasurable aesthetic.
Consider fitting additional components or textures to harmonize with the sand art effect and further enrich the composition. You can include subtle gradients, overlays, or texture layers.
Reassess the picture for any flaws or diversions that will detract from the overall development of the sand art impact. Utilize cloning or healing options to expel any undesirable components.
Compare your final upshot to the initial photo and past iterations to affirm that you’ve accomplished your desired vision for the sand art effect.
Lastly, save your work in a suitable file format and resolution for your planned usage, such as digital sharing, printing, or further editing.
Conclusion
In sum, sand art’s momentary feel, which is its eminent attribute, is the leading cause of its charm that trances viewers in fondness. You can draw enormous art concepts immediately using sand grains on any medium of your choice. The vulnerability and delicacy of sand works bear a great potential to be adored, gazed at, and enjoyed on the spot. Moreover, when this aesthetic approach is applied to digital fields like image editing, the manipulated photographs enable the viewer to relish art’s beauty without fearing its transient or temporary presence.


