


How to Release All Clipping Masks in Illustrator
Quick Answer: To release all clipping masks in Illustrator at once, press Ctrl + A to select everything, then press Ctrl + Alt + 7 on Windows, or Cmd + Option + 7 on Mac. This single shortcut releases every clipping mask in your document instantly, and it does not touch the artwork inside.
When you open an Adobe Illustrator file full of clipping masks, especially an old client PDF or artwork built by another team, the last thing you want is to spend your morning right clicking one mask after another. We have watched designers lose an entire day to this. The good news is that releasing all clipping masks takes one shortcut, and the rest of the cleanup is just two more keystrokes.
In this guide, we walk you through the exact method our design team uses to release all clipping masks in Illustrator in under a minute. You will learn the keyboard shortcut for Windows and Mac, the menu method for complex files, how to handle nested clipping masks, how to ungroup all after releasing, and what to do when the shortcut does not seem to work. By the end, you will clean any masked file with confidence, whether you are editing your own work or preparing client artwork for production.
What Is a Clipping Mask in Illustrator?
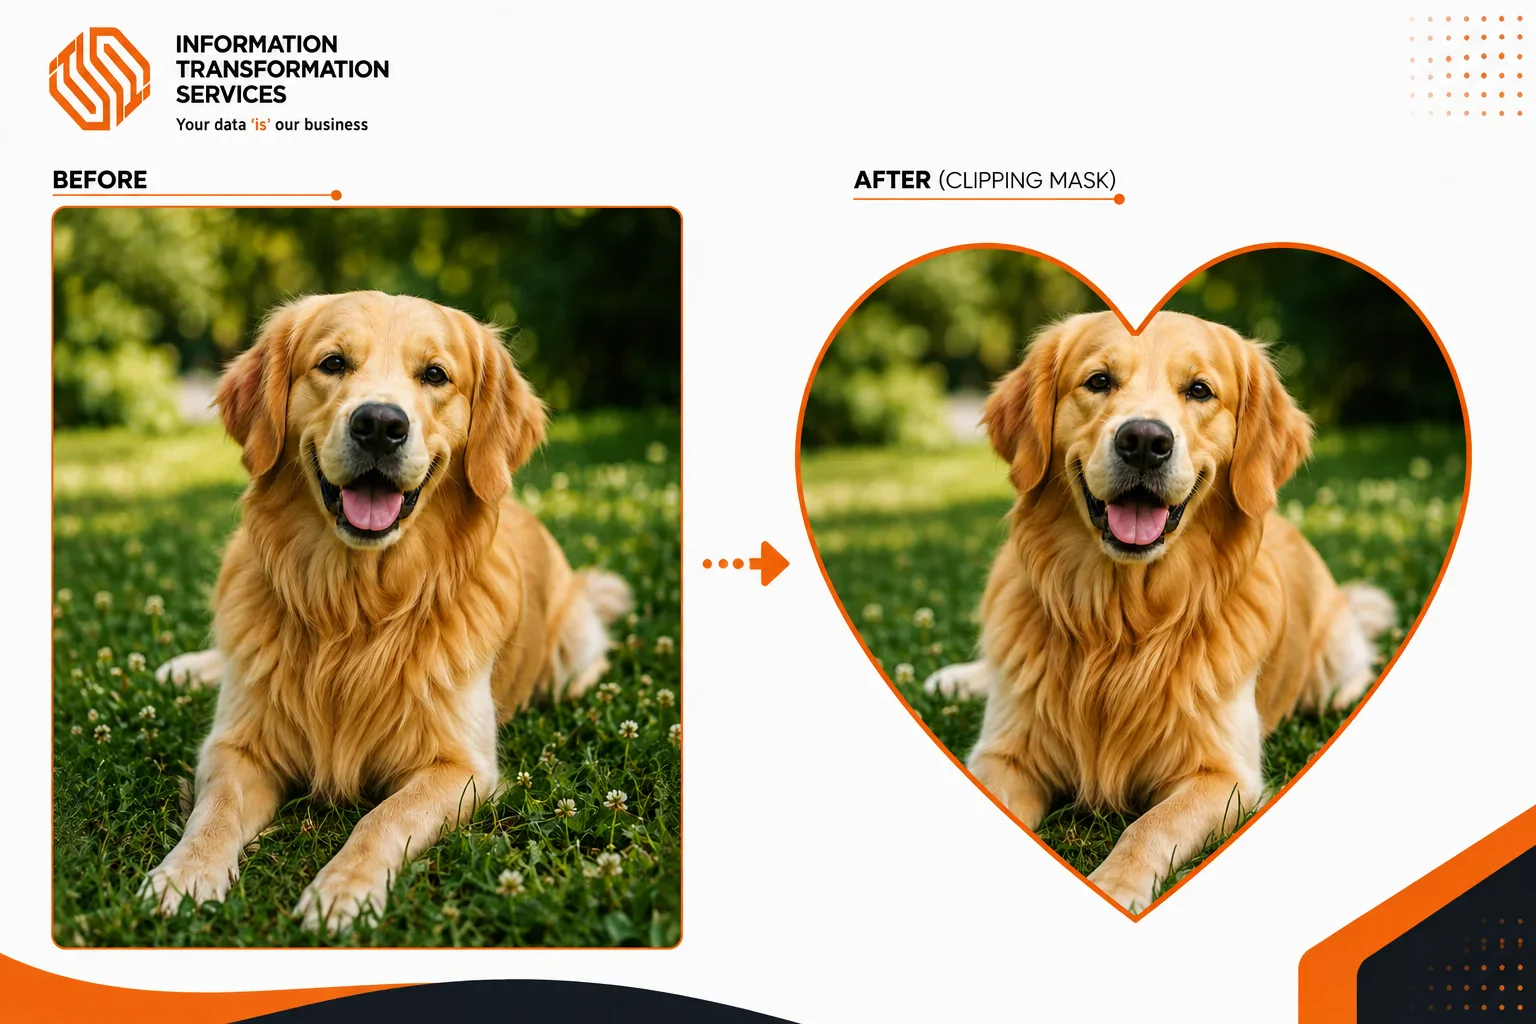
A clipping mask in Illustrator is a vector shape that hides every part of an image or object that falls outside it. Only the area covered by the shape stays visible. Designers use clipping masks for placing images inside text, cropping photos into shapes, and laying out catalog artwork quickly.
When you want to edit that artwork later, the mask gets in your way. Until you release the clipping mask, all the pieces stay locked together, so you cannot move, resize, or recolor them individually. Releasing breaks that link and returns every object to a normal, editable state.
If you only edit files you built yourself, you can release one mask at a time. But if you receive artwork from clients or other teams, as we do every day, the masks are usually many, nested, and locked. That is exactly where the release-all approach saves you.
Release All Clipping Masks in One Step on Windows and Mac
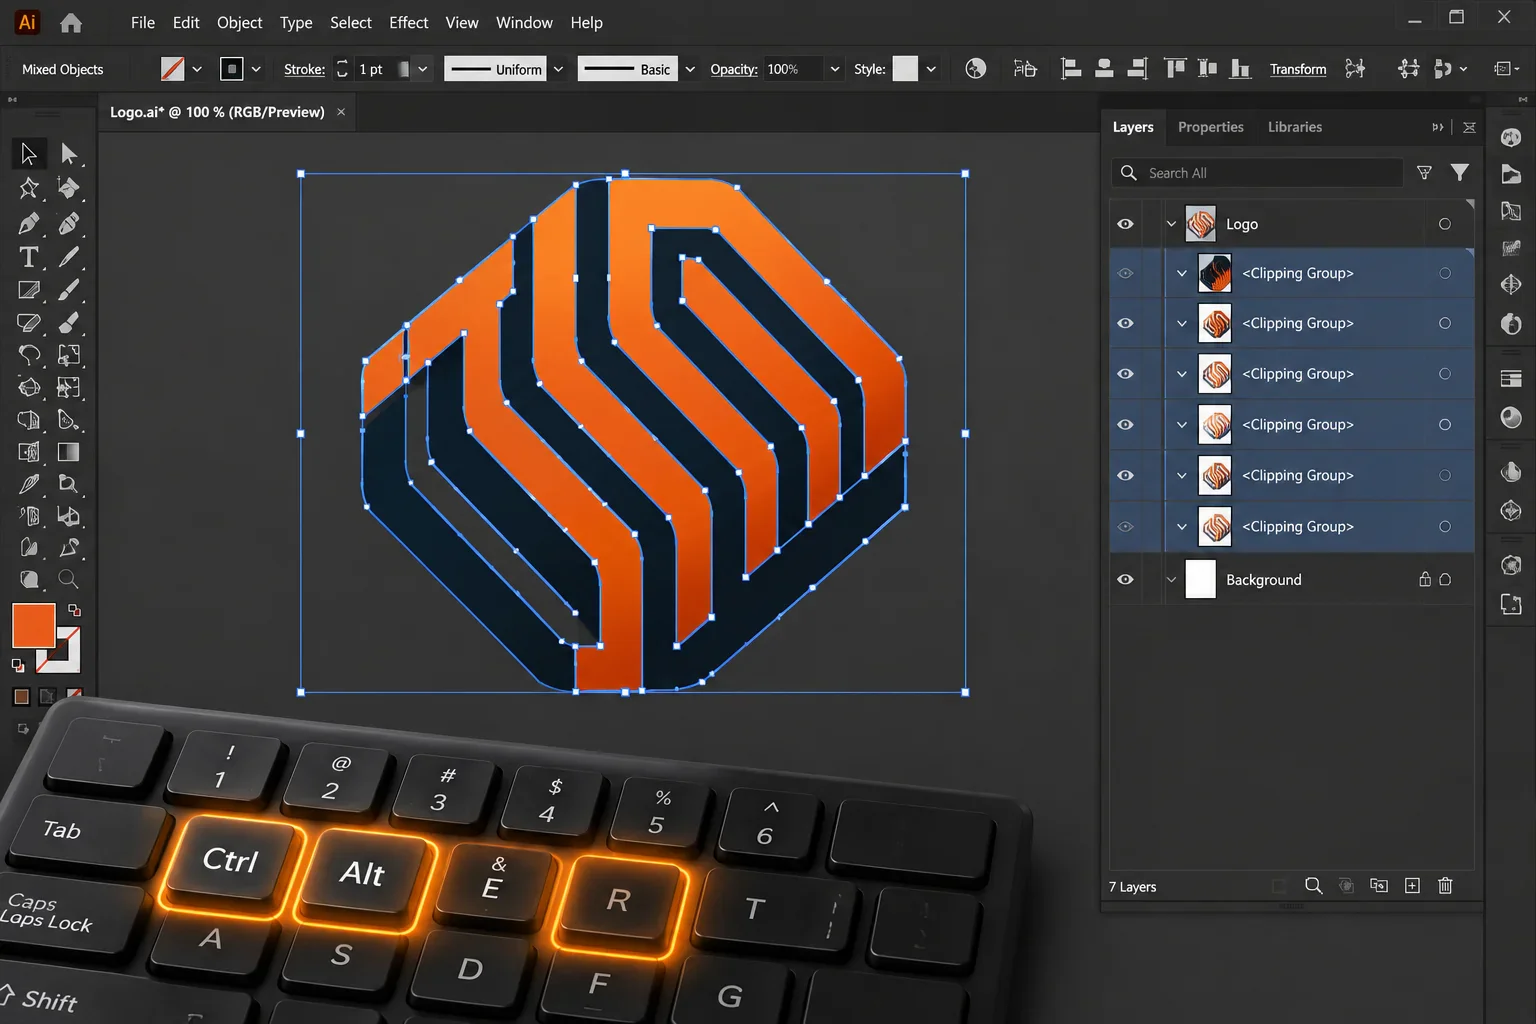
The fastest way to clean a whole document is the shortcut that releases everything in one move.
On Windows, press Ctrl + A to select all objects, then press Ctrl + Alt + 7. On Mac, press Cmd + A to select all objects, then press Cmd + Option + 7.
The key is to select everything first. If you select a single object, the shortcut releases just that one mask. When you select everything, every mask in the document releases at once.
We have used this clipping mask shortcut on files with dozens of nested masks, and it consistently releases them all. Many tutorials only show the shortcut for a single mask, which is why people assume it cannot handle the whole document. It can, as long as you select all first.
Use the Menu Method When Precision Matters
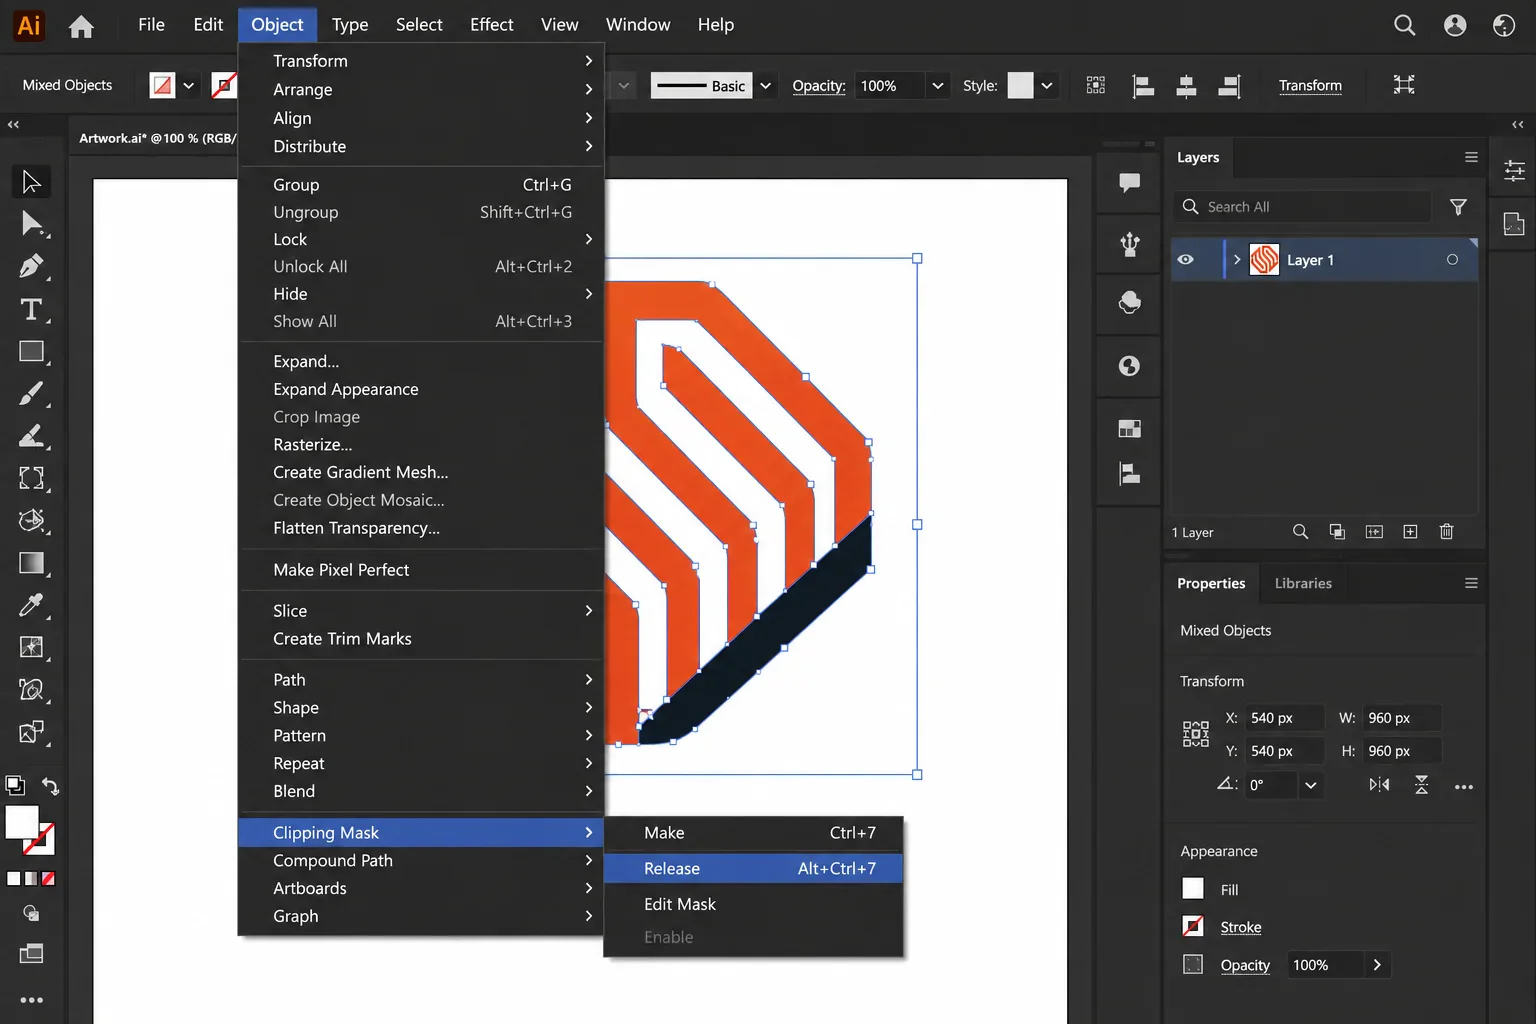
There is a menu route for releasing a clipping mask in Illustrator that gives you more control, and it behaves the same on Windows and Mac.
Choose Select, then Object, then Clipping Masks. This selects every clipping mask in your document without touching any other artwork. Once selected, choose Object, then Clipping Mask, then Release.
I prefer to combine both commands: Select, Object, and Clipping Masks first, then Object, Clipping Mask, and Release. This works even when the keyboard shortcut does not respond, and it lets you see the selection before you release. That is useful on files where you are not sure what is a mask and what is not.
Reach for the shortcut when speed matters and the file is clean. Use the menu method on complex client files when you want to confirm that you are not breaking anything else before you commit.
Release vs Delete: Which Command Should You Use?
Before you start, understand the difference between the two commands, because they change your result.
Release Clipping Mask keeps every object and simply removes the mask. The artwork inside becomes normal, editable shapes again. Use this when you need to keep working on the design.
Deleting the mask removes the clipping path entirely. If you choose Select, Object, and Clipping Masks and press Delete, the masking shape is gone. This is destructive, so we only use it on truly broken files where the mask is no longer useful.
Here is the rule you follow: Release the mask when you plan to keep editing the artwork. Delete it only when you are sure you will never need that clipping shape again.
What to Do When the Release Shortcut Does Not Work
This is the most common question we see around releasing clipping masks, and the answer is almost always one of three simple fixes.
Unlock everything first. Locked artwork ignores every selection and release command. Press Ctrl + Alt + 2 on Windows or Cmd + Option + 2 on Mac to unlock all. Then press Ctrl + A and Ctrl + Alt + 7 again.
Check the Layers panel. Open your Layers panel and make sure the layer holding the artwork is neither hidden nor locked. Click any lock or eye icon that is blocking your layer, then retry the release.
Handle nested masks. If the shortcut released some masks but not others, you are dealing with masks inside masks. The shortcut releases one level at a time, so press it again, or use the Select, Object, Clipping Masks method, until every mask is gone.
How to Handle Nested Clipping Masks
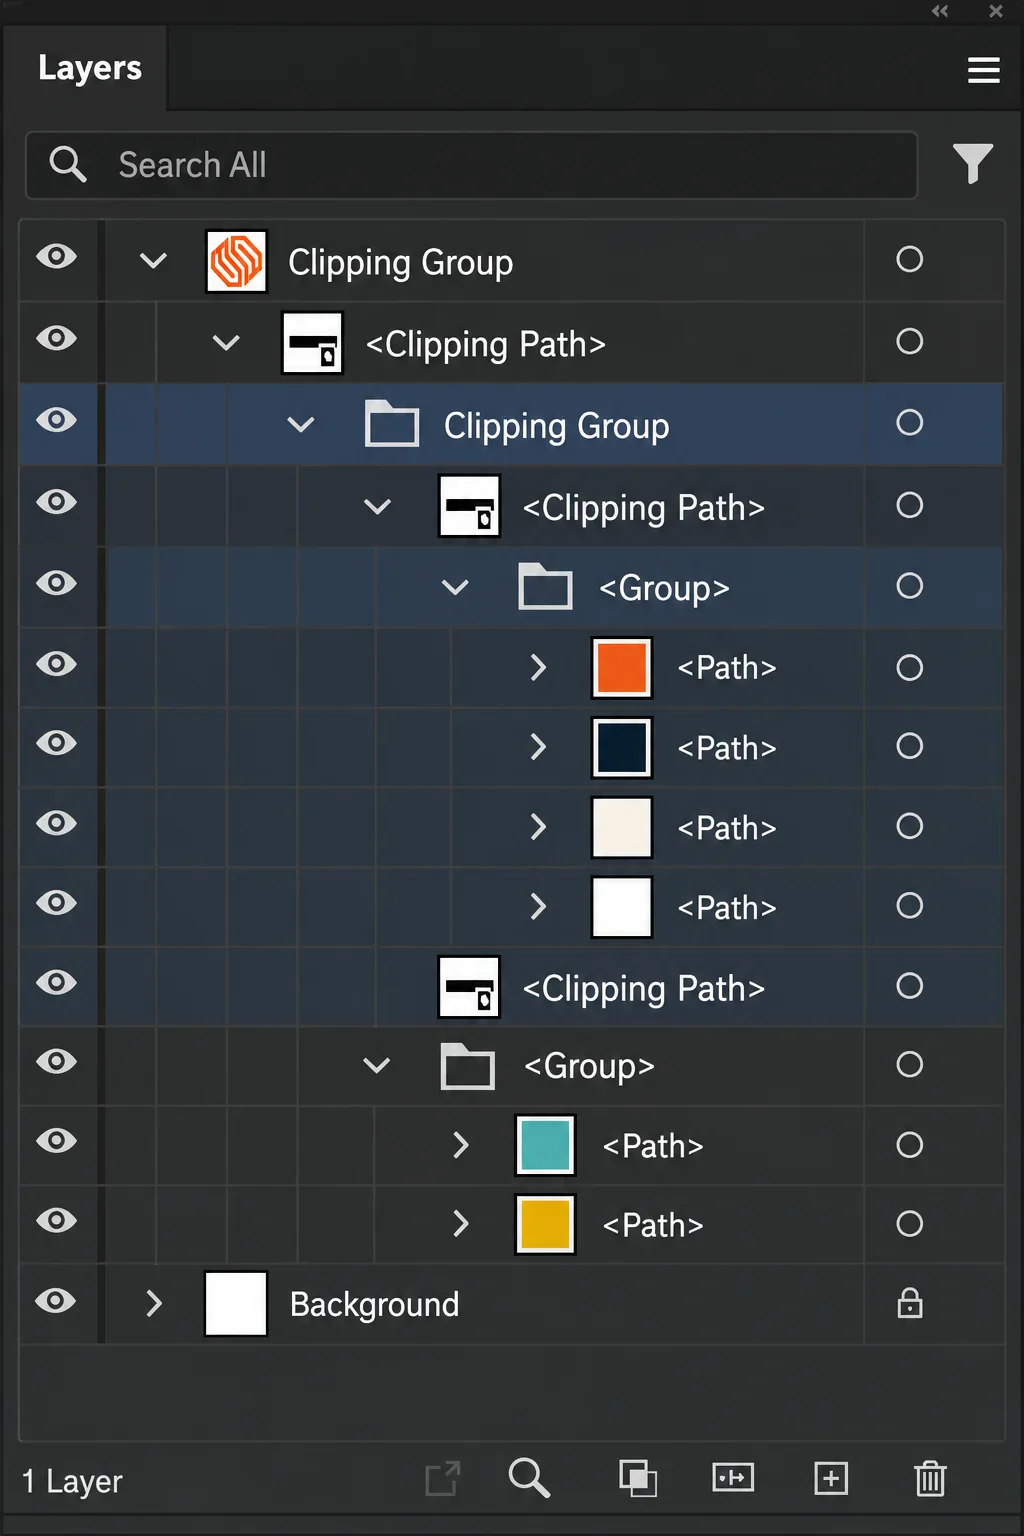
A nested clipping mask is a mask that holds another mask inside it. Files built by other designers, or placed from old PDF files, are full of them. We deal with these daily, and there is a clean way through.
Release them repeatedly. Press Ctrl + A, then Ctrl + Alt + 7 on Windows or Cmd + Option + 7 on Mac, and repeat until the shortcut no longer finds a mask. Each pass strips one level.
Record a quick action for speed. In Illustrator, open the Actions panel, record a new action, and inside it click Object, then Clipping Mask, then Release. Assign this action a custom keyboard shortcut. Now one click releases one level of every mask, which is perfect for files with many nested levels.
Ungroup what is left. Releasing a mask often leaves a group behind. Press Ctrl + Shift + G on Windows or Cmd + Shift + G on Mac to ungroup, and repeat until everything is fully separated.
Ungroup All After Releasing the Mask
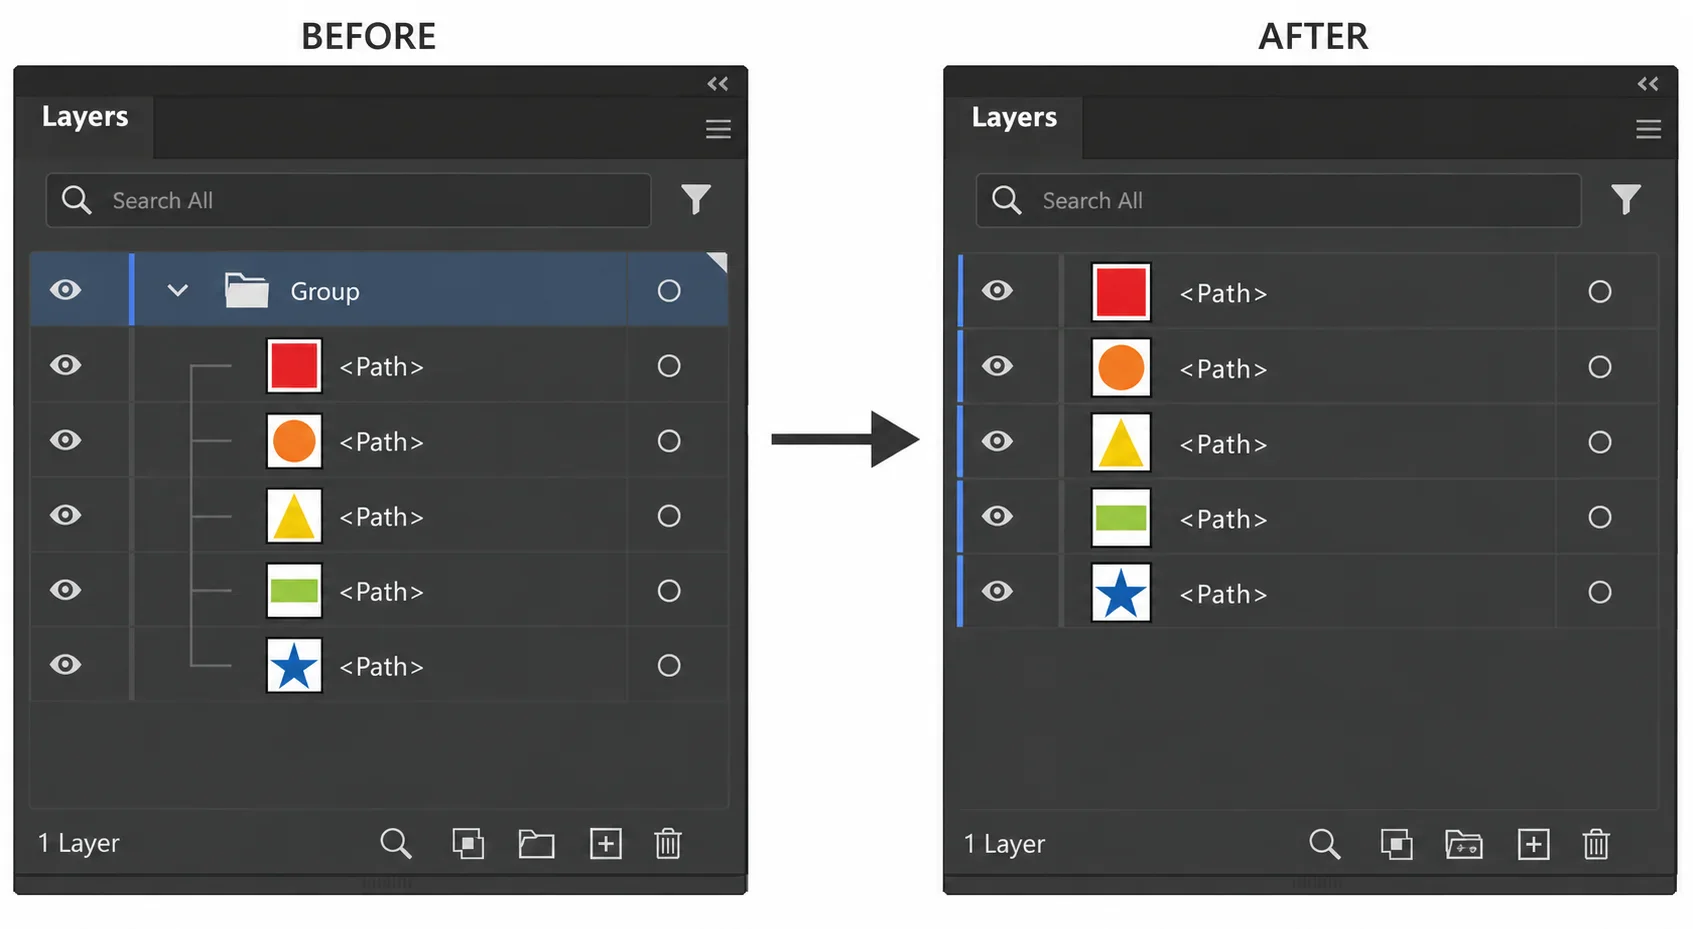
Releasing the mask is half the job. The objects usually stay grouped, which is why the file still feels stubborn. To make everything fully editable, you also need to ungroup all.
To ungroup all in Illustrator, press Ctrl + A to select everything, then Ctrl + Shift + G on Windows or Cmd + Shift + G on Mac. Repeat until every group is broken apart.
The full sequence we use on every cleanup is Ctrl + A, then Ctrl + Alt + 7 to release all masks, then Ctrl + Shift + G to ungroup the leftovers. Run through these in order, and your file behaves like a fresh, editable document.
A Clean Workflow for Client PDFs
This is the exact scenario that frustrates designers, and it is why our production team built a repeatable sequence. When you open an old client PDF in Illustrator and the artwork is locked inside masks, follow this order.
Step 1: Unlock everything. Press Ctrl + Alt + 2 on Windows or Cmd + Option + 2 on Mac. This unlocks all locked objects and layers.
Step 2: Select everything. Press Ctrl + A or Cmd + A on Mac.
Step 3: Release all clipping masks. Press Ctrl + Alt + 7 or Cmd + Option + 7. Repeat if nested masks remain.
Step 4: Ungroup the leftovers. Press Ctrl + Shift + G or Cmd + Shift + G, and repeat until no groups remain.
Step 5: Save a clean copy. Save your updated file with a new name so the original stays untouched
Why this order works: unlocking removes the most common blocker, selecting everything makes the commands apply to the whole document, and releasing before ungrouping means fewer passes. Together these steps turn a long chore into a one-minute routine.
Common Illustrator Mask Problems and Quick Fixes
From daily production work, these are the mask problems we see most often, and the direct fix for each.
Deleting everything outside the clipping mask.
The cleanest way is to release the mask first, then select the shapes you no longer need with the Direct Selection tool and press Delete. This lets you keep the artwork you want and remove only the parts outside the mask.
Unlocking all items in Illustrator. Press Ctrl + Alt + 2 on Windows or Cmd + Option + 2 on Mac. This single shortcut unlocks every locked object and layer in the document at once, so you do not have to click each lock icon individually.
The keyboard shortcut to release a clipping mask. For a single mask, press Ctrl + Alt + 7 on Windows or Cmd + Option + 7 on Mac. If you want to release every mask in the file at the same time, press Ctrl + A to select everything first, and then use the same shortcut.
Removing a clip group in Illustrator. Release the clipping mask using the shortcut or the Object, Clipping Mask, Release command, and then ungroup the remaining objects with Ctrl + Shift + G on Windows or Cmd + Shift + G on Mac.
Why This Matters for Production Design Teams
For design agencies, e-commerce teams, and printing companies, cleaning up masked client files is not rare it is daily. Every hour your designers spend fighting locked artwork is an hour not spent on creative work.
This is exactly the kind of repetitive production task that outsourcing solves. We can receive your raw masked files, clean and organize every layer, and return a fully editable document, so your in house designers stay focused on the work that matters.
Get a Free Quote From ITS for Illustrator Cleanup
Information Transformation Service (ITS) provides professional vector and image production services, handled by an experienced design team using industry-standard software every day. Our 2D and 3D modeling specialists and image editing experts work in Adobe Illustrator on client files daily, so cleaning up clipping masks, layers, and complex artwork is routine for us.
We are an ISO-certified company that has served more than 2000 satisfied clients worldwide since 1997. Whether you need a single file cleaned or an entire catalog of artwork prepared for production, we deliver accurate, consistent results at a competitive price, with quick turnaround and round-the-clock support.