How To Morph A Photo To Sketch
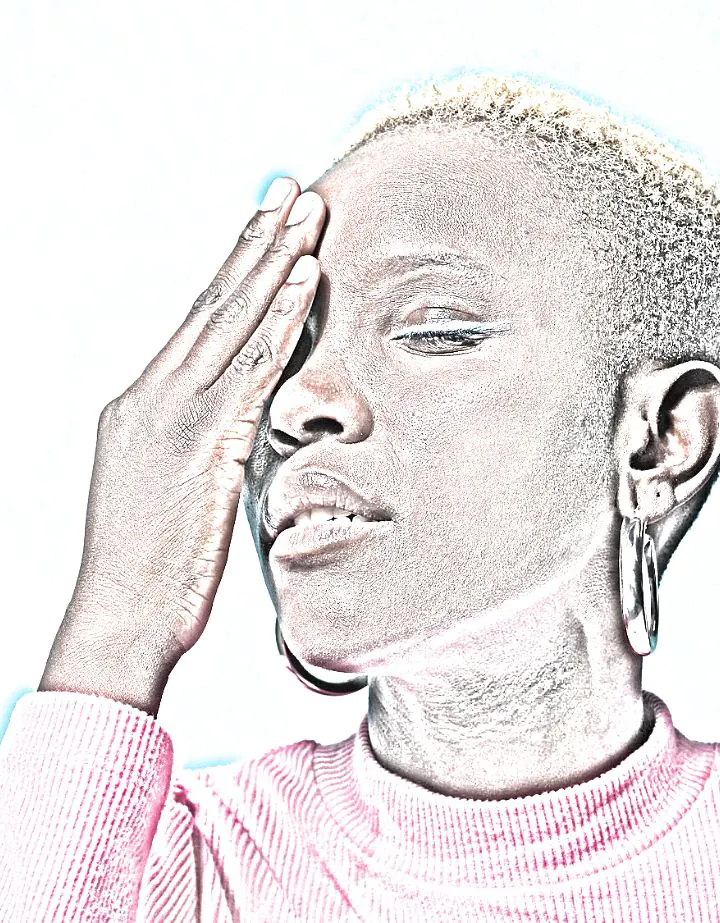
A photo sketch is a digital representation of the image that emulates the sight of a pencil-drawn sketch or charcoal sketch. Usually, a regular photograph is turned into a sketch using variable shades of black, white, and grey. With the advancement of technology, various contemporary image editing software can reproduce the lines, textures, and shading seen in pencil, charcoal, and other forms of hand-drawn sketches by using different filters, algorithms, and amendments. A photo morphed into a sketch withholds the subject and composition of the original image except for transposing it into a charming pencil-drawn or charcoal-like version. Though the subject and composition remain integral, they gracefully transition into a rendition that resonates with the elegance of hand-drawn artistry. This alloy of old and new, classic and modern, offers a fresh lens through which to appreciate visual storytelling. For a precise instruction pattern and applicable steps to morph an image into a sketch, consider the following steps:
Image Selection
Choose images wisely for optimal results:
Step 1: Purpose and Mood: Define the sketch’s purpose and mood, whether a portrait, landscape, or artistic venture. Decide on the mood you wish to convey.
Step 2: Clarity and Composition: Opt for clear, well-composed images. Uncluttered compositions highlight subjects and simplify conversions.
Step 3: Contrast and Details: Select images with subject-background contrast. Emphasize sketches with distinct, detailed elements.
Step 4: Texture Potential: Consider textures like fabric or rough surfaces. They add depth, ideal for a textured effect.
Step 5: Resolution Matters: Higher resolution offers finer detail. Avoid pixelation with high-res images for better sketches.
Preparation
Get your image ready for transformation:
Step 1: Duplicate the Original: Safeguard your chosen image by creating a duplicate. That preserves the original for reference.
Step 2: Adjust Contrast and Brightness: Enhance contrast and tweak brightness if necessary. A balanced contrast brings out sketch details.
Step 3: Crop and Composition: Refine composition with strategic cropping. Achieve focus on the main subject and guide viewer attention.
Step 4: Grayscale Conversion: Shift to grayscale to eliminate colour distractions. That lays the foundation for the sketch.
Step 5: Experiment with Filters: Apply basic sketch filters or presets. Gain a sneak peek into the final sketch effect.
Step 6: Save Intermediate Versions: Preserve progress by saving different versions. That aids comparison and facilitates backtracking.
Step 7: Backup Your Work: Always keep originals and intermediates. That provides a safety net against inadvertent changes.
Initial Sketch
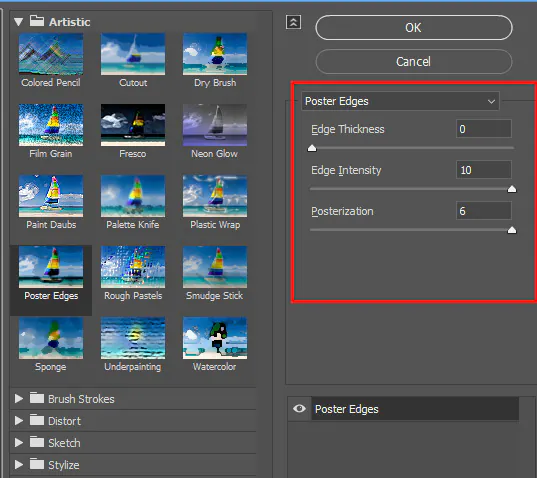
Step 1: Apply Sketch Filter: Apply a basic sketch filter to your prepared image. That will give you a rough sketch outline and help you visualize the direction.
Step 2: Adjust Filter Settings: Experiment with the settings of the sketch filter. Play with parameters like line thickness and intensity to achieve the desired level of detail.
Step 3: Layer Separation: Duplicate your filtered image to create separate layers. That allows you to work on specific elements without affecting the entire sketch.
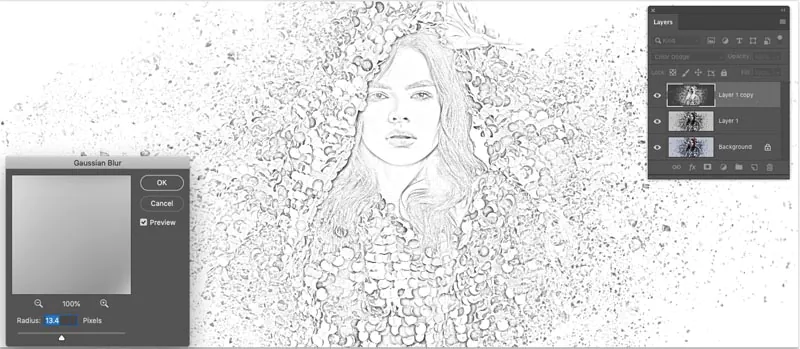
Step 4: Blur and Smoothing: Apply a subtle blur to the background elements of the sketch. That helps create depth and keeps the focus on the main subject.
Step 5: Define Key Features: Using an appropriate brush tool, start defining the key features of your subject. Focus on prominent lines and contours to bring your sketch to life.
Step 6: Erase and Refine: Use the eraser tool to remove unnecessary lines or smudges. Fine-tune the sketch to enhance accuracy and capture the essence of your subject.
Texture Layer
Elevate your sketch with textures. Follow these steps:
Step 1: Duplicate Sketch Layer: Preserve the original by duplicating the initial sketch layer.
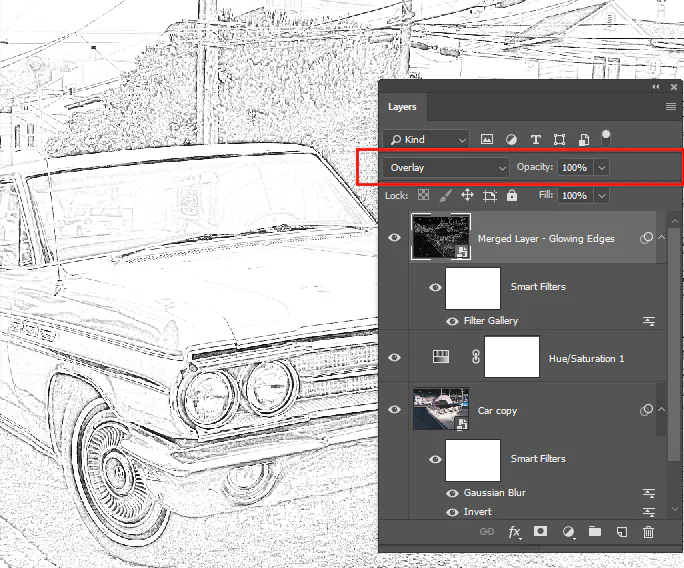
Step 2: Texture Overlay: Overlay a suitable texture using blending modes.
Step 3: Experiment with Blends: Try modes like Multiply or Overlay.
Step 4: Adjust Opacity: Balance texture strength by tweaking opacity.
Step 5: Focus with Masks: Apply texture selectively using layer masks.
Step 6: Blend and Smudge: Use soft brushes to blend texture seamlessly.
Shadows & Highlights
Step 1: Shadow Layers: Create new layers for shadows. Think about the direction of light and where shadows would naturally fall on your subject.
Step 2: Choose Shadow Colors: Select a dark hue that complements the overall tone of your sketch. That will be the base colour for your shadows.
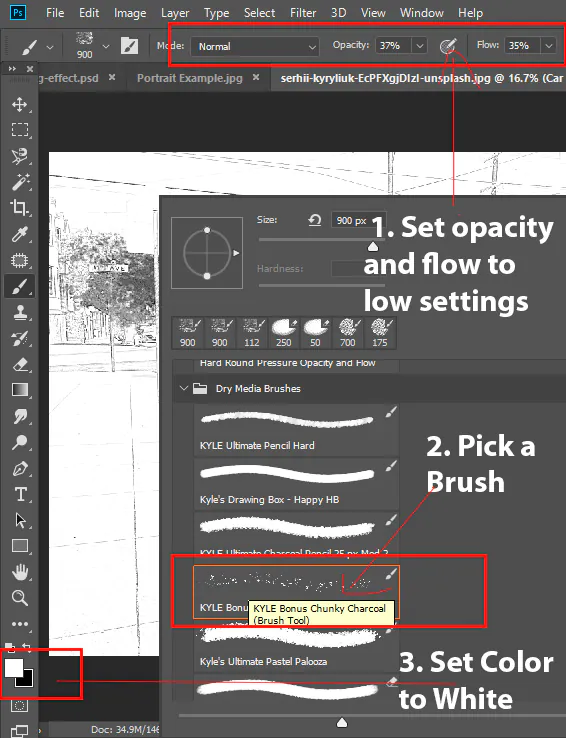
Step 3: Brush Techniques: Use a soft brush with low opacity to gradually build up shadows. Start with a subtle touch and gradually increase intensity for a gradual transition.
Step 4: Highlight Layers: Similarly, create layers for highlights. Choose a lighter colour that represents the illuminated areas of your subject.
Step 5: Blend and Smudge: Blend shadows and highlights using smudging or blending brushes with your base sketch. Soften edges for a natural look.
Step 6: Varying Opacity: Adjust the opacity of your shadow and highlight layers to control the intensity of shading. More opacity for deep shadows, less for gentle highlights.
Step 7: Layer Organization: Keep your shadow and highlight layers separate for easy adjustments. That also allows you to toggle their visibility for comparison.
Defining Lines
Step 1: Line Variation: Alter line thickness for impact. Use thicker lines for primary shapes and thinner lines to add intricate detail and texture.
Step 2: Pressure Sensitivity: Utilize pressure sensitivity on a tablet or stylus. Apply more pressure for bold lines and less for refined detailing.
Step 3: Refining Edges: Elevate edge definition. Intensify lines along outer edges for a distinct and pronounced appearance.
Step 4: Contour Lines: Emphasize 3D form with contour lines. These curves follow object contours, adding depth and dimension.
Step 5: Cross-Hatching: Experiment with cross-hatching for depth. Crisscross lines for a textured effect that adds shading and complexity.
Step 6: Accentuating Details: Highlight intricate areas. Use fine lines to accentuate textures like fur, fabric, or patterns.
Step 7: Negative Space: Enhance composition through negative space. Place lines strategically around your subject for added visual appeal.
Step 8: Step Back and Review: Gain perspective by zooming out periodically. That helps assess your work holistically and guides adjustments for a balanced outcome.
Refinement
Step 1: Zoomed-In Inspection: Zoom in to focus on specific areas. That allows you to work on intricate details and catch any imperfections.
Step 2: Smoothing Out: Using the appropriate brush tool, smooth out any jagged or rough lines. That gives your sketch a cleaner and more professional appearance.
Step 3: Clean-Up Pass: Go through your sketch layer by layer, cleaning up any stray lines or smudges. This attention to detail makes a significant difference.
Step 4: Compare with Reference: If you have a reference photo or the original image, compare it to your sketch. That ensures accuracy and helps you spot discrepancies.
Step 5: Finalize Shadows and Highlights: Fine-tune the shadows and highlights one last time. Adjust their opacity and placement for optimal realism.
Step 6: Balancing Contrast: Ensure the contrast between light and dark areas is well-balanced. That adds visual interest and prevents overly flat or harsh areas.
Step 7: Adding Accents: Add subtle accents using a small brush if desired. These could be highlights on reflective surfaces or small textures for a more authentic look.
Colour Accent (Optional)
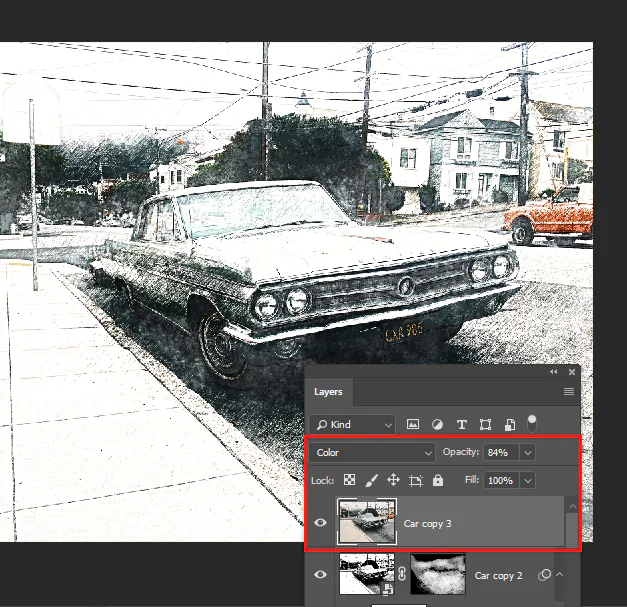
Step 1: Color Selection: Opt for a limited colour palette that complements the sketch’s mood. Choose colours that enhance without overshadowing its monochromatic essence.
Step 2: Color Layers: Introduce dedicated colour layers above the sketch to hold accents while preserving the original. That maintains the core structure.
Step 3: Brush Techniques: Employ a soft, low-opacity brush to delicately apply colour to specific areas. Use this technique to emphasize key features and elements.
Step 4: Blend and Overlay: Using blending modes, harmonize colour with the sketch. Overlay and Soft Light are effective for adding colour without obscuring lines.
Step 5: Balance and Consistency: Ensure uniform colour scheme cohesion. Distribute colour carefully to achieve an overall pleasing visual balance.
Step 6: Selective Coloring: Strategically add colour to elements that naturally possess it, like eyes or clothing, maintaining authenticity.
Final Touches
Step 1: Global Adjustments: Review your sketch holistically and make necessary adjustments. Tweak contrast, brightness, and sharpness to achieve balance and visual appeal.
Step 2: Zoomed-Out Check: View your sketch at a smaller scale to ensure its impact remains strong. Verify that key elements are clear and recognizable even when viewed at a glance.
Step 3: Signature and Watermarking: If desired, strategically add a signature or watermark to safeguard your work while maintaining its visual integrity.
Step 4: Save High-Resolution Copy: Save a high-quality version of your sketch in a lossless format. That preserves its excellence for sharing and potential future modifications.
Step 5: Document Your Process: Share insights into your creative journey, enriching viewers’ understanding of your artistic process.
Step 6: Seek Feedback: Invite constructive criticism from peers to refine your sketch before finalization.
Step 7: Appreciate Your Creation: Take a moment to admire your finished sketch and acknowledge the artistic accomplishment.
Finally, share your polished sketch on various platforms, engaging with your audience and inspiring others.
Conclusion
In conclusion, amidst the current rush of various fancy photo filters and effects, the photo sketch springs up as a unique image manipulation trend that boasts a significant and dedicated fan base. It reimagines the concept of enhancement by rejecting the superficial in favour of a metamorphosis that reimagines an image’s substance. The picture sketch holds a distinctive position in the continuum of creative discovery due to its potential to transform ordinary sights into remarkable ones. Your photographs, encased in the canvas of creative expression of photo sketch, will eventually shine as individual strokes that merge digital and traditional creativity into perfect visual symmetry.
