How To Create Your WordPress Blog In 15 Minutes?
WordPress platform has become the talk of the town these days because of the diversity of action it provides to its users. So if you wish to jump on the bandwagon to create your very own personalized WordPress account, then we have the perfect guide to lead your way. Undoubtedly, WordPress is an extraordinary platform that is both powerful and versatile; you can create a free blog, build your customized business website, market goods, and the list becomes extensive with every useful addition worth trying. Better yet, you can create your free blog in under 15 minutes. We’ll show you how to accomplish this task in this step-by-step guide:
Step 1: Purchase Hosting and Setup Domain Name
Have you already made up your mind about your blog niche? If yes! Then your free WP blog will become readily accessible to a wide audience from around the world. You require two things to complete this task:
Hosting – Every website over the Internet has a hosting provider, In general, this is the engine that powers your WordPress site.
Domain – This is your blog’s permanent address that your users are directed towards. For instance, like ours is its.com. Before setting up your domain name, find out what works for you.
You can purchase a domain name and blog hosting at the same time. Before jumping into it, you will need to select a WordPress host. There are numerous hosts available for WordPress owning to its popularity among users, moreover, we recommend using Bluehost for beginners who are new to the WordPress world.
Process To Sign-up For WordPress Hosting At Bluehost
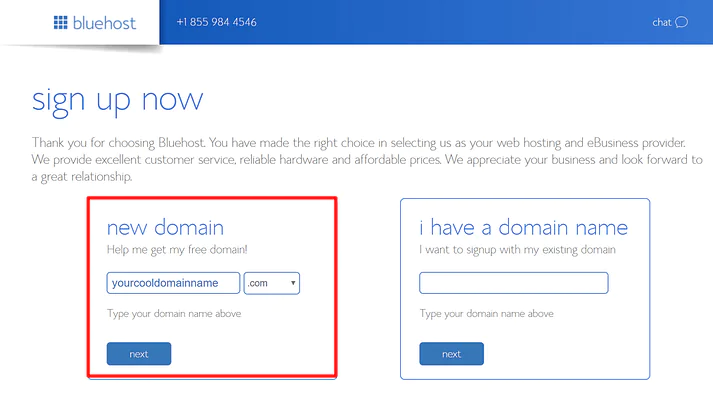
To set up your WP hosting at Bluehost you will have to open the official Bluehost site to unlock their Themeisle user’s special offers ($2.75/month). To land on the Bluehost plan options, you must click on the ‘Get Started Now option. For newbies, we recommend sticking with the basic plan because it offers good control over your blog. Click on the ‘Select’ button to proceed to the next screen. Now you will need to enter your domain name which you want to set up for your blog in the ‘New Domain’ box then click on the ‘Next’ button. Reflect on your blog name if it truly suits your blogging interests and set it up too. In case you are facing difficulties deciding on your blog name then Bluehost has a FAQ section dedicated to this topic for free.
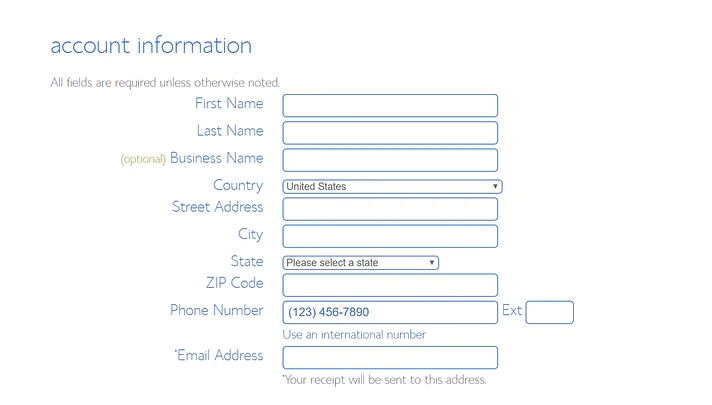
Once you have completed these two steps you will land yourself on the final screen. Here you are required to enter your basic account details and billing details, as shown in the below-attached image:
As you shift downwards, you will see another section waiting to be filled, the ‘Package Information’ section present at the bottom of the screen. Here you will have to decide on the years of hosting service which you wish to purchase alongside any add-ons. You can uncheck any add-ons which are by default selected by Bluehost.
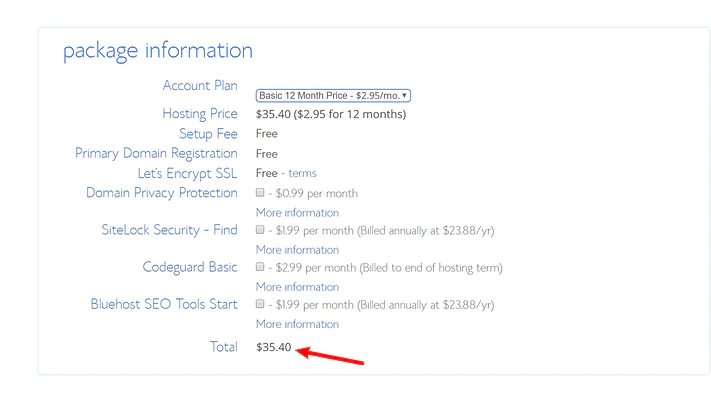
In the end, you will need to pay around ~$35 for your domain name and one year of a hosting plan. Submit all the provided information by clicking on the ‘Submit’ button at the end of your hosting plan purchase.
Step 2: Install Free WordPress Software
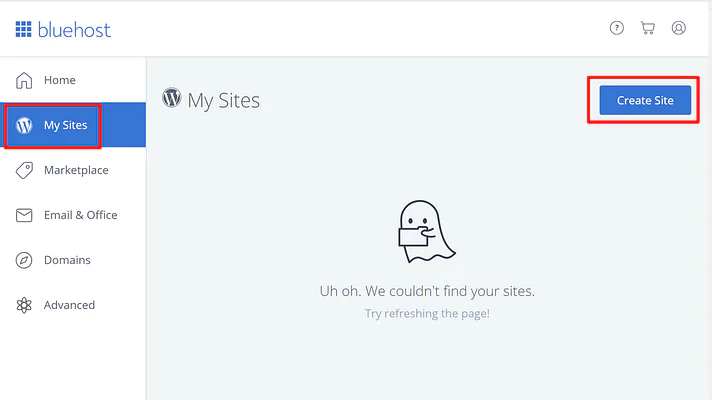
You can not create a WordPress blog without installing WordPress software; therefore, without wasting any more time install and login to WordPress via BlueHost email. You can easily access the BlueHost Customer Area from the received BlueHost email after the previous step. Go ahead and log in to Bluehost. When you complete this action BlueHost will directly take you through the whole WordPress installation process on your new site via a setup wizard. However, if you do not see a setup wizard, you may continue installing WordPress with BlueHost. Go to the ‘My Sites’ section and select the ‘Create Site’ button to launch the setup wizard:
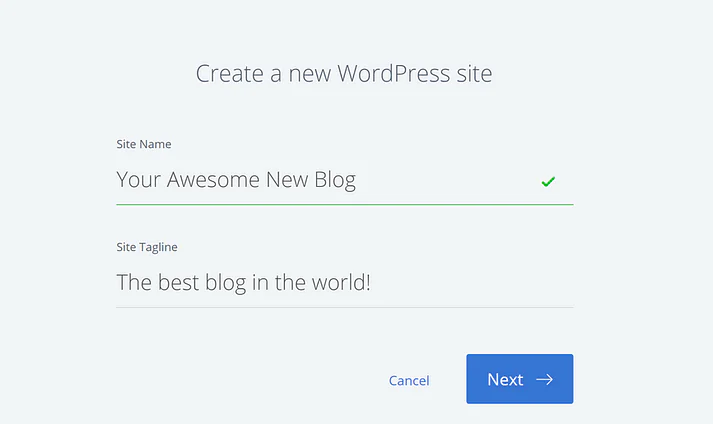
Later on, you will come across an important section about your site’s name, username, and password, which requires careful filling. This will ultimately decide how you will manage the WordPress blog:
Once you are done with the WordPress installation process, you can directly access your brand new blog’s dashboard via the yourdomain.com/wp-admin link.
Step 3: Go Ahead And Write Your First Blog Post
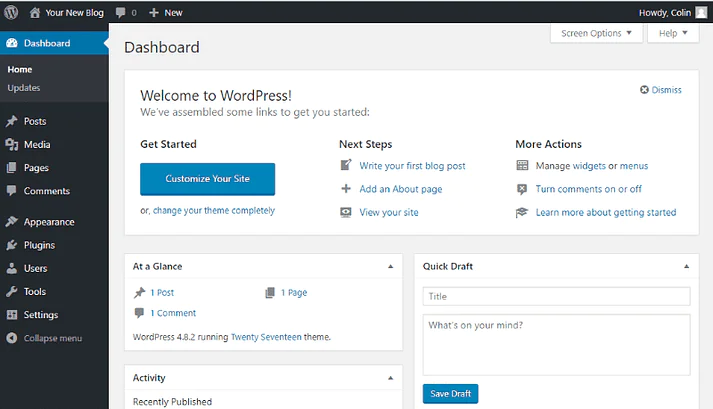
We are done with creating a new WordPress blog with just two steps, and we know how excited you are to get things going, but before that, you must learn to maintain your WordPress blog as well. We will show you how to change functions and add new looks to your blog within seconds. For this, you will have to go to your WordPress dashboard, which will look something like this:
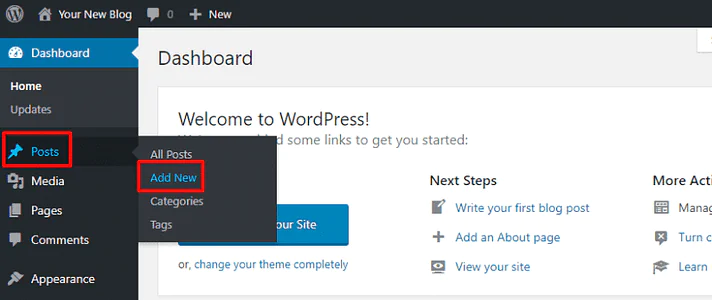
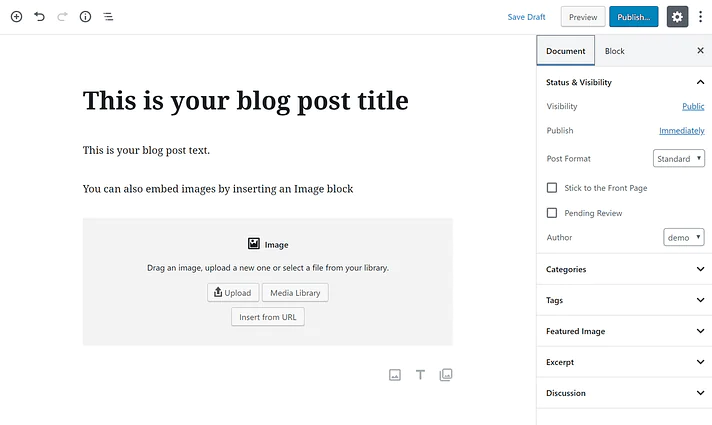
To write a blog post, you will need to:
Hover over Posts
Click Add New
As a result, WordPress Editor will be launched this lets you write blog posts using a block system. You can simply add text by clicking on the screen and typing. For including other files like images or videos, you can go to add ‘Blocks’.
Step 4: Change Your Blog Outlook
You get to access a large collection of themes and plugins as soon as you create your blog at WordPress. Themes are blog looks that you can easily set up according to your WordPress domain and plugins are system software that boosts your blog functionality. When your blog is created you already get an active theme by default. You can change it according to your domain or taste. There are thousands of WordPress themes that are available for WordPress sites, which involve open source themes as well. You are not only limited to a few themes that BlueHost shows you at the initial steps.
Where to find WordPress themes for your blog?
When you are ready to select a customized WordPress theme you can look into both free and premium ones. There is not much difference between the two, but the latter has more advanced features. The best place to look for free themes is the WordPress.org themes directory where you can find some suitable options to consider for your site. To get your hands on some fancy premium themes, you will require a much broader approach; some noticeable options are:
ThemeForest and Themelsle A large directory specially designed for premium themes.
How To Install A WordPress Theme?
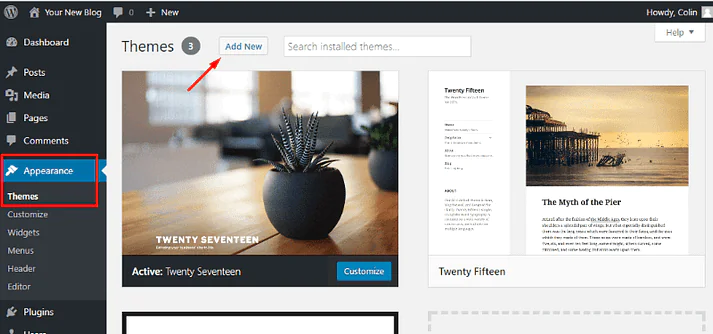
Once you have found your desired theme, you need to add it to your WordPress site; for this you will have to:
Go to ‘Appearance’
Select the ‘Themes’ section
The click on the ‘Add New button
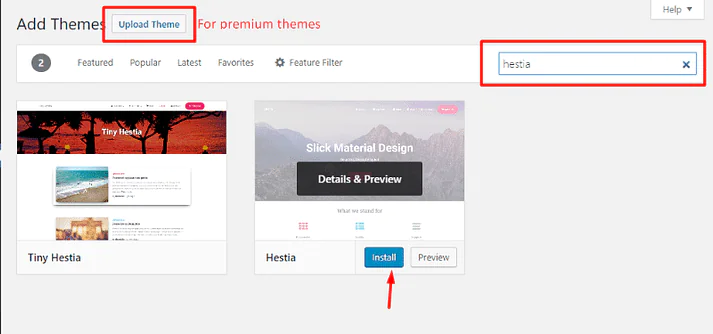
To choose a free theme for your WordPress blog, simply go to WordPress.org and search for the theme by its name, then click to install.
If you have decided to purchase a premium theme then click on the ‘Upload Theme’ button. From here, you can upload your ZIP file, which you must have received when you purchased this theme.
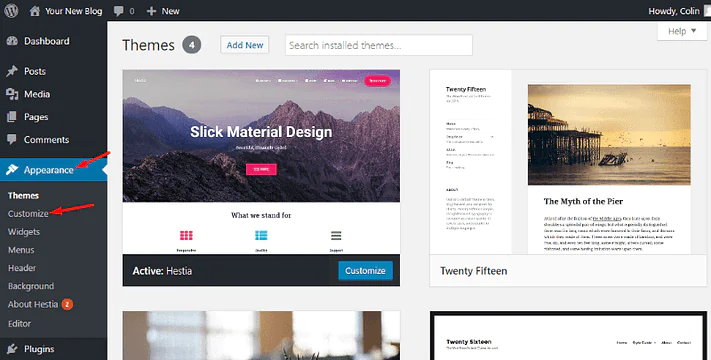
After successful installation of your WordPress theme, you can activate it by clicking on the ‘Activate’ button and it will be live on your site right that instance.
How to further customize your WordPress theme?
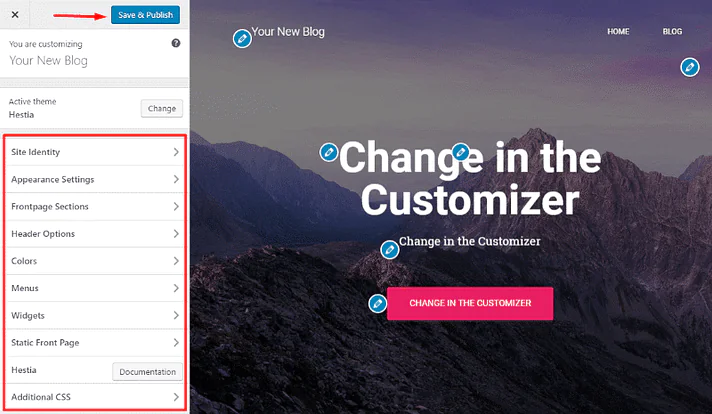
You can even take your theme one step further by customizing it to your liking using the WordPress Customizer. It supports an easy-to-use user interface and enables you to customize your themes to your command. WordPress Customizer helps to improve your web design without HTML or complex code. To do this, you need to perform Appearance → Customize:
By depending on certain themes of your choice, you will have access to different options in the sidebar, but there are a few general features that you can use with almost every theme:
Change the theme by using the list of the available options present on the left sidebar.
Get a real-time preview of the theme on your site on the website preview on the right.
Make sure that all your edited changes are properly saved and published by clicking on the ‘Save and Publish button.
Step 5: Here’s how to add functionality to your blog
Where themes are linked to only your on-site appearances, plugins usually focus on adding more functionality and support to your free WordPress blog. When you specifically create a WordPress blog, it includes all the abilities to write commendable blog posts and create pages. Plugins allow you to add more functionality, such as:
Contact forms
Social network options
Manual Support and Backups
Improved SEO and more
There is always a plugin for every feature you can think of; this is because the WordPress community expands 50,000+ free plugins which include premium options as well.
Where To Find WordPress Plugins For Your Blog?
There is a huge variety of plugins available for WordPress including both free and premium plugin options. We recommend looking at the official WordPress.org plugin directory for unlimited options. To search for premium plugins the best way is to go to the Google search engine and type ‘Best X (any type) Plugin’ and purchase from a professional developer. There are various amazing premium versions available at WordPress.org as well.
Must-Have WordPress Plugins For All WordPress Sites
You can find plenty full of really versatile plugins belonging to every niche. Every plugin performs a special action and is good for specific uses. We have sorted out a list of a few must-have plugins for your convenience that are workable for all sites, including blog posts. Here are some of the most anticipated WordPress plugins:
WP Super Cache
Yoast SEO
WPForms
Optimal
UpdraftPlus WordPress Backup Plugin
Google Analytics for WordPress by MonsterInsights
Wordfence Security
Jetpack by WordPress.com
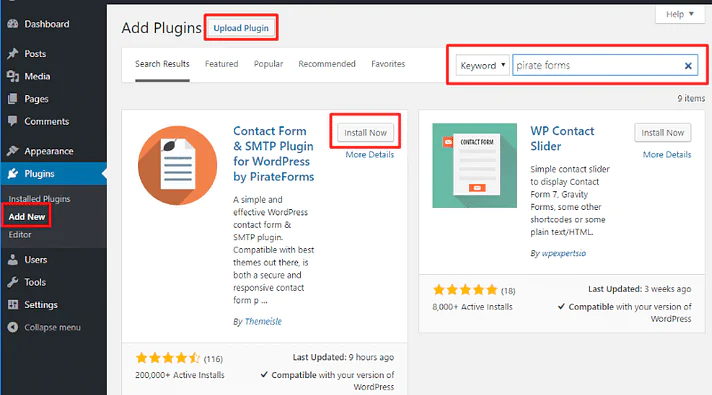
How to install WordPress plugins?
Here is a quick and detailed review on how to install your WordPress plugins:
Perform Plugins → Add New
In case of selecting a free plugin at WordPress.org search by name and click to install ‘Now’.
If you plan to purchase a premium plugin then you can click on the ‘Upload Plugin’ button and upload your ZIP file which you will receive as soon as you purchase the plugin.
You can instantly activate your plugin by going to the Plugin tab.