How To Create Transhumanist Art
Transhumanist art applies to the artistic movement that captures the phase of transhumanism, the shift from human to transhuman to posthuman. In the late 20th century, when contemporary art and traditional aesthetics predominated, transhumanist art questioned the artist’s place. Transhumanist art, which was first used in 1983, proposed artists a platform to nurture futuristic aspirations and imaginative thought in a time of scientific and technical advancement. This art is free from medium specifications; all works are created on the basis of imaginative potential. The assertive efforts by which artists remove conceptual barriers to broaden the field of human creativity are central to transhumanist art. In image editing, this art approach is extensively clasped to create futuristic and interactive art compositions that reveal the expanding mark of technology in modern man’s life. This blog will focus on the steps to be operated while creating exciting transhumanist art that fuses imagination and reason.
Step 1: Base Image Selection
Pick a high-resolution image of a human subject that lines up with your creative vision. Make sure the image has great lighting and clear details to encourage detailed editing.
Determine key areas where transhumanist components will be added, like the eyes, limbs, or skin. Check out the angles and lighting for unified integration.
Make a duplicate of the initial photo to preserve it in case you wish to return to the unedited form.
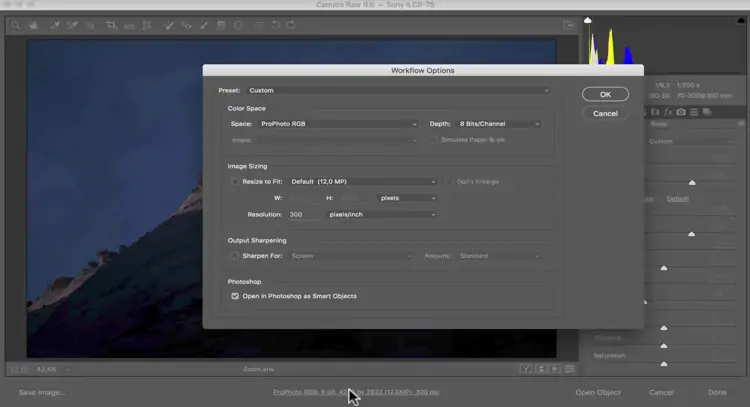
Launch Photoshop and make a new project. Use your chosen image as the base layer.
Organize your Photoshop workspace with fundamental tools like layers, brushes, and adjustment panels for simple access.
Alter the brightness, contrast, and sharpness to guarantee the base picture is clear and dynamic. It helps make the included components more natural.
Utilize masks to separate the subject from the background if essential, permitting more meticulous editing and the inclusion of transhumanist components later on.
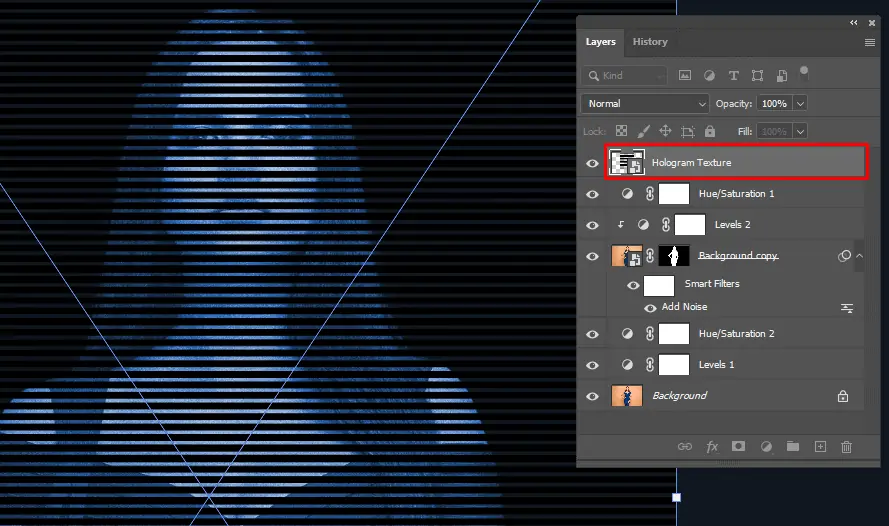
Step 2: Arranging Elements In Layers
In Photoshop, make numerous layers for different components you will be including. It helps with non-destructive editing and simple adjustments.
Clearly name each layer that concurred with its purpose, such as “Cybernetic Eye,” “AR Interface,” or “Skin Upgrade,” to keep your project assembled.
Use adjustment layers for changes like brightness, contrast, and color balance. These layers can influence all layers beneath them without modifying the initial image.
Gather related layers together or all components related to a cybernetic arm to streamline your workflow and make it simpler to oversee complex alters.
Try different blending modes, considering Overlay or Soft Light, to get the required effect for each layer. Blending modes can help blend new components consistently.
Set the opacity and fill levels of each layer to control the intensity of the included components, guaranteeing they mix naturally with the base image.
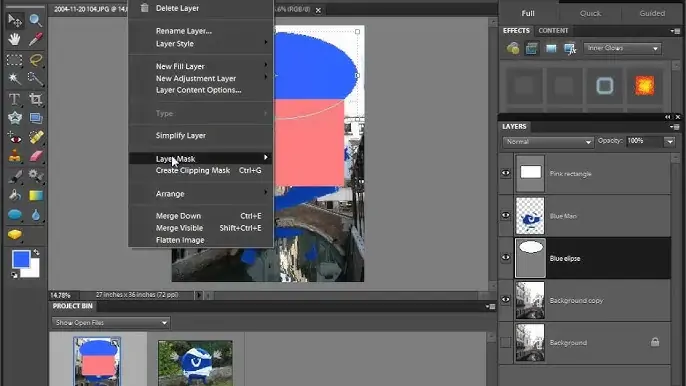
Utilize layer masks to cover up or uncover parts of a layer without erasing any content. This strategy permits precise editing and smooth moves between the base image and the included components.
Step 3: Adding AV Features
Begin by creating new layers, particularly for augmented reality (AR) components, such as digital interfacing or holographic shows.
Utilize tools like the Shape tool, Pen tool, and Text tool to design AR elements. That might incorporate screens, data overlays, or interactive buttons.
Join futuristic textual styles and icons that speak to digital interfacing. Alter their size, color, and opacity to fit the layout aesthetic.
Access the Perspective Transform tool to make AR components match the perspective and angles of the base picture, making them appear integrated and reasonable.
Include outer glow, shadows, and other layer effects to give AR components a holographic or lit-up see, enriching their futuristic dimension.
Utilize blending modes like Screen or Lighten to create AR components that look as if they are part of the environment, guaranteeing they don’t look out of place.
Revise the position and orientation of AR components to guarantee they fuse naturally with the subject, such as a holographic display emerging from a hand or eye.
Step 4: Incorporating Cybernetic Fragments
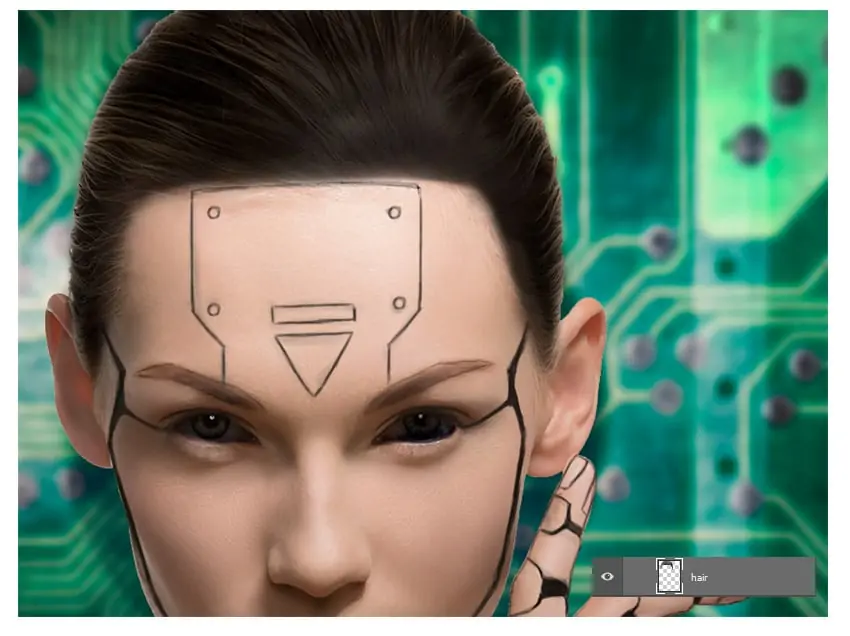
For each cybernetic increment, make sole layers. Name them clearly, like “Robotic Arm” or “Mechanical Eye” for an orderly workflow administration.
Utilize the Pen and Shape tools to draw robotic parts. On the other hand, pre-made cybernetic component pictures or 3D models can be imported.
Apply the Perspective Transform tool to adjust cybernetic parts with the subject’s body. Check that the parts conform realistically with the body’s angles and posture.
Include surfaces like metal or circuitry utilizing texture brushes or pattern overlays to form the cybernetic parts that look natural and detailed.
Utilize blending modes like Multiply or Overlay to correspond the cybernetic parts with the subject’s skin and clothing, making a consistent look.
Utilize the Brush tool with soft edges to include highlights and shadows, giving profundity and dimension to the cybernetic improvements.
Vary the opacity and fill of the cybernetic layers to blend them perfectly with the base picture. Utilize layer masks to refine edges and confirm the edits appear natural and cohesive.
Step 5: Including Biotechnological Alters

Build up new layers for each biotechnological modification you want to include, such as genetically enhanced highlights or bio-luminescent skin designs. Name these layers for easy recognizable.
Use tools like the Brush tool and Shape tool to form biotechnological features. You can too utilize custom brushes for special surfaces like bio-luminescence or organic designs.
Utilize the Color Balance, Hue/Saturation, and Gradient tools to apply dynamic, otherworldly colors to the biotechnological modifications, making them stand out and seem futuristic.
Apply surfaces such as scales, glowing patterns, or modified skin utilizing surface brushes or image overlays. Utilize blending modes like Overlay or Soft Light for natural blending.
Include fine details to the adjustments with the Brush tool, adapting size and opacity for intricate work. That could incorporate veins, enhanced musculature, or gleaming circuits.
Alter the blending modes and opacity to guarantee the biotechnological components combine consistently with the base photo, creating a cohesive view.
Utilize soft brushes to include shadows and highlights, improving the three-dimensionality of the biotechnological alterations. This lends a hand to creating the features that show up naturally consolidated with the subject’s body.
Step 6: Adding Futuristic Effects
Start by creating new layers for each futuristic aesthetic component you would like to consolidate, such as metallic surfaces or gleaming complements. Name these layers suitably for the organization.
Utilize assets like texture packs or make your own futuristic surfaces utilizing brushes or filters. Consider metallic, neon, or holographic textures for a high-tech appearance.
Apply blending modes like Overlay or Soft Light to include the futuristic textures onto the base picture, altering the opacity as required.
Operate the Brush tool with a soft brush and less opacity to paint glowing emphasis or highlights on particular areas, such as edges or technological components.
Employ the Gradient tool to include light beams or lens flares, mimicking innovative lighting effects. Alter the opacity and blending mode to coordinate them naturally.
Put in filters like Gaussian Blur or Motion Blur to make energetic impacts, including profundity and development of the image.
Persistently alter the layers, blending modes, and opacity levels to guarantee the futuristic aesthetics mix consistently with the base image, making a cohesive and compelling result.
Step 7: Accomplishing Final Touch-Ups
Evaluate the overall composition, checking that all added elements are balanced consistently with the base image and contribute to the required transhumanist style.
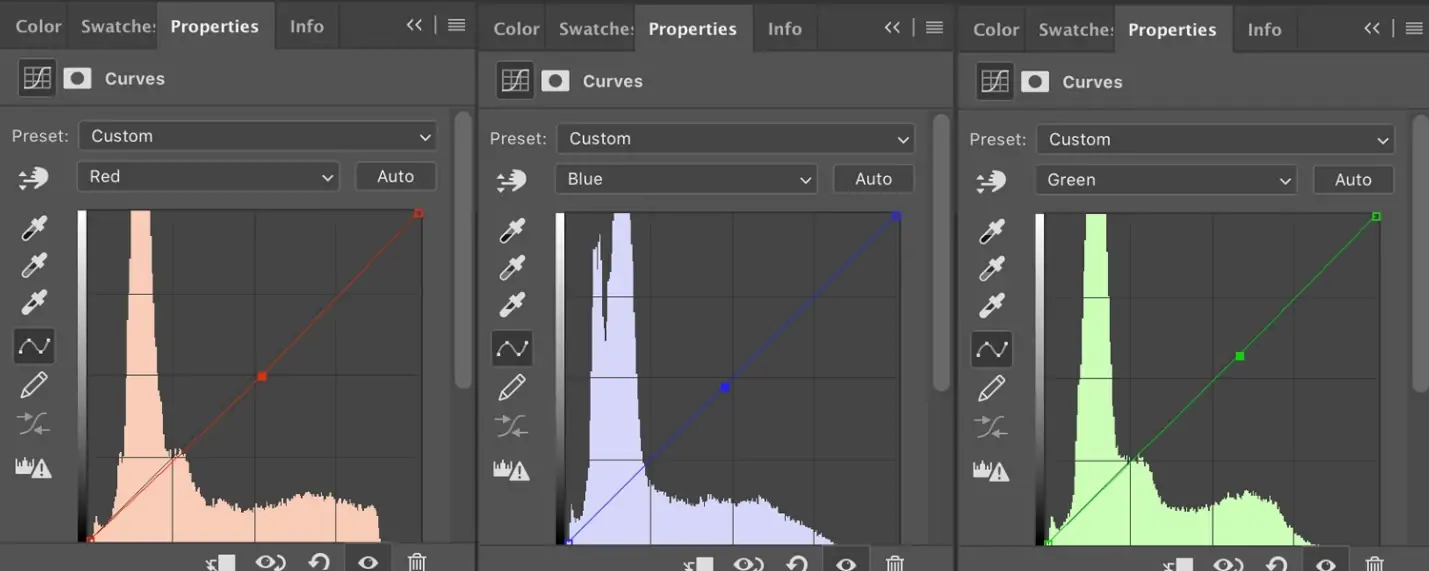
Utilize adjustment layers like Color Balance and Curves to refine the general color palette and tone of the image. Guarantee consistency and balance over all components.
Zoom in and inspect the image for any flaws or inconsistencies. Employ tools like the Clone Stamp or Healing Brush to expel diversions or refine edges for an elegant look.
Look into including atmospheric impacts such as lens flares, particles, or haze to upgrade the futuristic climate and include depth to the scene.
Evaluate the lighting of the image and make any essential alterations to ensure consistency and authenticity. Include or improve light sources to highlight key components and make visual interest.
Reconfirm that all components work together concordantly to communicate the required transhumanist theme. Make alterations as required to preserve cohesion and visual coherence.
Do one final analysis of the picture to ensure it meets your creative vision. Once fulfilled, save or export the image within the preferred format, which will be ready for sharing or additional refinement if needed.
Conclusion
In conclusion, the addition of transhumanist elements in images raises futuristic and advanced concepts. These elements often enhance or transform shots, depicting the prevailing technological advancements. You can amplify human features and recreate an augmented form of the subject. By combining robotic segments into human bodies, like automatic limbs, cybernetic eyes, or neural interfaces, you can indicate the union of man and machine in the modern age. Furthermore, genetic enhancements or bio-engineered attributes, including radiant skin, modified eye colors, or other transformations, give a glimpse of advanced biological controls. Using various digital tools and techniques, as highlighted in this blog, you can create awesomely incredible futuristic transhumanist artwork from your everyday images.
