How To Create Temperature Mapping Effect
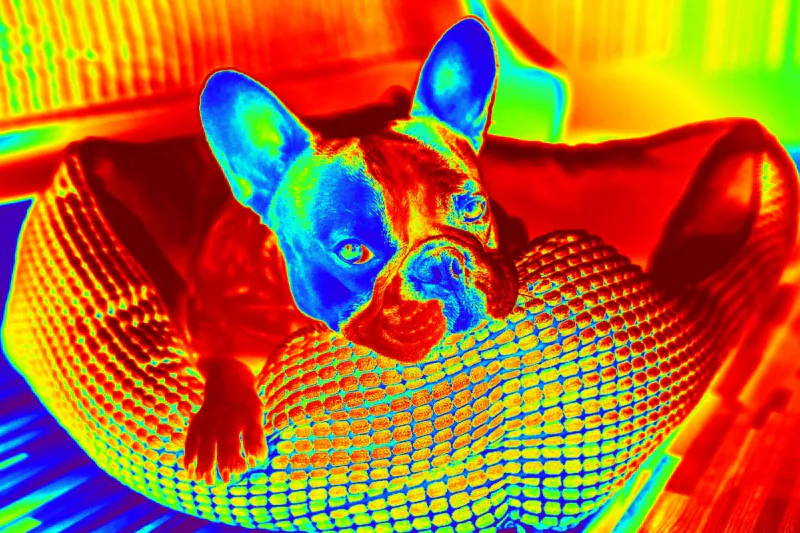
Temperature mapping is a fascinating process commonly employed in temperature analysis of a specific environment that is essential in enormous industries like pharmaceuticals and food manufacturing to check the sustainability of a specified temperature. Besides their technological significance, the innovative display of temperature variations attained through this process also gives a pleasing appearance and is visually vibrant with charmful color schemes. The fact that the creative temperature manipulation of images using temperature mapping technology aesthetically conveys the impression of warmth or coolness necessitates its contribution to the fields of photography and graphic design. The temperature mapping effect benefits visual perception and the viewers’ appeal by addressing color tones, gradient maps, saturation, contrast, and other related aspects of photographs. Instead of using specialized applications for temperature recognition as in traditional temperature mapping, modern image editing software such as Photoshop can be a great option to smoothly achieve these creative integrations into your photographs. This blog article will deal with the innovative inclusion of the temperature mapping effect to amplify the images, resulting in endearing compositions.
Step 1: Image Uploading
To start the temperature mapping process in Adobe Photoshop, open the image you expected to alter. Head to the “File” menu and tab “Open.” Find your photo file, tab on it, and press the “Open” button. Also, you can utilize the keyboard shortcut Ctrl+O for Windows or Command+O for Mac.
Upon opening the photograph, it becomes available for the consequent altering steps. This foundational step is the beginning point for any alterations you plan to form. Whether you’re working with a thermal image, a photo, or a visual representation, having the file open in Photoshop sets the framework for applying temperature-related adjustments.
This step ensures you have a clear visual representation of the picture you must work on, laying the basis for the ensuing alterations at temperature mapping.
Step 2: Tuning Colors
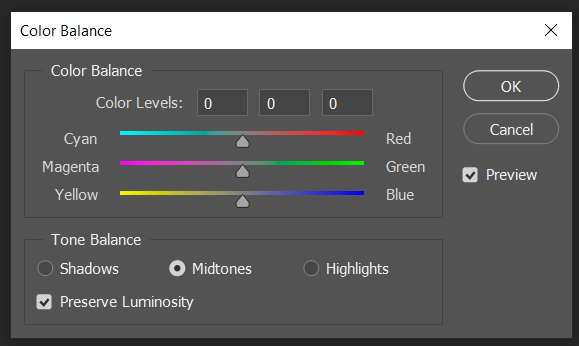
Move to “Image” > “Adjustments” > “Color Balance” in Adobe Photoshop. This step permits you to form global alterations to the general color tones in your photo, influencing its temperature.
Within the Colour Balance dialog, you’ll discover sliders speaking to the essential color tones:
Cyan/Red, Magenta/Green, and Yellow/Blue. To recreate temperature changes, alter these sliders appropriately. Moving towards the red and yellow tones gives warmth, whereas moving towards cyan and blue presents cooler tones.
This alteration is instrumental in accomplishing a wanted temperature mapping impact. It aids in conforming the color balance throughout the picture, setting the tone for ensuing refinements. Keep the changes mild for a natural appearance or more articulated for sensational temperature shifts.
After tuning the sliders to your liking, tap “OK” to apply the Color settings changes.
Step 3: Adjusting Levels
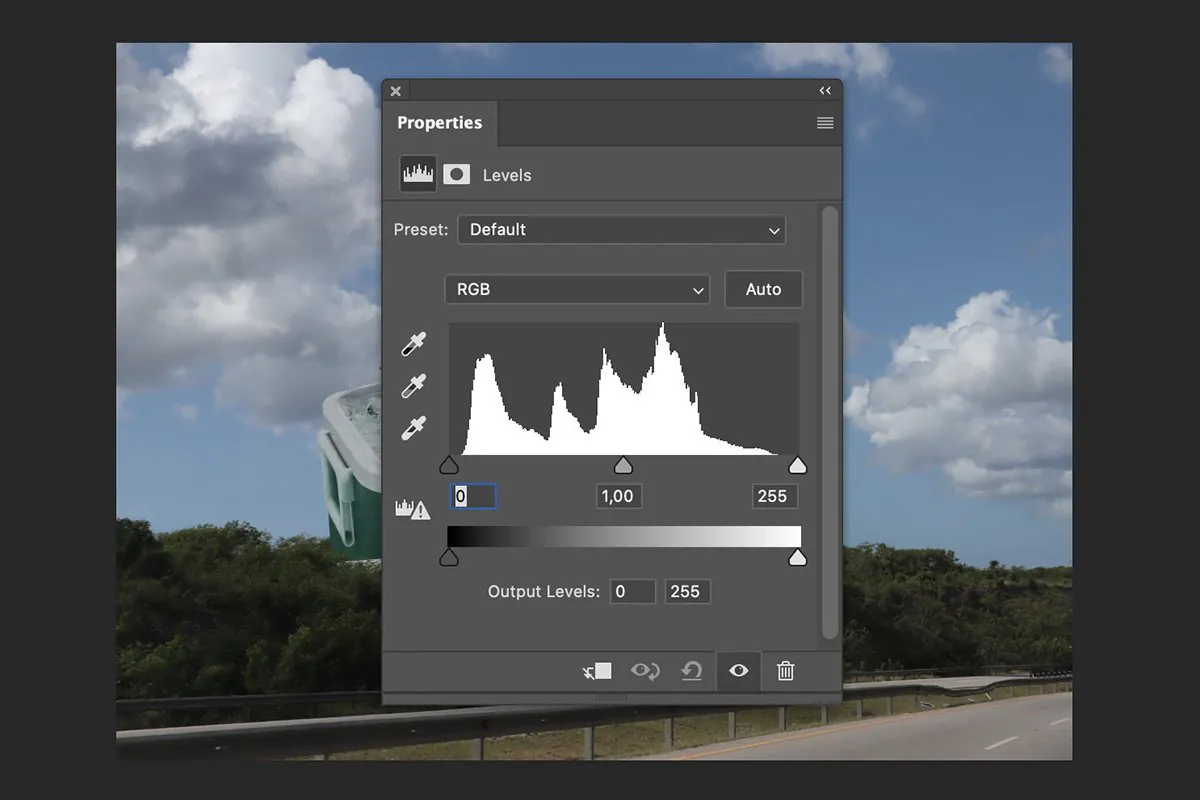
In this step, you need to go to “Image” > “Adjustments” > “Levels” in Adobe Photoshop and fine-tune the brightness, contrast, and tonal range of the picture, subsequently including the broad temperature mapping impact.
Within the Levels dialog, you’ll see a histogram depicting the conveyance of tones in your picture. Three sliders—black point, midtone, and white point—enable alterations. To upgrade the temperature mapping, consider controlling the midtone slider. Bringing it to the left darkens the midtones; moving it to the right, on the other hand, brightens the midtones.
Play with these alterations to attain the specified harmony. Darkening or brightening particular tonal ranges can complement warmth or coolness within the composition, fortifying the temperature mapping effect.
After you are satisfied with the alterations, tap “OK” to apply the changes.
Step 4: Applying Gradient Maps
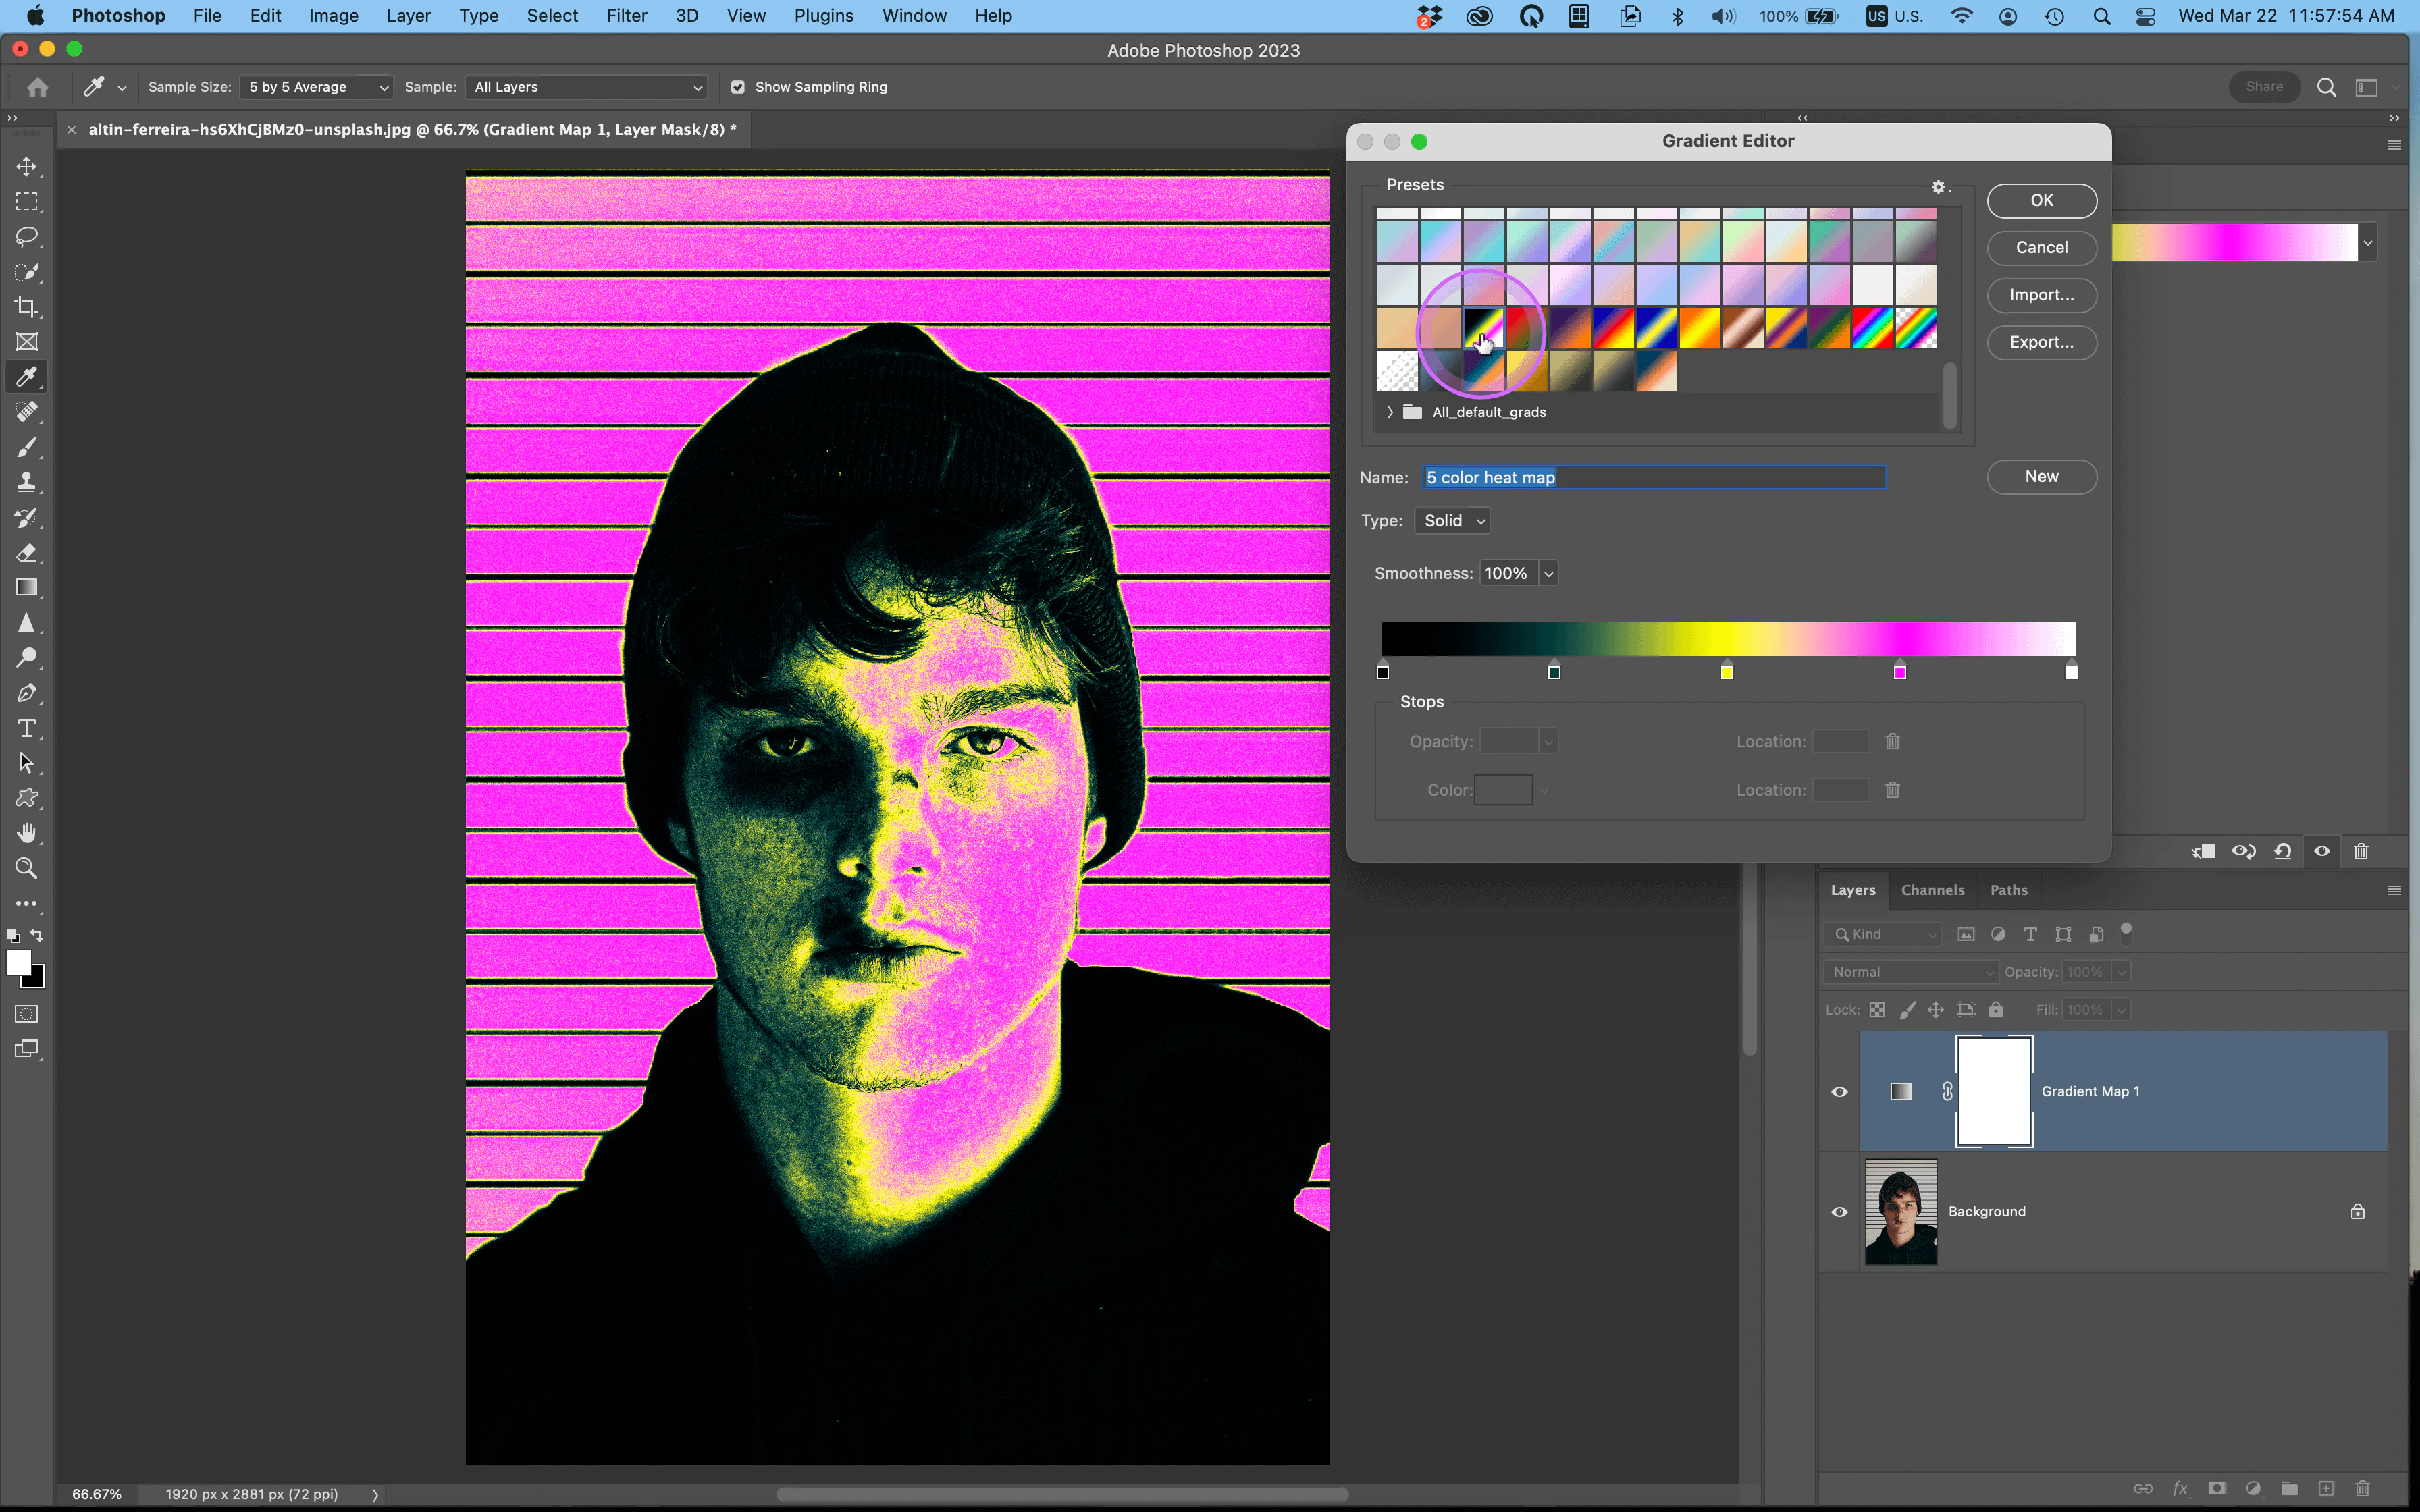
Continue to “Image” > “Adjustments” > “Gradient Map,” where you will be applying a gradient map to your picture, interpreting tonal values into a gradient of colors, and boosting the temperature mapping impact.
Within the Gradient Map dialog, you’ll see a gradient bar referring to the range of tones in your picture. Photoshop allocates colors to diverse tonal values in agreement with this gradient. For a temperature mapping effect, think about employing a gradient that shifts from warm to cool tones.
To include a custom gradient, click on the gradient bar to open the Gradient Editor. Here, you can alter or make a gradient that matches your envisioned temperature mapping. Warm colors like red, orange, and yellow refer to higher temperatures, whereas cool colors like blue and green imply lower temperatures.
After designing the angle, tap “Alright” in both the Angle Editor and Angle Outline discourse to apply the changes.
Step 5: Making Selective Color Tweaks
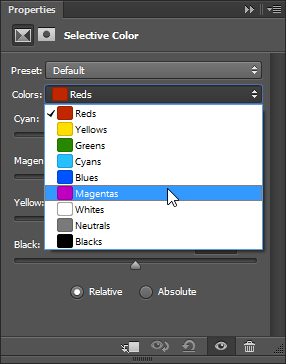
Proceed to “Image” > “Adjustments” > “Selective Color” in Adobe Photoshop. This step includes optimizing particular color channels to enrich the temperature mapping impact more.
You’ll discover color channel sliders indicating diverse hues in the Particular Color dialog. Tweak these sliders to adjust the intensity and balance of particular colors in your picture. For temperature mapping, emphasize the Reds, Yellows, and Blues.
Reds:
Increment the intensity to include warmth or reduce it for a cooler tone.
Yellows:
Go for warmer or cooler yellow tones.
Blues:
Regulate for a cooler all-around effect.
Play with these alterations to get a harmonious and cohesive temperature mapping. Press “OK” to apply the changes.
Particular Color Alteration permits nuanced control over distinctive color ranges, refining the temperature representation in your photo. This step leads to a more thorough and precise depiction of temperature varieties, giving compelling results.
Step 6: Selective Lighting And Darkening
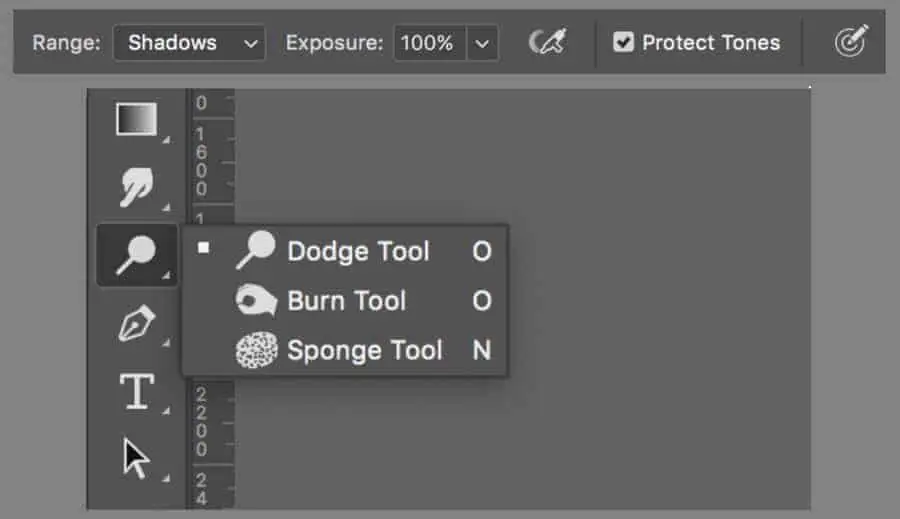
Get to the Dodge and Burn tools in Adobe Photoshop to selectively lighten or darken particular zones, improving temperature varieties within the image.
Dodge Tool:
Select the Dodge Tool from the toolbar.
Alter the brush size and exposure settings as per the zones you need to lighten.
Brush over areas where you need warmth, such as highlights or particular objects.
Burn Tool:
Select the Burn Tool in the toolbar.
Alter the brush size and exposure options for targeted darkening.
Apply the tool to zones where you need to complement cooler tones or make shadows.
By gradually utilizing these tools, you’ll shape the lighting inside the image, emphasizing temperature-related contrasts.
After utilizing the Dodge and Burn tools, the image should display upgraded highlights and shadows, strengthening the specified temperature varieties.
Step 7: Accessing Blur And Sharpen Options
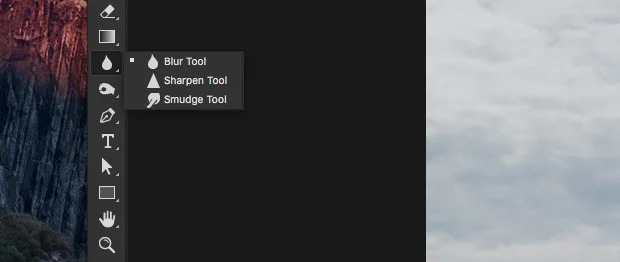
Utilize the Blur and Sharpen tools for refining subtle elements and emphasizing particular ranges, improving the total temperature mapping impact.
Blur Tool:
Click on the Blur Tool from the toolbar.
Alter the brush size and strength settings.
Use the tool in zones where you need to make a gentler, less detailed appearance, depicting a sense of warmth.
Sharpen Tool:
Select the Sharpen Tool from the toolbar.
Alter the brush size and strength settings.
Utilize the tool in regions where you need to improve detail, including clarity and emphasizing cooler tones.
The Blur and Sharpen tools empower you to control the level of detail in numerous parts of the image.
Try these tools to attain the required level of detail and accentuation on warmth or coolness inside the composition. After utilizing these tools, the image should show progressed clarity and focus, maximizing the temperature mapping impact.
Step 8: Saving The Adjustments
To conclude the temperature mapping process in Adobe Photoshop, save your altered image to protect the applied effects.
Get to “File” > “Save” to swap the initial picture with the temperature-mapped form. Confirm that you’re happy with the changes before picking this option.
Select “File” then “Save As” to make a new version of the photo. That permits you to hold the initial file while having a separate duplicate with temperature mapping alterations.
Select a suitable file format (such as JPEG or PNG) and assign the location for saving. Affirm your settings and tap “Save” or “Save As.”
Saving promises that your temperature-mapped composition is stored for future use or sharing. Preserving the changes helps you keep up the integrity of your inventive work and can effortlessly get to the final result for different applications. This last step wraps up the inclusion of the temperature mapping effect in your image.
Conclusion
In conclusion, the innovative and embellishing facet of the temperature mapping technique is highly appreciable for images and graphics. It provides an energetic mode of communication, empowering artists to uplift particular temperaments and intensify the effect of their visual content. In holding imminent significance while acquiring captivation and delivering messages, the importance of temperature mapping effects becomes increasingly pronounced. Rising above the customary boundaries of image editing, it offers a meticulous approach to narrating through visuals. So, whether it’s to enhance an image’s visual character, inspire feelings in digital artwork, or essentially make eye-catching photos, temperature mapping is an impactful method for image ornamentation.
