
How To Create Super Resolution Images
During the process of producing super resolution photographs, the image’s pixel density is increased to improve sharpness. Super resolution offers several benefits, in addition to enhanced image quality and clarity, especially for finer textures, edges, and contours. Additionally, it can lessen noise and abnormalities brought on by picture resizing, scaling, or compression. Higher-resolution image analysis and recognition, such as satellite imagery, medical imaging, and face identification, can also be made possible by it. Super resolution could additionally enhance an image’s realism and aesthetic appeal for art, design, or entertainment. To enhance your images with this multi-benefit approach, you need to be thoughtful of image editing and processing tools along with machine learning models. The following steps of this blog will provide you with a structured approach to turn your photographs into super resolution images.
Step 1: Gathering The Suitable Images
Pick the photographs that contain clear structures, even if they are hazy. Do not pick those having excessive clamour, pixelation, or overwhelming compression, as they can diminish upgrade quality.
Utilize high-quality formats such as PNG or high-resolution JPEG to keep more details. Harmonize the lighting, resolution and focus, especially if your project is multi-image based. Uniformity of all these factors will assist in distortion prevention.
Do not opt for the shots that own unnatural components or drastic distortions. A well-defined structure is a must-have for maintaining details.
In the case of working with multiple shots of the same subject, be sure that they have common perspectives.
Step 2: Making Necessary Changes
Set the size of the shot to accommodate the input requirements of the model. Regulate the perspective ratio to avoid any kind of distortion.
Minimize the noise and compression mishaps with the help of noise reduction tools available within your software. This phase boosts the clarity of the image.
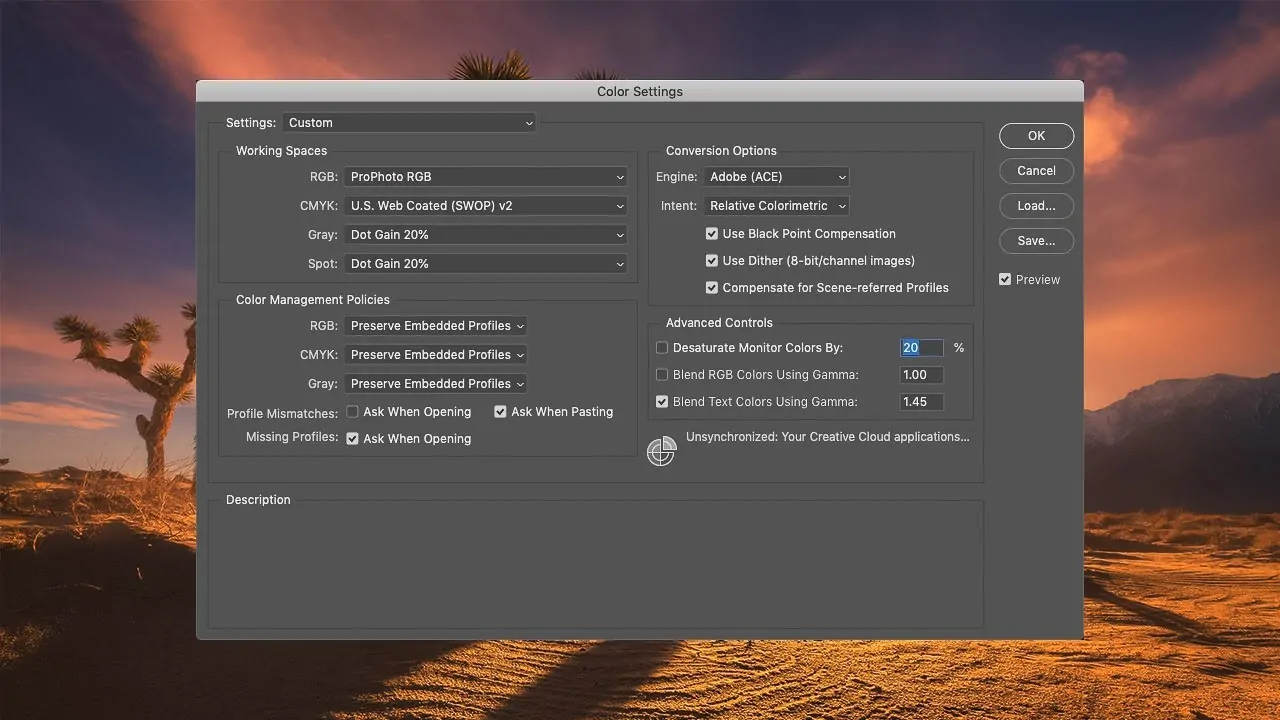
Determine a proper colour space like RGB or Grayscale and convert your photograph into it.
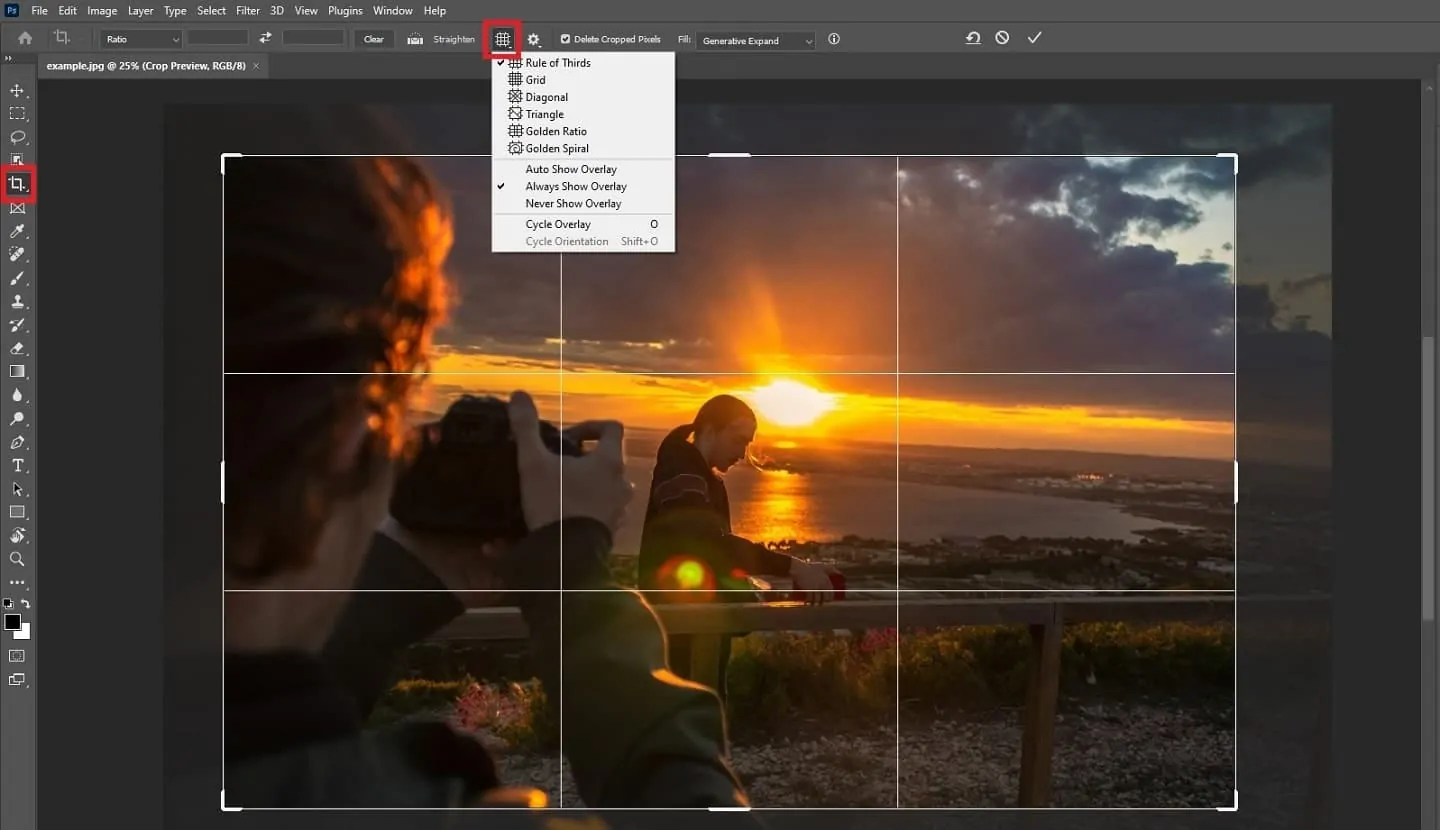
Moreover, look into adjusting and cropping the photograph and normalizing the pixel values with the help of deep learning models.
Preserve the preprocessed picture in a high-quality format. Utilize lossless compression to hold details and evade pointless quality loss before operating the super resolution model.
Step 3: Selecting A Super Resolution Model
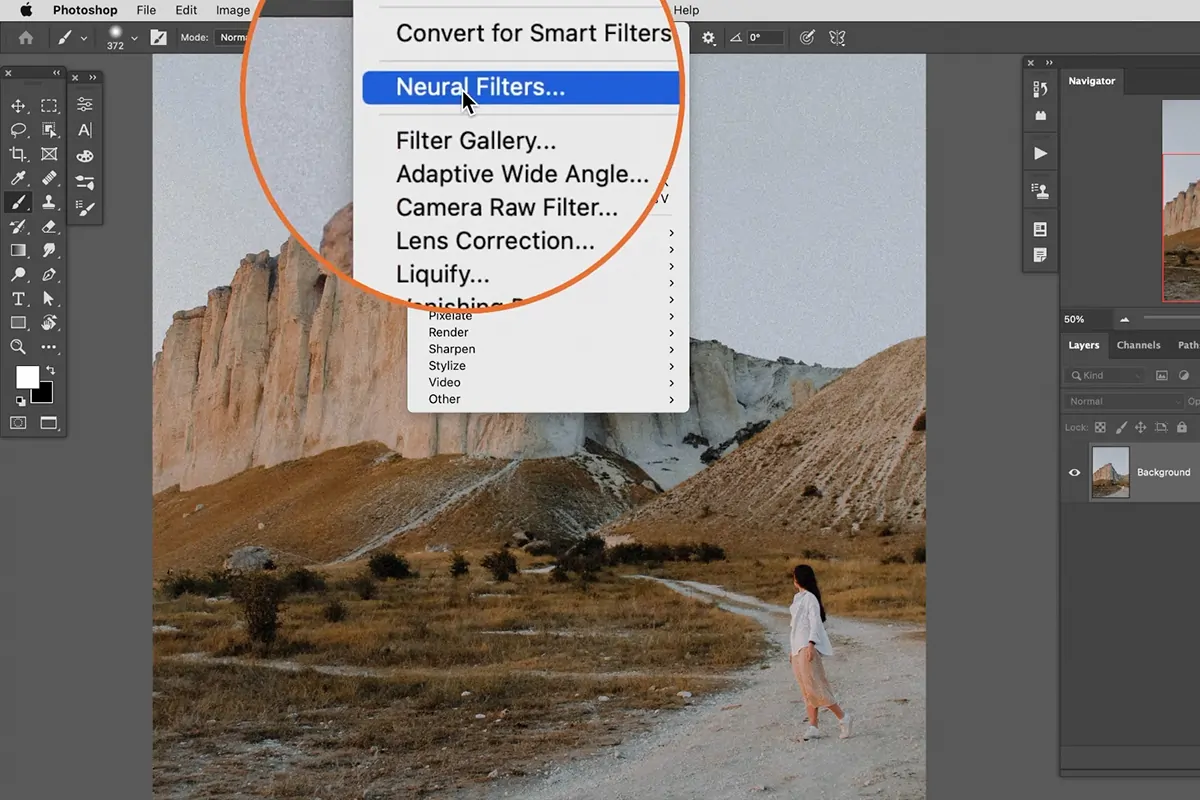
Utilize Photoshop’s Neural Filters for essential AI-powered upscaling. Head to Filter > Neural Filters > Super Zoom to improve subtle elements while upscaling.
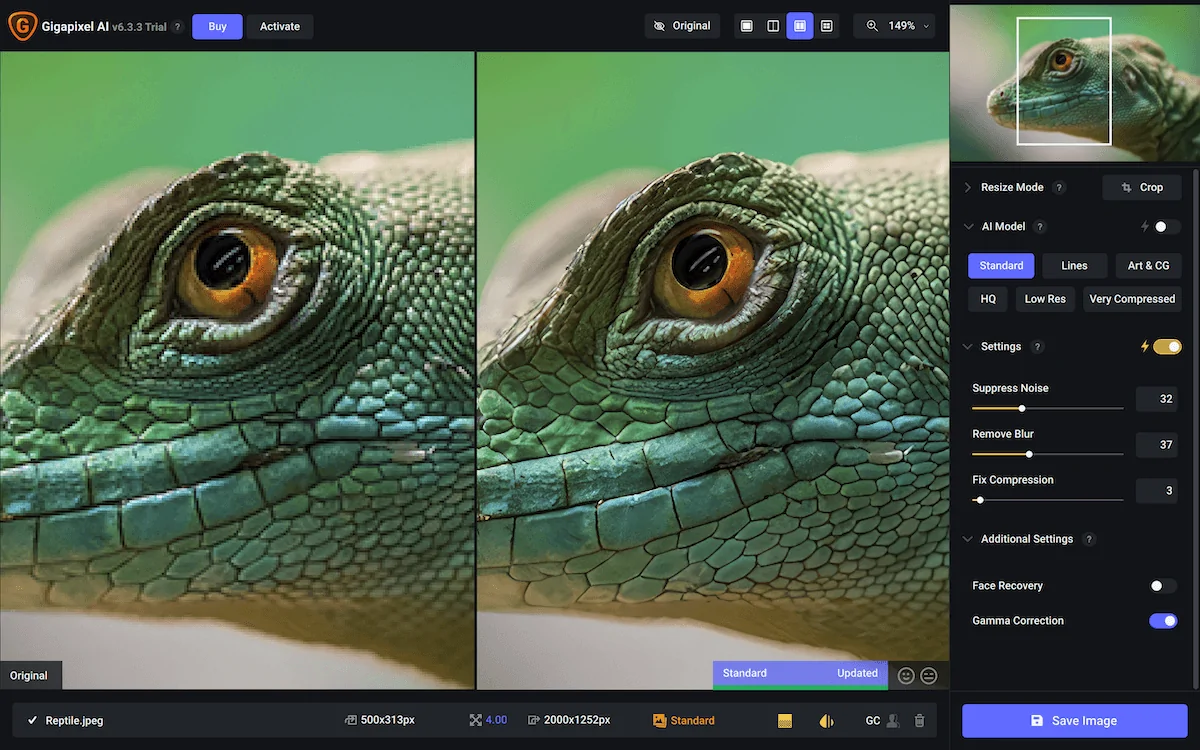
In case more control is required, install third-party Photoshop plugins such as Topaz Gigapixel AI or ON1 Resize AI. These offer progressed deep-learning upscaling inside Photoshop.
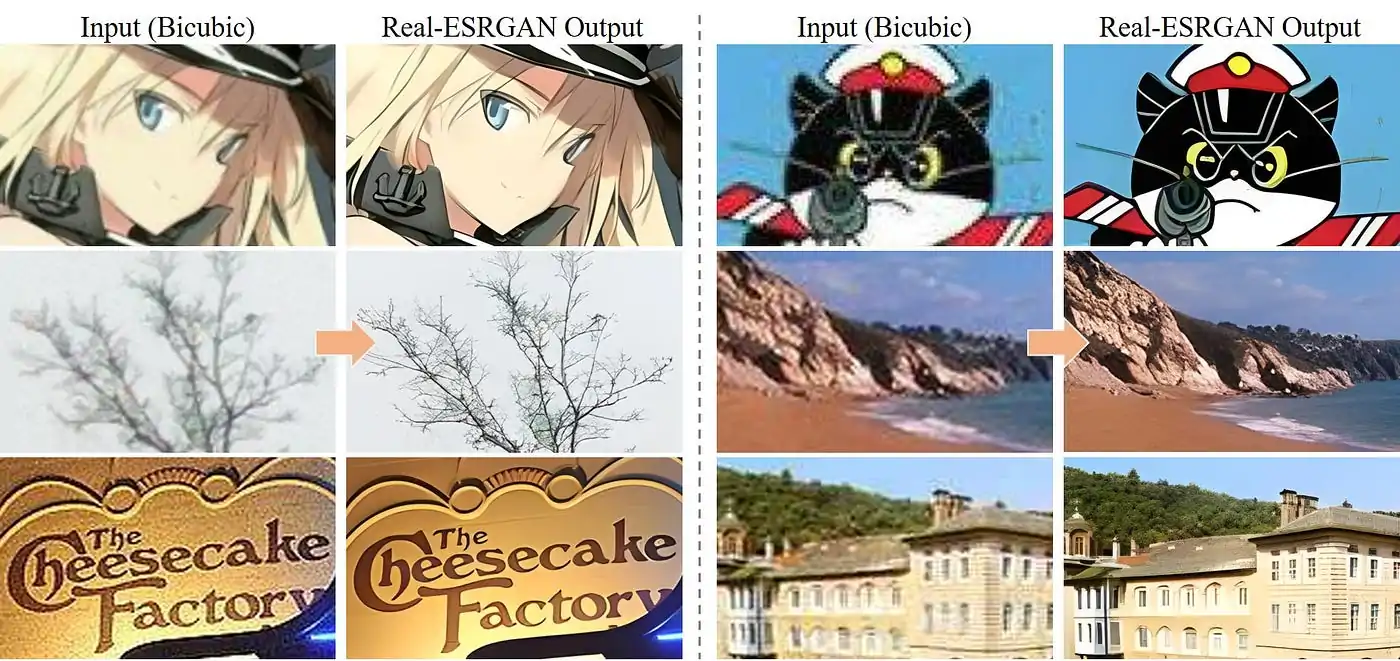
For extreme detail enhancement, utilize Adobe Firefly AI or external AI models like ESRGAN. Though these require external tools, you can import the results back into Photoshop for further edits.
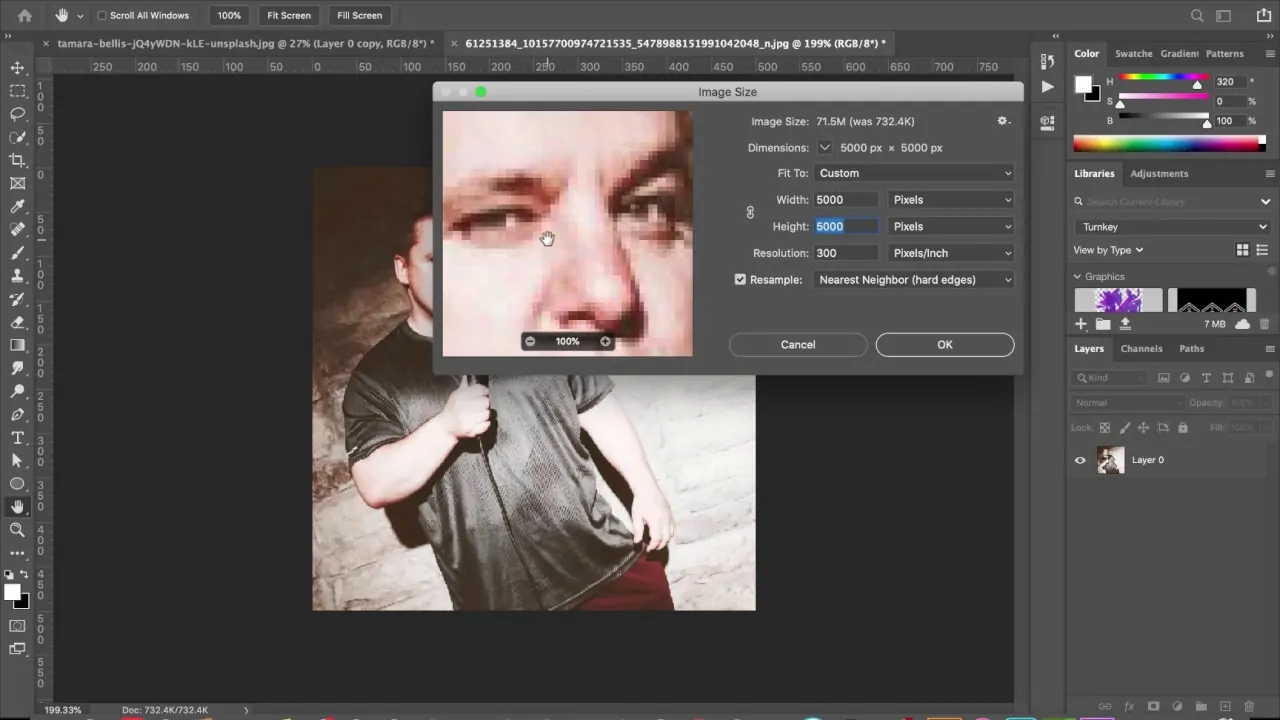
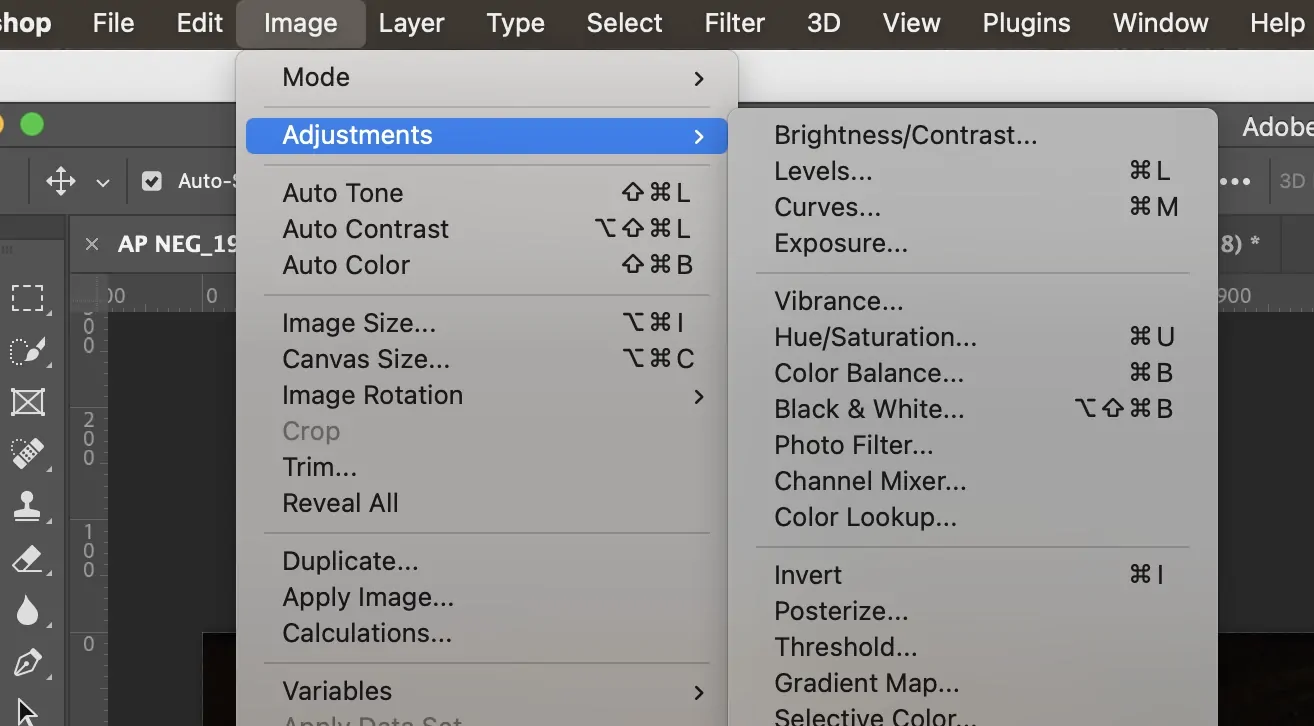
Try Photoshop’s Preserve Details 2.0 upscaling by clicking on the Image, then Image Size, and choosing this resampling strategy. It will sharpen edges while advancing resolution.
Play with diverse strategies inside Photoshop to compare results. Some pictures go better with Neural Filters. Likewise, others may benefit from manual sharpening and high-pass filtering.
If deep learning models are required, handle the picture externally with AI tools and later polish it in Photoshop for post-processing alterations.
Step 4: Setting Up The Model
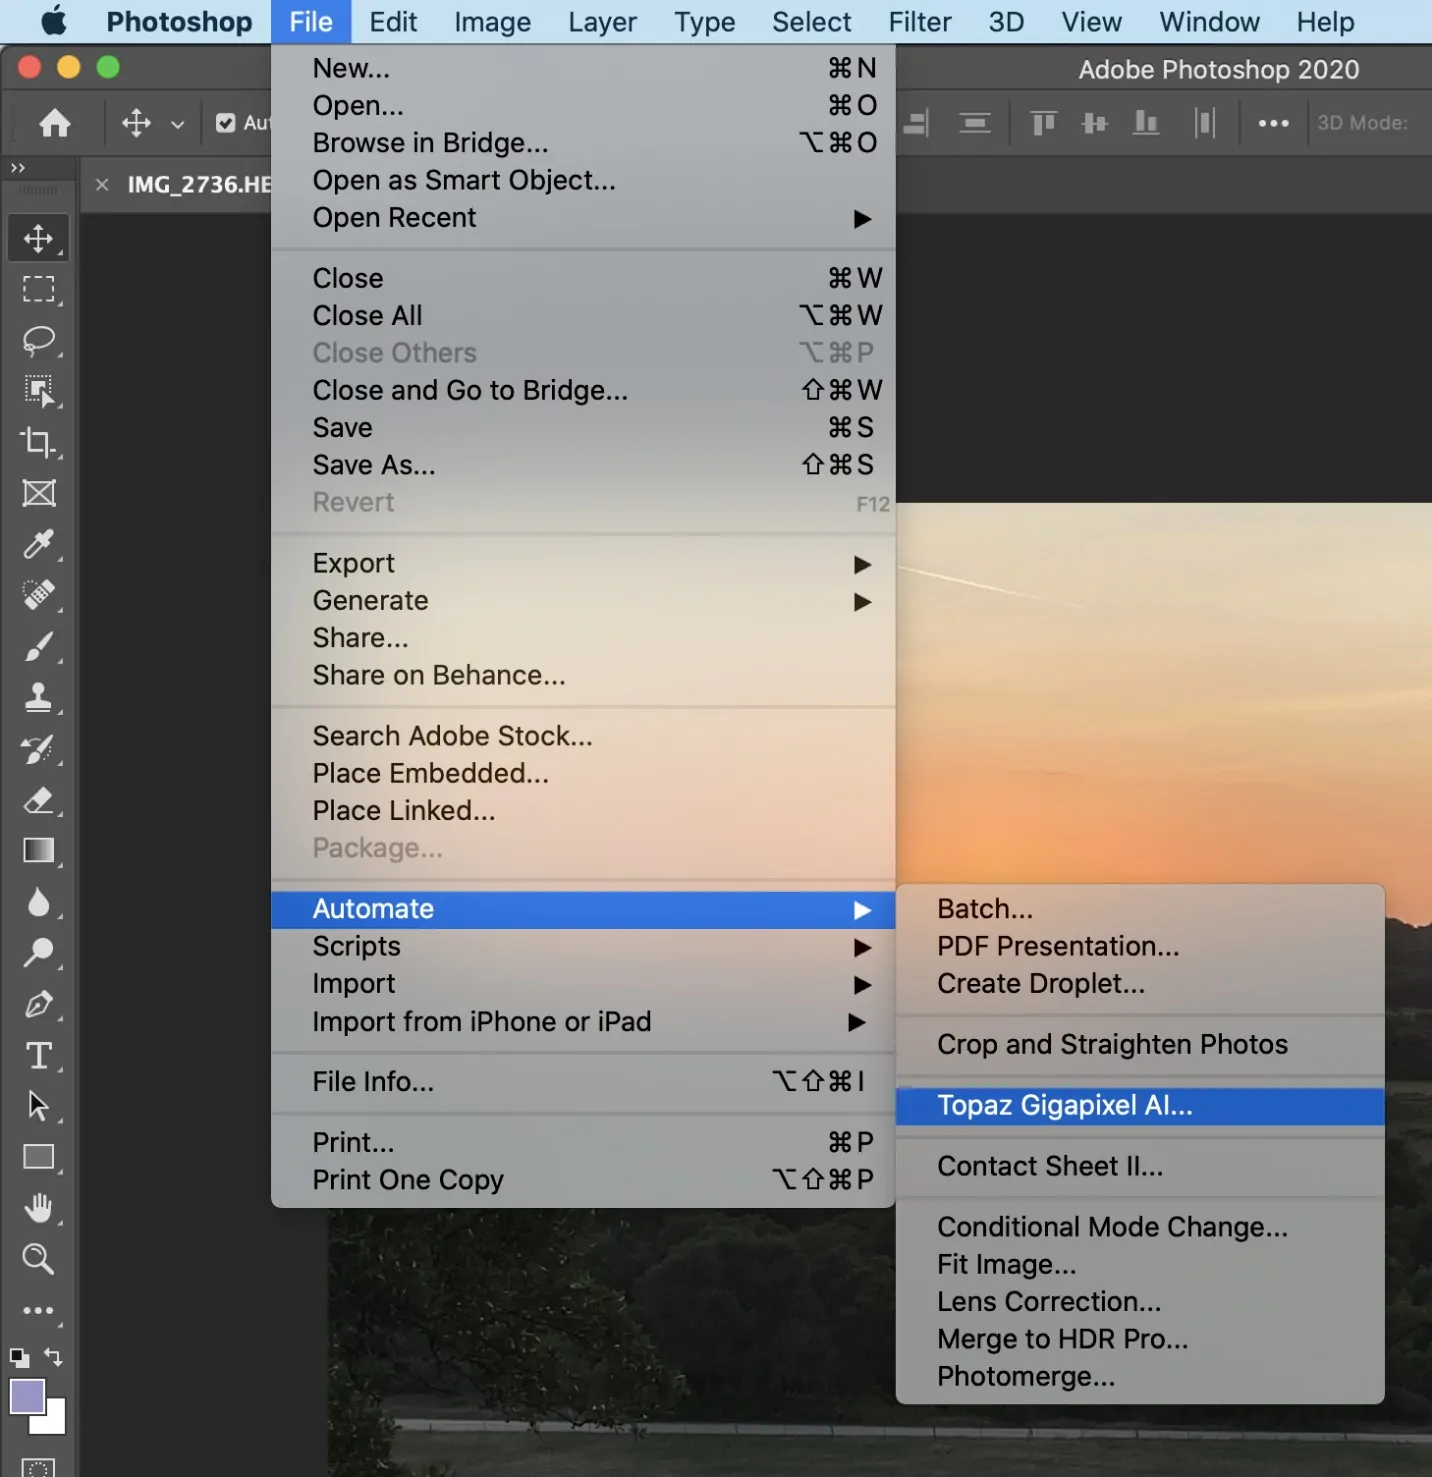
If you are utilizing Photoshop’s built-in AI, you don’t need any training. Just load the Neural Filters or an AI plugin such as Topaz Gigapixel AI. These models are pre-trained to provide super resolution images.
To have better control, download custom AI models like ESRGAN and utilize them with external tools such as Let’s Enhance or Waifu2x, then import the results into Photoshop for additional betterment.
If you are training a model from scratch, assemble high-resolution pictures and related low-resolution versions. Utilize AI frameworks such as TensorFlow or PyTorch for deep learning training.
Bring the trained or pre-installed model inside Photoshop or an AI-based upscaling plugin. Make sure that the right model is chosen for the type of enhancement required.
Run some test images to assess the efficiency of the model. Compare diverse approaches, like Neural Filters vs. Preserve Details 2.0, and alter settings for the most excellent outcomes.
After you have set up the model or tool, schedule the picture for enhancement by confirming that it is appropriately preprocessed and saved in a high-quality format before using the super resolution process.
Step 5: Executing The Model
Open the low-resolution photograph in Photoshop and head to Filter, select Neural Filters, then Super Zoom to add AI-powered upscaling while refining particulars.
If you are utilizing Preserve Details 2.0, proceed to Image, click Image Size, choose a higher resolution, and select Preserve Details 2.0 as the resampling strategy for superior sharpness.
For advanced AI enhancement, use Topaz Gigapixel AI or another plugin. Alter sharpness, noise lessening, and detail recovery settings for ideal results.
If you are working with an externally processed AI-enhanced picture like ESRGAN, bring it into Photoshop and utilize layer blending, masking, or sharpening to fine-tune details.
Compare distinctive upscaling strategies inside Photoshop. Utilize before-and-after layers to correspond for quality advancements, guaranteeing the ultimate image supports natural surfaces and clarity.
After you are satisfied, continue with post-processing steps, like fine-tuning sharpness, contrast, and noise reduction, to improve the last yield further.
Step 6: Enhancing Contrast And Clarity
Utilize Sharpening techniques in Photoshop, like Unsharp Mask or High Pass Filter, to improve fine details without presenting noise. Alter opacity for a natural appearance.
Utilize the Noise Reduction technique by utilizing Filter clicking Noise, then Reduce Noise to smooth out artefacts caused by upscaling while protecting imperative surfaces.
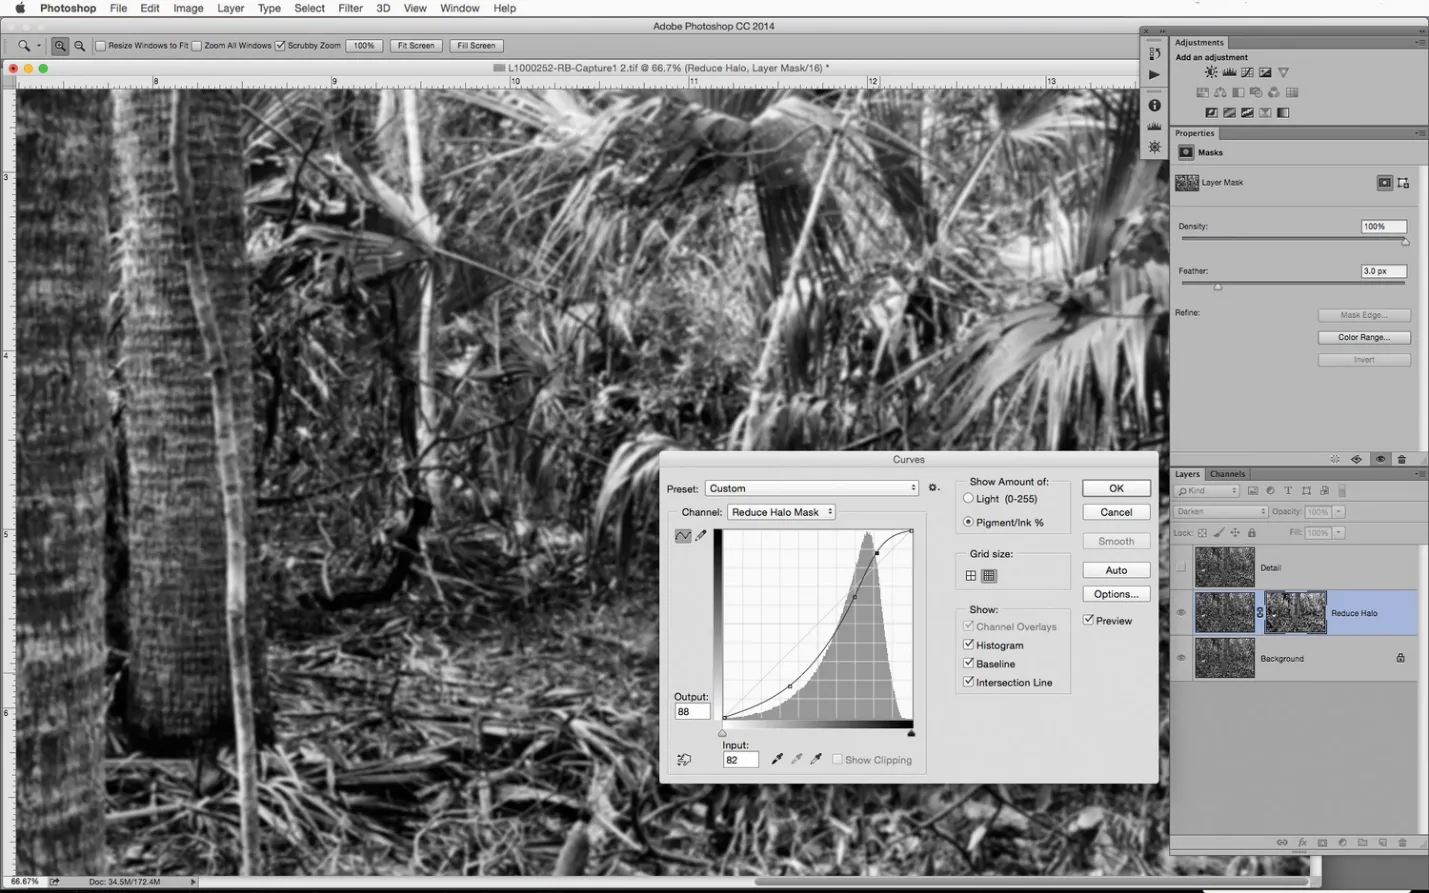
Alter Contrast and Clarity via Curves, Levels, or the Camera Raw Filter to improve profundity and make details striking. Avoid intemperate alterations that will make the picture look artificial.
As required, polish edges utilizing Select Subject and Masking Tools to evacuate undesirable blurring or halo effects around objects, guaranteeing a more uncluttered last result.
Utilize Blending Modes and Layer Masks to incorporate different enhancements while keeping up adaptability. It allows fine-tuning without permanently changing the initial picture.
After you are comfortable with the refinements, save the photograph in a lossless format, PNG or TIFF, to protect subtle elements, or export it as a high-quality JPEG if file size is a significant consideration.
Step 7: Finalizing The Composition
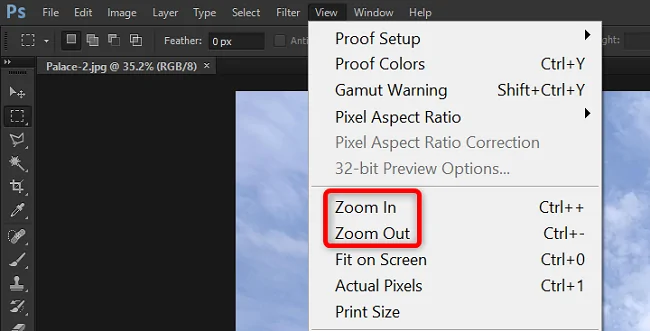
Use the Zoom in and review details at distinctive magnifications to check for undesirable artefacts, noise, or artificial sharpening caused by the super resolution process.
Compare with the initial picture by toggling between layers in Photoshop. Make sure that surfaces stay natural and that no essential details are lost or excessively exaggerated.
Accomplish conclusive alterations utilizing Curves, Hue/Saturation, and Selective Color to adjust tones and improve colour accuracy without making the photograph look counterfeit.
View the photograph on diverse screens or resolutions to confirm its quality over different display sizes. Additional refinements are vital to optimize the composition’s appearance.
Export the ultimate form within the fitting format, such as PNG for lossless quality or JPEG for web usage, and make sure that compression settings don’t degrade the image’s clarity.
Save the PSD file with all layers intact for future alters, permitting quick adjustments without beginning from scratch if further alterations are required.
Conclusion
In summary, creating a higher-resolution image from a lower-resolution or normal-resolution image is the main goal of super resolution. Unfortunately, blurry photos are prevalent and can be problematic for both enthusiasts and professionals. Using machine learning, the super resolution technique upscales, sharpens, and clarifies the image without sacrificing its essential features and details. Additionally, super-resolution is applicable in a wide range of industries, including satellite imaging, forensics, medical, and surveillance. The constraints of hardware-based image-capturing systems, such as sensor size and lens quality, can also be addressed by this potent approach.
