How to Create Professional-Looking Face Swap Images
Face swapping is a popular digital technology that allows users to switch faces between images easily, resulting in amusing and visually appealing visualizations. It detects and aligns important face landmarks in two photos using modern algorithms and facial recognition techniques. Face swapping tools generate a flawless blend by mapping facial traits from one face to another, resulting in funny to realistic face swaps. Face swapping, on the other hand, is a creative art form that necessitates attention to detail and aesthetics. It is critical to grasp the processes, tools, and steps required to create professional-looking face swap images, and ultimately you can create more exciting and aesthetically appealing content.
Exploring the Fascinating World of Face Swapping:
Face swap technology relies on sophisticated algorithms and facial recognition techniques to detect and align crucial landmarks. These algorithms meticulously analyze the intricate geometry of a face, allowing them to identify and precisely align key features such as the eyes, nose, mouth, and overall facial contours. Face swap tools achieve a seamless fusion by accurately mapping these features onto another face, resulting in captivating and often astonishing transformations. This intricate mapping process, facilitated by intelligent algorithms, brings forth a wide spectrum of outcomes. The possibilities are extensive, from lighthearted and whimsical exchanges that provoke laughter to remarkably realistic face swaps that challenge our perception of identity. Face swap technology has unlocked creative potential by empowering individuals to delve into visual storytelling, experiment with diverse personas, and indulge in imaginative self-expression. Whether for amusement, artistic endeavors, or even practical applications within the entertainment industry, face swap technology has emerged as a formidable tool in the digital landscape. Constantly evolving and refining, it delivers increasingly precise and believable face swaps, captivating our imaginations and stretching the boundaries of visual manipulation.
Gathering the Required Resources:
Before starting the face swapping process, gathering the necessary resources is essential. Here’s what you’ll need:
Two source images with well-aligned faces: Select images with clear and well-lit faces, ensuring the subjects look straight at the camera. Images with similar lighting conditions, angles, and expressions yield better results.
Face swapping software or tools: Various face swapping software and tools are available as standalone programs and online platforms. Take the time to explore different options and choose a tool that suits your requirements and offers user-friendly features. Consider factors like ease of use, face detection and alignment accuracy, and additional functionalities such as blending or morphing capabilities.
With well-prepared source images and a reliable face swapping tool, you’ll be well-equipped to embark on your face swapping journey. With these resources in place, you can now explore the exciting possibilities of creating professional-looking face swap images.
Preparing the Source Images:
Properly preparing your source images is crucial to ensure successful face swapping. Follow these steps for the best results:
Select high-quality images: Choose source images that are sharp, well-focused, and have a high resolution. Images with good lighting and minimal blur will yield better face swap outcomes.
Align the faces: When selecting your source images, look for faces that are well-aligned and facing the camera directly. This alignment helps the face swapping software accurately detect and map facial features.
Crop and frame: Crop the images to focus on the faces and remove unnecessary background elements. This step ensures that the main subject, the face, is the center of attention.
Adjust lighting and color balance: Ensure the lighting conditions in both source images are as similar as possible. Adjust the brightness, contrast, and color balance to ensure consistency between the two images. That helps in perfectly blending the swapped faces.
Maintain facial expressions: Choose source images with similar facial expressions to create more realistic face swaps. This similarity helps maintain the natural appearance and expressions of the subjects after the swap.
Following these preparation steps sets the stage for a successful face swap. Well-chosen, aligned, and optimized source images provide a solid foundation for face swapping, ultimately leading to professional-looking and visually appealing results.
Applying the Face Swap:
Now that you have your well-prepared source images, it’s time to dive into the face swapping process. Follow these steps to apply the face swap:
Launch the chosen face swapping software or tool: Open the application or access the online platform where you will perform the face swap.
Import your prepared source images: Use the tool’s import function to load the two source images you have selected for the face swap. Ensure that the software recognizes and correctly aligns the faces in the images.
Identify and align facial landmarks: The face swapping tool will typically provide automated or manual options to identify and align the facial landmarks. These landmarks include the eyes, nose, mouth, and other key facial features. Ensure the tool accurately detects and aligns these landmarks for the source and target faces.
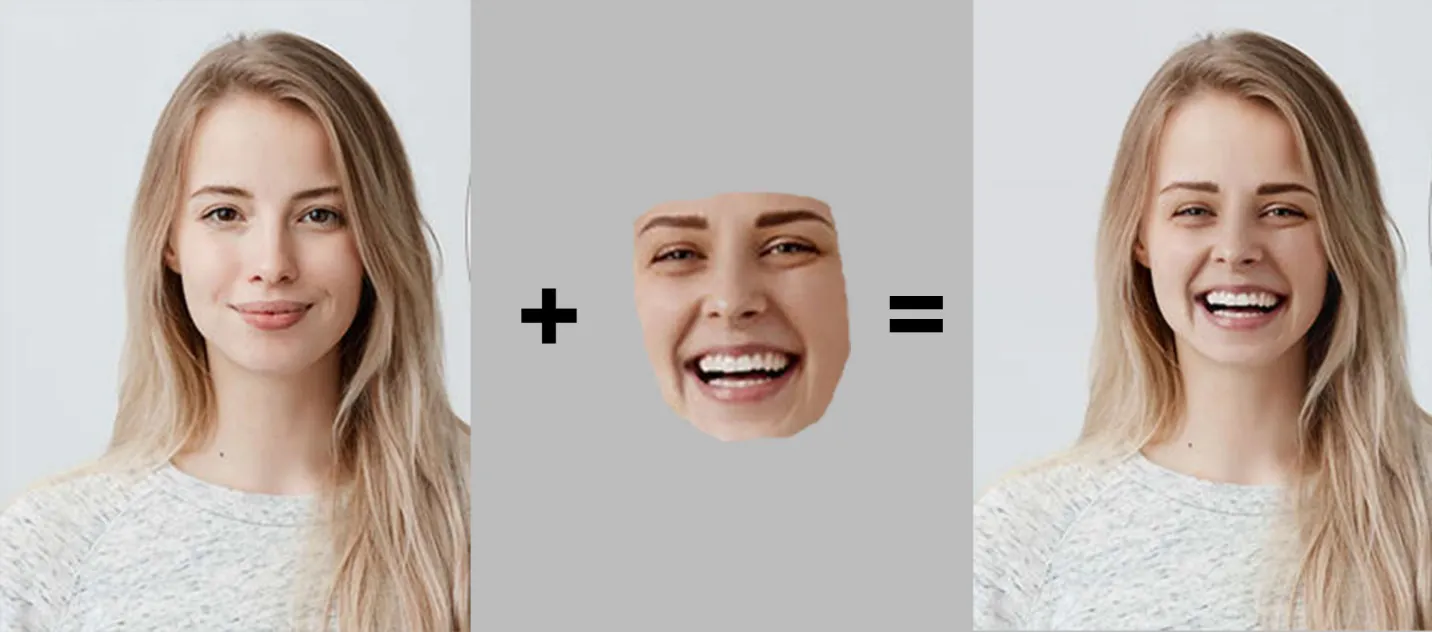
Initiate the face swap process: Once the facial landmarks are aligned, initiate the face swap process. The tool will map the facial features from the source face onto the target face, creating a blended result.
Preview and adjust: After the initial face swap, preview the result and make necessary adjustments. Pay attention to the alignment, blending, and overall appearance of the swapped face. Most face swapping tools offer options to fine-tune the alignment, blending intensity, and other parameters for a more refined output.
Fine-tune the blending: To achieve errorless integration of the swapped face, experiment with adjusting the opacity or blending mode of the swapped face layer. This step helps in achieving a more natural and realistic look.
Save or export the final image: Once satisfied with the face swap result, save or export the final image in the desired format and resolution.
Remember to try different techniques, adjust settings, and explore the capabilities of the face swapping tool you are using. You’ll improve your skills with each attempt and achieve more professional-looking face swap images.
Refining the Result:
After the initial face swap, it’s time to refine and perfect the outcome for a more polished and professional-looking result. Here are some steps you can take to refine the face swap:
Adjust blending and opacity: Fine-tune the blending of the swapped face by adjusting the opacity or blending mode. This step helps to integrate the swapped face with the target face seamlessly.
Manual edits and touch-ups: Utilize tools provided by the face swapping software or use photo editing software to refine and edit the facial features manually. You can use brushes, clone stamps, or liquify tools to adjust facial contours, align the eyes, or refine details for a more natural appearance.
Pay attention to details: Carefully examine the swapped face and ensure it matches the surrounding elements. Pay attention to matching skin tones, hairlines, and eye positions. Making these adjustments enhances the overall realism of the face swap.
Use additional filters and effects: Experiment with additional filters, adjustments, or effects to enhance the final result. These can include color correction, sharpening, or applying a soft focus effect. Be mindful not to overdo it, as subtlety often yields more professional-looking outcomes.
Seek feedback and iterate: Share the refined face swap with others and gather feedback. Constructive criticism can help you identify areas that may need further improvement. Iterate and make necessary adjustments based on the feedback received.
By applying these refinements, you can take your face swap from good to great, creating a more seamless and convincing transformation. The goal is to achieve a result that seamlessly integrates the swapped face while maintaining a natural and visually appealing appearance.
Experimenting with Additional Edits:
Consider experimenting with additional edits and enhancements to elevate your face swap images to a professional level. These creative touches can add realism, visual impact, and an extra touch of artistry. Here are some suggestions to explore:
Lighting and color adjustments: Fine-tune the lighting and color grading to ensure consistency and cohesiveness across the entire image. Adjust the brightness, contrast, and color balance to match the environment and create a harmonious look.
Facial shadows and highlights: Pay attention to the lighting direction and add or modify shadows and highlights on the swapped face. This step helps integrate the face more convincingly into the scene and enhances the overall realism.
Skin texture and retouching: Utilize retouching techniques to improve the skin texture of the swapped face. Remove blemishes, wrinkles, or imperfections, while maintaining a natural look. Be cautious not to over-retouch, as it may appear unnatural.
Facial hair and makeup: If the source and target faces have differences in facial hair or makeup, consider adjusting them to match. This step contributes to a more seamless and cohesive look after the face swap.
Background and effects: Add appropriate background elements or effects to blend the swapped face seamlessly into the overall composition. That can include adjusting the background colors, adding depth-of-field effects, or incorporating complementary elements to enhance the visual impact.
By experimenting with these additional edits, you can refine the details and create a more professional-looking face swap image. Remember to balance realism and artistic expression, ensuring the final result is visually appealing and convincing. Feel free to explore different creative possibilities, and trust your artistic instincts to make your face swap images stand out.
Conclusion
In conclusion, face swapping is a creative genre used by artists, comedians, and enthusiasts to express their views, emotions, and unique points of view. We can push the boundaries of reality and explore new worlds of visual narrative through the art of face swapping. Through shared experiences and hilarity, this creative process unites people worldwide.
