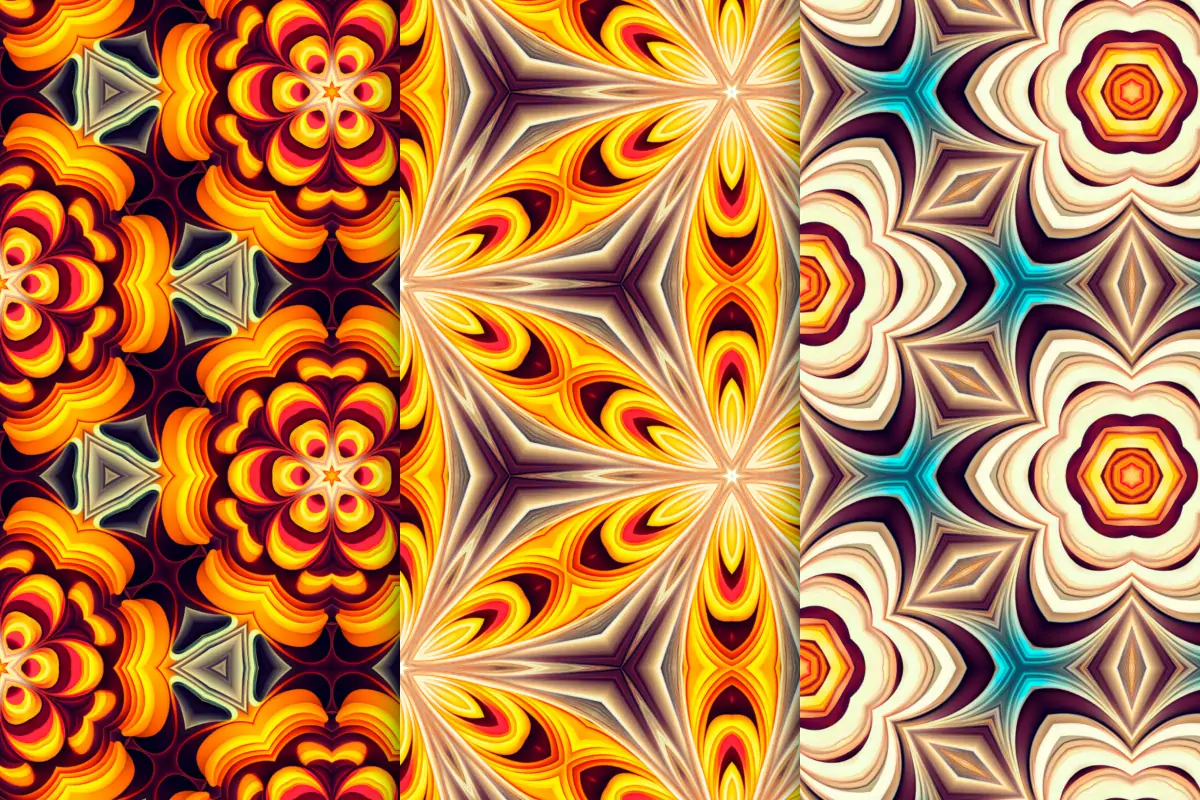
How To Create Digital Batik Patterns
The ancient art form of batik art has a rich history rooted in Java Island, Indonesia, which has been around for over two millennia; it is among the world’s most ancient textile customs. The culture of this art’s native region dominates the patterns that have been handed down through the ages. Batik is thought to have originated as a spiritual art form, with each design having a deeper meaning. Batik developed over time to integrate intricate designs and vivid shades, ultimately shifting into a digital form where its fascinating patterns enrich images, providing aesthetic backgrounds, textures, and mixed media elements. To add batik patterns into images, different digital tools offer features such as a layer, blending modes, masking, and color balancing, which help effectively blend batik patterns into the image components. This blog will brief you on the use of digital techniques to create elegant batik art, which you can later employ to modify your image’s aesthetics.
Step 1: Conceptualization
Begin by inquiring about conventional batik plans to get common themes, designs, and color schemes. See different sources such as books, online exhibitions, and social artifacts.
Choose a central subject for your digital batik composition. This can be impacted by nature, mythology, geometric designs, or individual experiences. Having a clear theme will direct your design process.
Gather a temperament board with pictures, color palettes, and surfaces that reflect your chosen theme. This visual reference will help you remain steady throughout your design process.
Make rough outlines of your thoughts on paper or digitally. Concentrate on the general composition and primary components without stressing about fine points of interest at this phase.
Distinguish key components that will be highlighted in your plan. These might incorporate particular shapes, lines, or images that are characteristic of conventional batik.
Share your concept and initial outlines with peers to make your concept more solid and cohesive before moving on to the following step.
Step 2: Initial Outlining
Start by making detailed outlines based on your concept. Utilize pencil and paper or a digital drawing tablet to lay the primary components and themes of your batik plan. Focus on precision and clarity.
Organize the components of your plan into a cohesive composition. Guarantee an adjusted layout, considering the stream and visual concordance of the designs and themes.
Set up clear borders or outlines for your plan, a commonplace of traditional batik art. These can be basic or complex, including the structure of your artwork.
Arrange the layers of your plan, as batik frequently includes numerous layers of wax and color. Consider how distinctive layers will interact and co-occur within the last piece.
Add symmetry and repetitive components, as these are characteristic of batik art. Confirm that themes are smoothly duplicated throughout the design.
Refine your outlines by including subtle elements and altering the layout for better adjustment. Beyond any doubt, each component is evident and well-defined, and we are planning it for digital rendering.
Step 3: Pattern Creation
Launch your favored design program and set up your canvas or archive to the specified dimensions and resolution for your digital batik.
Utilize vector apparatuses such as the Pen Tool or Shape features to form precise and adaptable shapes for your batik designs. This guarantees clean lines and smooth bends.
Start designing the complex designs and themes characteristic of batik works. Play with different shapes, lines, and bends to attain outwardly appealing arrangements.
Arrange your design into layers for way better administration and control. Isolate distinctive components of your design onto diverse layers to aid editing and manipulation.
Select a color palette inspired by conventional batik colors, or customize your own. Consider the noteworthiness of colors in passing on the temperament and subject of your artwork.
Make varieties of your designs to include visual interest and complexity. Try scaling, rotation, and mirroring to attain differing compositions inside your plan.
Step 4: Color Choices
Select colors that complement your subject and inspire the specified temperament for your digital batik work of art. Consider customary batik color palettes as well as your own inventive choices.
Make a palette of colors inside your design software to effectively get to and apply them to your artwork. Reorder your swatches to preserve consistency throughout the process.
Apply base colors to your digital batik design, using solid fills or gradients to set up the foundational colors for your designs and motifs.
Test with layering colors to get profundity and dimensionality in your work of art. Add lighter or darker shades to make highlights, shadows, and texture inside your designs.
Guarantee that your color choices harmonize well together and improve the overall visual mark of your digital batik design. Attend to contrast, saturation, and symmetry to form a cohesive color plot.
Conform colors consistently into your patterns, taking care to preserve the integrity of the themes and plans. Alter colors as needed to guarantee the clarity and readability of the designs.
Step 5: Wax Effects Simulation
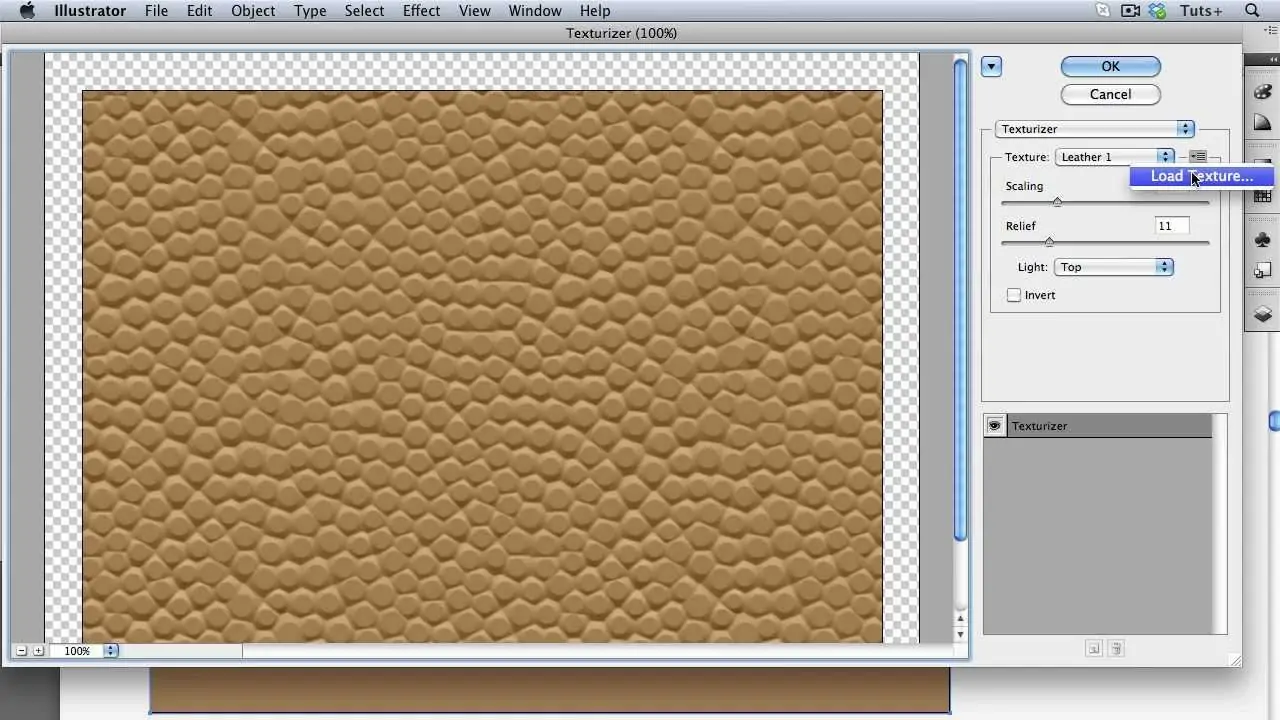
Select or create surfaces that imitate the appearance of wax in conventional batik. Seek for textures that pass on the characteristic splits, wrinkles, and inconsistencies of wax-resist coloring.
Employ layer masking procedures to mimic the application of wax in your digital batik craftsmanship. Apply masks to uncover or conceal ranges of your design where wax would naturally stand up to color.
Pick brushes with changing opacities and textures to imitate the application of wax. Test with different brush strokes and pressure values to attain reasonable wax effects.
Spread wax textures onto your digital batik design, tweaking the opacity and blending mode to attain the specified impact. Blend the textures consistently, along with your base colors and designs.
Include crackle designs and abnormalities to recreate the cracking of wax amid the batik process. Utilize brushes or texture overlays to make these particulars, paying consideration to naturalistic situations and dispersion.
Join the highlights and shadows of your wax texture to enhance its three-dimensional appearance. Utilize lighter and darker tones to mimic the light reflecting off the wax and casting shadows within the crevices.
Step 6: Final Tweaks
Use the Zoom feature to observe the fine points of interest and complexities. This identifies the required exact adjustments and refinements to upgrade the general quality of your plan.
Confirm consistency within the repetition and arrangement of designs and themes all through your work of art. Pay consideration to alignment, spacing, and symmetry to form a cohesive and visually satisfying composition.
Clean up any rough edges or stray marks in your plan to attain fresh and tidied diagrams. Utilize eraser tools or vector-editing strategies to refine the forms of your designs and shapes.
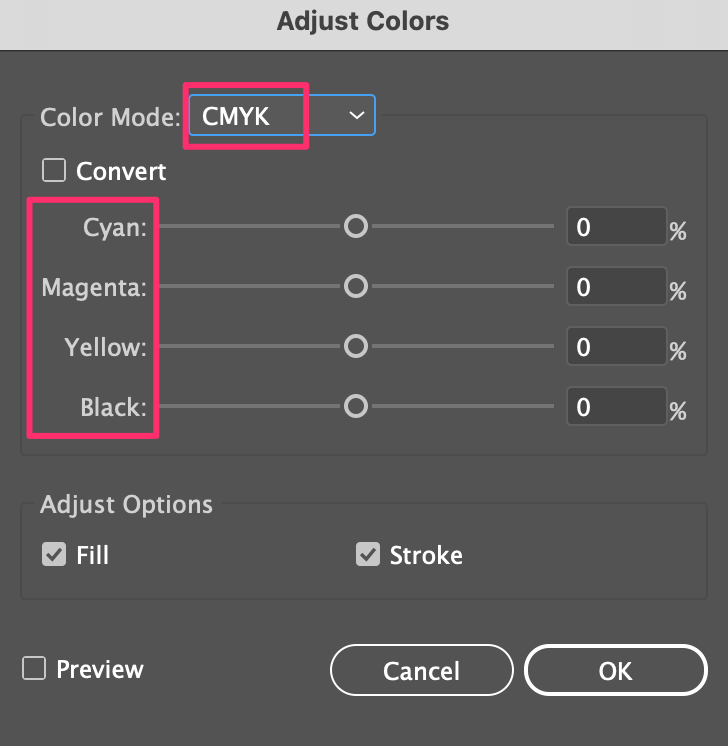
Tune the color balance inside your batik artwork. Revise saturation, brightness, and hue to attain a cohesive and adjusted color palette.
Upgrade the texture and profundity of your work of art by including subtle texture overlays or applying texture effects.
Include extra details or embellishments like intricate linework, embellishing components, or subtle accents to enhance your artwork.
Perform a comprehensive audit of your work of art to guarantee that all details are refined to your fulfillment.
Step 7: Review And Export
Assess your digital batik work of art as a whole, attending to particulars, composition, and overall coherence. Assess whether it corresponds with your beginning concept and vision.
Accomplish any conclusive alterations or refinements to your artwork based on your audit and feedback. Regulate colors, adjust composition, or make minor edits to upgrade visual clarity.
Arrange your files and layers inside your design software for ease of access and future reference. This incorporates naming layers, gathering components, and saving versions of your artwork for documented purposes.
Get set your artwork for export by guaranteeing that it is within the fitting file format and resolution for its aspiring usage. Consider whether you wish to separate files for print and digital applications.
Export your concluded digital batik artwork to the specified file format, like JPEG or PNG. Ensure the quality and probity of your artwork are retained in the export phase.
Conclusion
In closing, batik art is a distinctive cultural legacy that is not only distinctive, lovely, and alluring but also has a profound philosophical significance. In addition to being valued locally, batik has grown to be a well-acknowledged culture worldwide. With the digitalization of the world, art has also evolved in terms of the creation strategies and tools, although with an emphasis on the original themes. The traditional batik artwork remains preserved, and the digital batiks open ways of creative autonomy and smoothly maintain their aesthetic and cultural integrity. With the ease of their creation, digital batik patterns are prevailing in various modern pursuits.
