How To Create A Deep Glow Effect
A deep glow gives your photos, logos, and other design components a gentle, captivating light effect that emanates from the inside. It is a creative stimulant that lets you add breathtaking luminosities and glows to your projects. This aesthetic enhancer enables pictures to have similarities with the natural behaviour of light. It creates glows that are more than merely adding simple overlays. Yet, a natural blending of glowing subjects is presented with the surrounding objects genuinely, adding subtle shadows and a sense of depth. You can enrich the image’s existing lighting by adjusting its contrast and brightness to create natural light diffusion. Various software are available to facilitate artists and designers to ornate images with luminous deep glow effects. The popular options include After Effects, Adobe Photoshop, Krita, GIMP, and Affinity Photo. In this blog, we will utilize Adobe Photoshop, which offers a range of tools and features to add adorable glow effects, like the deep glow, to highlight distinctive parts of images and draw in the viewers’ engagement.
Step 1: Duplicating The Base Image
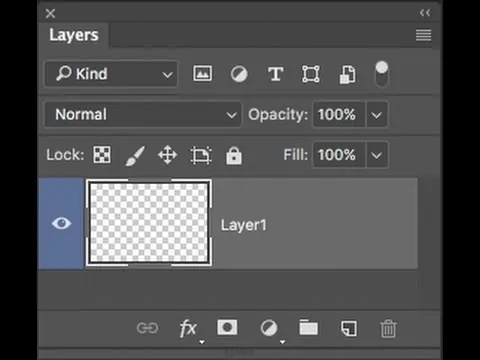
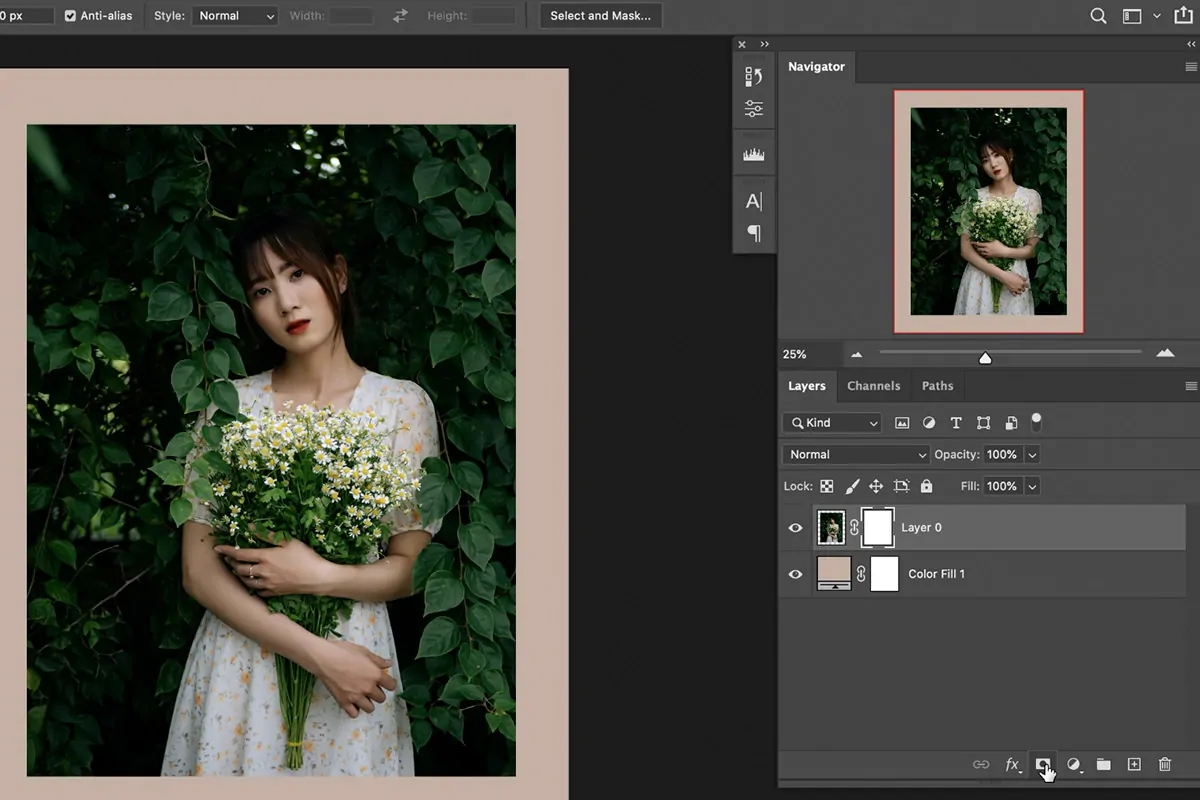
To initiate the editing process, you need to load your chosen photograph in Photoshop. Make sure that to add the subject or object where you ought to include a glow effect on a separate layer.
Within the Layers panel, press on the layer that holds the subject to which you need to apply the glow effect.
Tap on Ctrl + J to make a duplicate. It will guarantee that you have a backup of the initial layer and that independent glow alterations are permitted.
Click twice on the new layer’s title and rename it as Glow Effect to keep your workflow well managed.
In case you’ve got multiple layers, pull the duplicated layer to the top of the layer pile so that the glow effect does not interfere with other components.
Make sure that the visibility of both layers is empowered by clicking on the eye symbol so you’ll compare the impact as you work.
Copying the layer is vital since it permits non-destructive altering so that the initial picture remains untouched while applying the glow effect.
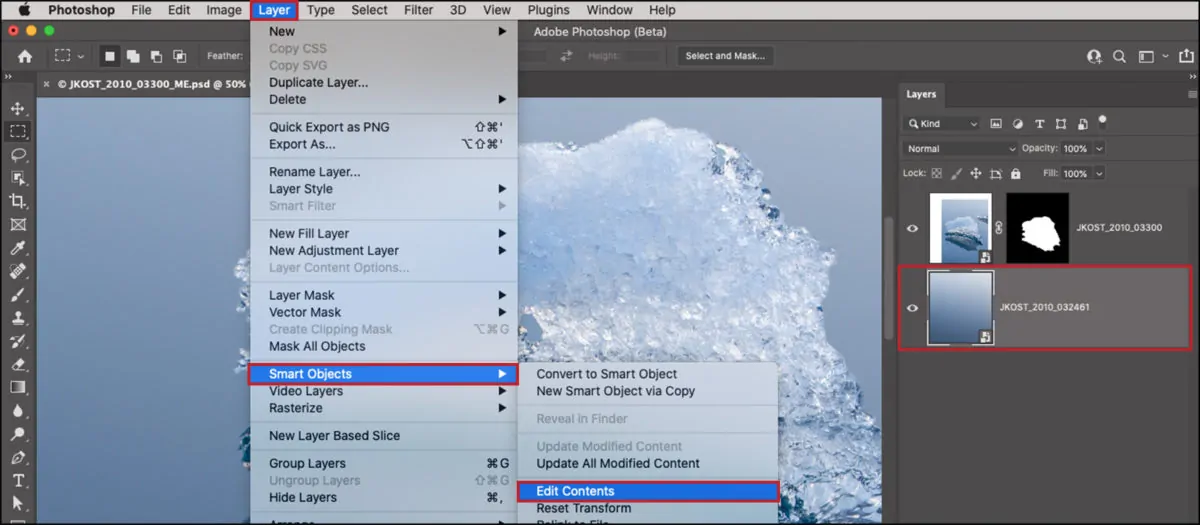
Step 2: Converting To A Smart Object
Within the Layers panel, tap on the Glow Effect layer that you made in the previous step.
On clicking, you will see a menu containing different choices. Seek for the Convert to Smart Object option.
That action will turn the layer into a Smart Object, permitting you to apply filters and adjustments in a non-destructive way.
Once you are done with the conversion, a small symbol will appear within the lower-right corner of the layer thumbnail, affirming that it is presently a Smart Object.
As the Smart Objects retain original data, you’ll be able to modify applied effects such as blur or glow anytime without losing quality.
Once the layer becomes a Smart Object, it will be prepared for further alterations, like including a glow while keeping the alters amendable.
Changing over to a Smart Object brings an easygoing, non-destructive workflow, making it simpler to modify and polish the glow effect afterwards.
Step 3: Creating Outer Glow

Within the Layers panel, tap on the Glow Effect layer to be sure that the glow applies to the proper layer.
At the bottom of the Layers panel, tap the fx symbol and click on Outer Glow from the menu.
Within the Outer Glow settings, specify the blending mode as Screen or Linear Dodge for an illuminated, natural glow impression.
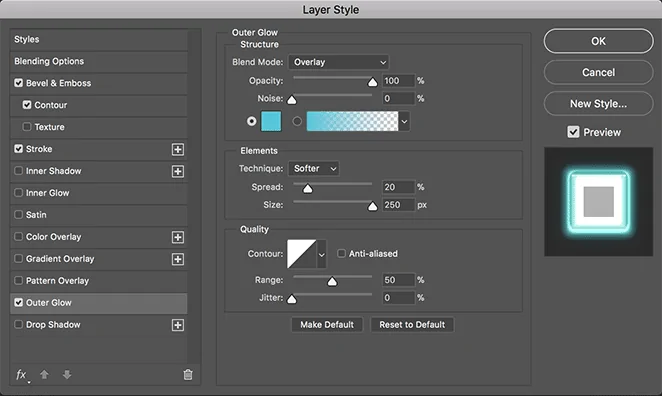
Tap on the colour box to choose a glow colour. Bright colours such as white, yellow, cyan, or neon tones are most suitable for a dynamic glimmer.
Alter the Spread to regulate the intensity and the Size to determine how distant the glow extends. Keep these values adjusted for a smooth effect.
Alter the Opacity slider to make the glow more substantial or milder accordingly. Alter the Range to fine-tune the transition between the glow and the background.
Utilizing the Outer Glow as a base layer helps to assemble the deep glow while letting the edges stay smooth and well-integrated with the photograph.
Step 4: Creating Blur Effect
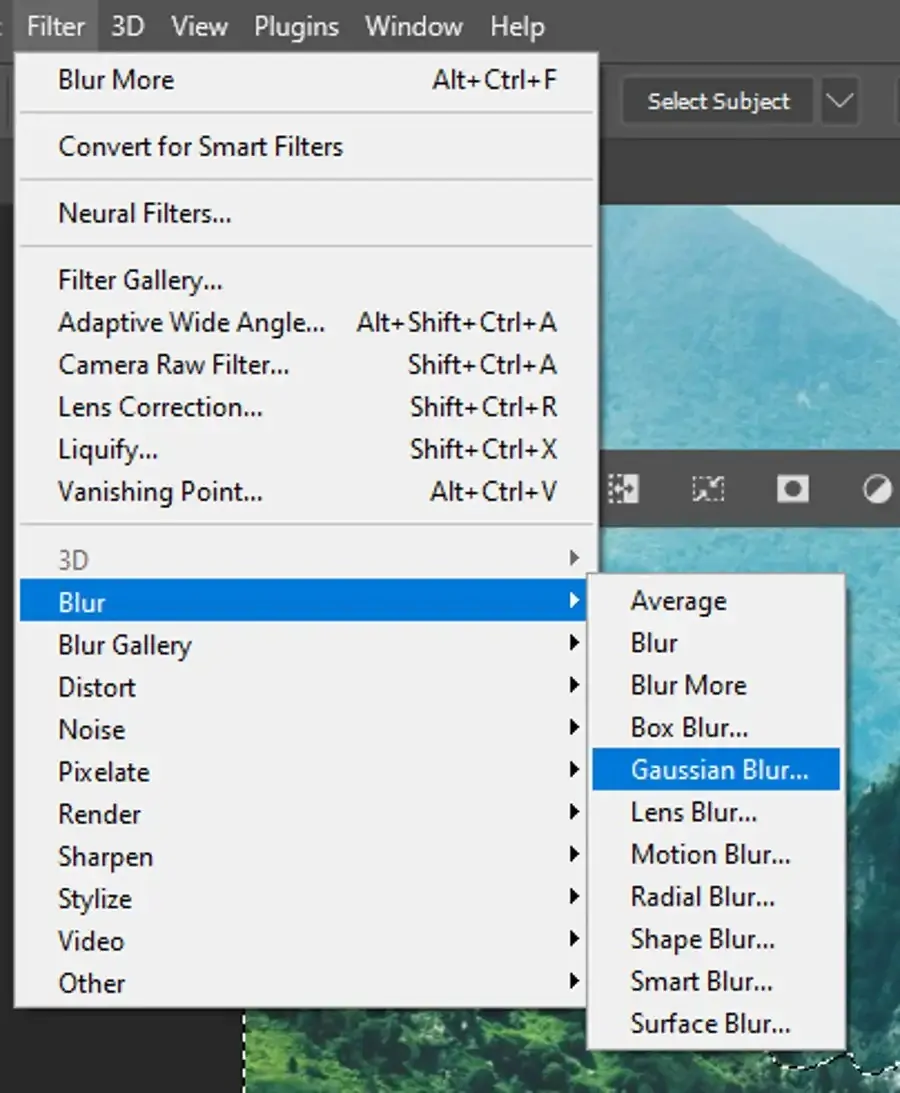
Tap on the Glow Effect layer within the Layers panel so that the blur applies solely to the glow and not the complete image.
Proceed to Filter and click Blur > Gaussian Blur from the top menu to get to the blur settings.
Within the Gaussian Blur settings window, alter the Radius slider. A lower value of almost 5 to 10 pixels makes a slight shine, whereas a higher value of 20 to 50 pixels produces a more assertive, diffused glow.
Activate the Preview option to notice the influences of the blur onto the glow in real time. Revise the radius value until the glow shows up naturally and spreads evenly.
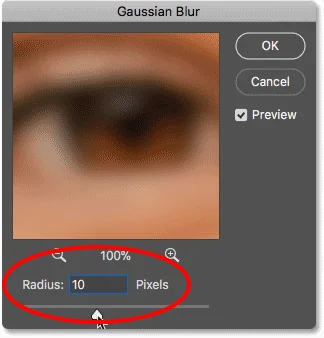
Tap Ok to use the blur effect. Because the layer could be a Smart Object, the Gaussian Blur stays editable and can be adjusted later on as required.
If the glow looks excessively strong, reduce the layer’s Opacity or decrease the Blur Radius narrowly for a more proportional effect.
Including the Gaussian Blur eases the edges and improves the Deep Glow, making it seem more realistic and visually pleasing.
Step 5: Adjusting The Levels
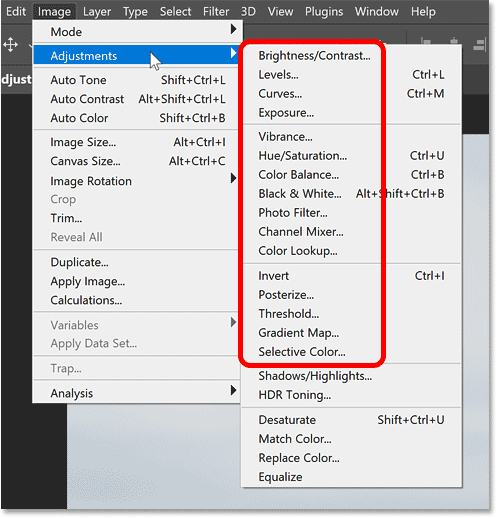
Tap on the Glow Effect layer within the Layers panel to confirm that the alterations only influence the glow.
Move to Image, click Adjustments > Levels, or use Ctrl + L to present the Levels panel.
Revise shadows, mid-tones, and highlight sliders to regulate the brightness and contrast of the glow. Carrying the right slider closer to the centre expands brightness while altering the middle slider upgrades intensity.
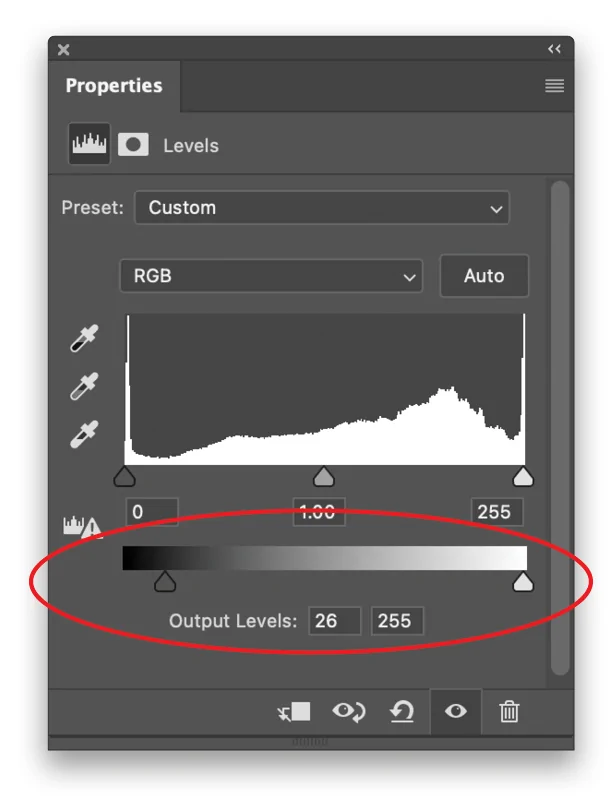
In case the glow seems too bland, increment the black point marginally to develop the contrast, making the glow integrate naturally with the photograph.
Activate the Preview checkbox to notice the effect in real time, altering the sliders until the glow shows up harmoniously.
Tap OK to finalize the adjustments. As the layer could be a Smart Object, you can alter the Levels at any time by double-tapping the effect.
Altering Levels enhances the depth and intensity of the Deep Glow effect, making it look distinct.
Step 6: Utilizing Color Dodge
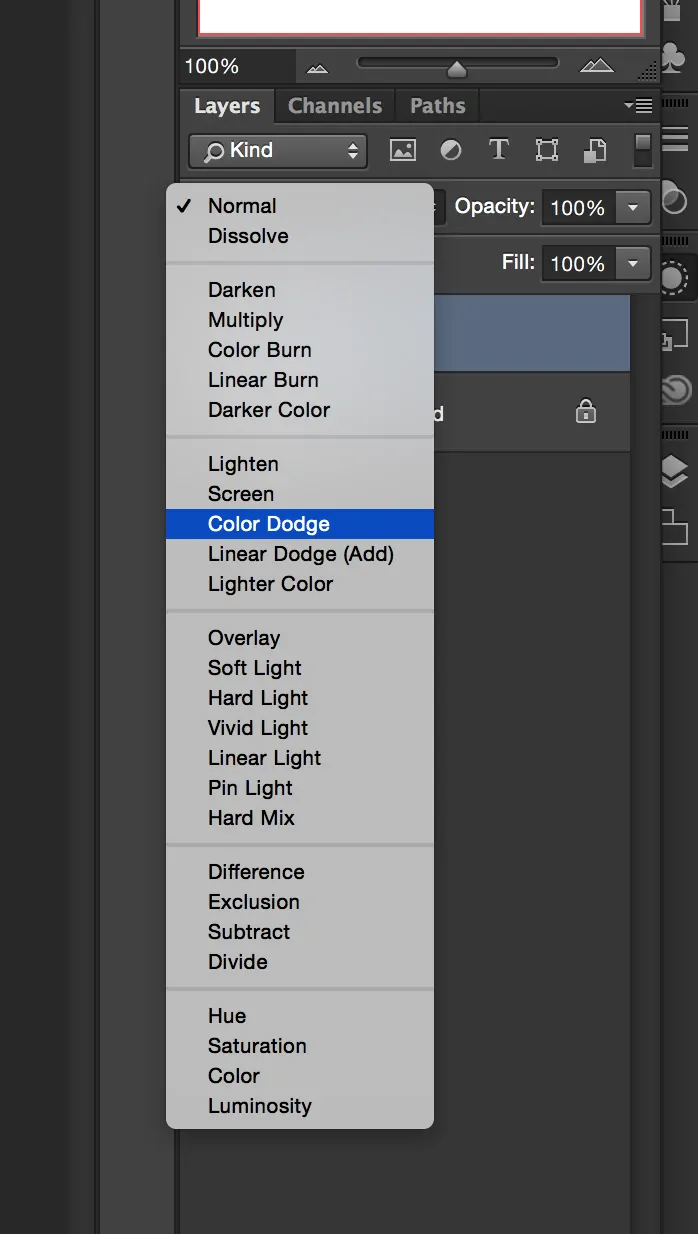
Tap on the Glow Effect layer and tap on Ctrl + J to make a duplicate. It will help intensify the glow without affecting the initial layer.
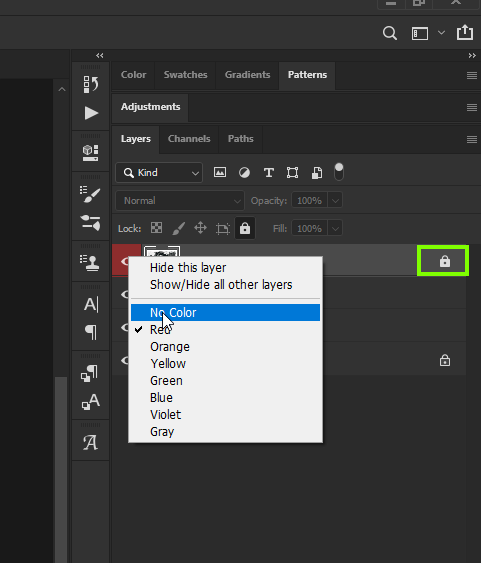
Within the Layers panel, choose the duplicated layer and alter its Blending Mode to Color Dodge. It will improve the glow by making the bright regions more vigorous and energetic.
If you find the glow too strong, decrease the opacity of the layer to merge it naturally into the picture. An opacity value of 40 to 70% is generally sufficient.
To hush the effect further, head to Filter, click Blur, then Gaussian Blur and set a slight Radius of 5 to 15 pixels to get a smoother glow shift.
Include a Layer Mask by tapping on the mask symbol at the bottom of the Layers panel and utilize a soft black brush to erase zones where the glow is overly drastic.
Use the Zoom out option and alter the opacity or blur as essential so that the glow looks realistic and integrates naturally.
Utilizing Color Dodge improves the depth and brightness of the glow, making it show up more spirited and remarkable.
Step 7: Fine-Tuning The Effect
![]()
Choose all glow-correlated layers by pressing Shift and clicking on each one. Group those layers by tapping on Ctrl + G. Also, the group should be renamed Glow Effect for superior management.
If the glow shows up too fierce, decrease the opacity of the layer group by integrating it naturally with the picture. Usually, a value of 50 to 80 % can offer the best results.
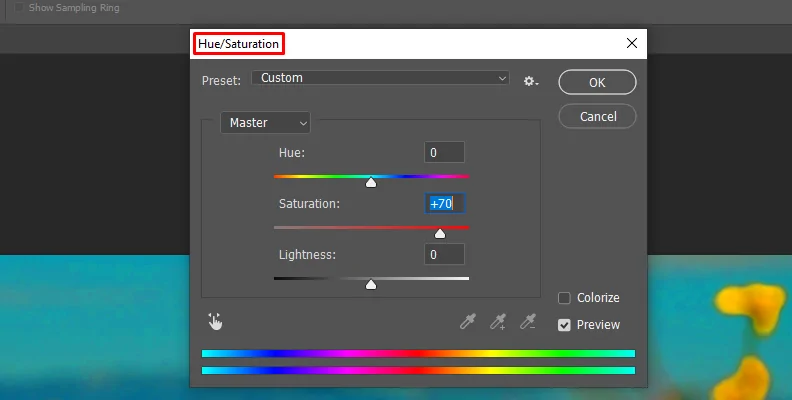
Tap Layer, then New Adjustment Layer, and choose Vibrance or Hue/Saturation to polish the intensity and colour of the glow. Expanding Vibrance raises the glow moderately while resetting the Hue/Saturation can move its colour towards a more customized appearance.
Make a new blank layer, put its Blending Mode to Soft Light, and softly paint over zones that require extra brightness employing a soft white brush.
Use the Zoom out and look at the glow beneath different backgrounds to be sure that it looks natural. Alter layer opacity or colour as required.
After you are satisfied, save the project in PSD format for prospective edits and export the ultimate picture in PNG or JPEG to share online.
The final tweaks make a perfect deep glow effect that improves the picture without overwhelming the initial details.
Conclusion
In summary, lighting is integral to emphasize certain regions of an image, accentuating the subject and directing the viewer’s attention. Similarly, adding a deep glow effect to photos that seems natural can provide some quite stunning results. It can significantly improve the image’s narrative and overall visual attractiveness. In addition to giving your picture an ethereal feel, a deep glow also helps to give it depth. You can also add a magical ambience to your composition by adding a hint of light or glow to specific zones, making them look more exquisite.
