
How To Convert An Image To Text
The convoluted process of converting a photograph to text typically incorporates operating Optical Character Recognition (OCR) technology. OCR program corresponds to the picture and acknowledges characters, switching them into machine-encoded content. OCR technology has essentially progressed, entrusting the accurate adaptation of printed or manually written content from images into editable libraries. It encounters applications in different scopes, such as report digitization, information passage computerization, and exposure for visually impeded people. OCR establishes digitizing physical documents, lessening reliance on paper-based records and encouraging data capacity, recovery, and trade in electronic formats. Other than specified OCR programs, image editing tools like Photoshop, Adobe Illustrator, and GIMP also promote in creation of amazing texts from images. Imagery and words merged have become their art form in a field where visual storytelling is the ruler. From appealing typography to metaphorical expressions, remaking photographs into textual classics opens a world of visionary prospects. This blog will continue debating how to convert an image to text, providing step-by-step guidelines.
Step 1: Image Importing

Find and double-click the Adobe Photoshop application symbol on your computer’s desktop or application menu.
After opening Photoshop, get to the top-left corner of the interface where the menu bar is found.
Tap on the “File” choice within the menu bar to uncover a dropdown menu containing different file-related actions.
Inside the dropdown menu, select the “Open” choice. This activity will indicate a discourse box to show on your screen.
Within the discourse box, head to the directory where the photo you want to switch to text is kept. Click on the photo file to choose it.
Next to choosing the photo, tap the “Open” button within the dialogue box. This activity will import the picture into the Photoshop workspace.
Guarantee that the photo contains explicit and neat content for successful text extraction utilizing OCR methods.
Step 2: Resolution Adjustment
Inside Adobe Photoshop’s interface, find the menu bar at the top of the screen.
After identifying, press the “Image” option to get to the dropdown menu containing different image-related operations and alterations.
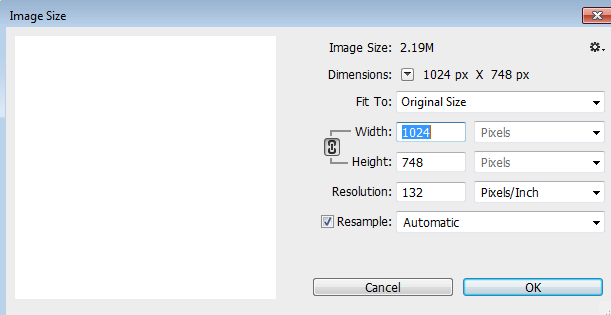
Via the dropdown menu, select the “Image Size” choice. This activity opens a discourse box where you can alter the measurements and resolution of the picture.
To improve the text’s clarity, you’ll alter the photo’s resolution within the “Image Size” dialog box. Increasing the resolution can raise the precision of text extraction utilizing OCR strategies.
To preserve the picture’s original aspect ratio while adjusting its size, guarantee that the “Constrain Proportions” checkbox is chosen.
After making the vital alterations to the image resolution, tap the “Ok” button to apply the changes and exit the discourse box.
Step 3: Applying Filters
Get to the top menu bar in Adobe Photoshop, where you’ll discover mixed options.
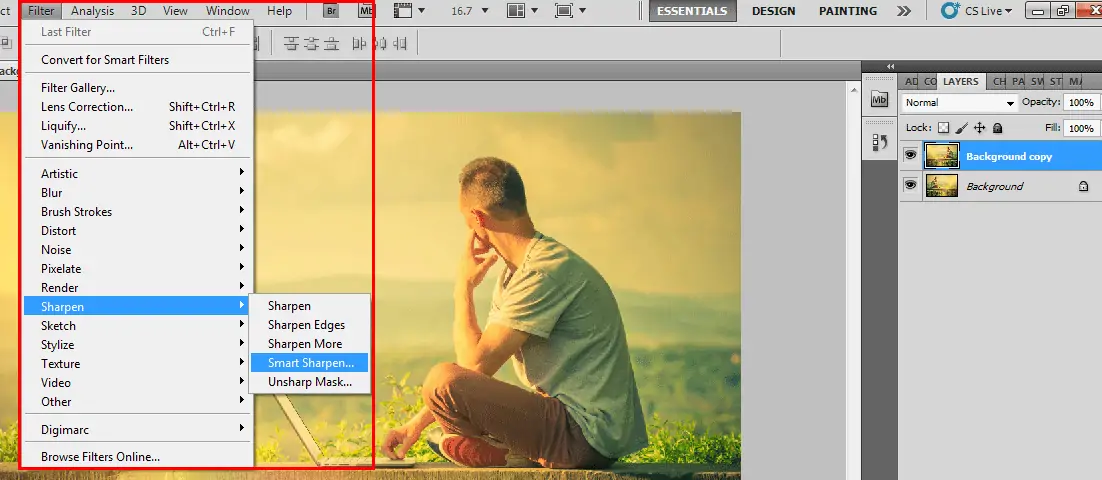
Once found, press the “Filter” option to uncover a dropdown menu containing an assortment of image control tools.
Inside the “Filter” menu, select the “Sharpen” feature. This activity opens a submenu with distinctive sharpening channels.
Relying on the traits of your photo and the level of detail within the text, select a suitable sharpening channel.
Standard Alternatives regularly include Sharpen, Sharpen More, and Sharpen Edges.
Once you’ve chosen the specified sharpening filter, press on it to apply it to the photo. That improves the brilliance and structure of the content inside the image.
A few sharpening filters may provide flexible settings like intensity or radius. Test with these settings to attain the specified level of sharpness while maintaining a strategic distance from over-sharpening distortions.
If essential, tap the “Ok” button to apply the changes near the dialog box after implementing the sharpening filter and steering settings.
Step 4: OCR Application
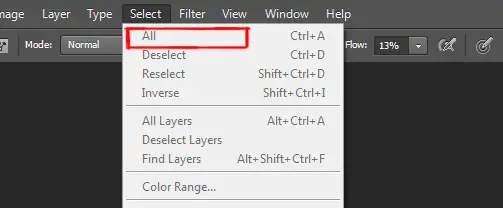
Get to the top menu bar to access editing choices, and tap on the “Edit” function to disclose a dropdown menu containing altering commands and capacities.
Inside the “Edit” menu, pick the “Select All” choice. This activity highlights the whole substance inside the active layer.
Pick all the content, get back to the “Edit” menu, and select “Copy”. This activity duplicates the chosen substance to the clipboard.
Begin a text-altering software like Microsoft Word or Notepad where you are expected to paste the replicated content.
Inside the text editing software, press on the document and select “Paste” from the menu, or press Ctrl + V to paste the replicated text.
Audit the pasted text for exactness and alter it as required. In some cases, OCR may present errors, particularly with complex textual styles or degraded images.
Step 5: Saving Modifications
Move to the top menu bar containing various alternatives and tap on the “File” alternative to uncover a dropdown menu with file-related functions.
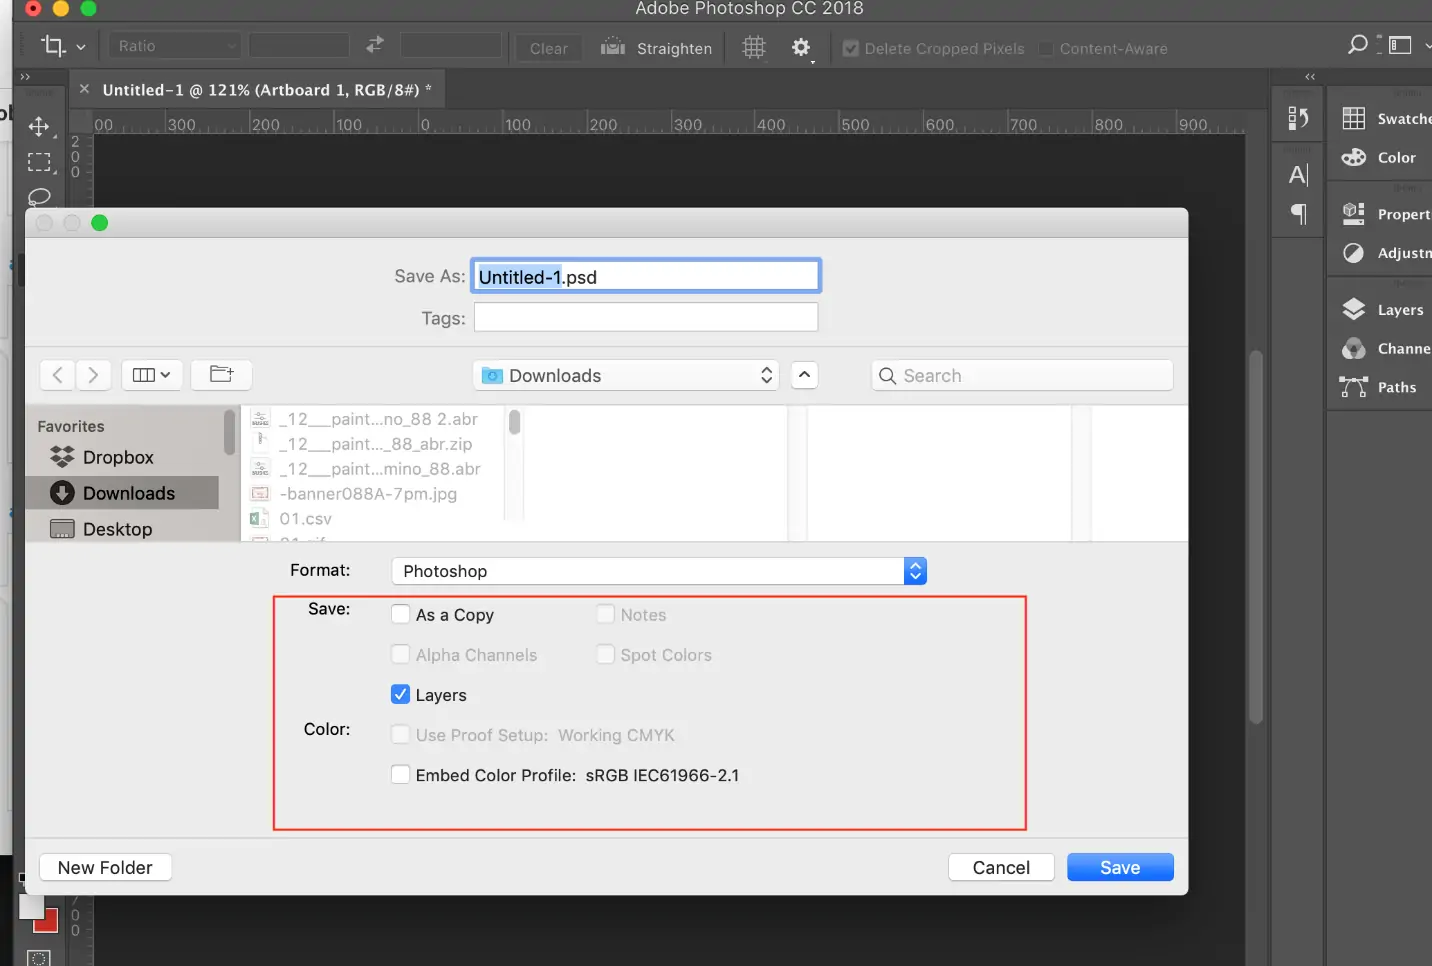
Inside the “File” menu, select the “Save As” function. That activity opens a dialog box for saving the prepared picture.
Within the “Save As” dialog box, pick the specified file formats like JPEG, PNG, or TIFF for the edited picture and head to the location where you need to save the image file.
Enter a fitting file title for the modified photograph within the dialogue box.
Under the chosen file format, you’ll have alternatives to alter settings such as picture quality or compression level.
After settings are arranged, press the “Save” button to save the processed picture to the desired folder with the chosen file format.
Step 6: Adjusting the Content
Start the text editing program where you stuck the extracted content from Adobe Photoshop.
Carefully read the extracted content to guarantee precision and completeness. Attend to any organizing issues or blunders presented amid the OCR process.
If you note any missteps or irregularities within the extricated text, make the fundamental alterations utilizing the text editing tools available within the software.
Utilize formatting alternatives such as font styles, sizes, and arrangement to progress the meaningfulness and exhibition of the text document.
Confirm that all pertinent data from the photograph has been precisely extricated and included within the text document.
Afterwards, you’ve reviewed and altered the extricated content save the document to protect the changes made.
It would help if you did extra processing or examination on the extracted content, like information extraction or language interpretation, coordinating with your needs.
Step 7: Concluding the Document
Precisely audit the document for any blunders, counting spelling and syntactic mistakes, and designing issues.
If you recognize any blunders during the editing phase, make the specified redresses utilizing the editing tools accessible in your text editing program.
Guarantee that the document is legitimately designed for coherence and clarity. Utilize suitable textual styles, font sizes, and dividing to progress the document’s appearance.
Include details such as headings, subheadings, and bullet points to systematize the content and make it easy to read.
Once you’re fulfilled with the content and designing of the document, spare it in your wanted file format like PDF or DOCX.
Make a backup copy of the document to anticipate data misfortune in case of accidental cancellation or file debasement.
If the document is expected for distribution, share it with the pertinent parties through e-mail, cloud capacity, or other means as suiting.
Conclusion
In conclusion, changing an image to text is a novel image development that expands the narrative aspect in a linguistic form. The blend of symbolism and content exemplifies more than just a valuable tool; it is an art form in which graphical story and dialect expression cross. The assortment of fascinating typography, allegorical dialect, and typical representations turns pictures into literary magnum opuses that uplift feelings, transmit narratives, and rouse ingenious energies. Whether you are going to extract a specific segment of a photo as the text or rely on the all-out details, the advanced techniques mentioned in the above blog can be valuable backers for you in your editing processes.
