How To Apply Neon Noir Filters In Photoshop
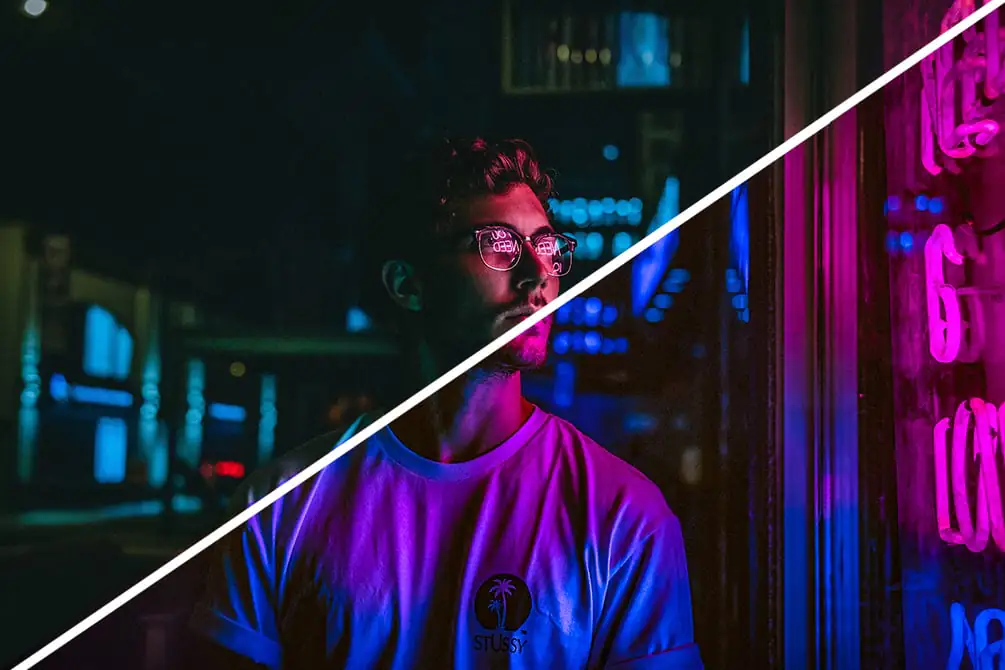
The incorporation of Neon Noir filters into image editing presents a disparate approach, carrying both artistic and thematic weight. These filters draw inspiration from the fetching radiance of neon lights, enlivening images with a distinctive amalgamation of intrigue and nostalgia. By emulating the vibrant hues, pronounced contrasts, and climate often found in nocturnal urban settings, Neon Noir filters imbue images with an added layer of depth and fascination. Beside their immediate aesthetic appeal, these filters also hold deeper theme-oriented indications. Neon lights have long been emblematic of urban landscapes, particularly within the context of bustling cityscapes and enigmatic alleyways. The application of Neon Noir filters using any dedicated software like Photoshop can stir emotions that span from the excitement of urban exploration to the contemplation that accompanies a solitary evening walk. These filters are frequently used conjuring a neo-noir atmosphere—a genre defined by shadows, mystery, and urban surroundings—that intensifies the narrative resonance of the image. Ultimately, this creative manipulation prompts contemplation, highlights the interplay between light and darkness, and offers a visual expression beyond conventional methods.
Step 1: Open Your Image
Begin your neon noir editing journey by launching Adobe Photoshop and opening the image you’re eager to transform. It’s crucial to select an image with strong contrasts and intriguing lighting to truly embrace the essence of neon noir. This genre thrives on bold interplays of light and shadow, and choosing the right image will set the foundation for an electrifying result.
Once Photoshop is up and running, navigate to the “File” menu and select “Open.” Browse through your files and select the image that resonates most with the neon noir aesthetic. As the image loads onto your workspace, take a moment to observe its details and imagine the striking neon colors and dramatic contrasts that will soon come to life.
Step 2: Duplicate the Background Layer
Now that your chosen image is open and ready for transformation, it’s time to preserve your original artwork. Duplicating the background layer provides you with a safety net, allowing you to experiment and apply filters without altering the original image.
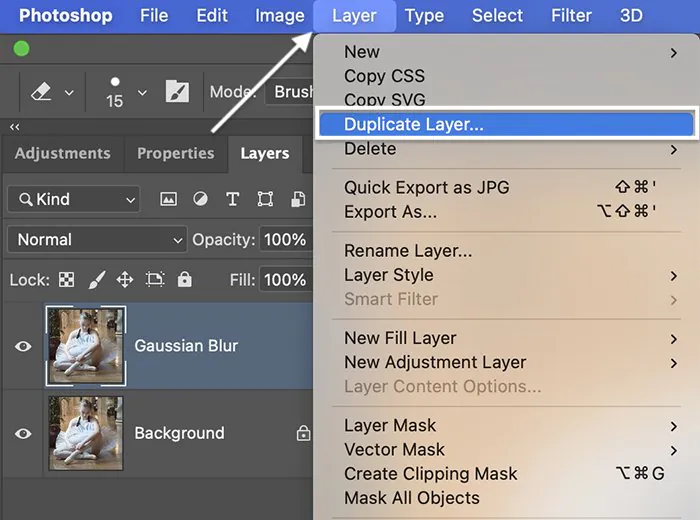
To duplicate the background layer, locate the Layers panel on the right-hand side of your Photoshop workspace. You’ll find the background layer listed there. Right-click on the background layer and select “Duplicate Layer” from the context menu that appears.
Upon selecting “Duplicate Layer,” a dialog box will prompt you to name the duplicated layer. You can keep the default name or assign a new one—it’s entirely up to you. Once you’ve named the duplicated layer, click “OK” to confirm.
Step 3: Apply the Neon Filter
With your duplicated layer prepared, it’s time to infuse your image with the captivating neon noir essence. The neon filter will bring the vibrant, otherworldly glow that defines this style.
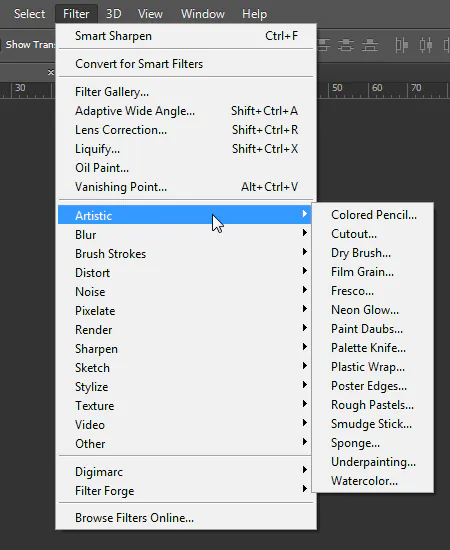
To apply the neon filter, navigate to the “Filter” menu located at the top of your Photoshop workspace. Within the “Filter” menu, explore the “Artistic” or “Special Effects” submenu—exact menu names may vary based on your Photoshop version.
In the submenu, you should find a selection like “Neon Glow” or a similar option. Clicking on this choice will trigger the neon filter to be applied to your duplicated layer. Almost instantly, you’ll witness your image undergo a striking transformation, as neon-like hues and luminous accents start to emerge.
Remember that the neon filter might have adjustable parameters that allow you to fine-tune its intensity, color variations, and other characteristics. A dialog box may appear with these options, allowing you to sculpt the neon effect to your vision.
Step 4: Adjust Filter Settings
Now that you’ve applied the neon filter and witnessed the initial transformation, it’s time to refine and mold the effect to achieve precisely the neon noir atmosphere you envision. The ability to adjust filter settings empowers you to tailor the glow, intensity, and color scheme to align with your creative intent.
After applying the neon filter, you might notice a dialog box or a panel with various customization options. These options allow you to control the filter’s parameters and tweak its visual impact. Here’s where your artistic intuition and technical prowess come into play.
Experiment with settings like “Glow Intensity” to control how luminous the neon elements appear. You can also adjust the “Brush Size” or similar settings to dictate the size of the neon accents. Play around with color choices, as neon noir embraces bold and vibrant hues that contrast dramatically against the darker elements.
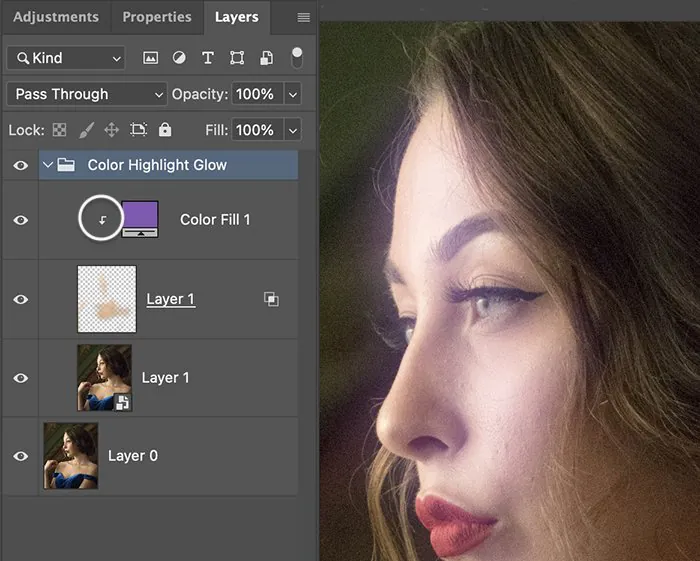
Step 5: Create Depth with Blend Modes
Now that your image boasts a vibrant neon glow, it’s time to elevate it further by delving into the realm of blend modes. Blend modes are like the secret sauce of image editing—they enable you to blend layers together in various ways, adding depth and complexity to your composition.
To explore blend modes, focus on the Layers panel. It’s usually located on the right-hand side of your Photoshop workspace. With your neon-filtered layer selected, you’ll notice a drop-down menu near the top of the Layers panel. This is where the blend modes reside.
Click on the blend mode drop-down menu to reveal a plethora of blending options. For the neon noir effect, consider blend modes like “Overlay,” “Multiply,” or “Screen.” These modes interact with the underlying layers in unique ways, intensifying highlights and shadows while enhancing the overall ambiance.
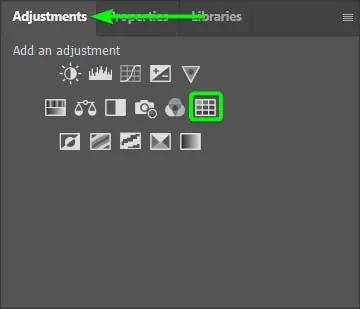
Step 6: Add Adjustment Layers
As your neon noir masterpiece takes shape, it’s time to fine-tune the finer details and enhance the overall mood through adjustment layers. Adjustment layers provide a non-destructive way to modify various aspects of your image without altering the original pixels. They’re like virtual filters that you can customize and readjust at any time.
To begin, look for the “Create new fill or adjustment layer” icon at the bottom of the Layers panel. It resembles a half-filled circle. Click on this icon to reveal a menu of adjustment layer options.
Consider starting with the “Curves” adjustment layer. Curves allow you to manipulate the tonal range of your image, enhancing contrasts and adding depth. Play with the curve’s shape to intensify the lights and shadows, further enriching the neon noir ambiance.
Next, explore the “Color Balance” adjustment layer. This layer enables you to fine-tune the color tones in your image. For neon noir, experiment with shifts towards cyan and magenta to amplify the futuristic and surreal qualities.
Lastly, add a “Vibrance” adjustment layer to control the overall saturation. Boosting vibrance can intensify the neon colors while preserving a natural feel in less-saturated areas.
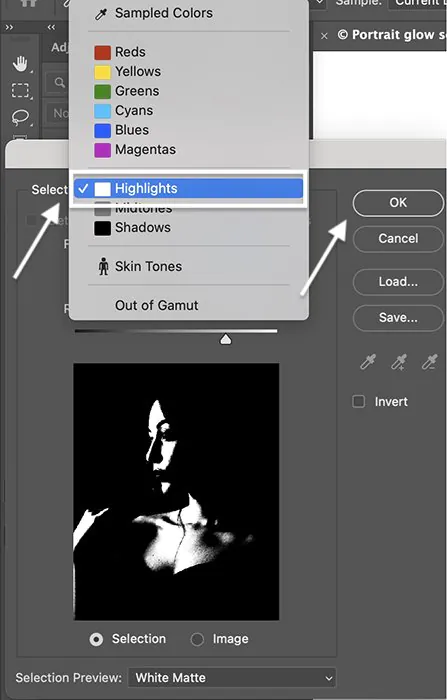
Step 7: Refine with Masking
Your neon noir image is nearly complete, but there’s always room for meticulous refinement. Masking offers a precise way to target specific areas and control the visibility of effects and adjustments you’ve applied so far. With masking, you can ensure that the neon elements blend seamlessly with the original image, adding depth and dimension.
To start, select the layer you want to apply the mask to, which could be one of the adjustment layers or even the neon-filtered layer itself. With the layer selected, find the “Add Layer Mask” icon at the bottom of the Layers panel—it’s shaped like a rectangle with a circle inside. Clicking this icon will add a white layer mask to the selected layer.
Select the layer mask by clicking on it. You’ll notice a border around the mask thumbnail in the Layers panel, indicating that you’re now editing the mask, not the layer itself.
Grab the Brush tool from the toolbar and set your foreground color to black. With black as your brush color, paint over areas of the mask where you want to hide or tone down the effect. As you paint, the underlying layers will become visible, effectively “masking out” the neon effect in those areas.
For areas where you want the neon effect to shine through, switch your brush color to white and paint over those regions on the mask. This “reveals” the effect in those spots, allowing the neon glow to illuminate specific parts of your image.
Step 8: Final Touches
Lastly, add those finishing touches that will elevate your creation from impressive to unforgettable. These subtle yet impactful additions will further enhance the overall atmosphere.
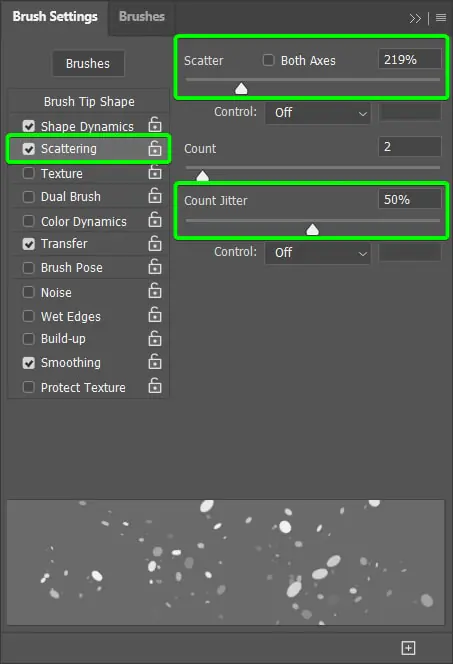
Consider adding elements like rain or fog to the scene. These weather effects can intensify the mood and drama of your neon noir composition. You can find stock images of raindrops or mist online, or you can create your own using Photoshop brushes or filters.
To add rain or fog, create a new layer above all your other layers. Then, use brushes or filters to paint or generate the desired effect. Adjust the layer’s opacity to control the intensity of the effect, ensuring it blends seamlessly with your image.
Another option is to experiment with lens flares. These bursts of light can add a touch of cinematic flair to your neon noir scene. Place a lens flare on a new layer and adjust its position and opacity until it complements the existing light sources in your image.
Lastly, consider fine-tuning the overall color balance and contrast one final time. This last adjustment can make a significant difference in ensuring your neon elements harmonize with the rest of the image.
Conclusion
To wrap up, the application of Neon Noir filters holds significance both in a concrete and philosophical sense. These filters, designed to mimic the ambiance of neon-lit urban landscapes, serve as a creative avenue for eliciting emotions, adding depth to visuals, and presenting a novel perspective on familiar scenes. They encourage observers to engage with the interplay of light and darkness, making them a valuable tool in image editing for artistic expression and a fresh outlook. The blend of vibrant tones and intriguing shadows in these filters turns everyday scenes into stories that tempt viewers to inquire the charm of urban mystique.
