How To Add Nostalgic Effects To Images
In photography and visual art, nostalgia is a potent technique that prompts feelings and memories. These artistic effects will transport you back in time. The sense of social connectivity is heightened by nostalgia, which gives the impression that we are a part of a larger social network. The dreamy appearance and timeless quality that nostalgia effects lend to photographs have made them popular even in recent years. By creating an atmosphere, a tone, or a range of emotions, these effects can give contemporary images the appearance of being from a completely different era. To create this defect, warm, faded, or sepia-toned colours are enhanced in photographs as they stimulate the appearance of vintage photos and movies. Additionally, you can add tints that are associated with a certain era, such as the pastel shades of the 1950s or the vivid neon hues of the 1980s. This blog will guide you through the editing process of creating nostalgic moods within your contemporary images and bestowing them with an undying charm.
Step 1: Color Adjustments

Begin by opening your picture in your chosen editing program, considering alternatives like Photoshop, Lightroom, or GIMP.
Head to the colour alteration tools. These tools can be named Color Balance, Hue/Saturation, or Color Mixer, depending on the application you are using.
Slowly lower the saturation to quiet the colours. This step helps accomplish the faded appearance typical of old photos.
Move the temperature slider towards the warmer side to include a slight yellow or orange tint. This provides the picture with a sunlit, mature feel.
Ease the shadows and highlights to lower contrast. This practice helps to make a more uniform, mellowed feel across the picture.
Test with individual colour channels like red, green, and blue to further alter the colour harmony. You can increase the reds and yellows to improve the warm, nostalgic feel.
Persistently preview your adjustments to confirm the image keeps up a congruous, usual look while reaching the specified nostalgic impact.
Step 2: Using Sepia Filters
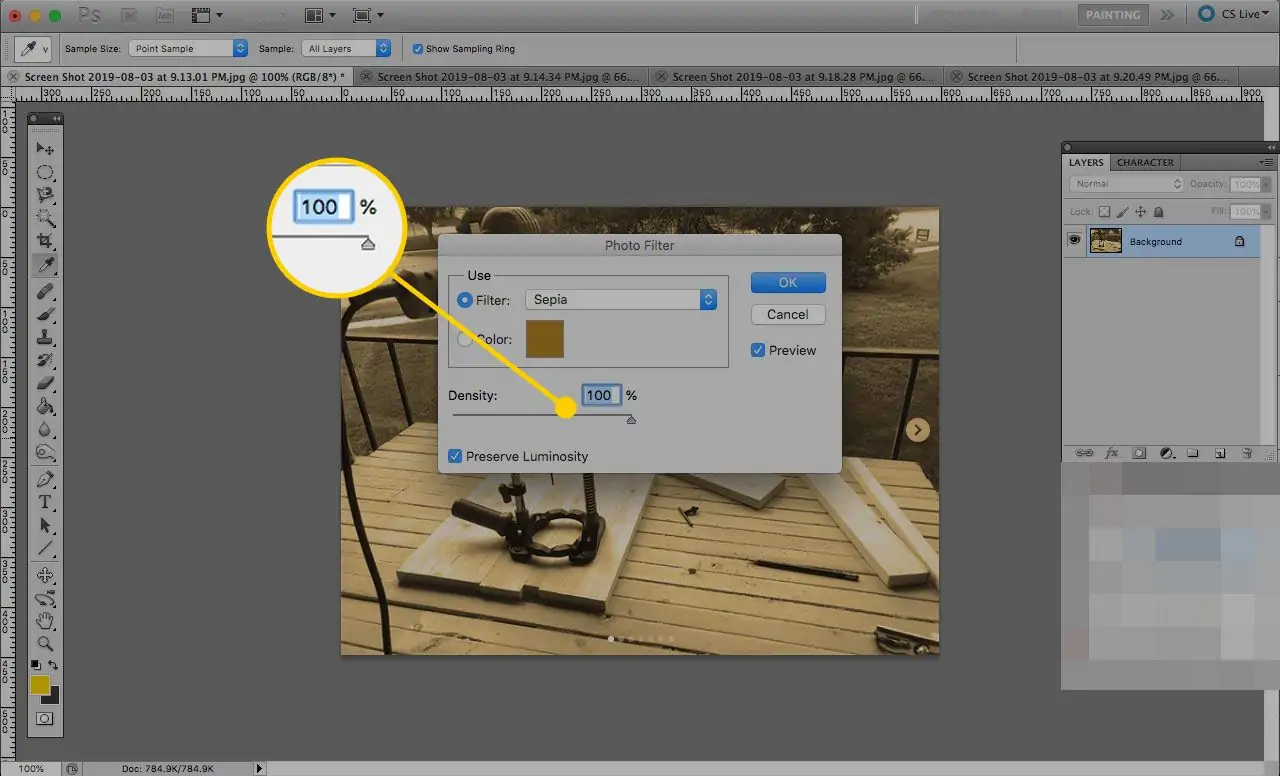
Find the filter or adjustment tool option for sepia tones in your editing app., or you can explore options like Photo Filters, Color Effects, or comparative categories.
If accessible, make a new alteration layer for the sepia impact. This allows you to adjust or limit the effect afterwards without modifying the initial picture.
Choose the sepia filter and apply it to your photo. The picture will take on a warm, brownish shade typical of vintage photos.
Utilize the filter’s level or intensity setting slider to control the quality of the sepia effect. Too solid can overpower the image; as well, light may not accomplish the required look.
Alter the tone and saturation inside the sepia filter to urge the ideal tone. You might need to incorporate a bit more yellow or downsize the redness for an accommodated look.
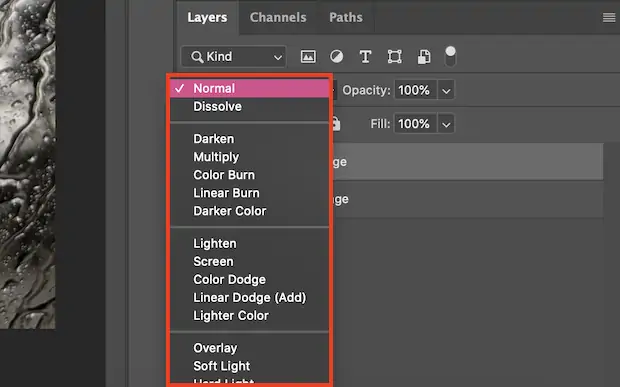
Test with blending modes like Overlay or Soft Light, if your program permits, to attain a more integrated impact.
Persistently compare the sepia-toned image with the first to guarantee the impact enhances the nostalgic sense without affecting the image’s quality.
Step 3: Adding Noise
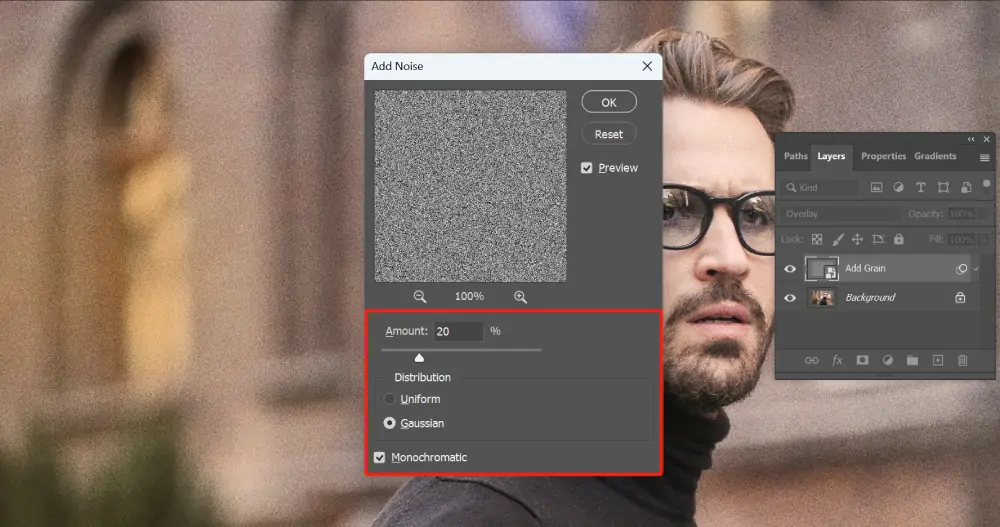
Find the grain or noise filter in your editing program. In Photoshop, you can see it under Filter > Noise > Add Noise.
If attainable, make a new adjustment layer to include grain. It is helpful for non-destructive editing and simple modifications.
Begin by establishing a moderate amount of grain. However, avoid using too much grain as it can dominate the image; in the same way, too little grain may not accomplish the required vintage look.
Set the size of the grain particles. Bigger particles can provide a rougher, more pronounced surface, while tiny particles give a modest, finer impact.
Select between even or Gaussian distribution. Choosing Gaussian delivers a more natural, film-like grain in contrast to even one.
Alter the blend mode of adjustment layer and opacity to coordinate the grain consistently into the picture.
Step 4: Vignette Application
Discover the vignette tool in your editing program. If you are using Lightroom, you can find this tool in the “Effects” panel. Using Photoshop, you’ll utilize the Lens Correction filter or make a manual vignette with layers and masks.
Consider making a new adjustment layer for the vignette effect. It permits you to alter or remove the vignette later without influencing the initial image.
Begin by applying an essential vignette impact. You will get the darkened edges of the picture, pulling the viewer’s eye towards the epicentre of your shot.
Utilize the amount slider to control the intensity of the vignette. A slight vignette can improve the nostalgic aspect without being too prominent, while a stronger vignette can make a sensational impact.
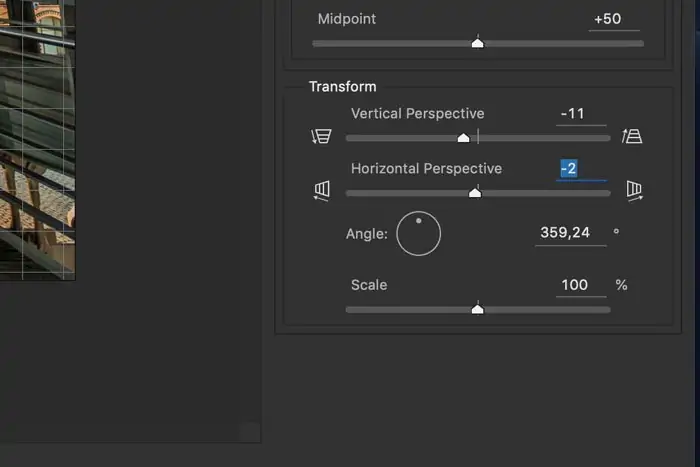
Modify the midpoint slider to direct how distant the vignette effect advances into the picture. A descending midpoint value will move the darkening closer to the centre, whereas a more increased value keeps it close to the edges.
Alter the roundness slider to regulate the shape of the vignette. Creating a more rounded vignette makes a gentler, more conventional look; correspondingly, a less rounded vignette can be more trendy and stylized.
Increment the feathering to make a smooth transition between the vignette and the centre of the picture. That bypasses harsh edges and keeps up a natural, nostalgic feel. Constantly preview and alter as required for the finest result.
Step 5: Adding Light Leaks Effects
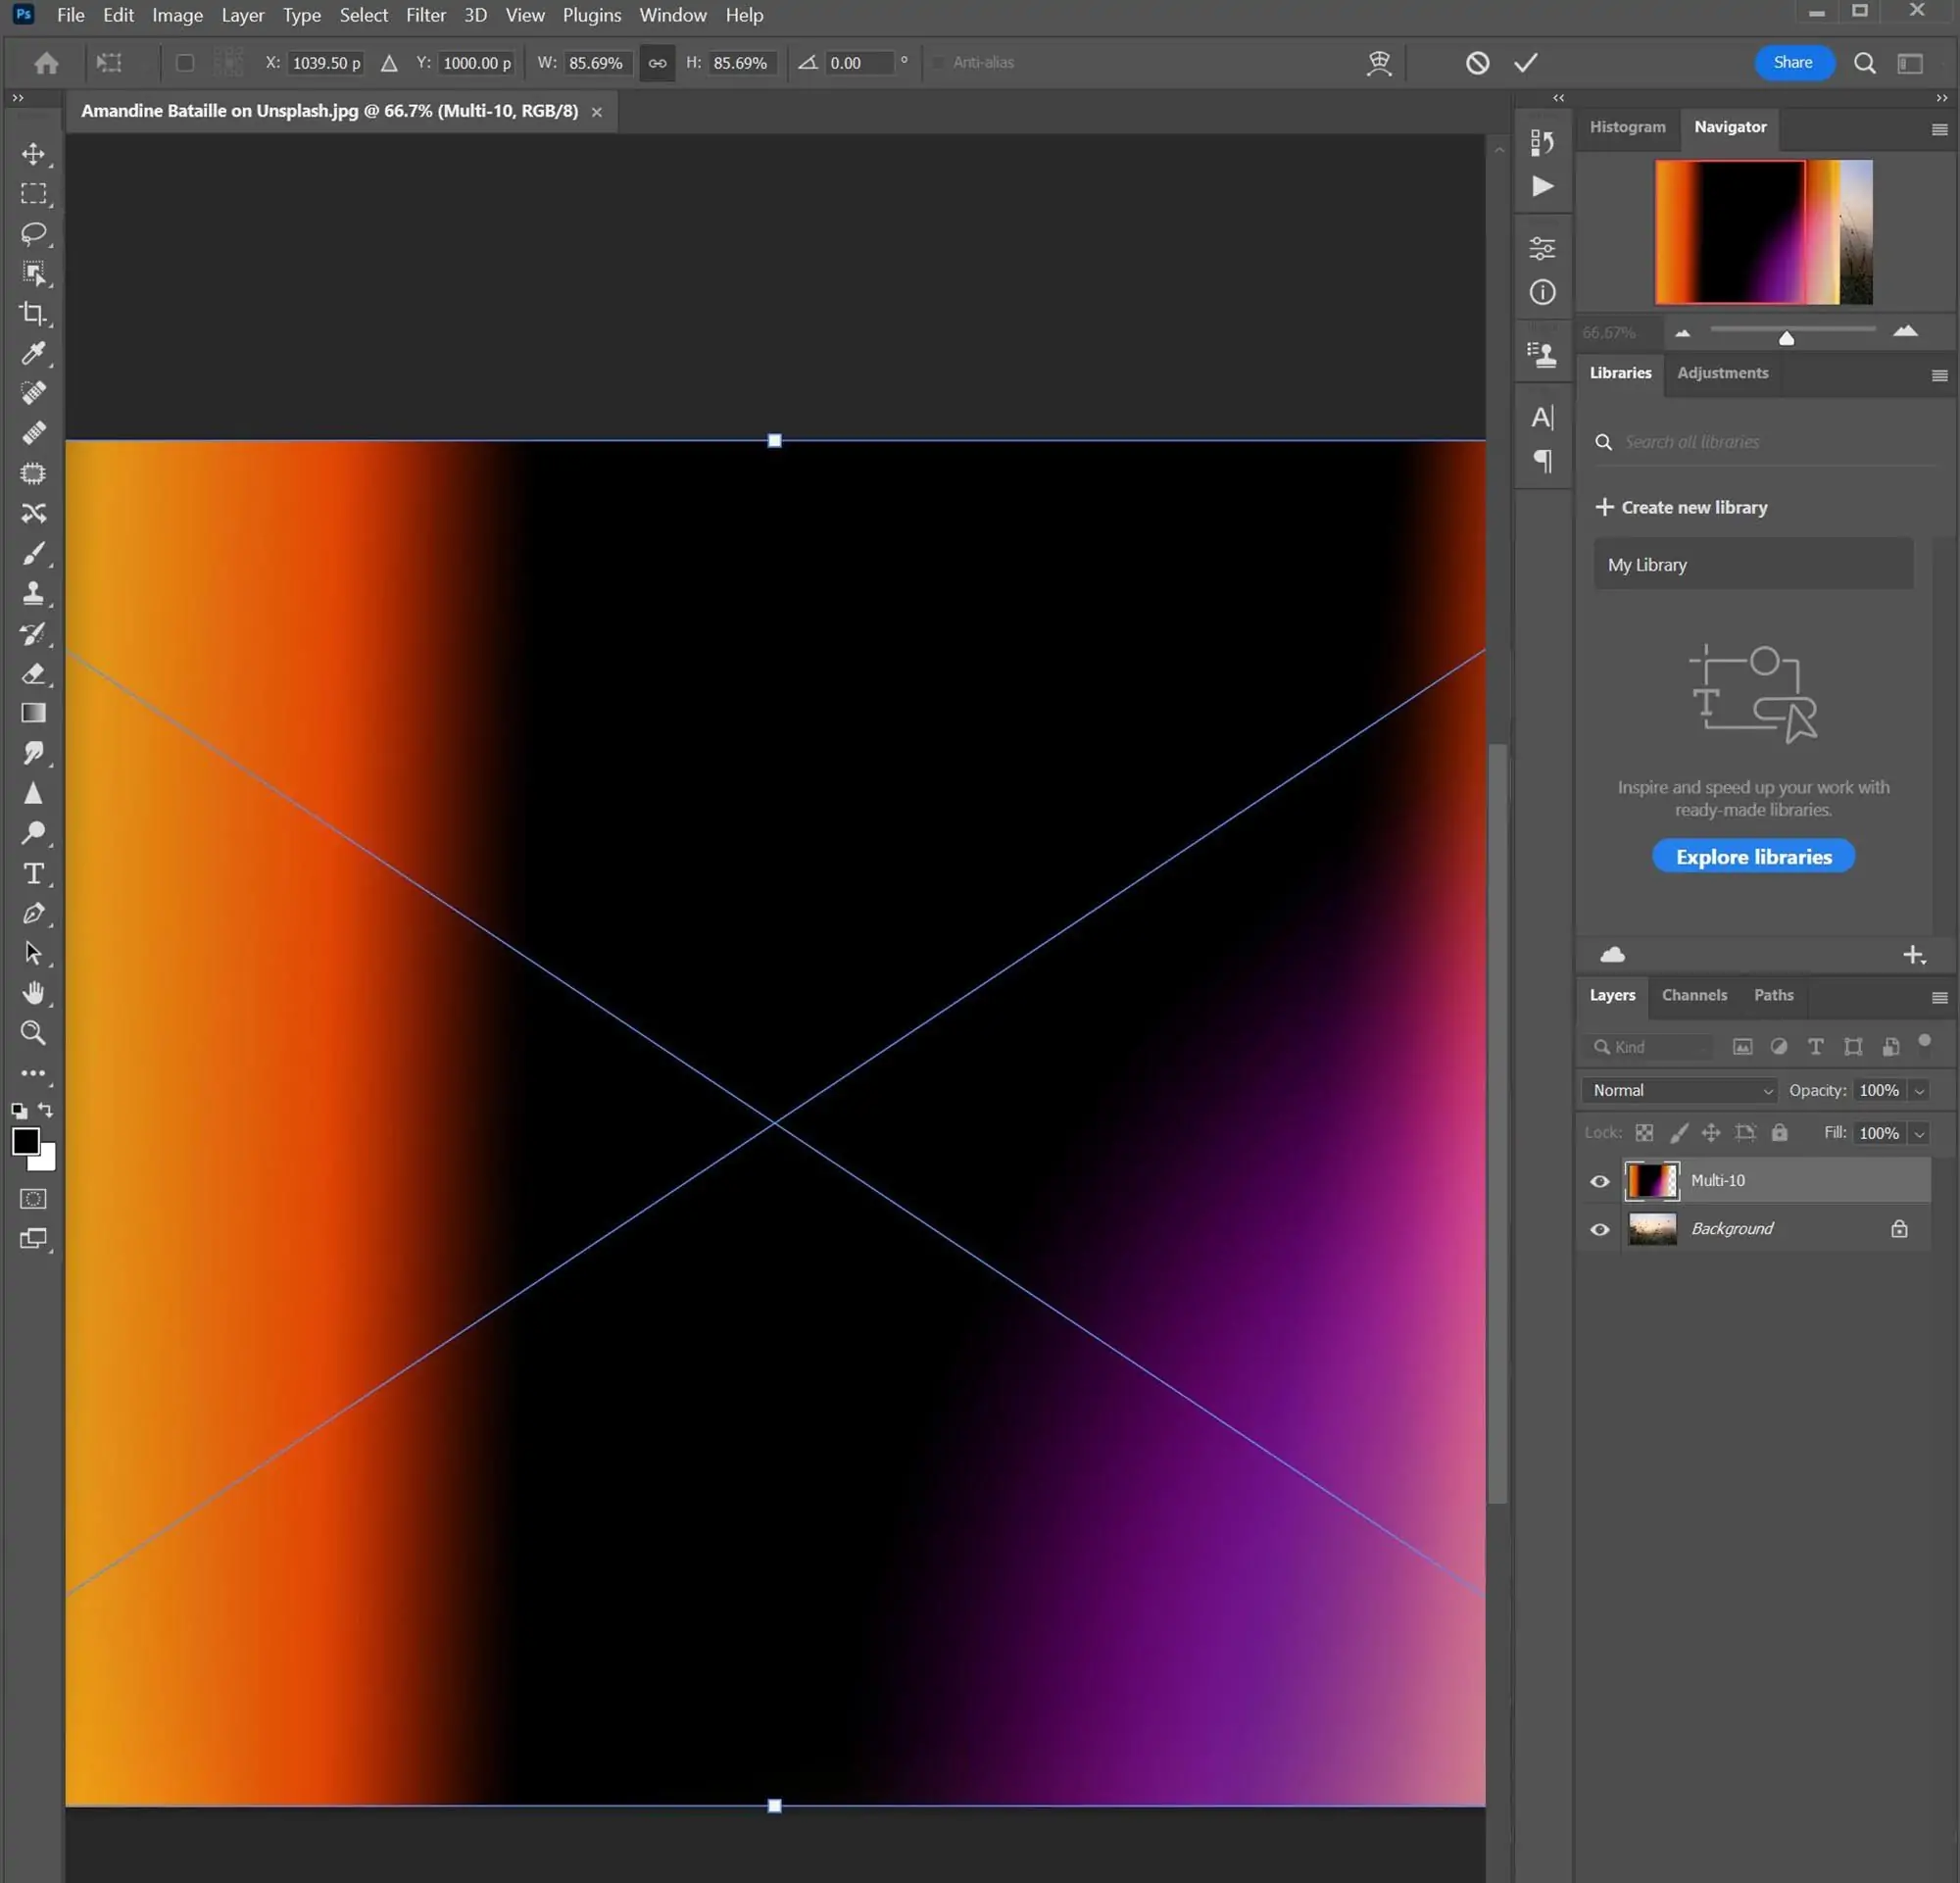
Find the tool or filter particularly planned for recreating light leaks. This might be found within options like effects, filters, or brush tools according to the software.
Select a preset or manually apply the light leak impact to your photograph. This often includes setting a light leak pattern or gradient and spreading it to the required ranges of the image where you need to make a vintage, flawed light effect.
Revamp the intensity and colour of the light leaks, tweaking the parameters like brightness, contrast, hue, and saturation to attain the specified nostalgic appearance.
Alter the blending mode and opacity of the light leak layer to consistently conform it with your original image. Play with blending choices like Screen, Overlay, or Soft Light for distinctive effects.
Utilize transformation tools to alter the position, scale, and rotation of the light leak effect as needed, guaranteeing it improves instead of distracting from the general composition.
Step 6: Texture Enhancements
Bring a texture file into your editing program. You can go for textures that possess subtle components like scratches, dust, or paper surfaces that have a ripened appearance to your photo.
Put the texture layer over your image layer in the layer stack. This lets you control and blend the texture without altering the initial image specifically.
Try with different blend modes like Overlay, Delicate Light, and Increase to combine the texture consistently with your picture. Each blend mode influences how the texture is associated with the colours and tones of the fundamental image.
Adapt the opacity of the texture layer to regulate its vehemence. Lesser opacity values have a milder effect, whereas more heightened values make the texture more evident.
Revise the size and position of the texture layer as required to accomplish the required coverage and distribution of texture over the image. This action guarantees that the texture upgrades the nostalgic effect and does not overpower the most subject.
Utilize masking tools to specifically apply the texture to specific areas of the image. This permits you to preserve clarity in key regions while including texture in others, improving profundity and interest.
Keep auditing your alters to guarantee the texture improves the nostalgic feel. Perform concluding alterations for blend modes, opacity, and masking for a cohesive and visually engaging mark.
Step 7: Blurring And Finalizing
Make a duplicate of your original image layer so that you can work non-destructively and correspond the edited form with the initial.
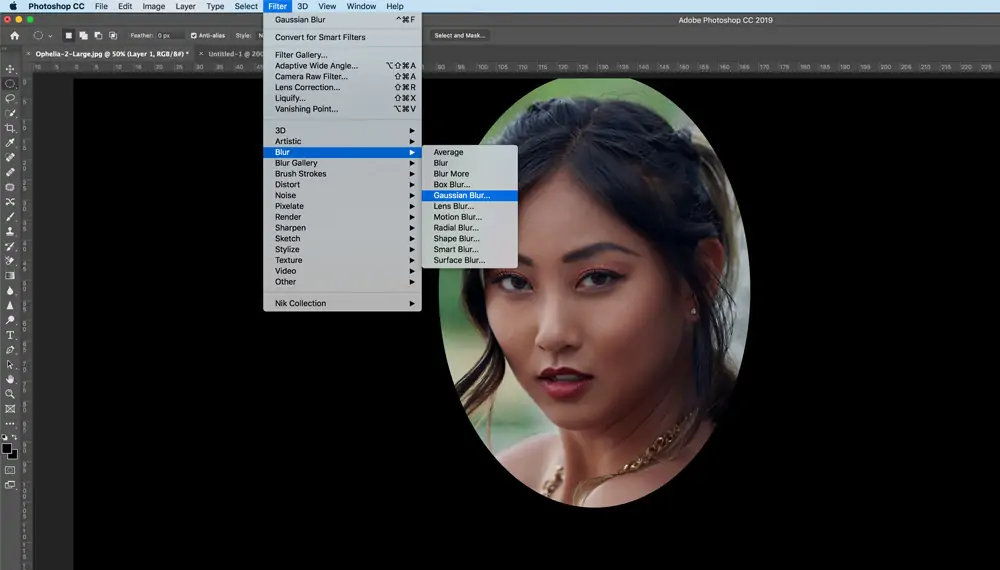
Utilize the Gaussian Blur channel using Filter > Blur> Gaussian Blur in Photoshop or comparable options in other editing programs. Alter the radius to soften the image slightly.
Apply the blur specifically utilizing layer masks or selection tools to obscure particular areas while protecting sharpness in others, like keeping faces or critical details clear.
Play with different softening procedures, like utilizing the soften brush or adding a surface blush for a smoother texture and retaining edge details.
Imitate a shallow depth of field by obscuring the background more than the foreground. This strategy can bring focus to the subject and make a nostalgic, wistful climate.
Set the opacity of the blurred layer and get into different blend modes like Overlay or Soft Light to incorporate the softened impact with the initial image.
Reexamine your alters at distinctive zoom levels to make sure that the specified nostalgic vibe is accomplished. Make any last adjustments for a lustrous last result and save your finalized image in a fitting format.
Conclusion:
To conclude, the nostalgia effect fabricates the style of bygone periods and gives photos an antique look, thus equipping them with an ageless charisma. It enables the viewers to strengthen ties with the past, relive past experiences, and recognize how much has changed over time. In its visual nature, a nostalgic effect is a reminder of what has gone before, as well as our aspirations to witness the history. Thus, glimpsing the resultant images enhanced with a nostalgic climate, the viewers are emotionally affiliated with them and feel like going back to a time of incredible profoundness and fiction.
