
How to Add Glow Effect to Your Images
The glow effect technique adds an ethereal radiance to your images, drawing attention and creating an inviting environment. If you want to accomplish the glow effect in your images, you should consider the vital steps and techniques used for this purpose. You should also be conscious of the context and purpose behind the image as a means to develop the glow effect appropriately. A subtle glow may be added to raw landscape-like photographs, and a vivid and vibrant glow can be applied to various digital artworks. This blog is a step-by-step tutorial to help you improve your abilities in generating a dazzling glow effect in your images. Following these procedures before altering your photographs can establish the essential aesthetics to get a balanced and pleasing result.
Step 1: Open the image in your preferred image editing software.
Launch the image editing software by double-clicking on its icon or accessing it from your application menu.
Once the software is open, locate the “File” menu or toolbar option at the top of the interface.
Click on “File” to open the dropdown menu and look for the “Open” or “Import” option.
Select “Open” or “Import” to initiate opening an image.
A file explorer window or dialog box will appear, allowing you to navigate to the location where your image is stored.
Browse the folders and drives to find the image you want to work with.
Select the image file by clicking on it once, then click the “Open” or “Import” button.
The image editing software will now load the image onto its canvas or workspace, and you can see the image in the main editing area.
Step 2: Duplicate the image layer.
To duplicate the image layer in most image editing software, including Adobe Photoshop and others, you can follow these sub-steps:
Ensure the image layer you want to duplicate is selected in the layers panel or layer palette. Typically, the layer will be named “Background” or “Layer 1.”
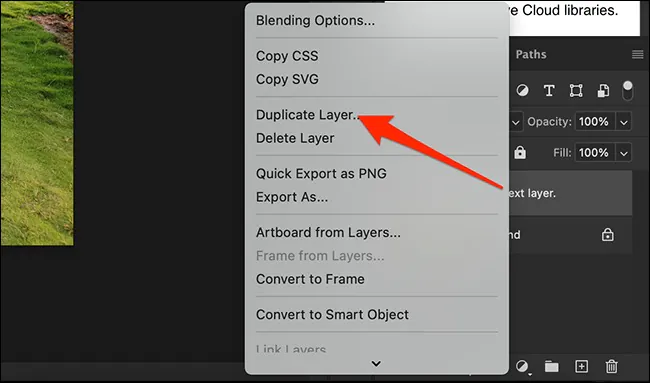
Right-click on the selected layer to open a contextual menu.
Look for an option from the menu like “Duplicate Layer” or “Copy Layer.”
Click on the “Duplicate Layer” or “Copy Layer” option.
A dialog box or prompt may appear asking you to specify a name for the duplicated layer. You can give it a new name or leave it with the default one.
Click “OK” or “Duplicate” to create the duplicate layer.
The software will create a new layer identical to the original image layer. It will be positioned above or below the original layer in the layers panel or stack.
Step 3: Apply a blur filter to the duplicated layer.
To apply a blur filter to the duplicated layer in most image editing software, including Adobe Photoshop and others, you can follow these sub-steps:
Ensure the duplicated layer is selected in the layers panel or layer palette. That is the layer on which you want to apply the blur effect.
Locate the “Filter” menu at the top of the interface. It is usually found alongside other menu options like “File,” “Edit,” and “Image.”
Click on the “Filter” menu to open a dropdown or expanded list of filter options.
From the available filter options, look for “Blur” or “Blur Gallery.”
Hover over or select the “Blur” or “Blur Gallery” option to reveal a submenu or a list of specific blur filters.
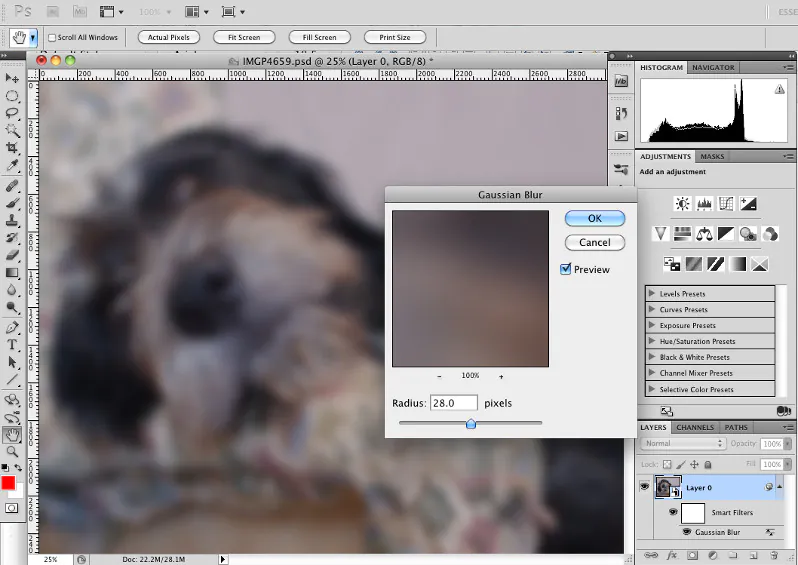
Choose the appropriate blur filter based on your preference or the desired effect. Standard options include “Gaussian Blur,” “Motion Blur,” or “Lens Blur.”
After selecting the desired blur filter, a dialog box or panel will appear. Adjust the settings, such as the blur radius or intensity, to control the amount of blur applied.
Preview the effect in real-time if available and make further adjustments as needed.
Once you are satisfied with the blur settings, click “OK” or apply the filter to apply the blur effect to the duplicated layer.
Step 4: Adjust the blending mode of the duplicated layer.
To adjust the blending mode of the duplicated layer in most image editing software, including Adobe Photoshop and others, you can follow these sub-steps:
Ensure the duplicated layer is selected in the layers panel or layer palette. That is the layer on which you applied the blur effect.
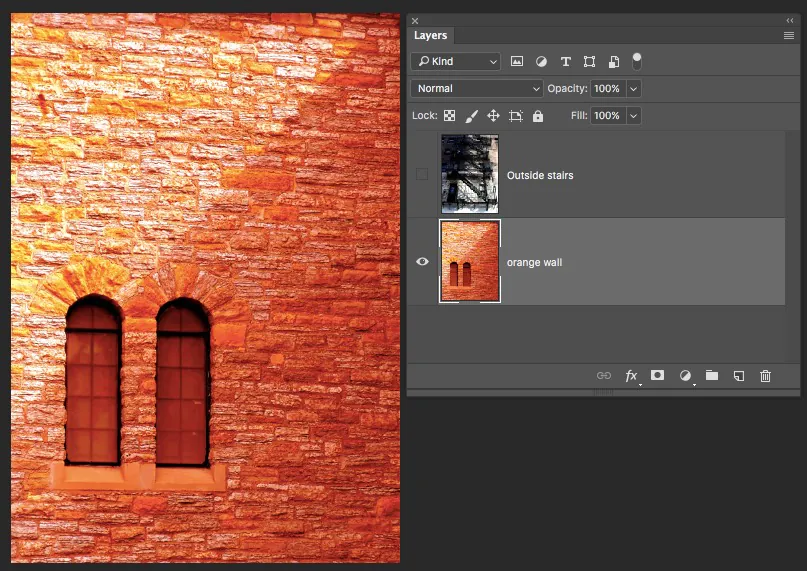
Locate the blending mode dropdown menu in the layers panel or layer palette. It is usually located at the top and labeled “Normal” or “Opacity.”
Click on the blending mode dropdown menu to reveal a list of available modes.
Scroll through the blending mode options and hover over each option to see a live preview of how it affects the image.
Select the desired blending mode that enhances the glow effect. Standard blending modes for creating a glow effect include “Screen,” “Overlay,” “Soft Light,” or “Lighten.”
As you select different blending modes, observe how it interacts with the underlying layers and adjust the opacity if necessary to fine-tune the glow effect.
Once you have chosen the blending mode and adjusted the opacity, you will see the glow effect applied to the duplicated layer, creating a vibrant and glowing appearance.
Step 5: Fine-tune the opacity of the duplicated layer.
To fine-tune the opacity of the duplicated layer in most image editing software like Adobe Photoshop and others, you can follow these sub-steps:
Ensure that the duplicated layer on which you applied the blending mode is selected in the layers panel or layer palette.
Locate the opacity slider or field in the layers panel or layer palette. It is usually represented by a percentage value or a slider bar.
Adjust the opacity slider or enter a specific value in the opacity field to control the intensity of the glow effect.
Move the opacity slider to the left to decrease the opacity, making the glow effect more transparent. Move it to the right to increase the opacity, intensifying the glow effect.
Observe the image in real-time to see the changes in the glow effect as you adjust the opacity.
Fine-tune the opacity until you achieve the desired level of glow effect that suits your preference or the overall design of the image.
You can also try different opacity values to balance the glow effect and the underlying layers.
Step 6: Optionally, further refine the glow effect.
To further refine the glow effect in most image editing software, including Adobe Photoshop and others, you can follow these sub-steps:
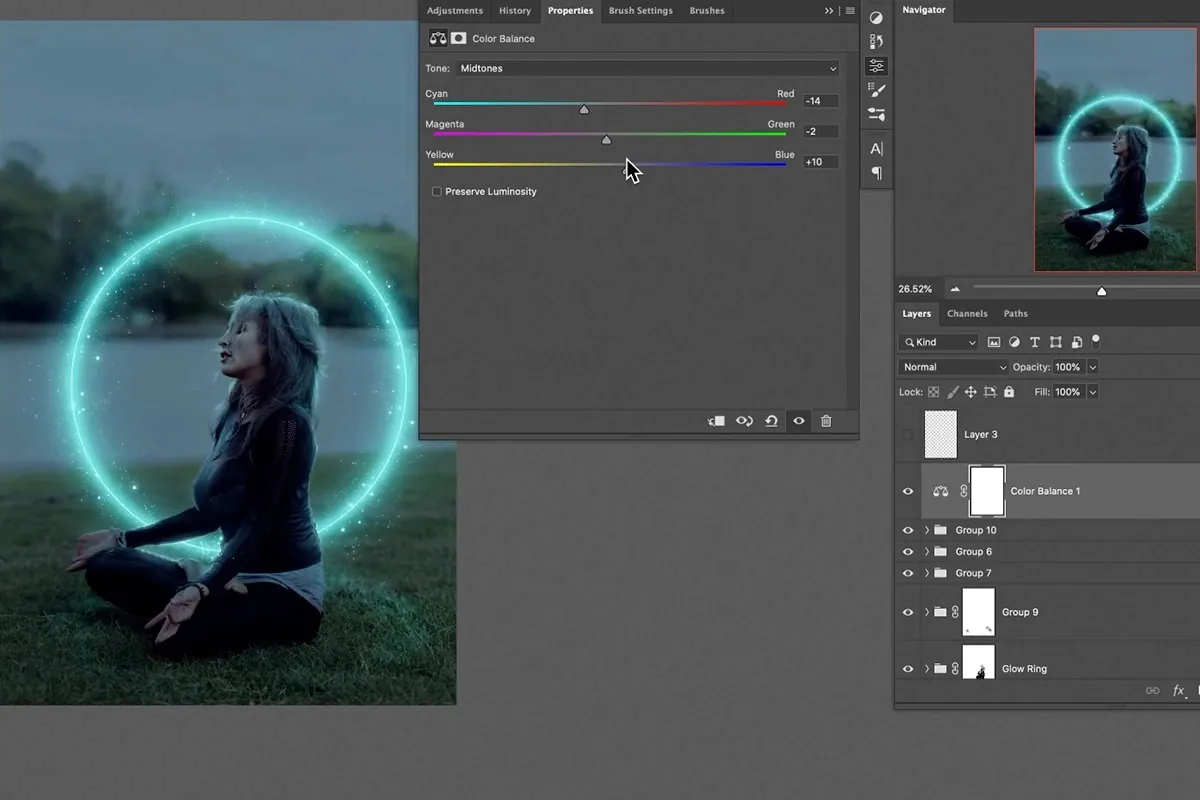
Add adjustment layers: In the layers panel or layer palette, look for options such as “Adjustment Layer” or specific adjustments like “Curves,” “Levels,” or “Hue/Saturation.” Click on the desired adjustment option to apply it as an adjustment layer. Adjust the settings of the adjustment layer to enhance the glowing areas’ brightness, contrast, or color. That helps you achieve a more refined and customized glow effect.
Apply additional filters: Explore other filters available in your image editing software to enhance or stylize the glow effect. Filters such as “Sharpen,” “Blur,” “Glow,” or “Noise” can be applied selectively to the duplicated layer or adjustment layers to add extra dimension or texture to the glow effect. Experiment with different filters, settings, and blending modes to achieve the desired visual result.
Use layer masks: By applying a layer mask to the duplicated layer or adjustment layers, you can selectively reveal or hide the glow effect in certain parts of the image. Use tools like brushes or gradients to create precise masks and blend the glow effect seamlessly with the underlying elements.
Continuously review and adjust: Preview the image and adjust as needed throughout the refining process. Pay attention to the glow effect’s composition, balance, and subtlety. Experiment with different techniques, settings, and combinations to achieve the desired result.
Step 7: Save the final image.
To save the final image in most image editing software, including Adobe Photoshop and others, you can follow these sub-steps:
Ensure you are satisfied with the glow effect and any additional refinements you made to the image.
Go to the “File” menu at the software interface’s top.
Click on “File” to open the dropdown menu.
Look for the “Save” or “Save As” option in the dropdown menu and click on it.
A dialog box or window will appear, allowing you to specify the save location, file name, and file format.
Browse to the desired folder or location on your computer where you want to save the image.
Enter a suitable file name for the image. Ensure that you choose a descriptive name that reflects the content or purpose of the image.
Select the appropriate file format for saving the image, such as JPEG, PNG, or TIFF. Go for the format that best suits your intended use or requirements.
If available, adjust any additional settings or options related to the chosen file format, such as compression level or transparency options.
Once you set the save location, file name, and file format, click “Save” to save the final image with the glow effect.
The image will be saved in the given location with the chosen file format, preserving the glow effect and any other edits you made.
Conclusion
The glow effect is an excellent approach for adding radiance and beauty to your photographs. While using this technique, be mindful of balancing subtlety and exaggeration. Refrain from being overly cautious by relying solely on conventional steps and techniques. In addition, you can also use your creative thoughts according to the context of your photographs. Incorporating your creativity while following the proper step-by-step approach and considering the overall image composition, you can successfully unveil the full advantage of the glow effect.
