How To Add An Agate Effect To Images
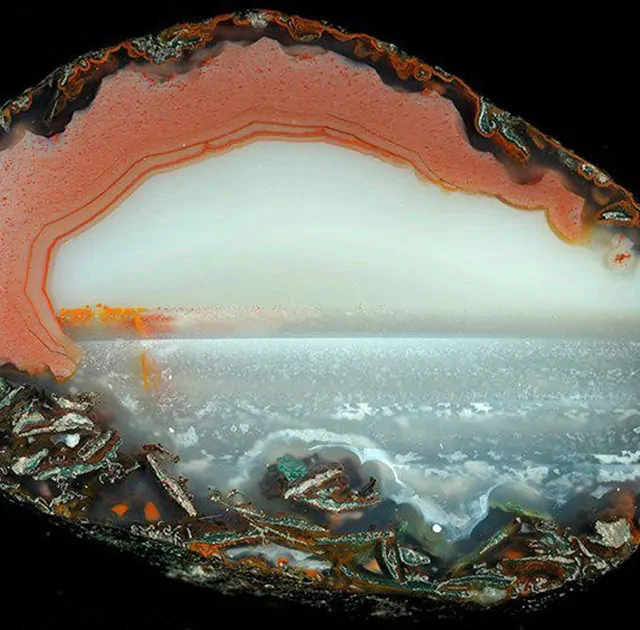
A stunning composition of weaving patterns and vivid colours makes agate one of the most visibly diverse gemstones in the world. There are several types of agate, and they’re categorized by physical traits. The most popular type is banded agate, which is widely available and globally sourced. Most commonly, agate is considered an ornamental material used for carvings, decor, and jewellery. Agate is also associated with spiritualism, often perceived as an incredible stone for those seeking to manifest their dreams and goals. It is thought to make individuals feel more connected with their inner strength, power and purpose. The alluring beauty with its spiritual meaning makes agate a symbol of eternal beauty and elegance, letting artists seek inspiration from its attractive banded patterns when creating artworks. Moreover, in the field of image editing, this gemstone’s unique patterns or bands are utilized as an idea to enhance images with patterned backgrounds, highlighting selective details or using as an overlay to cover the whole composition; likewise, in digital art and designs it is equally prevailing to make artworks that indicate striking colour patterns and layered aesthetics.
Step 1: Preparing Agate Texture
Search for high-resolution agate pictures from stock photo sites or texture libraries. The picture you choose must possess clearly defined bands and rich hues to form a realistic effect. If you are utilizing a photograph from your personal collection, it must contain suitable lighting and contrast.
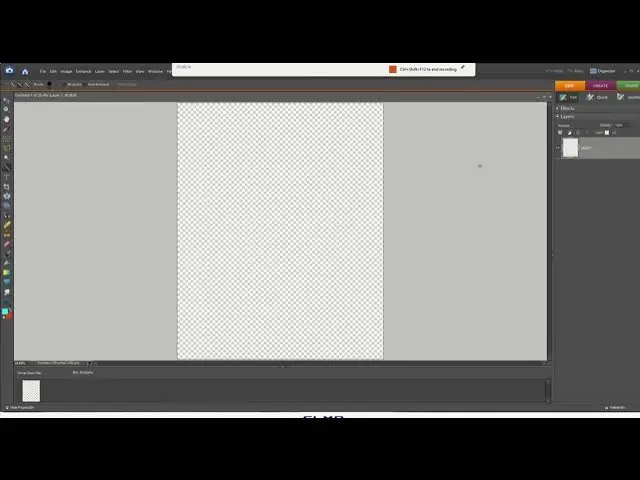
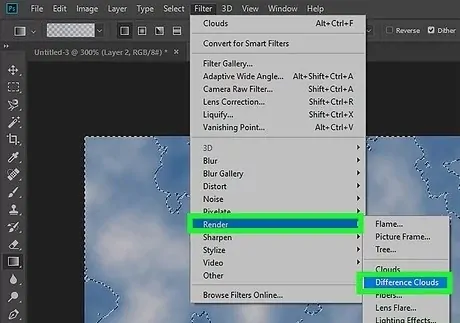
If you want to create a customized surface, begin with a clear canvas and utilize the Filter menu to select Render > Clouds and set up a base. Click on Filter and select Render > Difference Clouds again and again to make twirling, organic designs.
Utilize the Liquify tool and select the Forward Warp Tool to push and stretch the designs into layered, curved bands corresponding to genuine agate shapes. Revise the brush size to make smooth transitions.
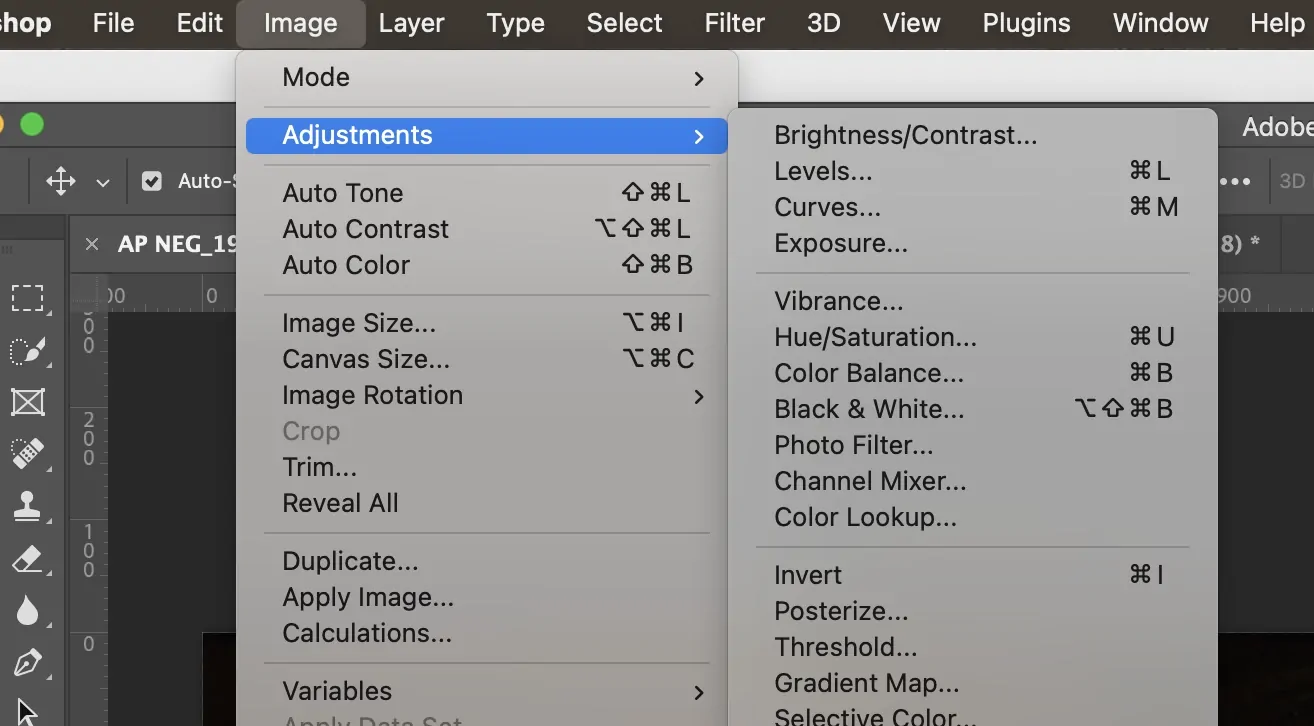
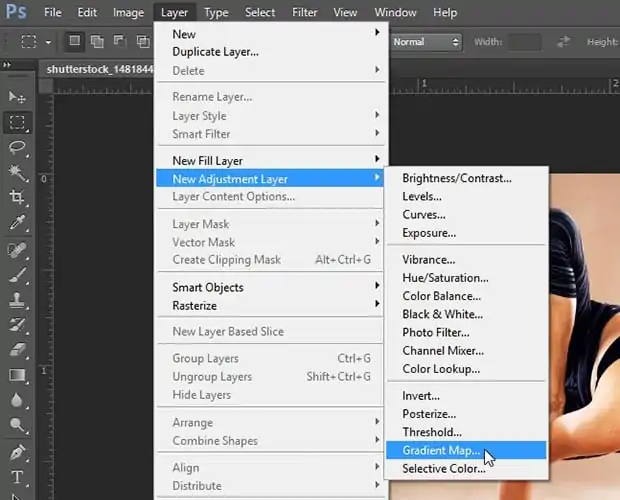
Move to Image, click Adjustments, and select Hue/Saturation, testing with colour shifts to attain realistic agate shades. Moreover, you can utilize Gradient Map for more affluent, multitoned colour blending.
Utilize Noise to include fine mineral details, then utilize Gaussian Blur to smooth out rough edges. It will make the surface seem more polished before being applied to your photograph.
Step 2: Enhancing The Base Image
Load your primary photograph in Photoshop, then drag and drop the agate surface onto it. Utilize Ctrl+T to resize it to sheathe the whole canvas. Press on Shift as you are resizing to preserve proportions.
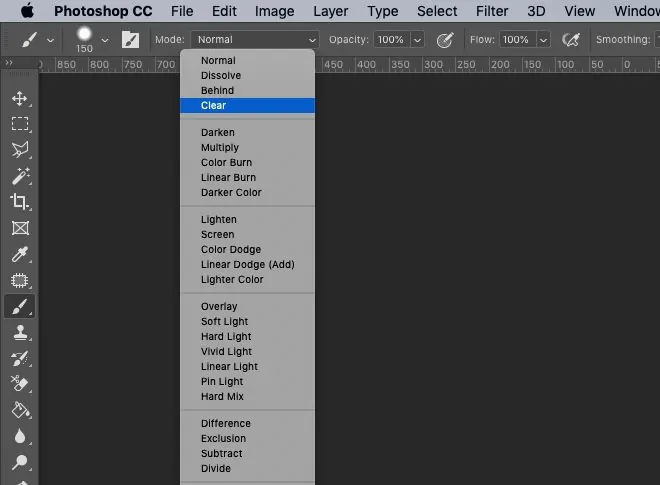
Within the Layers panel, alter the blending mode of the agate surface layer to Overlay, Soft Light, or Multiply, depending on how you require it to communicate with the photograph. Try distinctive blending modes to get the most suitable visual effect.
Decrease the Opacity of the agate texture by around 50 to 80%, incorporating it naturally with the base picture. If you find the impact overly assertive, decrease the opacity more til it harmonizes with the main picture.
Include a Layer Mask and utilize a delicate brush with low opacity to erase undesirable zones where the surface ought to be less prevalent.
As required, make a duplicate of the agate texture layer and apply distinctive blending modes to heighten the effect. Alter layer opacity and positioning to form a remarkable arrangement.
Step 3: Resetting The Opacity
Within the Layers panel, choose the agate surface layer and alter the Opacity slider. A value of 40 to 80 per cent usually works sufficiently, depending on how overwhelming you need the effect to be. Bringing down opacity guarantees the smooth texture blending without overpowering the initial picture.
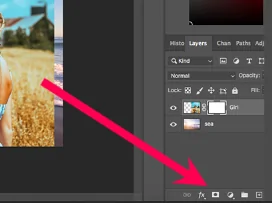
Tap on the Add Layer Mask button at the bottom of the Layers panel. It will allow you to eradicate or hush parts of the surface without changing it for good.
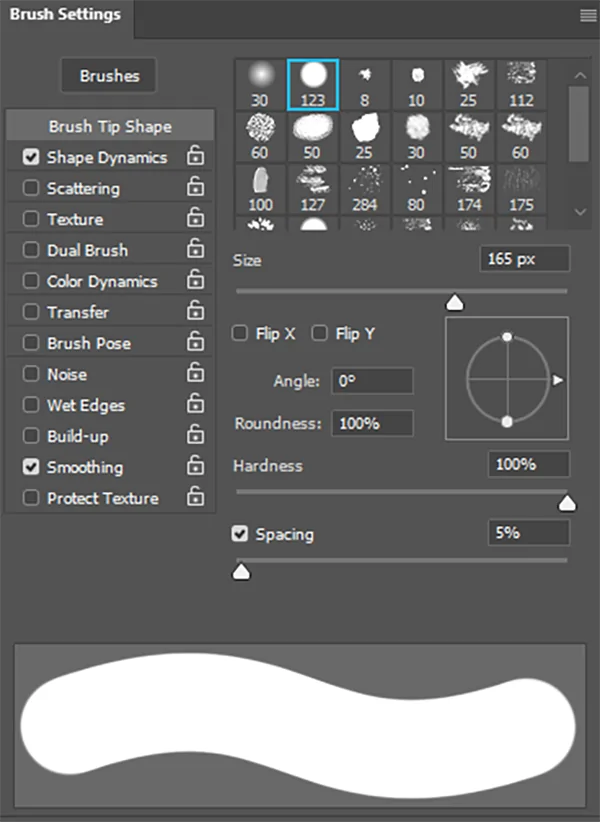
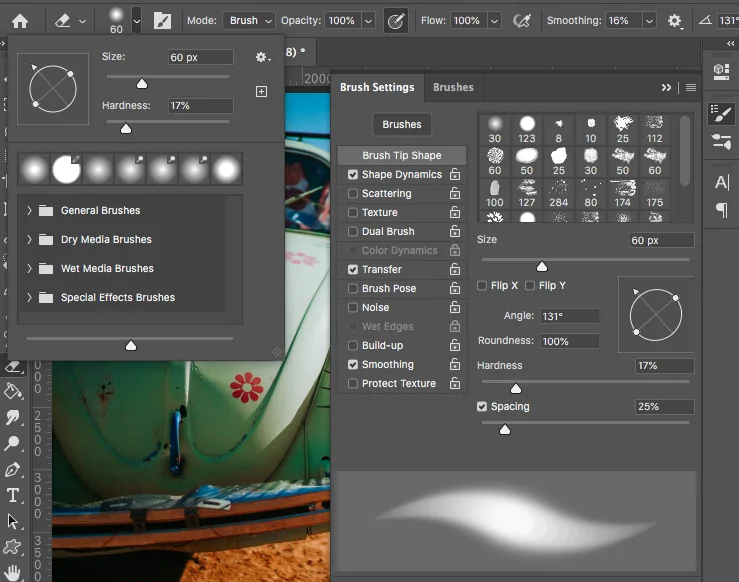
Enable the Brush Tool, select a delicate round brush, and set the opacity as low as 20 to 40 per cent. Set the frontal area colour to dark and delicately paint over zones where you need to decrease the intensity of the added texture, including faces, central points, and shadows.
In case you need a progressive fade, you can choose the Gradient Tool, pick a black-to-transparent gradient, and drag over the mask to form a smooth transition between the surface and the initial picture.
Tap Ctrl+I to modify the mask, covering up the surface completely. At that point, utilize a white brush to selectively get back the effect in certain ranges, allowing inventive management over where the agate pattern shows up.
Step 4: Adding Liquify Effect
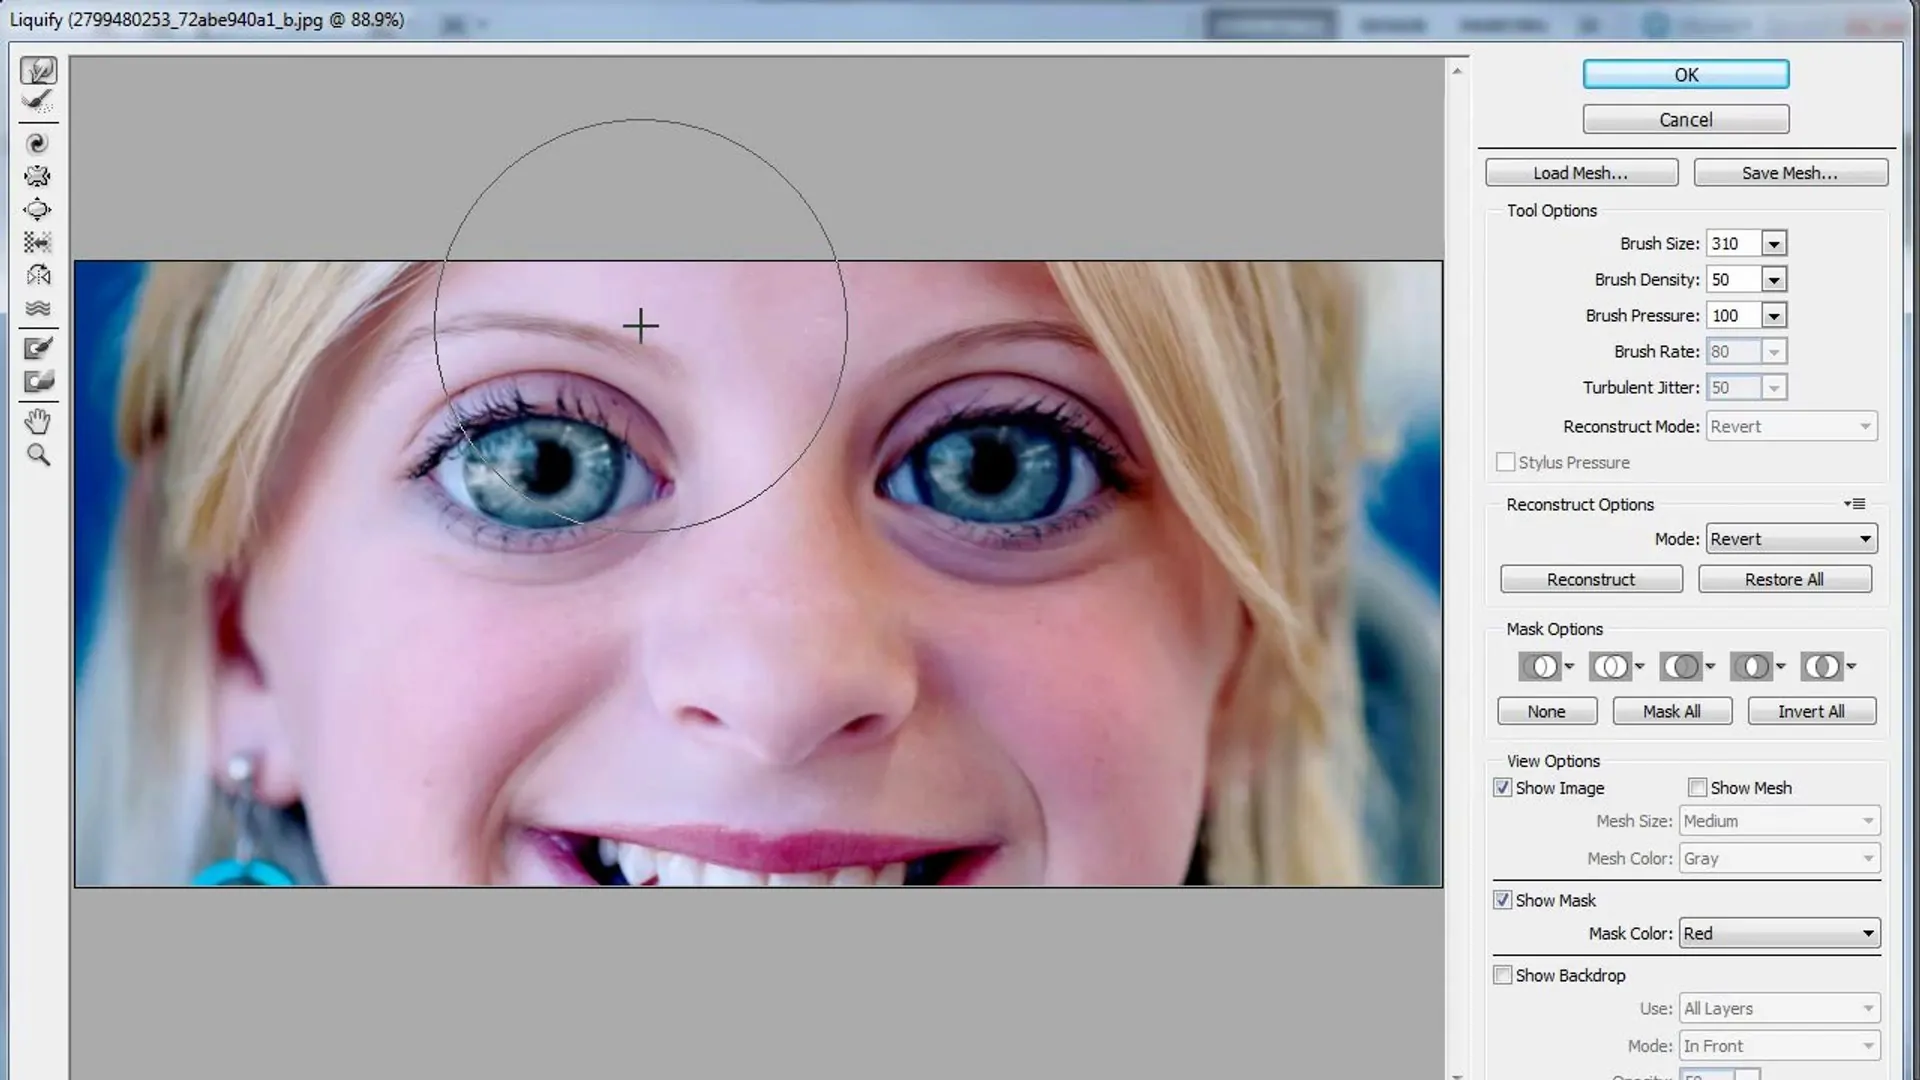
Click on the agate texture layer, and move to Filter to select Liquify. That tool will help reshape the texture, making it look more fluid and natural.
Within the Liquify panel, choose the Forward Warp Tool. Alter the brush size to correspond to the scale of your surface, then tenderly push and curve the bands to imitate the natural flow of genuine agate formations.
Spread nuanced strokes to make layered, wavy bands. Do not go for over-the-top warping to preserve a realistic setup. On the off chance that is required, decrease brush pressure for better adjustments.
Click on the Twirl Clockwise Tool to include a subtle circular motion in some regions, making the surface appear more natural. Utilize a low-strength setting to dodge distortion.
In case parts of the texture ought to stay unaltered, utilize the Freeze Mask feature to secure those zones during altering.
Tap Ok to conclude the Liquify effect. If the warping is too strong, decrease the layer opacity or utilize a layer mask to integrate certain zones more smoothly.
Step 5: Adjusting The Colors
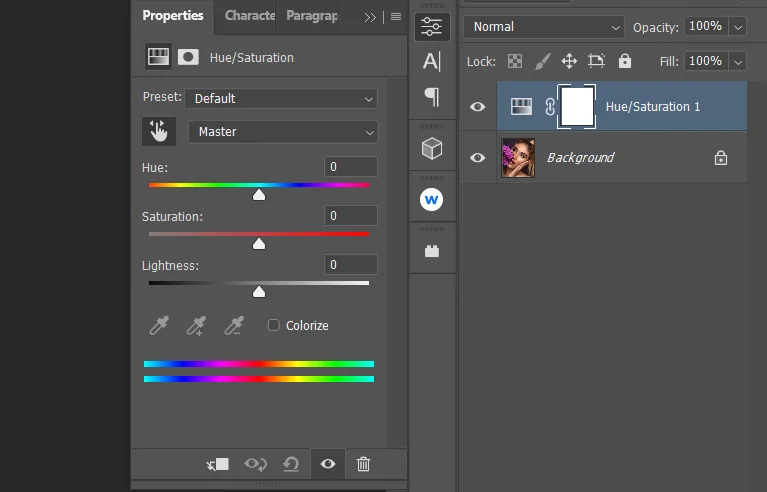
Proceed to Image and click on Adjustments > Hue/Saturation to alter the general colour tones of the agate texture for a superior accommodation within the photograph.
Drag the Hue slider on the left or right side to redirect the agate’s colours. Also, play with distinctive tones, like deep blues, rich purples, or warm amber hues, depending on the temperament you want to attain.
Upgrade the abundance of the agate effect by somewhat expanding the Saturation slider around 10 to +40. Evade over-saturating because it may make the texture feel unnatural.
Move to the Image to select Adjustments > Brightness/Contrast and modify the settings to guarantee the agate design conforms naturally with the base picture. Expanding contrast can make the bands more defined while bringing down brightness can make a more subtle effect.
Click on Image, then Adjustments > Color Balance, and alter the Midtones, Shadows, and Highlights independently. It will keep up a more layered impression within the agate effect.
If you need a customized colour blend, proceed to Image, click Adjustments, and then Gradient Map. Prefer a gradient preset, and alter opacity to blend it immaculately with the picture.
Step 6: Applying Layer Styles
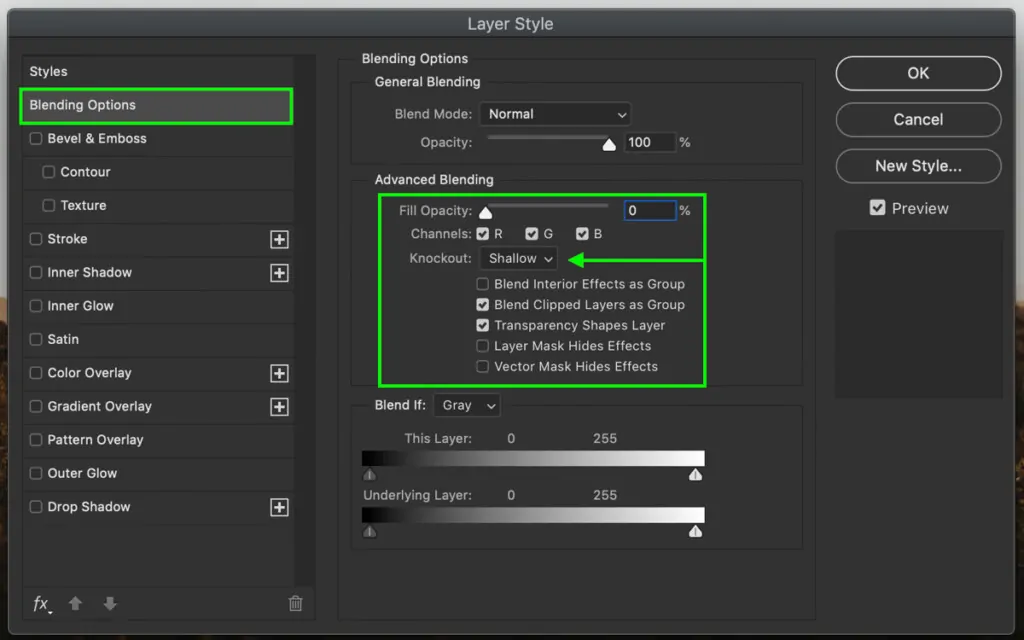
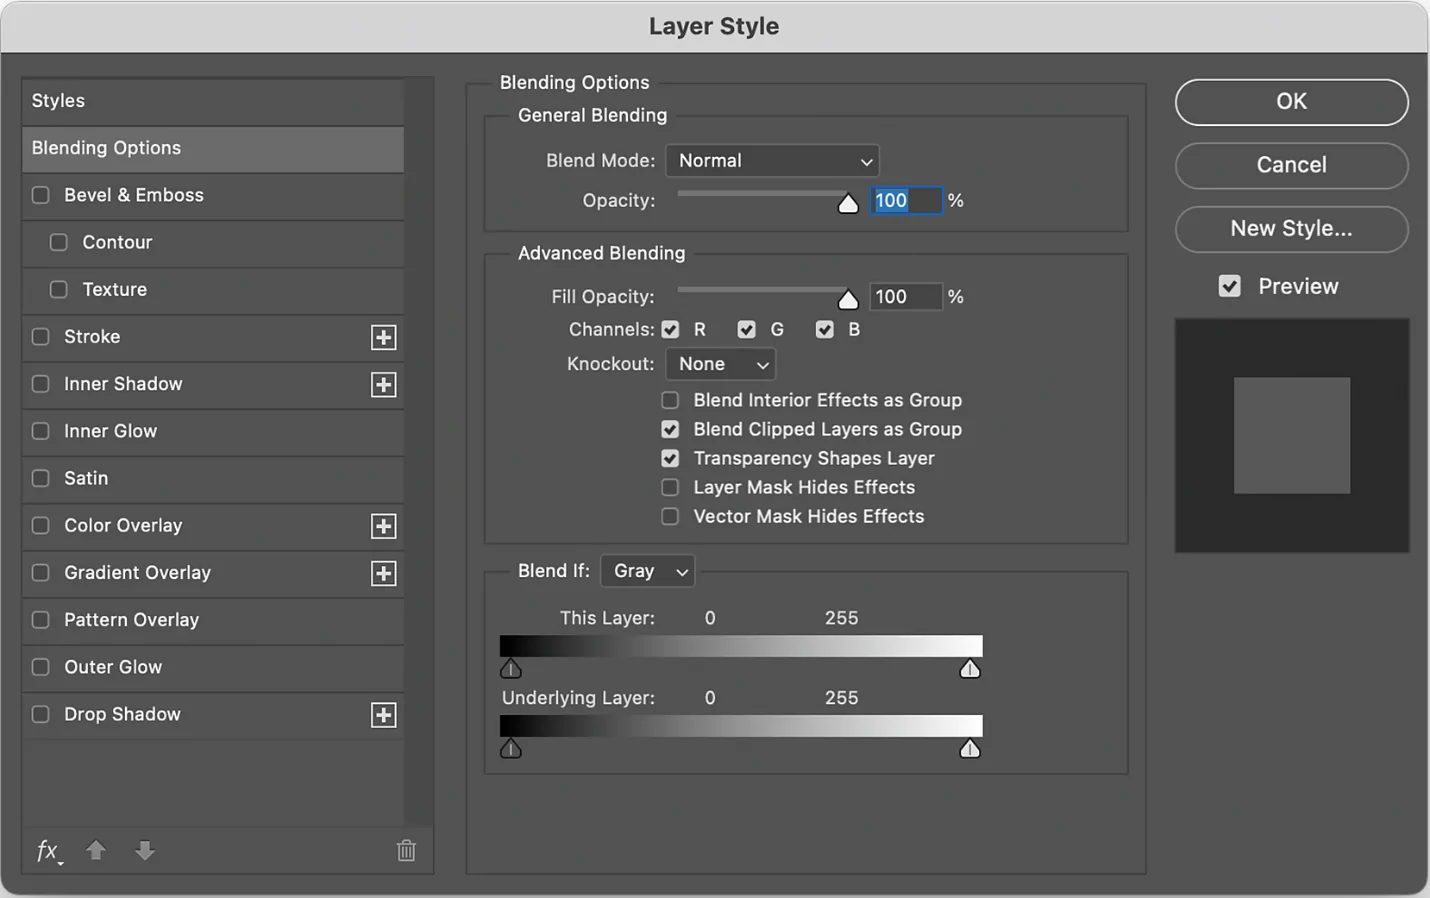
Tap twice on the agate texture layer to unlock the Layer Styles board. Activate Bevel and Emboss, put the Style to Inner Bevel, and alter the Depth slider to 50 to 100 per cent to provide the surface with a slight 3d impression. Alter the Size and Soften sliders for a smoother combination.
Within the same Layer Styles panel, click on Inner Shadow and specify the Blend Mode to Multiply. Alter the Opacity, Distance, and Size to form a lifelike shadow formation that produces the texture feel embedded within the photograph instead of just overlaid.
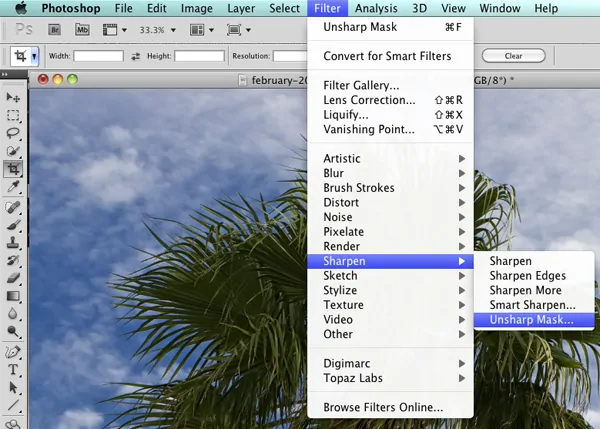
Head to Filter, click Sharpen, then Unsharp Mask, and alter the Amount and Radius accordingly to upgrade the details within the agate design.
Proceed to Filter, click Noise, then Add Noise and set it to a low value while Gaussian and Monochromatic are chosen. It will imitate the inconspicuous grain found on natural stone surfaces.
Make a copy of the agate texture layer; at that point, proceed to Filter > Stylize > Emboss. Alter the Angle, Height, and Amount value, set this copy layer’s blending mode to Overlay and decrease its opacity for a modest refinement.
Utilize the Eraser Tool with a soft brush or apply a Gaussian Blur to the edges of the agate surface. It is to avoid harsh lines and help the surface blend smoothly into the underneath picture.
Step 7: Polishing The Image
Choose the agate surface layer and alter the Opacity slider within the Layers panel. A value between 50 to 80 per cent usually guarantees the surface incorporates naturally without overwhelming the initial photograph.
Choose the Eraser Tool, set it to a soft circular brush with low opacity, and tenderly erase regions where the texture looks too severe. It will help emphasize central points while keeping the effect adapted.
Head to Image, click on Adjustments > Gradient Map, select a gradient that goes with your picture, and alter its blending mode, harmonizing the colours of the agate surface with the rest of the photograph.
Activate the Dodge Tool to illume highlights and the Burn Tool to obscure shadows. Use them selectively to improve the natural forms of the agate surface, making it more lifelike.
Head to Filter, click on Lens Correction, then Custom, and alter the Vignette Amount slider to darken the borders. It can pull attention to the centre, making the agate surface more fascinating.
After you are done, save your final picture in PSD format to facilitate the prospective alters, then select a suitable format like PNG or TIFF to export the composition while retaining all elements without compressing any details.
Conclusion
In summary, agate is used to stabilize and refine one’s energy, leading to attaining mental, physical, and emotional equilibrium. Moreover, this charming gemstone has historically been used to carve decorations and objects, such as jewellery, mortars, pestles, marbles, and beads. The vibrant and fascinating abstract patterns of agate stone inspire the creation of lovely textures that define their striking jewel tones. These textures’ vivid hues will draw attention and can be used in a wide range of visual art applications, including design, art, and image enhancement. In the end, you will have compositions exhibiting layered patterns or bands, often introducing uniquely abstract dimensions.


