How To Create A Lucid Dream Effect
The lucid dream effect, as a part of mental activity, is a common phenomenon in which a person within a dream is subconsciously aware of the fact that he is actually dreaming. Awareness helps people to play a part in shaping their dream scenes and characters. Anyhow, this amazing aspect of human perception and psychology is able to evoke digital artists and image editors to include fascinating and surreal lucid dream elements in their images. The major modifications made or added to images for creating a lucid dream environment include intense colours or the use of gradients, a soft focus strategy for applying a misty or ethereal touch and the blending of layers and different surreal elements into the main images that give illusions of actual dreaming. Adding gleams or flares also chips into the lucidity and dream-likeness of the images. This blog will guide you through some basic features or techniques to employ while using image editing apps like Photoshop, Affinity Photo, or Lightroom to make an ordinary image appear like a mysterious, enigmatic lucid dream.
Step 1: Initial Adjustments
Start your editing process by starting your software, such as Adobe Photoshop, on your PC.
Get to File > Open or utilize the shortcut Ctrl+O or Cmd+O for Mac. This will open a file dialog.
Move to the area of the image file you need to turn into a lucid dream impact. Press on the file to pick it up.
Tap on the Open option within the file dialog. Your picture will presently show up within the main Photoshop workspace.
Scan the image’s size and resolution by aiming for Image > Image Size. Guarantee it meets your project necessities.
Save the opened picture as a new file by progressing to File > Save As. Select a format such as PSD or TIFF to preserve layers and alters.
Organize your Photoshop workspace to your inclination, making tools and panels effortlessly available for another step in editing.
Step 2: Intensifying The Colors
Guarantee you’ve picked the right layer within the Layers panel where you need to alter the colours.
Head to Image > Adjustments and select either Hue-Saturation or Color Balance according to the effect you want.
Within the Hue/Saturation window, utilize the sliders to modify the Hue, Saturation, and Lightness. Expand Saturation to form colours more distinctive, or alter Hue for a colour move.
Within the Color Balance window, alter the Shadows, Midtones, and Highlights sliders to alter colour tones. That aids in making an overall dreamlike colour impact.
Press Ok to apply the colour changes to the picture. Survey the impact and make additional changes if necessary.
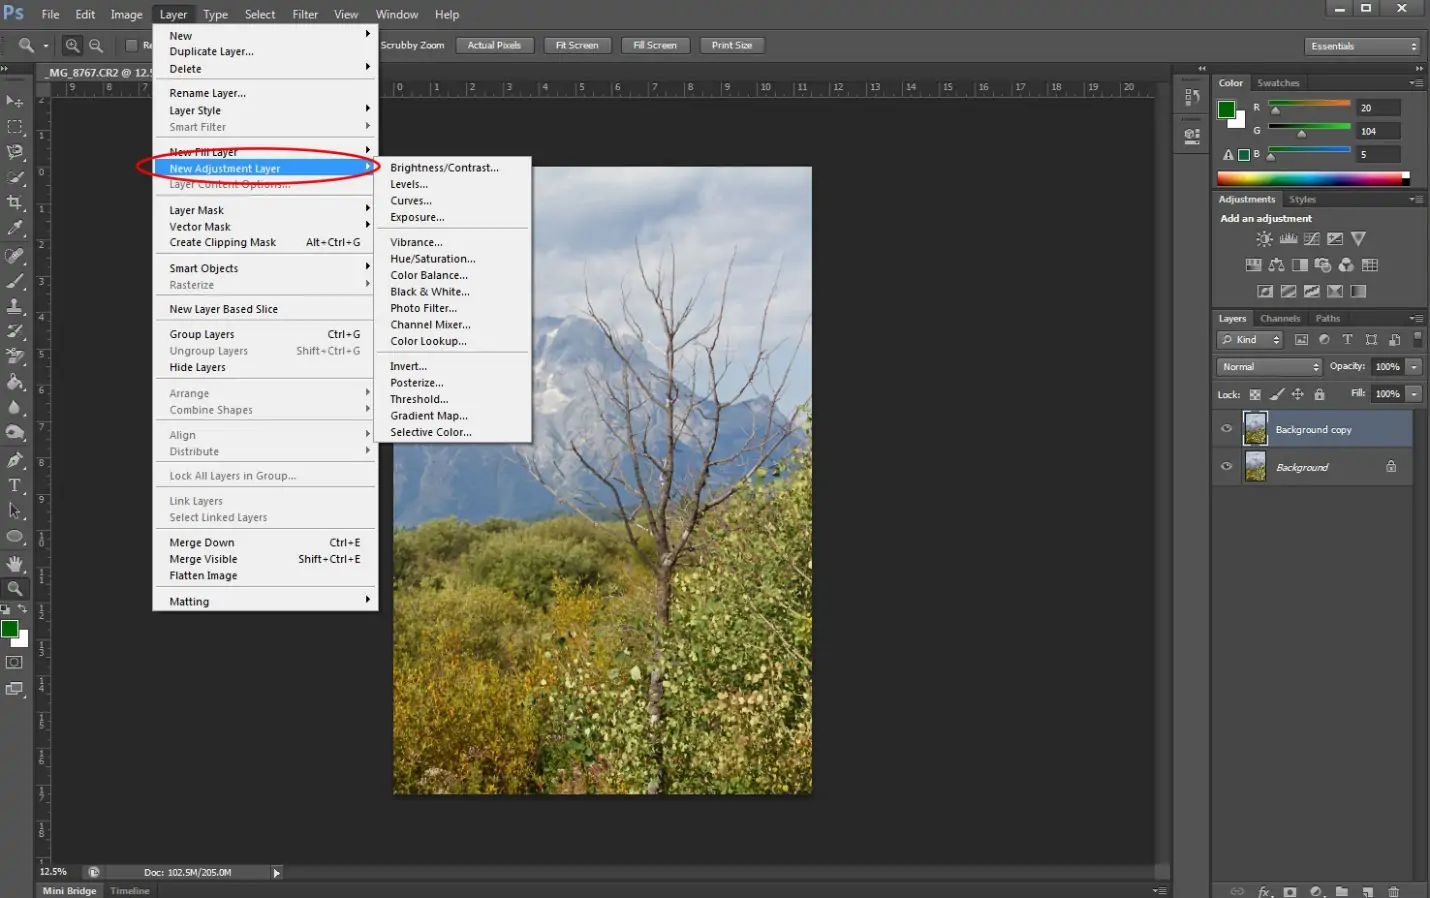
For finer control, use Layer and New Adjustment Layer and select Hue/Saturation or Color Adjust. That practice preserves your settings non-destructive.
Save your work frequently by getting to File and Save to guarantee your changes are protected.
Step 3: Application Of Soft Focus
Click on the picture layer within the Layers panel. Tap on Ctrl+J to make a copy of it. This makes a backup layer for non-destructive altering.
Go to Filter > Blur and Gaussian Blur with the duplicated layer selected. This action will show a Gaussian Blur dialogue box.
Within the Gaussian Blur dialog box, alter the Radius slider to redirect the amount of blur. Using a lower radius makes an unpretentious blur, whereas the next radius makes it more noticeable. Find a harmony that accomplishes a delicate focus effect without excessively obscuring details.
Inspect the preview box to see the effect in real-time. Revise the radius as required until you accomplish the required softness.
Press Ok to finalize the Gaussian Blur. Your duplicated layer presently incorporates a soft focus impact.
Alter the opacity of the blurred layer within the Layers panel to blend it easily with the initial layer. That is usually done by selecting the blurred layer and dragging the opacity slider.
In case you need to redirect where the soft focus is connected, include a layer mask to the blurred layer. Utilize a soft brush with low opacity to paint on the mask, uncovering or covering up the blur impact as required.
Step 4: Including Lighting Effects

Use Layer, New, then Layer or tap on Shift+Ctrl+N to make a modern layer over your photograph.
Pick up the Brush Tool from the toolbar or press B. Pick a soft-round brush with a lower opacity value and stream settings for a mild application.
Assign your foreground colour to white or a very light shade. That will be utilized to paint light impacts.
Within the new layer, softly paint zones where you want to include a dreamy shine. Fill the colour in delicate, gentle motions to form a delicate lighting effect.
Revise the blending mode of the layer to Overlay, Soft Light, or Screen within the Layers panel. It coordinates the lighting effect along with your image for a more natural appearance.
Alter the opacity of the light layer to tune the magnitude of the effect. Decreased opacity comes about in a subtler gleam.
Include a layer mask to the light layer in case you wish to refine the regions where the lighting impact is added. Utilize a soft brush with low opacity to paint on the mask, holding the visibility of the light effect.
Step 5: Presenting Surreal Objects

Choose where you need to present surreal components, like floating objects, mutilated shapes, or unusual surfaces.
You can either utilize pictures of strange objects or make them utilizing tools in Photoshop. To form, utilize the Pen Tool or Lasso Tool to draw and shape new components.
Next, you need to import or draw these components into new layers. Utilize File and Place Embedded to import objects or draw them specifically into new layers.
Modify the blending modes and opacity of these layers to conform them easily to your picture. Standard blend modes for dreamlike impacts incorporate Overlay and Multiply.
Proceed to Filter > Liquify to mutilate and warp parts of your shot or included components. This feature can make bizarre shapes and impacts that improve the surreal factor.
Utilize aesthetic options such as Filter > Artistic or Filter > Distort to further handle the components and upgrade the dream-like development.
Include layer masks to new components for thorough mixing. Utilize a soft brush to paint on the mask, adapting visibility and unity with the initial picture.
Step 6: Revising Blending Options
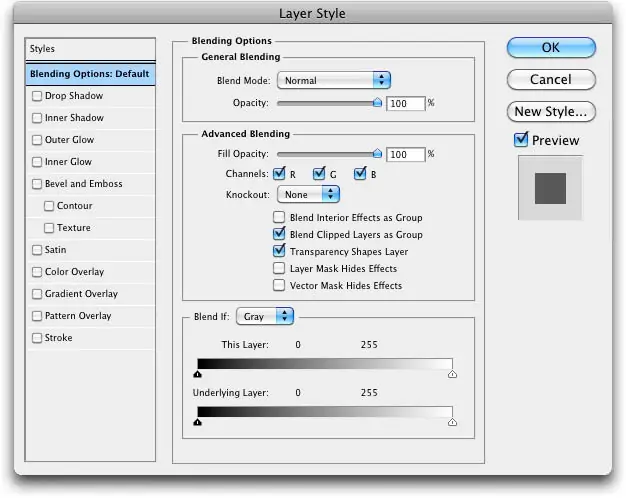
Select the layer you want to revise within the Layers panel. That might be a layer with included components, lighting effects, or alterations.
Within the Layers panel, discover the dropdown menu at the top that is set to Normal by default. Tap this dropdown to get to diverse blending modes.
Play with diverse blending modes like Overlay, Screen, Multiply, or Soft Light. Each mode relates to it in an unexpected way with the layers underneath it. For example, Overlay upgrades contrast, whereas Screen helps the image.
After you have selected a blending mode, alter the layer’s opacity to regulate the effect’s quality. Decreased opacity makes the impact more subtle, whereas higher opacity heightens it.
Ceaselessly preview your picture as you alter the blending mode and opacity. This makes a difference in evaluating how well the effect coordinates with the general picture.
Include a layer mask if you would like to apply the impact specifically. Utilize a soft brush to paint on the mask, directing where the blending mode’s effect is obvious.
Routinely save your advance to guarantee you do not lose any alterations. Utilize File > Save to keep your changes intact.
Step 7: Use Of Aesthetic Filters
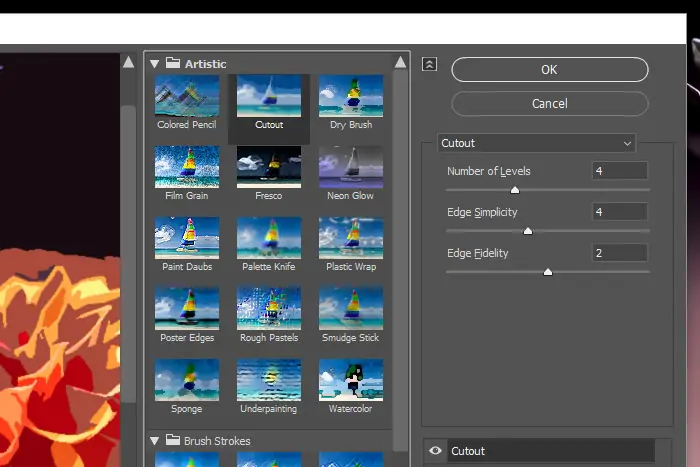
Select the layer to which you need to apply artistic filters within the Layers panel. That can be your fundamental image layer or a layer with included components.
Proceed to Filter > Artistic in the best menu to view accessible creative filters. This incorporates choices like Paint Daubs, Watercolor, and Sponge.
Pick a filter that accommodates your dream-like effect. For example, Paint Daubs can give a painterly impression, while Watercolor includes a soft, fluid surface.
Design the filter’s settings within the dialog box. Alter sliders to retain the effect’s amplitude, surface, and other parameters to match your vision.
Inspect the preview box to see how the filter influences your picture. Confirm that the result improves the strange quality without overpowering other components.
Press Ok to apply the filter to the chosen layer. The aesthetic impact is presently permanently connected.
Look at the general image to ensure all components reconcile well. Make any last adjustments utilizing additional filters, layer masks, or opacity settings as required. Save your final work by getting to File and Save.
Conclusion:
Finally, with a lucid dream effect, you can create imaginative and illusionistic scenarios that stimulate viewers’ interest and cause them to straddle the line between dream and reality. This editing approach will always benefit you, either when you are working on your digital art or editing some actual photographs to get a more lofty narrative and feel. As a final product, you will get images that are not only aesthetically beautiful but also emotionally compelling, prompting the viewer’s sentiments of memories and mysticism.
