How To Use The Color Picker Tool To Edit Images
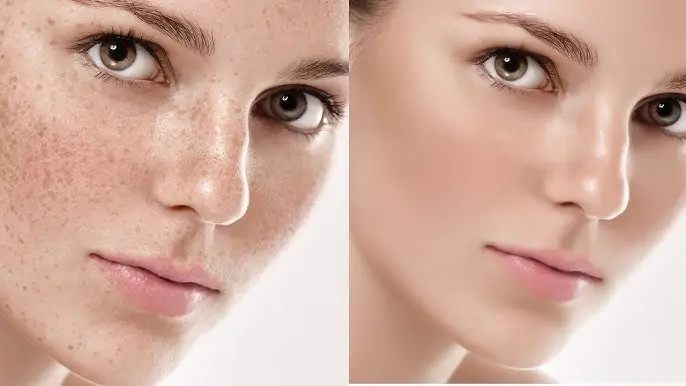
The color picker is a critical component of photography and digital art. This tool facilitates users in precisely selecting and manipulating colors, thus maximizing the visual persona and appeal of photographs. In the beginning, this tool contained a straightforward dropdown menu, which later developed into advanced, extensively featured plugins and applications. This mighty feature has now become a requisite for photographers and digital artists. It provides a rich color palette that breeds creativity by streamlining the editing or creation of images within color consistency. The resulting images after color tool adjustments are exalted in terms of various features, including supplemented saturation, brightness, hues, contrasts, mood, and overall atmosphere. Moreover, for designers and aspiring artists, using a color picker tool helps them learn about color theory, digital color representation, and color harmonies. Users may experiment with different medleys and saved palettes and modify colors thanks to its versatility and customization features. This blog will present a step-by-step process of using a color picker tool to enhance the tone and overall aesthetic feel of your images.
Step 1: Initial Adjustments
Initiate any of your favored image editing programs on your PC, considering the alternatives like Adobe Photoshop or GIMP.
Search for the option to open an existing image file or start a new project.
Get to the folder where your image file is kept and select it to open inside the editing program.
After the photograph is loaded, you have a range of editing tools and functionalities to control its appearance.
Make sure that you’re working with a high-resolution adaptation of the image to hold quality amid editing.
Get yourself acquainted with the software’s interface, including menus, toolbars, and boards, to explore effectively.
Put on record any specific features or shortcuts inside the software that will uplift the editing process.
By initiating your editing software and selecting your photograph as the starting step, you’re set to continue improving its colors by utilizing the color picker tool smoothly.
Step 2: Locating Color Picker Tool
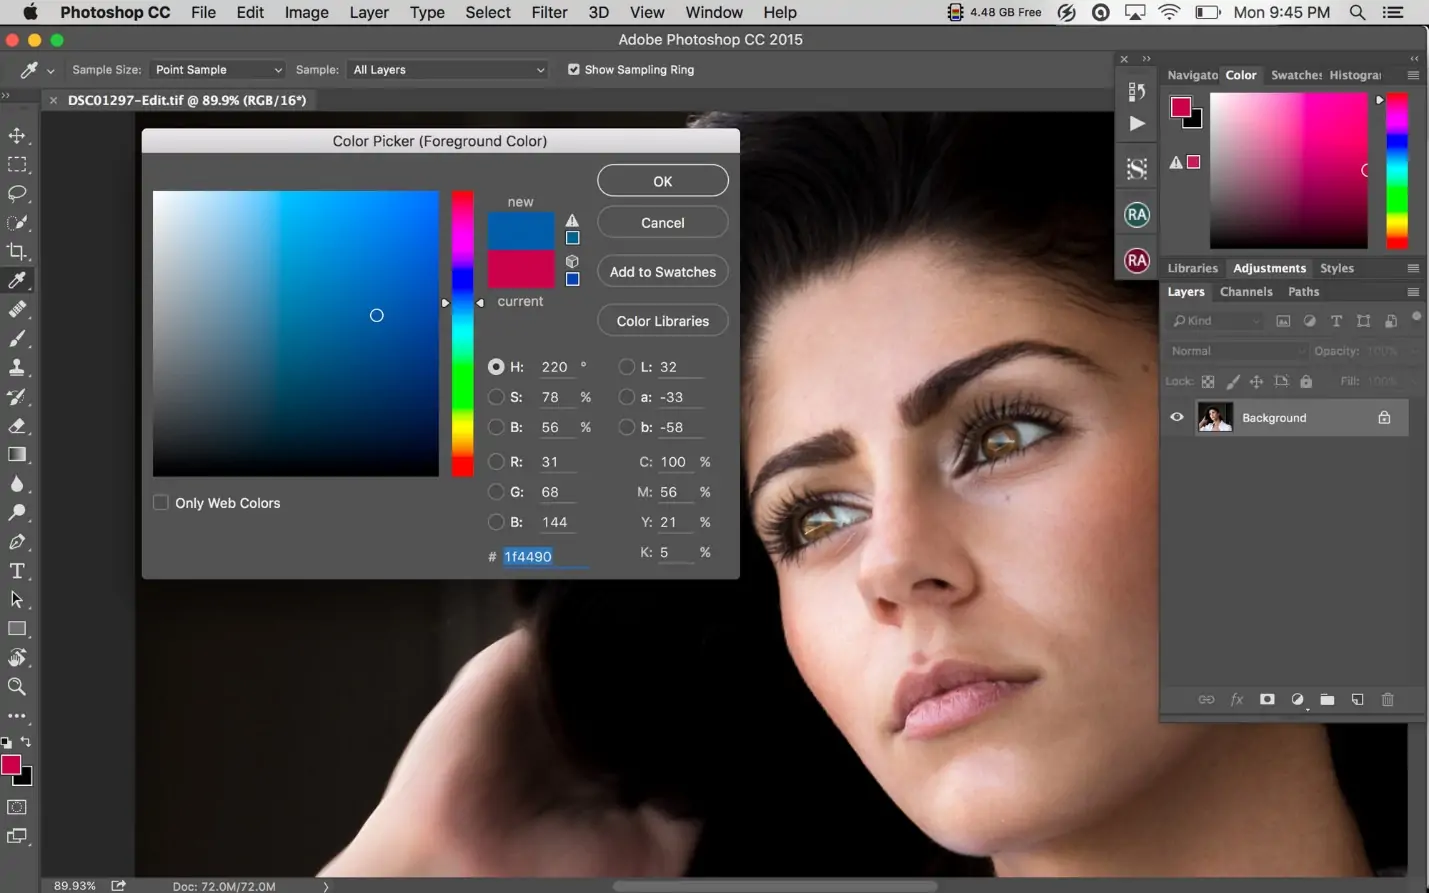
Find the color picker tool within the toolbar or menu alternatives.
Search for a symbol that looks like an eyedropper, commonly utilized to represent the color picker tool.
On the other hand, check inside the color selection choices, where the color picker tool can be integrated.
If you’re unsure where to find the color picker tool, consult the software’s help documentation or look for instructional exercises online.
Get the know-how of the different modes or settings accessible inside the color pickers tool, like RGB, HSL, or HEX.
As per your software, the color picker tool may offer extra features like sampling colors from particular zones or layers.
Confirm that the color picker tool is easily open throughout your editing session by keeping it handy within the toolbar or assigned workspace.
By getting to the color picker tool, you’re ready to continue selecting and manipulating colors inside your shot to attain hoped upgrades.
Step 3: Specifying The Zones
With the color picker tool presently open, position your cursor over the range of the photo you want to improve.
Take your time to distinguish the particular color or shade you need to alter, as this will serve as the premise for your improvements.
Consider variables such as lighting, composition, and, in general, style when selecting the range to improve.
If you’re uncertain which color to target, explore distinctive parts of the image utilizing the color picker tool to test different tints.
Focus on details inside the image, such as gradients, shadows, and highlights, as they may influence your color choice.
Be sure of the intended objective or theme of the image, as this will direct your choices when choosing regions to upgrade.
Try selecting distinctive colors inside the image to see how they affect by and large composition and visual appeal.
By keenly choosing the region to boost, you lay the footing for detailed color alterations utilizing the color picker tool, resulting in exceptional image enhancements.
Step 4: The Color Sampling
Once you’ve determined the range to enhance, position the color picker device over the specified color or shade inside that region.
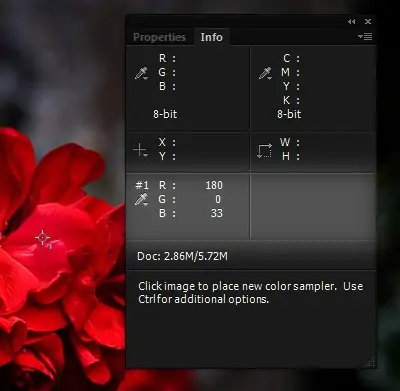
Press on the color with the color picker tool to test it. This activity captures the color’s traits, like its RGB or HEX values.
Analyze the sampled color’s values shown within the color picker tool’s interface. These values speak to the color’s composition in different color models.
Confirm that the sampled color precisely reflects your intended choice for an upgrade by comparing it to adjoining colors inside the image.
If fundamental, alter the position of the color picker tool to test distinctive ranges of the image to discover the culmination color for refinement.
Assume the setting of the sampled color inside the overall composition of the picture to guarantee cohesion and agreement in your edits.
After you’re done with the sampled color, continue to the next step to adjust its attributes for modification.
Step 5: Set Up Color Variables

After sampling the specified color, it’s time to polish its properties to upgrade the image viably.
Use the color adjustment tools given by your editing software to alter traits such as hue, saturation, brightness, or contrast.
Explore each quality separately to get its impact on the sampled color and how it impacts the general image.
Make progressive adjustments to avoid extreme changes that will diminish the image’s visual allure or coherence.
Check out to how modifications to one property may influence others, as they are mostly interconnected.
Persistently evaluate the image’s appearance as you make adjustments, ensuring that improvements comply with your vision for the ultimate result.
Utilize reference points within the image, such as adjacent colors or particular components, to direct your decision-making during the editing process.
Look to attain an adapted and harmonious color palette that improves the image’s overall aesthetic while keeping up its keenness and intended message.
Step 6: Tuning The Details
After the beginning adjustments made to the color attributes, take a minute to assess the overall effect on the photograph.
Evaluate how the altered colors are associated with the rest of the picture and whether they add to the desired aesthetic.
Observe minute details and subtleties in color to guarantee a cohesive and clean appearance.
Regard testing with additional altering procedures or effects to maximize the image’s visual appeal.
Look for feedback from peers or colleagues if accessible, as new points of view can give valuable experiences and recommendations for advancement.
Touch up your enhancements based on feedback and personal judgment, pointing out a result that meets your inventive vision.
Take breaks occasionally to rest your eyes and gain viewpoint, permitting you to return to the editing process with recharged focus and clarity.
Believe your creative instinct as you hone the enhancements, endeavoring for a result that reverberates together with your intended message and audience.
By committing time and consideration to fine-tuning the enhancements, you’ll be able to raise the image to its maximum potential, making a visually captivating and impactful composition.
Step 7: Exporting The Final Image
After you have performed all necessary enhancements, it’s time to conclude the changes and save your work.
Audit the image one last time to guarantee that all alterations align together with your inventive vision and desired result.
If fundamental, make any last-minute changes or refinements to fine-tune the image before finalizing the changes.
Reconfirm the settings and file format choices in your editing program to get compatibility and ideal quality for the saved image.
Look into saving a duplicate of the initial image or making a form history to protect your work and permit future modifications on the off chance that is required.
Select a file title and goal folder for the saved file, ensuring that it’s easily available and organized for future reference.
Confirm the saving process and hold up for the software to complete the operation, indicating fruitful completion.
Once saved, take a minute to appreciate your enhanced image and appreciate the exertion and creativity that contributed to its transformation.
After these modifications and save the picture, you finalize the editing process and create a clean and visually compelling piece ready for sharing or publication.
Conclusion:
In conclusion, a color picker tool holds a plethora of advantages, making the process of choosing colors more effortless. Its visual interface makes it simple for users to precisely select whatever hue they want. The support of color picker tools lets us witness how various hues and ones would appear in different designs before committing them to final presentations. Furthermore, it stimulates speedy and accurate color selection, which aids in saving time during the creative process and optimizes the design workflow. Ultimately, by using a color picker, either to retain your brand identification or edit common shots, the resultant visual coherence always uplifts the quality of the absolute resultant images.
