How To Create An Aurora Effect
The shimmering display of natural light, or aurora effect, visible at night, is a ravishing natural phenomenon that inspires everyone. Blue, red, yellow, green, and orange lights gently shift and change shape like softly rolling curtains. Auroras can be seen only at night and typically occur only in the lower polar areas. Natural phenomena are also often associated with human nature. Certain individuals believe that colored energy fields, or auras, are also produced by humans and can indicate a person’s mood and health, while others believe that visual perception is knotty. However, regardless of your spiritual beliefs, you always find this aesthetic aspect of nature totally lovable. In the visual art drive, artists and editors roused by the exquisite lighting of auroras are also including this effect in images. To create this effect, the atmosphere of an image is revised using tools like Photoshop and techniques like layered light patterns and blending gradient overlays to create a specific ambience.
Step 1: Choosing The Base Image
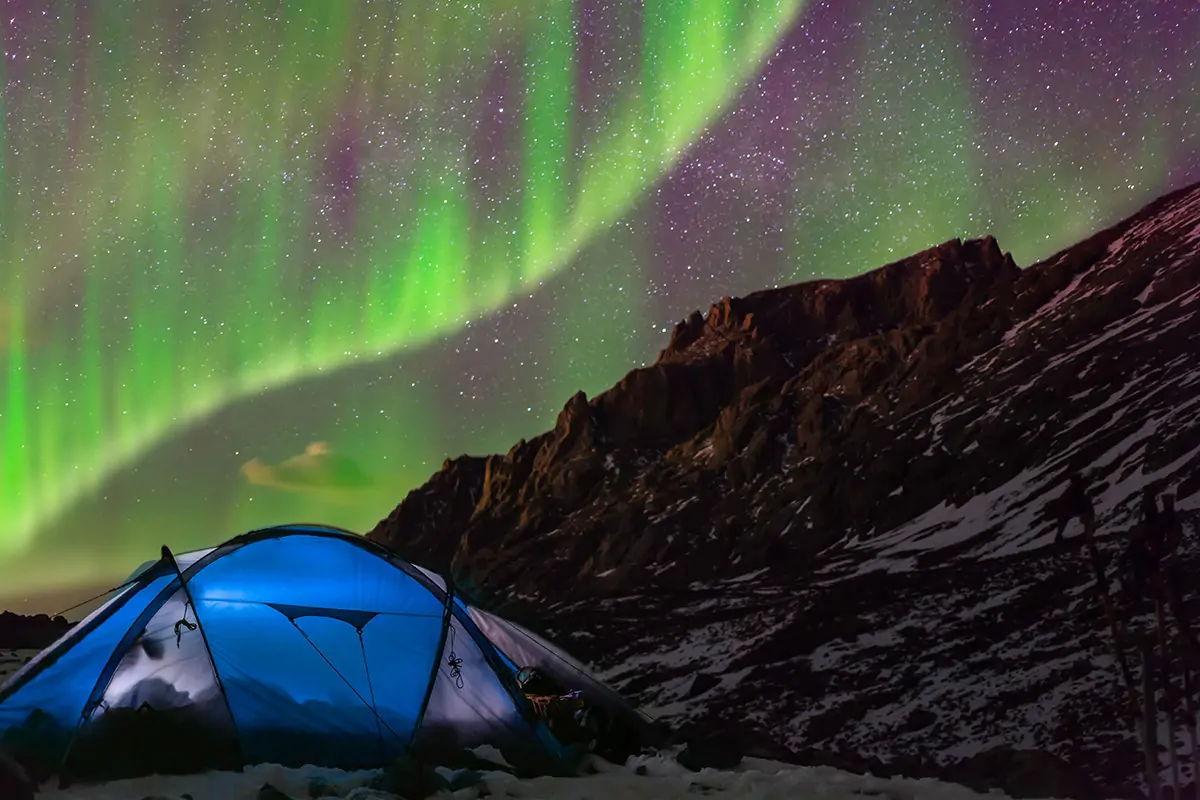
Select an image that would benefit from the addition of the Aurora Effect. Opt for photographs with broad skies, alluring scenes, or nighttime scenes with clear perceivability.
Observe the composition and overall disposition of the photo. The Aurora Effect works well with images highlighting open skies where the colorful lights can be noticeably displayed.
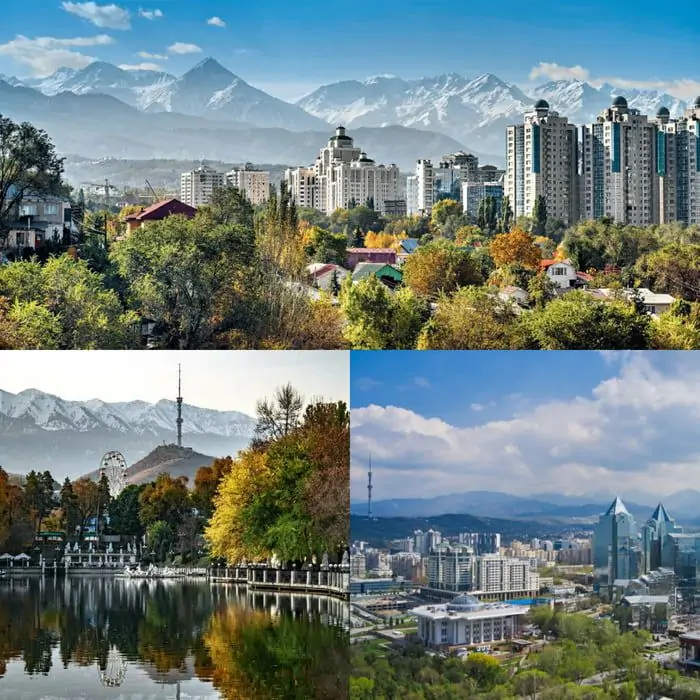
Guarantee that the photo has adequate contrast and detail to incorporate the aurora effect. Pictures with well-defined components, such as mountains, trees, or cityscapes, can create exciting foregrounds against the aurora-filled sky.
Examine the lighting conditions within the unique photo. While the aurora effect can be connected to both daytime and nighttime scenes, different techniques may be required to attain realistic effects depending on the surrounding lighting.
Be sure of the photo’s aspect ratio and resolution, as these variables can influence how the Aurora Effect is connected and seen in the final photograph.
Step 2: Duplicating The Image
LaunchLaunch your chosen photo using your favored image editing program.
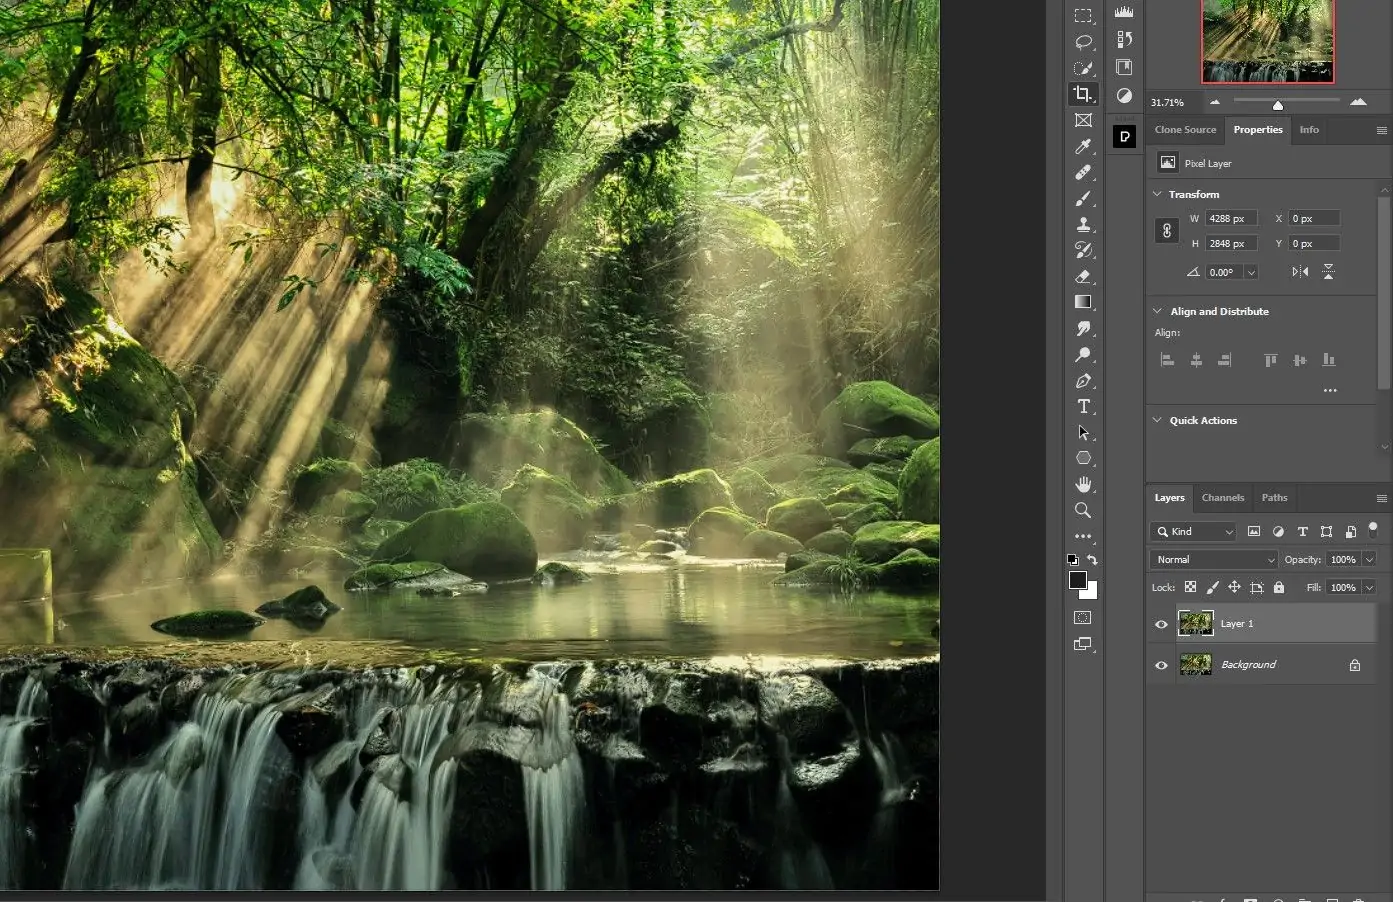
Find the layers panel or menu, often within the toolbar or a designated interface segment.
Click on the button to create a new layer. This will create a transparent layer over your original image layer.
Title the new layer appropriately, like “Aurora Impact” or “Aurora Overlay,” to keep your modification organized.
Ensure the new layer is situated over the initial photo layer within the stack. This way, you can ensure that the Aurora Impact will be connected to the photo.
Acquaint yourself with the different features and choices accessible for editing layers in your computer program. You can consider the choices for adjusting opacity, blending modes, and layer masks, which can be utilized later to refine the Aurora Effect.
Take a minute to save your progress so that you do not lose any changes made to the photo and can return to past adaptations if necessary during the altering process.
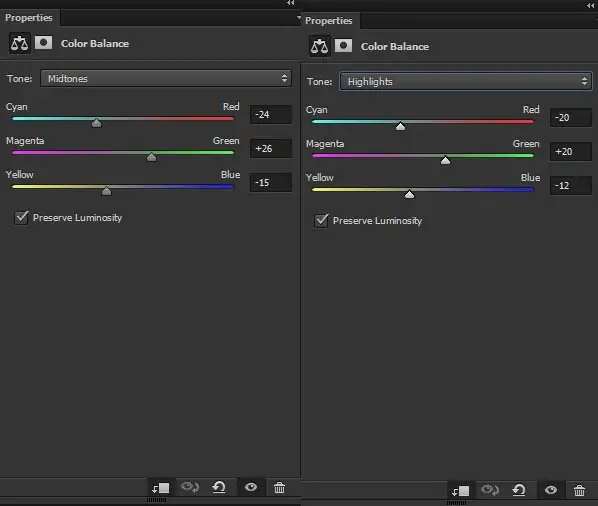
Step 3: Utilizing the Gradient Tool

Click on the recently made layer to select it to apply the Aurora Effect.
Go to the gradient tool in your picture-altering program. This feature permits you to make smooth changes between colors.
Select dynamic colors often related to auroras, such as shades of green, blue, purple, and pink. Experiment with different color combinations to attain the desired result.
Make a gradient overlay on the Aurora Effect layer by clicking and dragging the gradient tool over the canvas. Alter the direction and length of the gradient to go with the required orientation of the auroras within the photo.
Then again, you can utilize gradient maps to apply color gradients to the Aurora Effect layer. This strategy gives you more control over the colors and permits exact adjustments.
Weigh up the colors and gradients connected to guarantee they complement the overall temperament and composition of the photo. Make any essential alterations to attain the required visual effect.
Save your advancement intermittently to protect your work and permit simple undo of changes if required. It guarantees that you fine-tune the Aurora Effect without losing past alters.
Step 4: Experimenting Blending Options
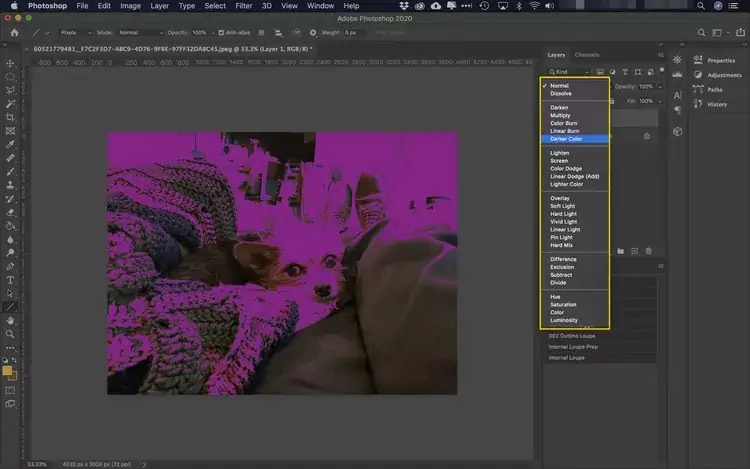
Head to the blending modes dropdown menu within the layers board of your editing application.
Test with distinctive blending modes to discover the one that best mingles the Aurora Effect with the primary photo. Standard blending modes for this effect incorporate Screen, Lighten, and Overlay.
Preview each blending mode to see how it influences the appearance of the auroras and their interaction with the photo. Remember that each blending mode produces special effects, so select the one that improves the overall climate and authenticity of the picture.
Alter the Aurora Effect layer’s opacity to regulate the auroras’ vigor. Bringing down the opacity can make a more unpretentious effect, whereas expanding it can make the auroras more pronounced.
Reweigh the blending mode and opacity alterations, guaranteeing that the Aurora Impact consistently fuses with the photo and improves its visual mark.
Save your advancement to protect the alterations made to the Aurora Effect layer, permitting further refinement in subsequent steps.
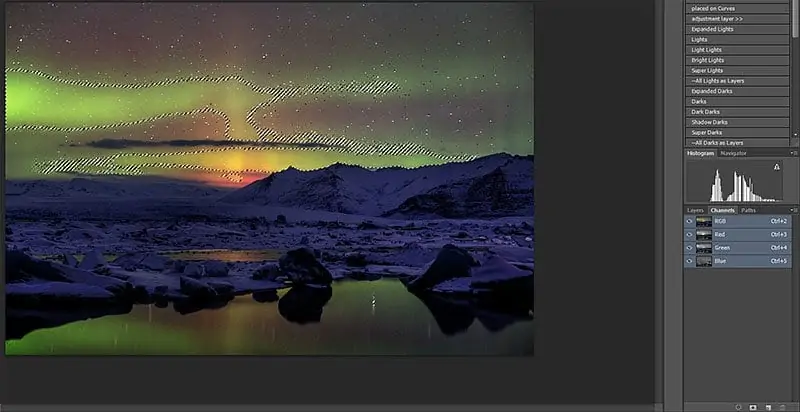
Step 5: Using Layer Masks
Utilize brush tools that are accessible in your editing app to refine the application of the Aurora Effect to particular ranges of the photo.
Pick a soft-edged brush with fitting size and opacity settings to guarantee the smooth mixing of the auroras with the encompassing components.
Make a layer mask for the Aurora Impact layer to control where the effect is pronounced. It permits you to uncover or conceal specific parts of the auroras as needed.
Utilize the brush tool to paint on the layer mask with dark to cover up zones of the Aurora Effect layer or with white to uncover them. It empowers exact control over which parts of the photo show the auroras.
Alter the brush settings and opacity accordingly to merge the auroras with the encompassing view invariably.
Regulate the brushwork and layer mask adjustments to guarantee that the Aurora Effect appears true to life and improve the photo’s overall formatting.
Here again, save your advance intermittently to protect the brush and mask alterations made, permitting simple undoing of changes as needed.
Step 6: Including Lighting Effects
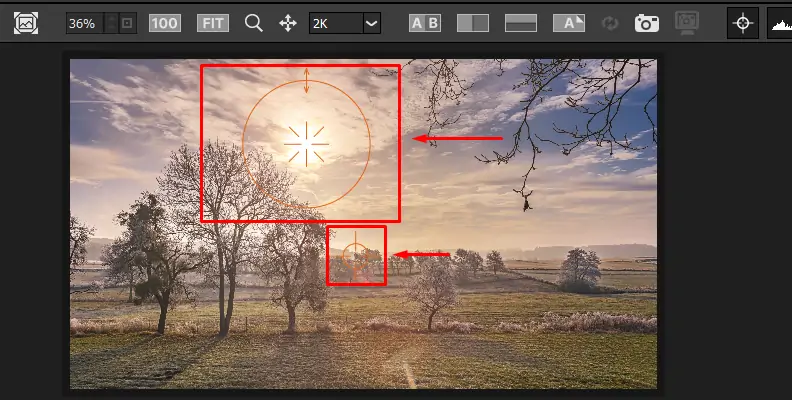
To improve the authenticity of the Aurora Impact, consider lighting effect choices such as glow or lens flares.
When including lighting impacts in a photo, consider the heading and intensity of light sources within the photo to guarantee consistency with the overall scene.
Use subtle glow effects around the auroras to imitate the atmospheric scattering of light during a genuine aurora show. Adjust the opacity and size of the glow to attain a natural-looking impact.
Try using lens flare effects to mimic the interaction of light with the camera lens. Position the flares strategically to complement the auroras and add profundity to the picture.
Beware not to exaggerate the lighting effects, as excessive glare or artificial-looking flares can reduce the realism of the Aurora Impact.
Audit the lighting effect adjustments in conjunction with the Aurora Impact, making any vital changes to attain a harmonious and visually satisfying result.
Save your edits to protect the lighting effect alterations, permitting further refinement in the ensuing steps.
Step 7: Polishing The Final Image
Keenly survey the whole composition, including the Aurora Effect, blending modes, brushwork, and lighting intensity.
To attain the specified visual outcome, make any vital alterations to the colors, opacity, and positioning of the Aurora Impact.
Test with diverse settings and procedures to tune the appearance of the auroras and their integration with the photo.
Regard particulars such as the move between colors, the shape and development of the auroras, and their interaction with the surrounding details.
Review the picture with fresh eyes and guarantee that the Aurora Effect harmonizes with the general temperament and composition.
Request input from others to pick up different viewpoints on the adequacy of the Aurora Effect within the photo.
Save numerous versions of the altered photo at distinctive stages of the editing process to permit simple comparison and backtracking.
After complete satisfaction, save the ultimate edited photo in a suitable file format and resolution for targeted usage.
Conclusion
In conclusion, the aurora effect can elevate the atmosphere and narrative of an image, shifting its status from ordinary to extraordinary. Considering the enchanting reminder of the energetic relationship between the sun, Earth, and its magnetic field, you can create dynamic, colorful streaks of light within the sky, especially in landscape images comparable to natural marvels. The technique is oftentimes also associated with the creation of a sense of ponder and fantasy in scenes or night sky pictures, giving them a mysterious or supernatural feel. By employing digital tools and techniques, you can effectively apply the aurora effect and identify the particular patterns and color traits of auroras.
