How To Use Selenium With Python For Web Automation
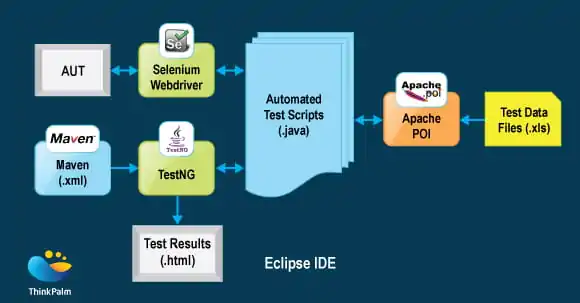
The process of Web automation can automate repetitive actions like submitting forms and extracting data while saving time and with minimum risk of human errors. It also boosts efficiency by running tests or tasks without needing human involvement. Moreover, it is one of the best ways for businesses to stay ahead in product development, particularly with features like clicking and scrolling. Web automation is mostly about imitating human behavior because it is essential to make sure the software functions for users of all kinds of devices. With the help of an automation tool like Selenium, which is an open-source automated test framework, we can use a browser without a human being present and automate tasks like entering data into forms and interacting with websites using code. Numerous programming languages, including Python, Java, .net, PHP, C#, etc., are compatible with Selenium. In this blog, we will address the step-by-step process of using Selenium with Python for web automation to help accomplish day-to-day web operations without even opening a browser.
Step 1: Selenium And WebDriver Installation
To begin utilizing Selenium with Python for web automation, the primary step is to install the vital details, which include the Selenium package and the suitable WebDriver for the browser you want to automate.
To begin with, first, confirm that Python is installed on your system. Then, open a terminal or command prompt to install Selenium by using the command:
pip install Selenium
That command can install Selenium’s Python bindings, which permit you to communicate with a web browser programmatically.
Following, you have to download the WebDriver for the browser you’ll utilize. For illustration, if you’re utilizing Chrome, navigate to the ChromeDriver site and download the version that approximates your installed form of Chrome. If you are utilizing Firefox, you need to download GeckoDriver. Put the WebDriver in a folder that is included in your system’s Path, or assign the path manually in your script.
The WebDriver functions as a link between your Python code and the browser, permitting Selenium to transmit commands to the browser. That arrangement is pivotal since Selenium mandates this driver to open web pages, recreate clicks, input content, and execute other browser-based activities.
After the installation has ended, you can now start composing Python scripts to automate browser interactions with Selenium.
Step 2: Importing The Fundamental Libraries
The second step includes importing the fundamental libraries and putting up the WebDriver in your Python script. Selenium offers a variety of operations to connect with web components, but you must begin with importing the package and initializing the WebDriver.
Begin by importing the Selenium web driver module, which incorporates all the strategies required to supervise your browser:
from selenium import webdriver
After that, you have to initialize the WebDriver by identifying which browser you’ll utilize. On the off chance that you are utilizing Chrome, launch the Chrome WebDriver like this:
driver = webdriver.Chrome()
If using Firefox, you can go with the following:
driver = webdriver.Firefox()
The given line makes an instance of the WebDriver that unlocks a new browser window and holds up for further commands.
Also, if your WebDriver is not within the system Path, you must indicate its area:
driver = webdriver.Chrome(executable_path=’path/to/chromedriver’)
The setup step is necessary since it will build up a direct association between Selenium and your preferred browser. From here, you will be able to connect with any web page, automating tasks like clicking buttons, submitting forms, and extricating information.
Step 3: Getting On To A Web Page
This step is about navigating to a web page utilizing the Selenium WebDriver. After setting up your WebDriver, the following task is to lead it to the web page you need to automate.
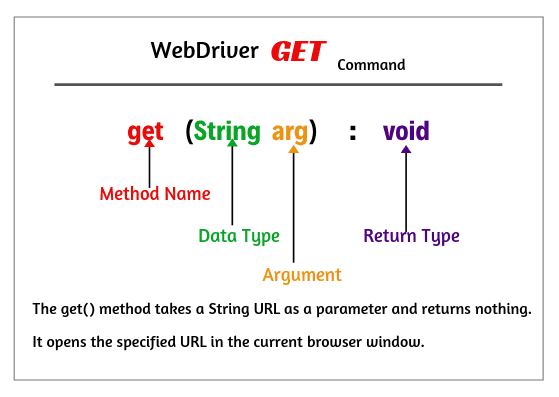
To get to a website, utilize the get() procedure. This strategy opens the URL within the browser window initialized by the WebDriver. For instance, to head to a sample location like “example.com,” you have to type in:
driver.get(‘https://example.com’)
The above line mandates Selenium to load the desired URL within the browser. It’s imperative to note that the get() strategy waits for the page to load thoroughly before running the following line of code. It will guarantee that any ensuing activities, such as clicking or typing, are conducted only after the page is completely accessible.
You can utilize this strategy to get to any site or web application that you simply want to automate. For illustration, you can utilize it to log in to an account, scrape information, or test a website’s usefulness. This step is pivotal in web automation because it sets the beginning point for further interaction with the web components on the page.
Step 4: Interacting With Web Components
In this step, you have to work on interacting with web components. After navigating to a web page, Selenium permits you to communicate with its components, which include buttons, text fields, and links. To do this, you need to find the components on the page using diverse strategies given by Selenium, like find_element_by_id, find_element_by_name, or find_element_by_xpath.
The following code is about how you can find and interact with components:
Assume that you need to interact with a search box on a webpage. You’ll find it by its name attribute using the following:
search_box = driver.find_element_by_name(‘q’)
The above-given code finds the search box component where q is the name attribute.
After successfully finding the component, you’ll be able to input text into it utilizing send_keys():
search_box.send_keys(‘Selenium Web Automation’)
After the text input completion, you’ll submit the form, for example, by hitting the Enter key:
search_box.submit()
You can utilize comparative strategies to press buttons, select dropdowns, and connect with different other components on the page. This step is basic in automating user interactions like filling shapes, clicking links, or executing web testing.
Step 5: Dealing With Delays And Waiting
In this step, you have to deal with delays and waiting for components to load. In real-world settings, web pages often take time to load, and particular components might not be instantly accessible. To guarantee that the script doesn’t fall flat due to timing problems, Selenium gives ways to wait for components to appear before you interact with them.
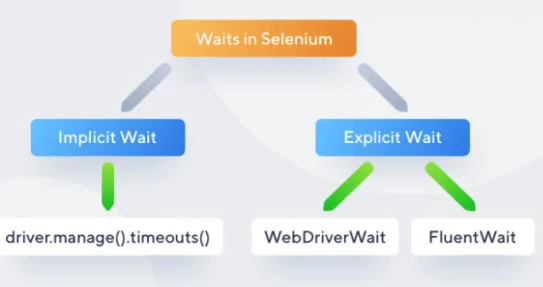
Selenium has two basic sorts of waits:
The first one is an implicit wait, which tells Selenium to wait for an indicated sum of time before throwing an exception if the component is not discovered. It globally affects all components in your script with the help of the given code:
driver.implicitly_wait(10) # Waits up to 10 seconds for elements to be available
Another kind of wait is Explicit waits, which are more adaptable and let you wait for particular conditions, like the existence of an element or the visibility of a button. You’ll set a maximum wait time, and the WebDriver will scan for the condition intermittently:
from Selenium.webdriver.common.by import By
from Selenium.webdriver.support.ui import WebDriverWait
from Selenium.webdriver.support import expected_conditions as EC
element = WebDriverWait(driver, 10).until(
EC.presence_of_element_located((By.ID, ‘element_id’))
)
In the above case, Selenium waits up to 10 seconds for the component with the ID element_id to be displayed on the page. In case the component emerges within this time, the script continues; if not, it presents a timeout exception.
Step 6: Properly Shutting The Browser
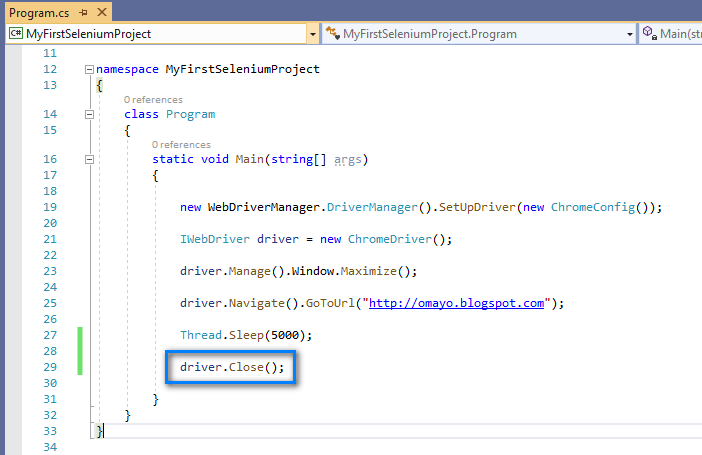
Let’s move on to the final step, which is properly shutting the browser once your automation tasks are concluded. After your script has wrapped up interacting with the webpage, it’s important to shut the browser session to free up system resources. Selenium presents two strategies named as close() and quit().
If you have opened numerous browser windows or tabs and need to shut only the dynamic one, you can utilize the close() method:
driver.close()
This code will close only the current window that the WebDriver is controlling while keeping the WebDriver session running. Likewise, other windows that are opened stay unaffected.
For shutting down the entire browser and finish the WebDriver session, utilize quit() with the following code help:
driver.quit()
This approach closes down all browser windows that were opened by Selenium and also closes the WebDriver session. It is a good practice to utilize quit() at the conclusion of your script, particularly in the event that you need to guarantee the closure of all running browsers in the background.
Appropriately terminating the browser avoids resource leaks, which can hinder your system or cause errors in long-running automation errands. Ever incorporate this step to confirm smooth execution and clean up after your automated tasks are ended.
Conclusion
In conclusion, for web automation, Python is the language most favored by developers for creating Selenium test scripts because of its readability, ease of use, and simplicity. Python’s compact and straightforward syntax makes it possible to write scripts more quickly and with greater ease, which is essential for testing scenarios. Also, you can access extensive libraries and frameworks that operate well with Selenium, simplifying difficult tasks like reporting, data manipulation, and tool interaction. Your web automation tasks using Selenium with Python can simply be enriched by the wealth of resources.


