How To Use Scripts In Image Editing
The series of commands in scripts help users shape the process of image editing automatically. Unlike manually applying each modification to images, you can use a script to apply all specified functions to images. The utilization of scripts is especially useful for editing a batch of images, so you no longer need to edit images one by one. Instead, you can use the same set of adjustments to edit all your photographs at once. Scripts are offered by various image editing tools like Adobe Photoshop, GIMP, Affinity Photo, and many more. Each application provides pertinent choices to help your automated editing process. As a result, the set of modified images at the end contains consistency in modifications made, saving time and effort while getting images without any undesirable variation in enhancements. Your set of photographs, with the help of scripts, can effectively reduce the manual efforts you need otherwise to edit images singly. The main measure you have to consider is the script preparation and arrangement process. Also, you should have basic knowledge of coding languages like JavaScript if you are using Photoshop. This blog will further address a step-by-step way to facilitate the creation and application of your script.
Step 1: Making Initial Changes In The Software
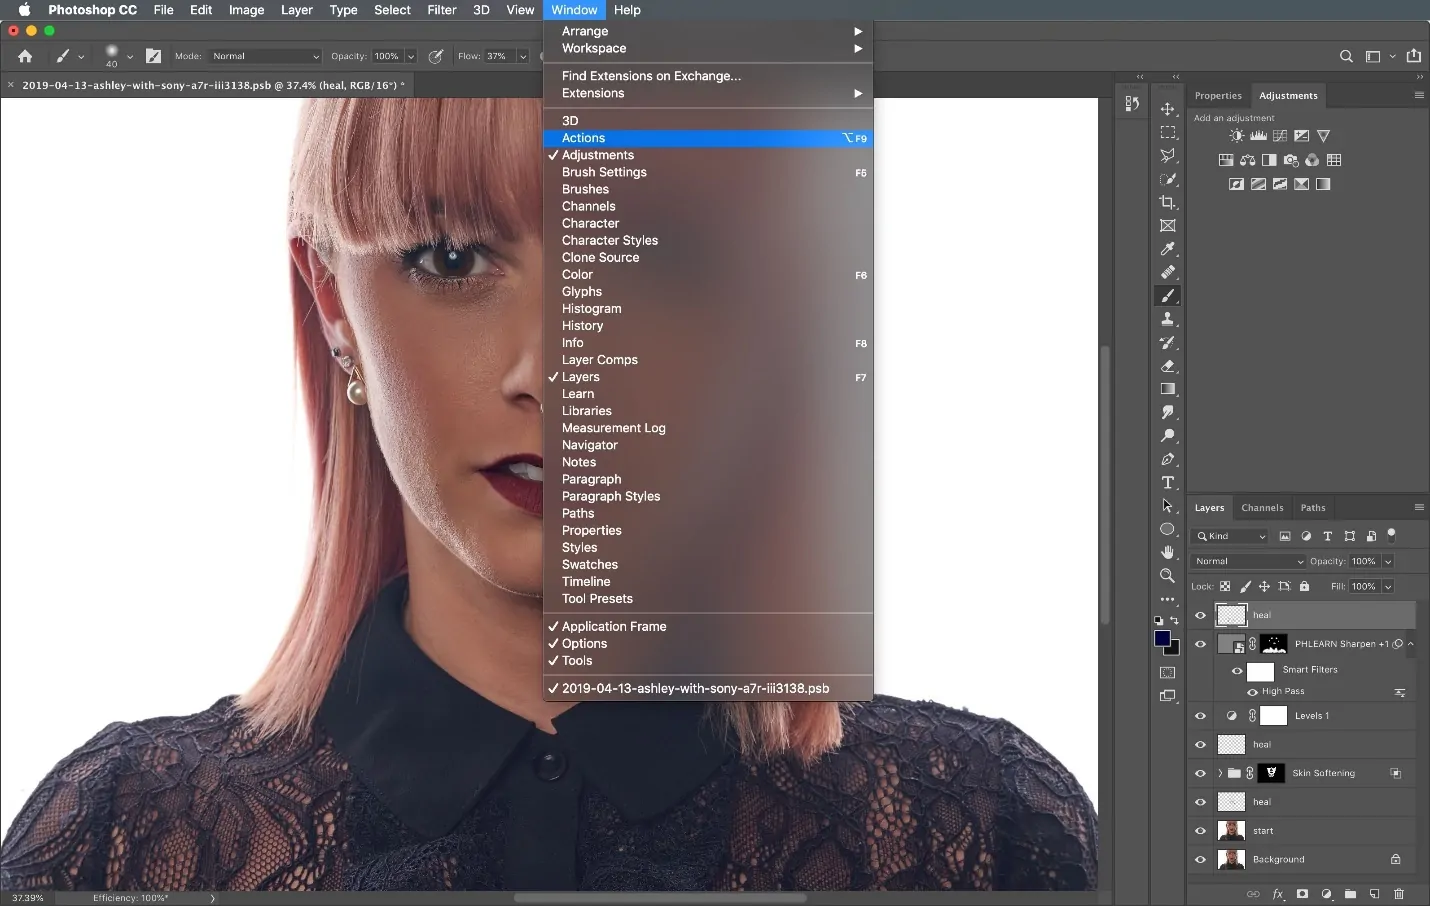
Load the Adobe Photoshop app on your PC, and from the top menu, tap on Window, and after that, select Actions. It will open the Actions panel, where you’ll create and oversee recorded actions.
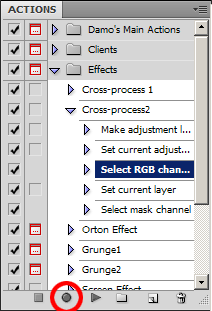
At the foot of the Actions panel, tap on the Create New Action option. It looks like a square symbol next to the trash bin. A dialog box will appear on that.
Within the dialogue box, give your action a momentous name like Batch Resize. That title will assist you in identifying the action afterward.
You’ll be able to assign this action to an existing set or make a new one, helping you to keep the actions systematized.
After you have entitled your action, tap Record. Photoshop will now record each altering step you proceed with. Do not worry; this recording can be stopped or paused once you finish your task, giving you power over the automation process.
Step 2: Specifying The Desired Edits
After recording starts within the Actions panel, continue with the image edits you need to automate. For example, if your objective is to resize pictures, head to Image > Image Size, alter the dimensions, and implement the changes.
If you need to incorporate particular adjustments, you can apply channels. For instance, use Filter > Sharpen > Unsharp Mask to upgrade the subtle elements in your picture. Each step is recorded and will be replayed after you run the activity on other photographs.
If you need to incorporate color adjustments, proceed to Image > Adjustments and make modifications like Brightness/Contrast, Levels, or Curves. These changes will also be part of the recorded action.
You can form new layers, alter opacity, or apply effects like blending modes or layer styles. All these steps will also be captured within the recording process.
Proceed to perform all the steps that ought to be automated. Don’t forget that each action you take is being documented so you can apply the same set of adjustments to future shots.
Step 3: Saving The Recorded Actions
After performing all the specified photo editing steps, survey the actions you’ve taken to confirm that everything is accurate.
You can stop recording your actions by going back to the Actions panel. Tap the stop button found at the base of the panel. It will stop Photoshop from recording any further activities, successfully saving all the steps you’ve just accomplished.
As you stop the recording, you can audit the recorded steps inside the Actions panel. Each step will be listed, indicating the particular alterations and commands that Photoshop will replicate automatically when the action is applied.
Before utilizing it on a large batch of pictures, you should try the recorded action on a single photograph to confirm that it functions as planned. Open a new picture, select the action within the Actions panel, and press Play, which is a triangle button, to apply the sequence of edits.
Your action will be saved and prepared for future utilizes.
Step 4: Working On Script Editor
Move to the top menu and choose File to see a drop-down menu from which you can select Scripts. This function permits you to get to different scripting and automation highlights inside Photoshop.
Within the Scripts submenu, press Script Editor. It opens the Script Editor window, where you can type in or modify JavaScript code. If Script Editor isn’t available, you’ll have to utilize an external text editor to form your script file and, after that, run it in Photoshop.
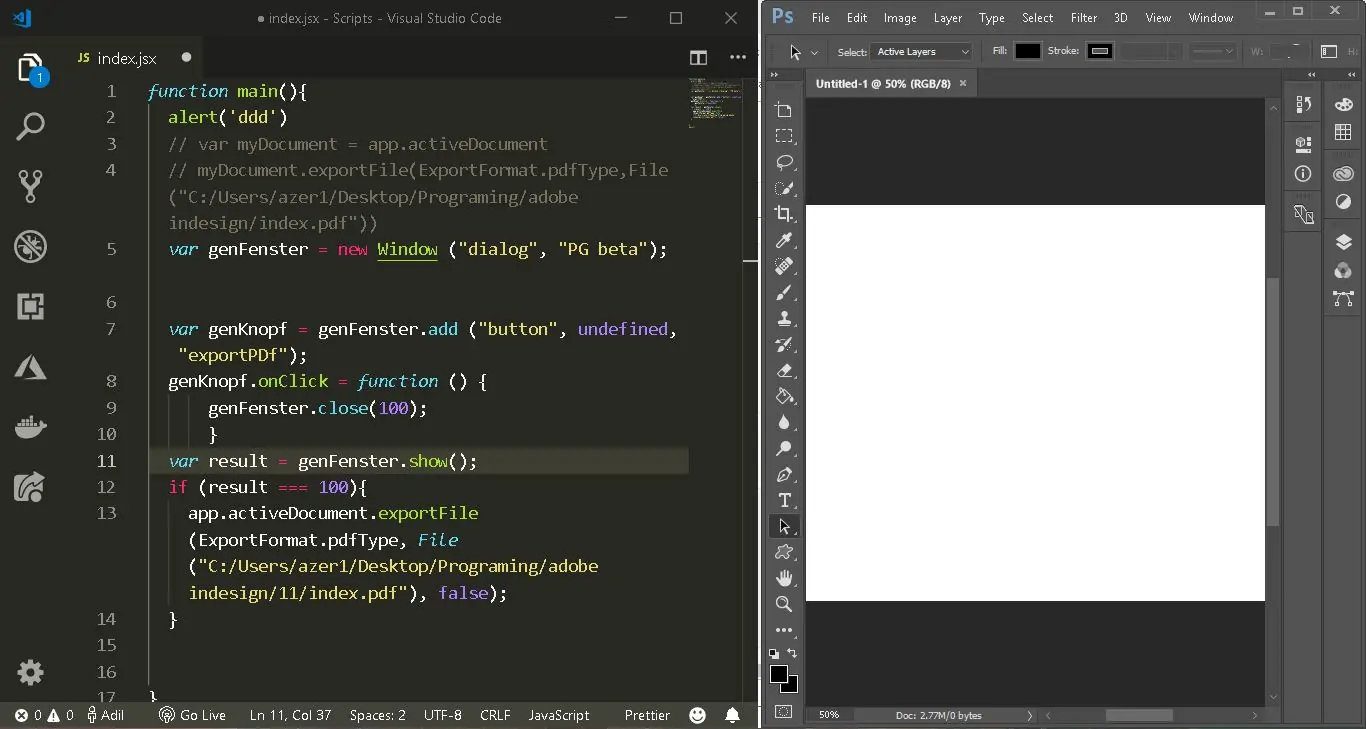
Within the Script Editor window, you’ll begin writing a new script. If you’re utilizing an outside editor, open a new file and save it with a .jsx extension, a format employed for Photoshop scripts.
Enter your JavaScript code into the Script Editor. That code can automate different errands, like resizing pictures, applying filters, or batch handling.
After composing your code, save the script file. In the Script Editor, you can utilize File > Save As to keep your script for later utilization.
Step 5: Creating The Script
Keep Photoshop open, and get to File > Scripts > Script Editor.
Start by understanding the fundamental layout of a Photoshop script. A basic JavaScript script for Photoshop usually includes initializing the document, performing activities, and saving the file.
Following is an essential illustration script that resizes an image and saves it:
var doc = app.activeDocument; // Get the active document
doc.resizeImage(800, 800); // Resize the image to 800×800 pixels
var saveFile = new File(“/path/to/your/folder/” + doc.name); // Define the save location
var saveOptions = new JPEGSaveOptions(); // Define save options
saveOptions.quality = 10; // Set JPEG quality
doc.saveAs(saveFile, saveOptions, true); // Save the file
Adjust the script as required for your particular tasks, like changing dimensions, file formats, and quality settings.
Protect the file with a .jsx extension in an area where Photoshop can easily approach it.
Step 6: Applying The Prepared Script
Be sure that Photoshop is running and that the document you need to process is open. If it is a folder of images, it must be ready if your script is outlined for batch processing.
Move to File > Scripts > Browse. This function permits you to choose and run scripts that you’ve held.
Within the file dialog that opens, get to the area where you saved your .jsx script file. Choose the script file and tap Open. Photoshop will start implementing the script.
If your script processes numerous pictures or performs complex errands, observe the progress. Photoshop will apply the specified actions to the existing document or group of pictures.
After the script has wrapped up running, examine the changes made to guarantee they fulfil your anticipations. As essential, alter the script and again run it to polish the outcomes.
If the script operates as planned, you can save it in an assigned folder for future operations. It makes it easy to get to and run again as required.
Step 7: Editing Multiple Images
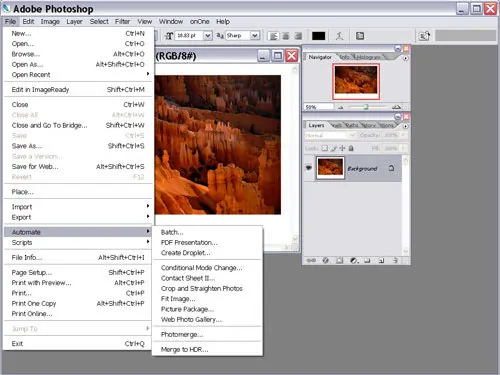
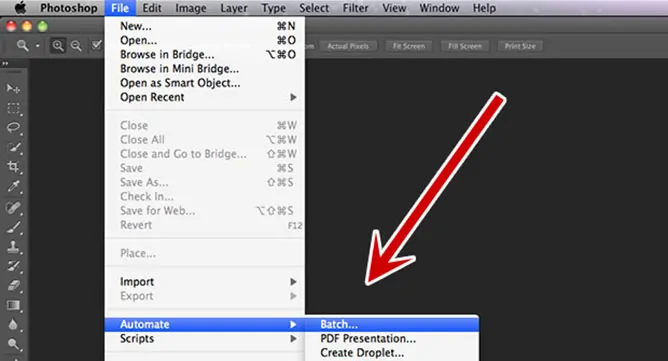
Follow the options of File > Automate > Batch to unlock the Batch dialog box, where you’ll set up automation for multiple documents.
Within the batch dialog box, select the activity you created or the script you saved. For actions, pick the appropriate set and action title. In case of employing a script, guarantee it’s accurately configured in your actions or directly within the script settings.
Beneath the Source area, select Folder and press Choose. Move to the folder containing the pictures you need to process and click it. You will see that Photoshop will apply the script to all pictures in that folder.
Within the Destination section, select where you need to save the processed pictures. You can pick a Folder and specify the output area or select other alternatives as required.
Follow the file, naming traditions as required, like you can add text or numbering. It confirms that processed files are saved accurately without overwriting initials.
Tap Ok to begin the batch processing. Photoshop will perform the script on each picture within the source folder and save the developments as your settings.
Once the batch process is concluded, survey the yield files to affirm that the script has been connected accurately and the results are as anticipated.
Conclusion
In conclusion, automation is useful in any task, as it can enable us to solve certain problems more quickly and efficiently. The same is the case of image editing, where scripts save that time, which is often consumed in repetitious steps to edit multiple images. You can schedule your series of modifications and facilitate your batch image processing projects, thus enhancing consistency and productivity. Using scripts can be significantly valuable for event photography, as a cohesive and harmonious look across all images renders integration and creates dazzling memories of that particular occasion.


