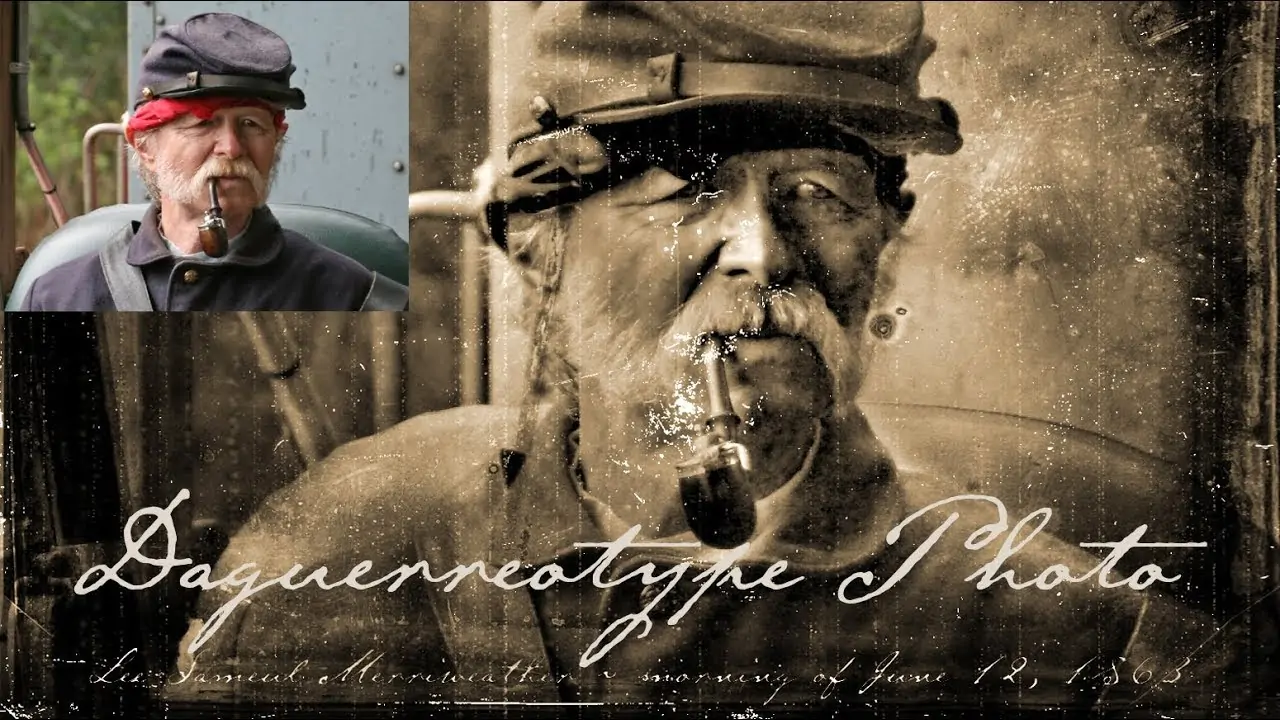
How To Turn An Image Into Daguerreotype
The daguerreotype technique belongs to the ancient kind of photography and was originated by Louis Daguerre in the 19th century. This process involved creating a finely detailed image on a silver-coated copper plate. It was necessary to clean and polish the copper plate that had been coated in silver so that its surface resembled a mirror. After that, the plate was sensitized over iodine in a confined box until it developed a yellow-rose look. After exposure to a camera, the plate was developed over hot mercury until an image appeared. The final product was a detailed, unique image with a striking metallic luster. The ancient photography technique of daguerreotype still holds its significance in the world of varying filters and effects used to manipulate digital images. Various software tools and techniques are accessible to artists to create shiny and illustrious photographic effects of daguerreotype. This blog will address the steps and tools required to turn an Image into a daguerreotype composition.
Step 1: The Base Image Selection
Select a photo with solid contrast and clear details or, in a perfect world, a representation or still-life image, as these subjects tend to work well for daguerreotype-style impacts.
Ensure the photo features a great composition, with the subject as well-framed and centered as attainable.
Appraise the mood and climate you want to communicate with the ultimate daguerreotype-style image. Search for photographs with appropriate lighting and tonality.
Attend to the overall quality and resolution of the photo. Images with higher resolution will, for the most part, create superior results when applying editing effects.
Be sure that certain components of the photo, such as texture and surface elements, may influence how well the daguerreotype effect can be added. Select a photo with a relatively smooth surface for the best outcomes.
As essential, make any fundamental adjustments to the images’s exposure, color balance, and cropping before continuing to apply the daguerreotype impact.
Step 2: Using Compositional Strategies

Operate image editing software such as Adobe Photoshop or GIMP to open the chosen photo.
Evaluate the composition of the image and decide if any editing or resizing is essential to progress the in style.
Employ the rule of thirds or other compositional rules to make the subject well-positioned inside the frame.
Edit out any distracting components or empty space that diverts from the focus of the image.
Test with different editing ratios to discover the most visually appealing composition.
Assume the aspect ratio of the ultimate daguerreotype-style image you need to create, whether it’s square, rectangular, or another form.
Make any fundamental alterations to the composition utilizing the cropping tool or by manually resizing and repositioning elements within the photo.
Watch out not to crop too much, as you’ll lose critical details or make an uneven composition. Endeavor for an agreeable balance between the subject and negative space.
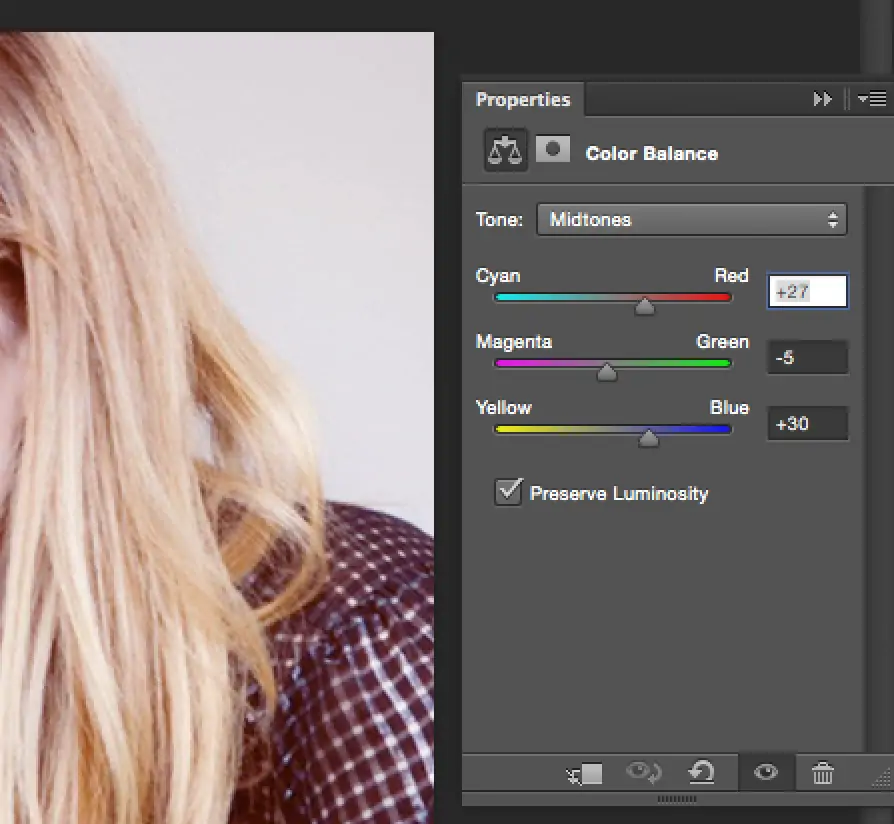
Step 3: Tweaking Color And Contrast Settings
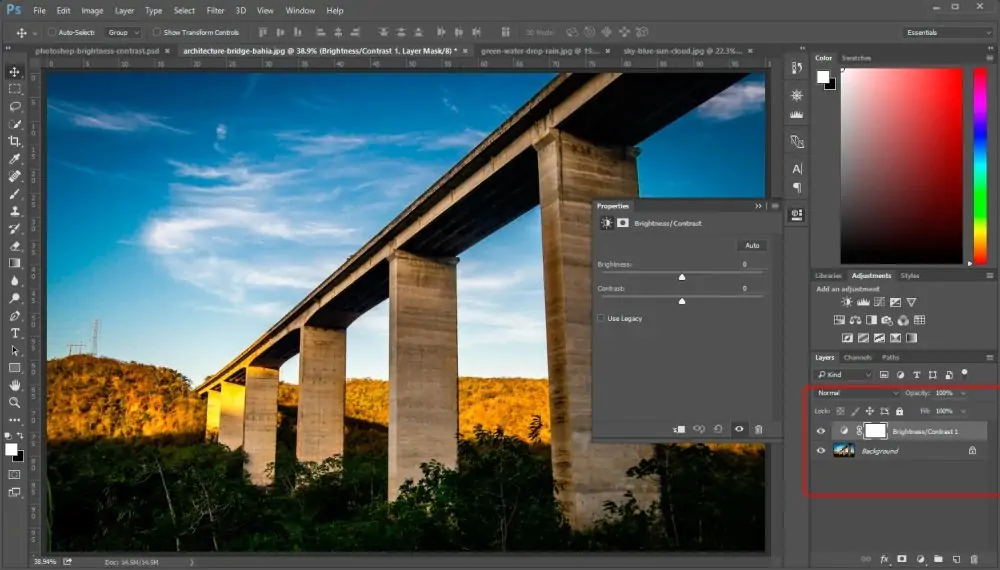
Navigate to the color and contrast adjustment tools in your chosen image editing app.
Decrease the saturation of the picture to make a more repressed, vintage look reminiscent of daguerreotypes.
Try adjusting the contrast to improve the tonal range and emphasize points of interest within the image.
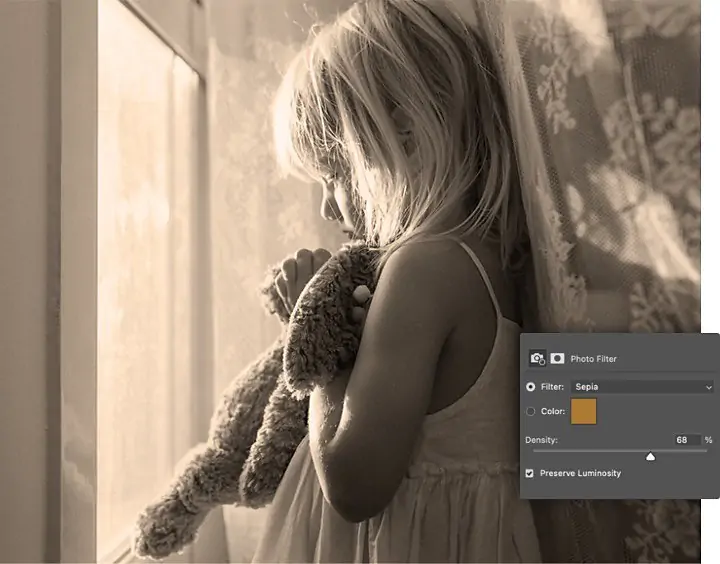
Assume that a slight sepia tone is included in the image to further inspire the look of a daguerreotype. This could be accomplished by altering the color balance towards warmer tones.
Utilize curves or level adjustments to polish the prevailing brightness and contrast of the image.
Opt for a balanced tonal range with rich blacks and unobtrusive highlights to upgrade the vintage feel.
Look out not to exaggerate the adjustments, as this will result in an unnatural or fake appearance. Aim for a mild, nuanced effect that complements the initial photo.
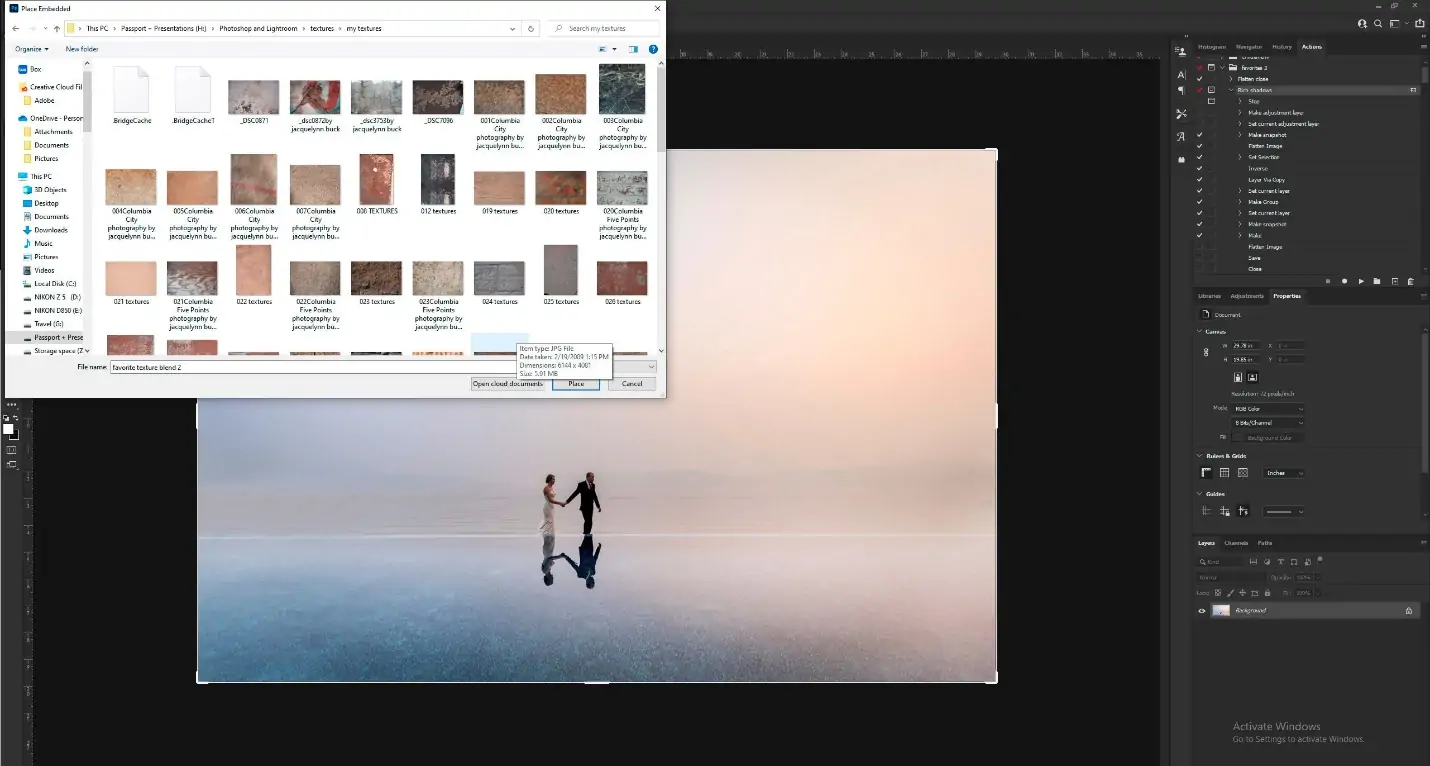
Step 4: Employing Texture Overlay

Get or make an appropriate texture overlay that takes after the texture of a daguerreotype plate. That may incorporate textures of aging paper, metal, or other materials.
Bring in the texture overlay into your image editing app and put it over the photo layer.
Alter the blending mode of the surface overlay layer to “Overlay” or “Soft Light” to merge it with the basic photo while protecting its surface.
Scale and place the texture overlay to cover the whole photo or particular zones where you need to recreate the appearance of a daguerreotype plate.
Test with the opacity of the surface overlay layer to control the intensity of the impact. A decrease can make a more subtle texture, while the increased opacity will make the surface more pronounced.
Temper the blending alternatives and layer adjustments as required to attain the specified result. You can also attempt to apply extra effects, such as noise or grain, to enrich the vintage look of the photo.
Step 5: Using Sharpening Options
Utilize the sharpening tools accessible in your application to improve the clarity and sharpness of details within the picture.
Use a moderate amount of sharpening to avoid presenting artifacts or a coarse appearance.
Center on sharpening key zones of the photo, such as the subject’s features or conspicuous objects, to bring out fine details.
Alter the sharpening settings, such as radius and strength, to attain the required level of sharpness without over-sharpening the photograph.
Utilize masking or specific sharpening techniques to apply sharpening only to particular regions of the image, protecting smoother areas and minimizing commotion.
Beware not to exaggerate the sharpening, as this will result in an unnatural or overstated appearance. Look for a
discreet enhancement that improves the general clarity and detail of the image while keeping up a natural facade.
Audit the image at full resolution to guarantee that the sharpening alterations enhance the specified ranges without presenting unwanted artifacts or distortion.
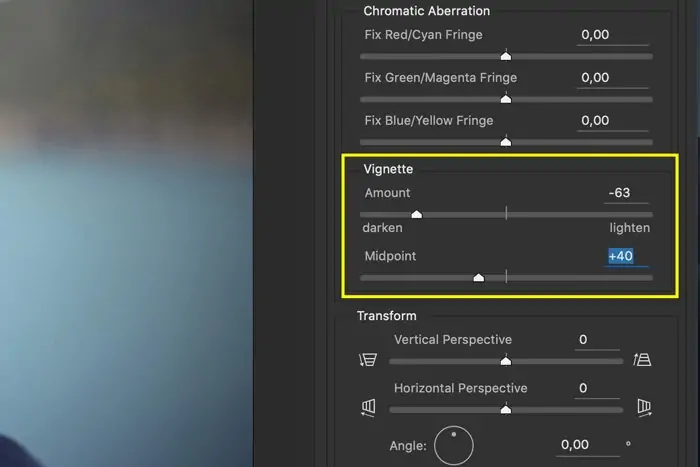
Step 6: Including Vignette Effects
Make a new layer over the photo layer in your image editing app.
Choose a soft brush tool with less opacity and set the closer view color to black.
Utilize the brush tool to paint along the edges of the image, steadily obscuring the corners and edges to form a vignette effect.
Tweak the brush size and opacity as required to achieve a subtle obscuring effect that frames the image without overwhelming it.
Then again, utilize a vignetting filter or adjustment layer to apply a vignette effect to the complete image.
Play with distinctive vignette shapes and levels to discover the most compelling result.
Watch out for blending the vignette effect smoothly with the rest of the photograph to dodge harsh moves or obvious altering artifacts.
Survey the composition at full resolution to check that the vignette impact upgrades the general composition and temperament of the photo without degrading the subject.
Step 7: Performing Final Tweaks
Audit the overall appearance of the image and make any fundamental modifications to polish up the daguerreotype-style effect.
Consider extra editing procedures like adjusting brightness, contrast, and color balance to attain the specified vintage appearance.
Test by applying filters or effects to improve the temperament and environment of the photo.
Include any last embellishments or enhancing components, such as borders or overlays, to progress and enhance the daguerreotype aesthetic.
Hold on and assess the image as a whole to guarantee that all components work together evenly.
Compare the edited picture to the original version to gauge the adequacy of the daguerreotype-style conversion.
Save the ultimate altered image in an appropriate file format, JPEG or TIFF, and the preferred resolution.
Think of your composition with others or consolidate it into a digital or print project to grandstand your abilities and inventiveness in applying daguerreotype-style impacts to digital photographs.
Conclusion:
In conclusion, daguerreotype style inclusion in image editing is a magnificent edition that enhances the visual pizzazz and viewer involvement in images. Even though the original is charming in its own privilege, the digital daguerreotype also holds significant precision, sharpness, and detail. Also, the physical daguerreotypes are highly delicate and have a surface that resembles a mirror. Given the great vulnerability of the metal plate, most daguerreotypes are displayed in a specific housing. Taking these aspects into account, digital aesthetics allow one to see this attractiveness in a convenient and light manner. Observing the measures indicated in this blog, you can recast your contemporary photographs into a vintage-looking daguerreotype-style photograph, which seizes the exceptional charm of this antique photographic technique.
