How To Create Zen Art Effect
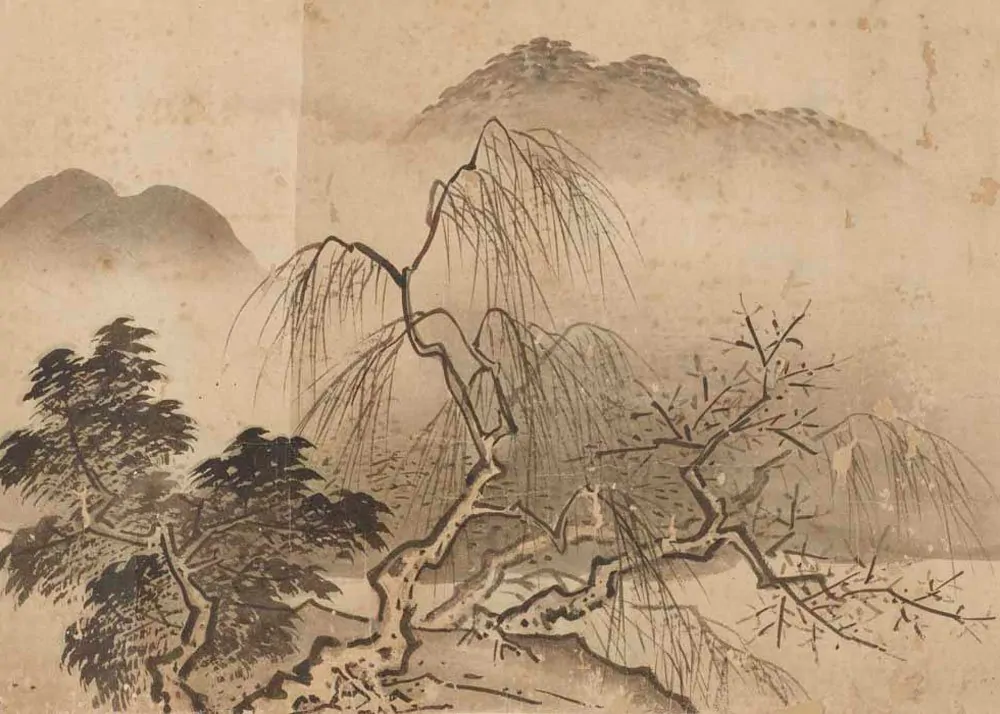
Zen art, a type of East Asian art frequently linked to Zen Buddhism, stresses spontaneity, simplicity, and a strong bond with nature. The Zen philosophy of direct experience and the value of meditation are reflected in this art form, which produces works that inspire peace and promote meditation. Zen art is distinguished by its simplicity and how it expresses deep thoughts and feelings via ink, brushstrokes, and space. Notwithstanding its religious foundations, the form’s influence and development cut beyond spirituality and popular culture. Classic Zen paintings symbolize the balance between humans and the environment, and they usually feature natural settings like animals, bamboo, and landscapes. The deliberate use of negative space in Zen paintings further invites spectators to discover serenity and purpose in the unseen or unsaid. Zen art still prevails, and artists exuberantly employ this tranquil art approach. Moreover, with the expansion of digital art approaches, digital artists and image creators have also fancied the minimalism of Zen art correspondingly. The digital tools and approaches help individuals who lack artistic proficiency yet want to create something and experiment with their visions deliberately. This blog will further go on with a practical presentation of a step-by-step process using digital tools to mimic the distinct features of traditional zen art in modern images.
Step 1: Creating A New Document
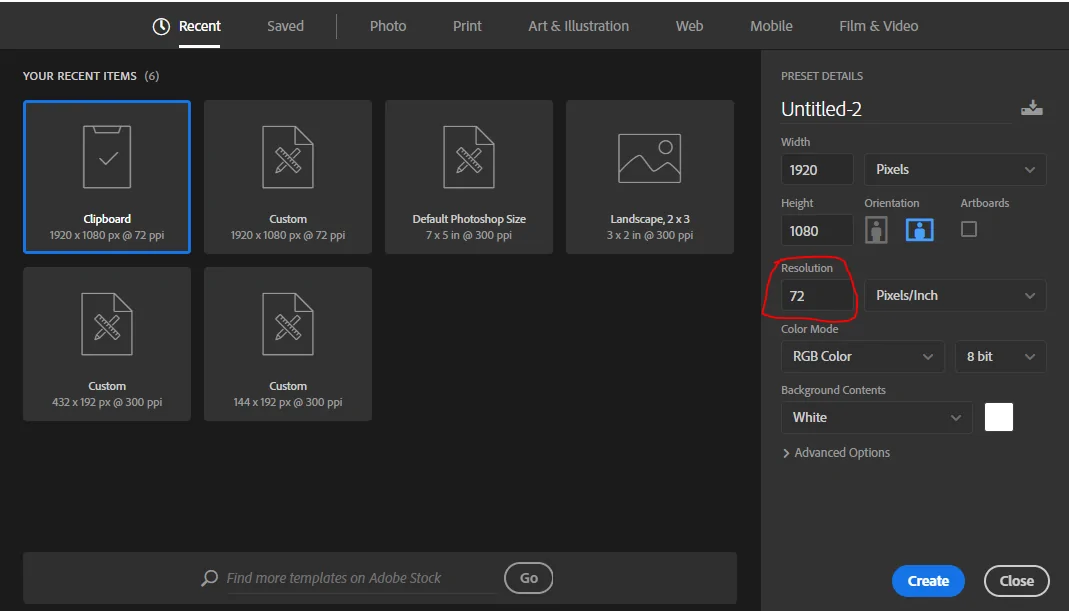
Making a thought-out canvas is basic for accomplishing a Zen art impact in an image. Begin by opening Adobe Photoshop and making a new document with dimensions like 1920×1080 px or a square format of 1080×1080 px for social media usage. Setting a high-resolution canvas will confirm a superior quality for detailed brushwork and surfaces.
To mimic the simplicity of Zen works by specifying the background colour to white, light beige, or mild grey to form a calm, balanced air. Do not pick radiant or excessively complex backgrounds since they will disrupt the thoughtful ambience.
To imitate conventional Sumi-e ink canvases, download a handmade paper texture. You can either get free textures online or compose them by photographing genuine paper. Assign the layer blending mode to Multiply and decrease the opacity as required.
Maintain sufficient empty ranges within the design, highlighting Zen’s concept of negative space. It will make sure the composition stays uncluttered and serene.
Step 2: Converting The Photograph To Black And White
As zen art usually depends on monochrome tones, form, surface, and emotion, you need to look into changing the photograph to black and white to remove distractions and upgrade the minimalist style. It will help make a Sumi-e or ink wash effect, imitating traditional Zen paintings.
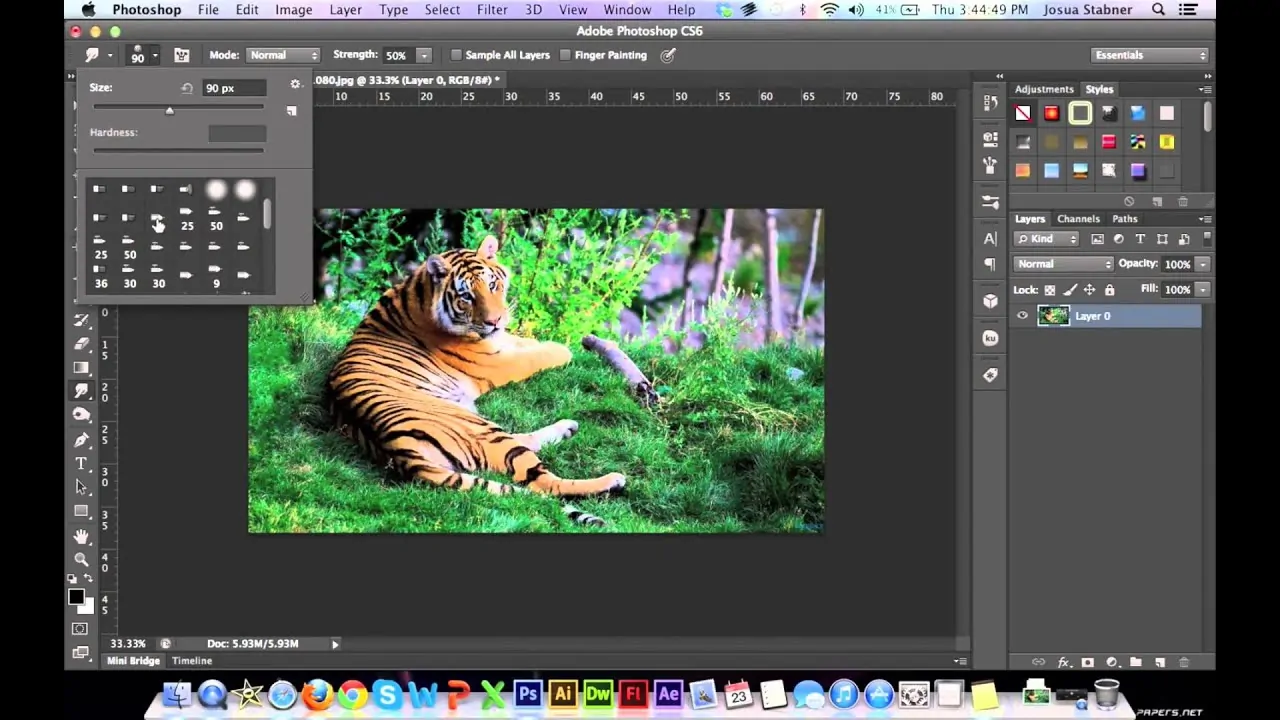
Load your selected photograph in Adobe Photoshop and set it on the canvas. Resize and alter it for harmony, guaranteeing it accommodates the standards of Zen composition, mostly asymmetrical and moderate.
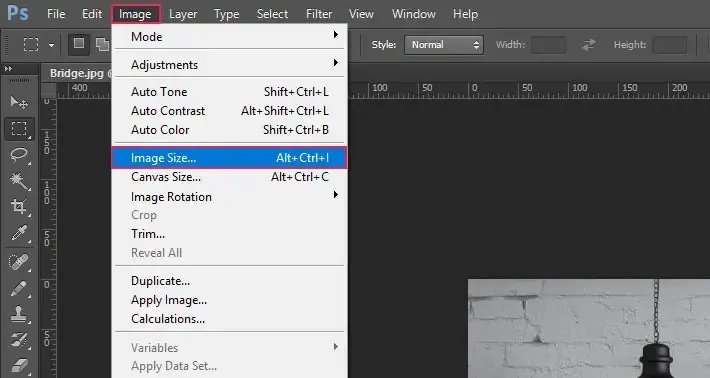
Move to Image, click Adjustments, and select Black & White to desaturate the photograph. Alter the individual colour sliders to manage brightness and contrast. That practice gives more adaptability than merely desaturating the picture using key shortcuts.

Head to the image, select Adjustments, and then Levels or Curves to tune the contrast. Deep blacks and bright whites will make a flashy, ink-like effect necessary for a Zen-inspired formation.
Make a copy of the image layer, specify the blending mode as Soft Light, and alter opacity to 20 to 50 per cent. It will upgrade depth while keeping up a natural impression.
Step 3: Creating Sumi-E Brush Effect
To obtain a true Zen aesthetic to your shot, you need to apply a Sumi-e or ink wash brush effect, imitating the expressive strokes of conventional Japanese ink artworks.
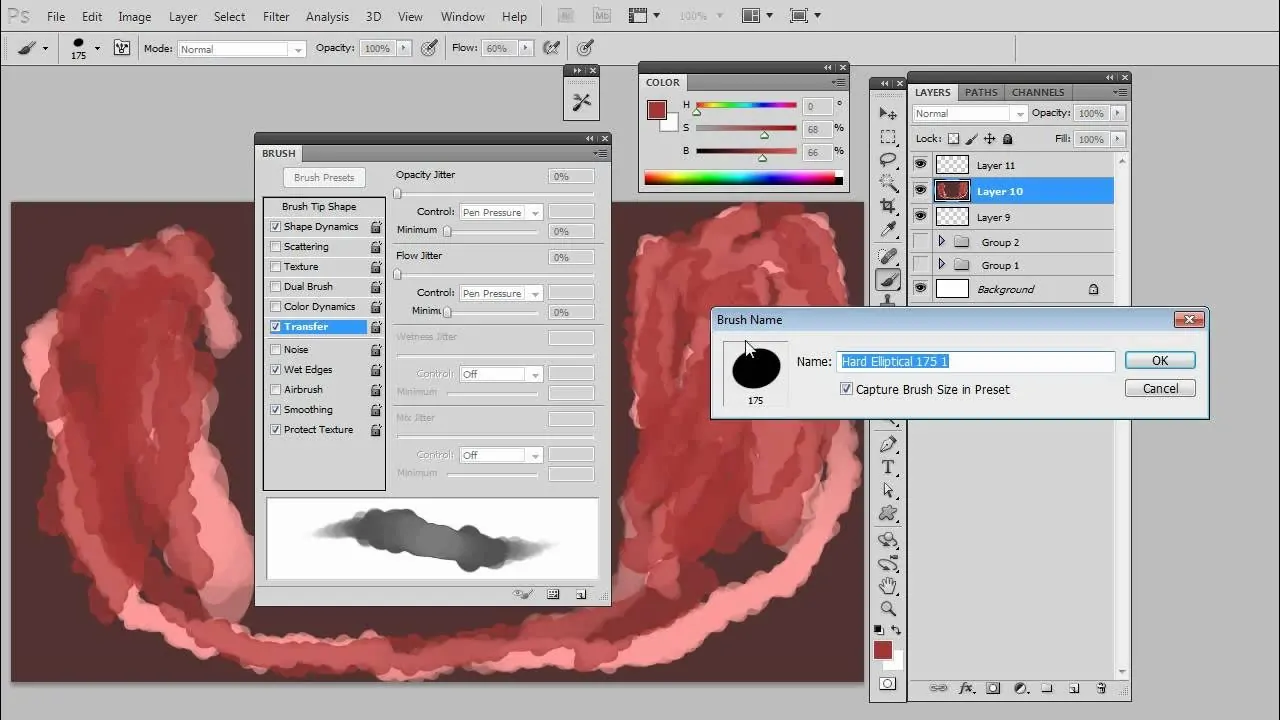
To achieve the Zen ink wash effects, you will have to utilize specialized brushes. You can download Sumi-e or watercolour brushes from free online resources. To download these tools, proceed to Brush Tool, click Brush Settings and Import Brushes and load the downloaded set.

Select a soft-edged Sumi-e brush from the set you have just imported. Specify the opacity to 50 to 70 per cent to imitate ink bleeding into conventional paper. Modify the flow and size according to the impact you want. For instance, larger strokes are best for backgrounds, while the finer ones are suitable for the finer details.
Set up a new layer over the black and white picture and utilize a black or dark grey colour.
Delicately paint along edges and outlines, improving natural shapes while leaving parts untouched for harmony.
Try different blending modes such as Multiply, Overlay, or Soft Light to combine brush strokes naturally with the picture. Decrease opacity as required for a more mild effect.
Step 4: Creating Soft Focus Effect

A soft-focus effect improves the serene and thoughtful quality of Zen art. By blurring parts of the picture, you’ll imitate the natural stream of ink in conventional Sumi-e painting, making depth and an illusory impression.
Before you apply the blur, make a duplicate of the photo layer to protect the initial. It will permit non-destructive editing and simple alterations.
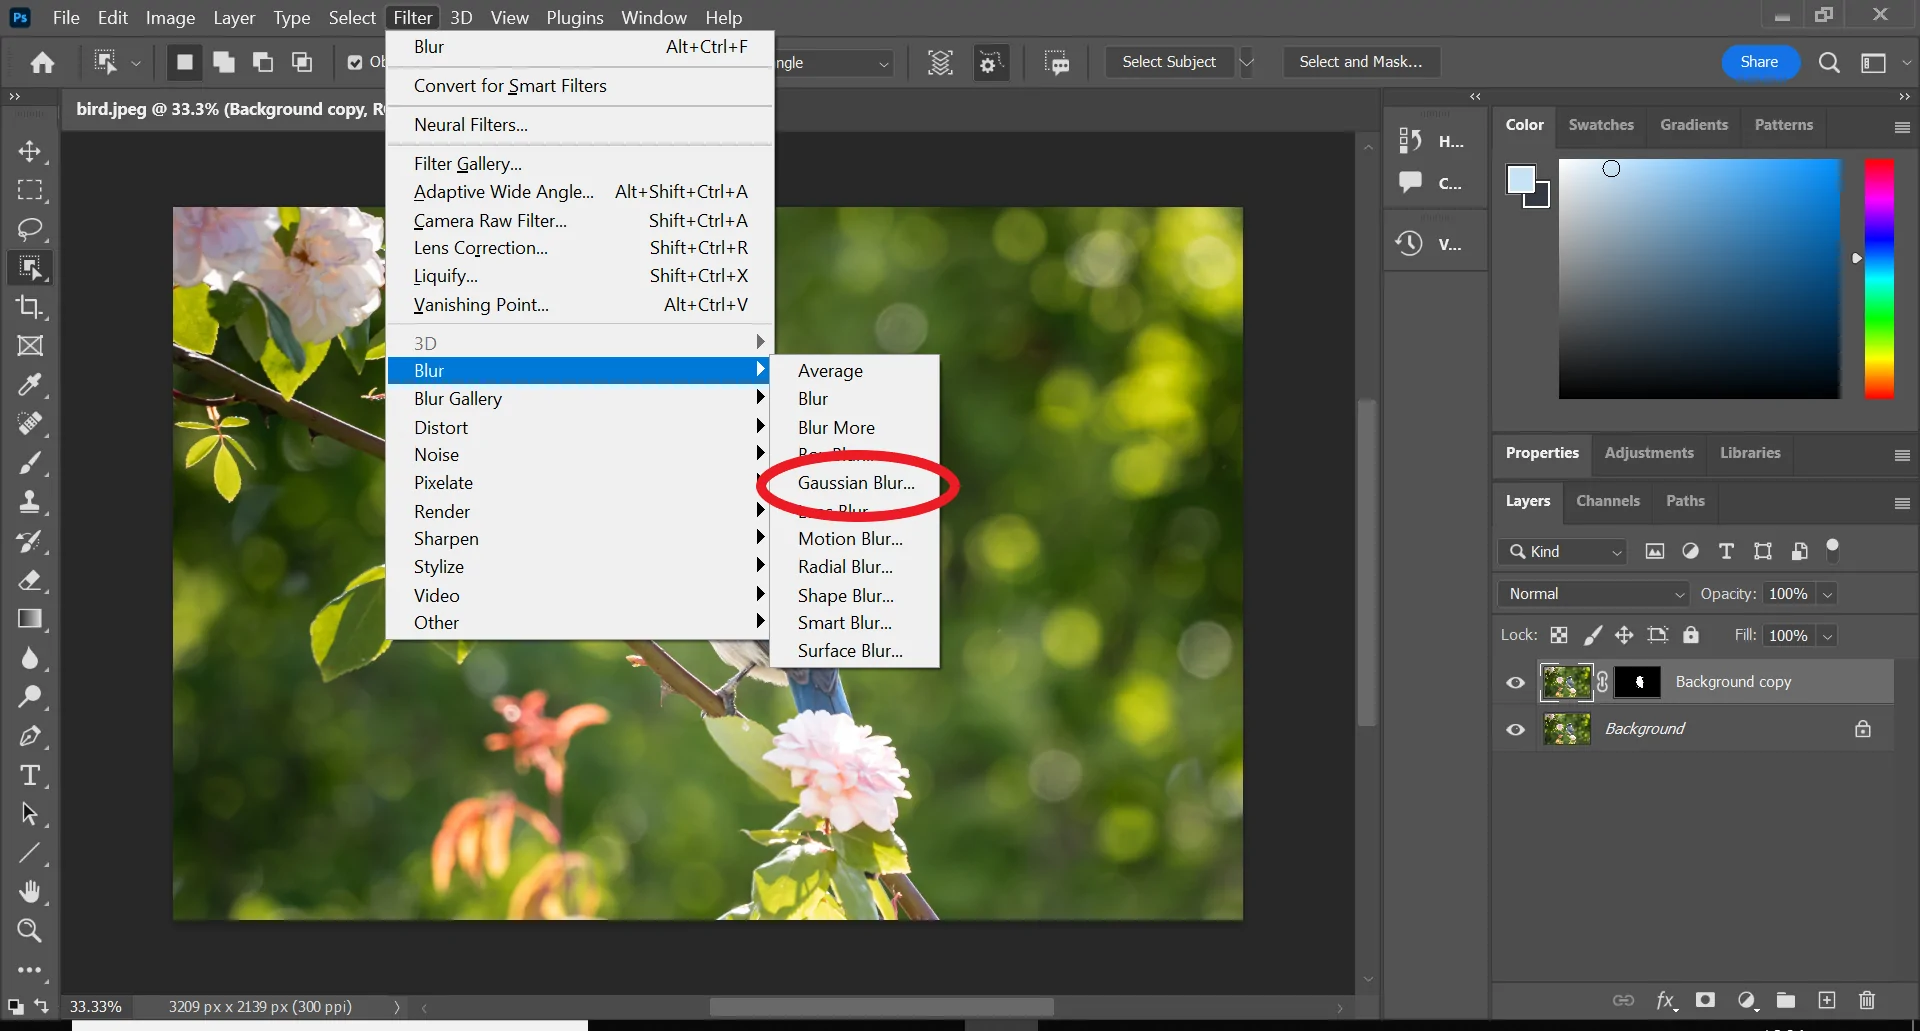
Proceed to Filter, select Blur, then Gaussian Blur, and specify the Radius as 2 to 5 pixels per the picture resolution. The objective is to make a delicate, unobtrusive blur without losing fundamental details.
Pick a soft and round brush with low opacity and use it to lay a layer mask on the blurred layer.
Tenderly paint over ranges where you need to reestablish sharpness, just like the focal point of the photograph.
To get a more fluid, ink-wash effect, utilize Filter click Blur and Motion Blur with a small angle. That will give the picture an organic brushstroke-like development.
Step 5: Adding Negative Space
To recreate the negative space feature of zen art, you need to carefully remove or tone down pointless details, enriching simplicity, harmony, and serenity.
Before you erase any portion of the photograph, choose the main focal point. That could be a tree branch, a mountain outline, or any other Zen-inspired entity. The remainder of the picture ought to fade into empty space to keep equilibrium.
Activate the picture layer and include a Layer Mask with a soft round brush of low opacity; it will be helpful in smoothly eradicating parts of the picture.
Concentrate on expelling diverting components, keeping only the fundamental forms.
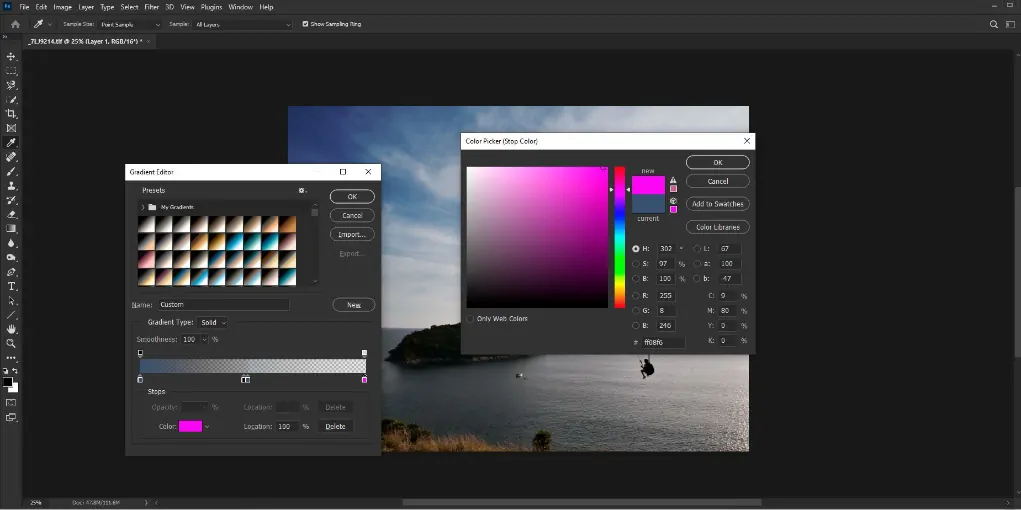
Activate the Gradient Tool and specify a black to transparent gradient.
Use the gradient on the Layer Mask to form a smooth move between the subject and the empty area.
Zen art frequently takes after asymmetry or Fukinsei for an organic, balanced appearance. So, avoid emphasizing the subject. Rather, you should place it off to the side and let empty space overwhelm one portion of the photograph.
Step 6: Applying Mild Ink Splashes
To improve the realism of the artwork, you will add fine ink splashes or delicate brush accents. It will create a natural, hand-painted feel within the picture. This step refines the overall composition while keeping up simplicity.
Download free ink splash surfaces or handmade brush strokes from online resources.
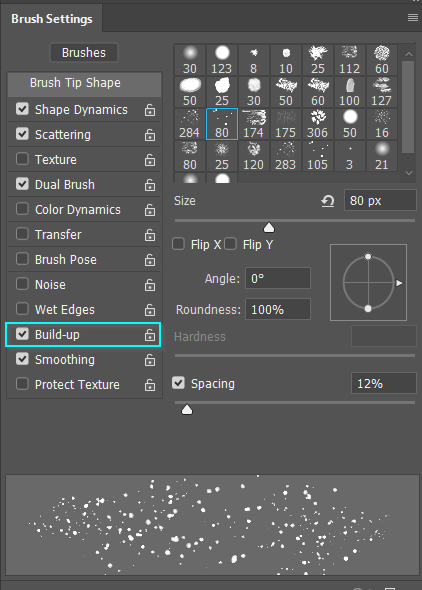
On the other hand, make your own splashes employing a custom brush in Photoshop with a low-flow setting of around 20 to 40 per cent for delicate ink effects.
Put the ink splash surface on a new layer over the primary photograph and specify the blending mode to Multiply or Overlay to incorporate it consistently.
Alter the opacity to around 30 to 70 per cent to keep it subtle and prevent overwhelming the composition.
To polish the ink details further, select the Smudge Tool and tenderly drag the edges of the ink sprinkles. It will mirror the way ink inherently spreads on conventional washi paper.
Proceed to the Image and tap on Adjustments, then Levels and regulate the blacks, greys, and whites to attain a more rhythmic harmony between light and dark zones.
Step 7: Finalizing The Artwork
In the final step, you may want to add a slight vignette to darken the edges of the picture. It will instantly make the composition draw the viewer’s eye toward the central point and improve the serene temperament of Zen art.
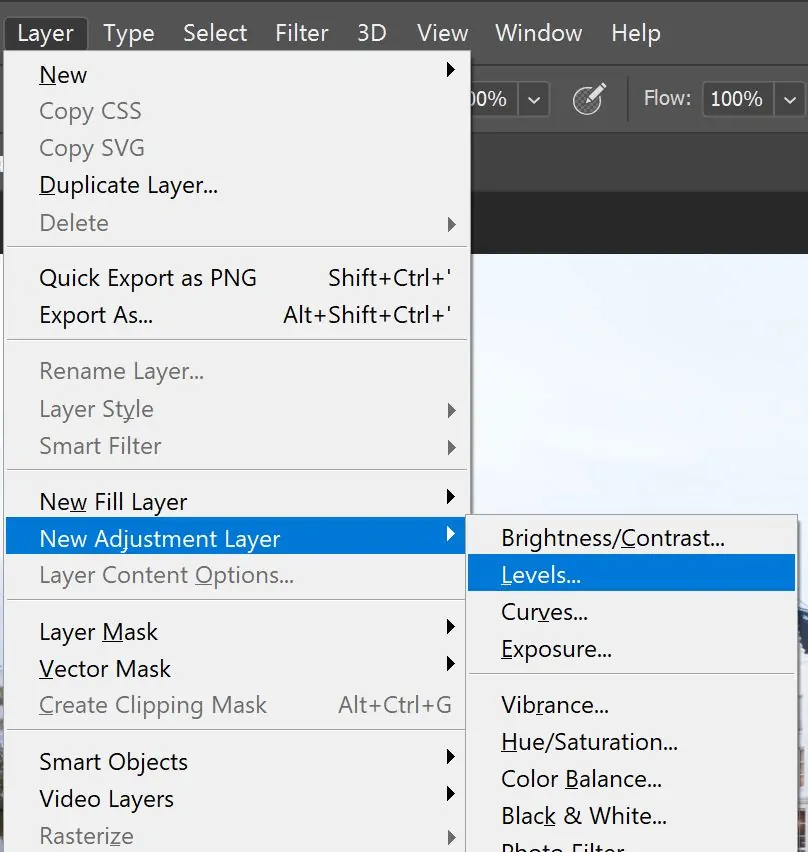
Move to Layer, select New Adjustment Layer > Levels or Curves, and regulate the brightness. It will prepare the picture for a more natural vignette impact.
Head to Filter, select Lens Correction, then Custom Tab.
Beneath the Vignette, decrease the Amount and expand the Midpoint to regulate how distant the effect extends.
Hold it soft to mirror the unpretentious moves of the zen art.
Make a new layer, fill it with black, and put the blending mode to Soft Light.
Utilize the Eraser Tool with a soft brush to delicately erase the interior, leaving only a light shadow along the rims.
Decrease the opacity of the vignette layer to avoid an overwhelming impression.
The objective is to improve focus without making the effect overly evident.
After you are all okay with the effect, you will export the final image by reaching to File, clicking Export, then Save for Web, and selecting PNG or JPEG for the finest clarity.
Conclusion
In summary, zen art appreciates simplicity, which offers your image an appreciable minimalism and dreamlike allure. The idea of simplicity, minimalism, and, specifically, the use of negative space helps foreground the critical components of the image in the viewer’s view. It also helps eliminate unnecessary details and distracting elements. In addition, the Zen art effect application is not restricted to typical artworks. Instead, it expands from creating images and designs to contemporary designs, architecture and even everyday life settings. Ultimately, the final compositions effortlessly charm the onlookers with their tranquillity and captivating mindfulness.
