
How To Create An Aerial View Effect
The aerial view typically refers to the captured shots or videos of a scene from high altitudes using cameras from aircraft or drones. These strategies are beneficial for capturing geographical regions where human access is unimaginable and saving time by not directly visiting the place and making photography arrangements. Yet, like other unusual aesthetic effects, the aerial view effect has also become an image modification approach in which perspective, gradients, blurriness, and many different facets of images are deliberately manipulated. Besides, depth enhancement plays a significant part in making the fallacy of elevation. Editors utilize the depth of field control and specific blurring strategies to reproduce the focus angles witnessed in aerial symbolism. It accentuates far-off backdrop components while steadily blurring details closer to the viewer, reinforcing the sense of height and distance. With the rise of progressed image editing tools and strategies, suffusing your usual photographs with a sense of glory suggestive of aerial photography has become virtually accessible without the compulsion for actual aerial capture. The step-by-step process to do so is as follows:
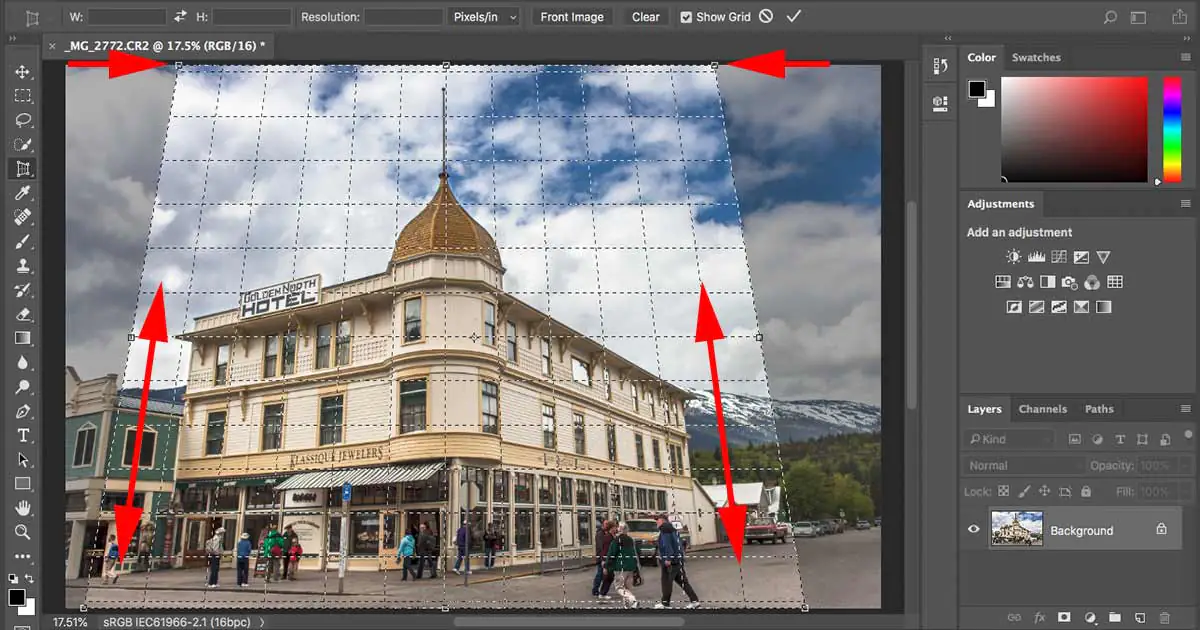
Step 1: Applying Perspective Corrections
Assess the current viewpoint of your photograph to decide the angle and scale alteration required for the aerial view effect.
Find and access the perspective correction tool from your picture editing software’s toolbar or menu choices.
Determine key reference points inside the shot that can be utilized to correct the perspective, such as building corners, horizon lines, or prominent structures.
Utilize the perspective correction tool to alter the angle and scale of the picture, adjusting the reference points to make the illusion of seeing the scene from a higher level.
See the perspective correction settings in real-time, making any essential fine-tuning to guarantee the required aerial viewpoint is accomplished.
After you’re happy with the perspective correction, make the fundamental modifications and move on to the following stage of creating the aerial view effect.
Step 2: Amplifying the Depth
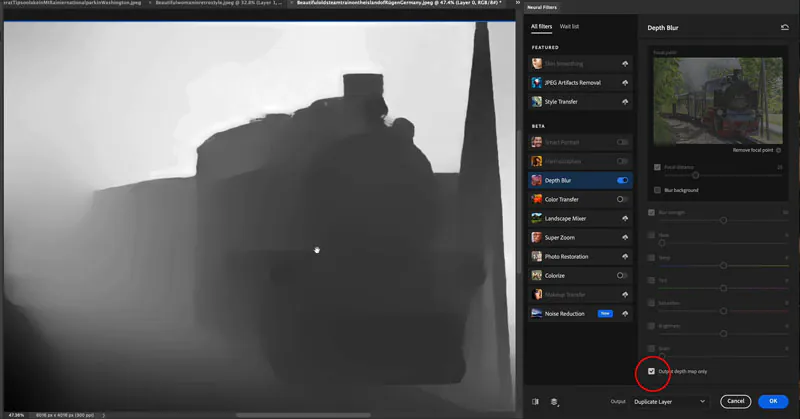
Examine the depth of field within the image, noticing regions that should show up sharp and in focus in contrast to those that should be blurred to recreate depth.
Find and select suitable tools for depth enhancement, such as blur filters, gradient masks, or specific focus alterations.
Distinguish central points inside the image that should stay sharp and in the center, such as foreground objects or primary subjects.
Utilize blur filters or gradient masks to slowly blur components of the picture that are more distant from the focal points, making sense of profundity and space.
Optimize the blending of blurred and sharp zones to get smooth moves and realistic depth enhancement.
See the depth enhancement effects in real-time, altering the blur level, and focus ranges as required to attain the specified aerial perspective.
Tweak the depth improvement settings to adjust authenticity and aesthetic impact so that the image successfully passes on the sensation of seeing from a high elevation.
Save the depth upgrade alters before continuing to the next editing steps in the aerial view effect.
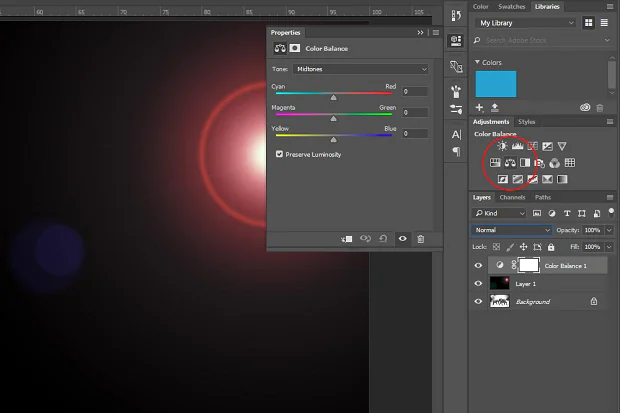
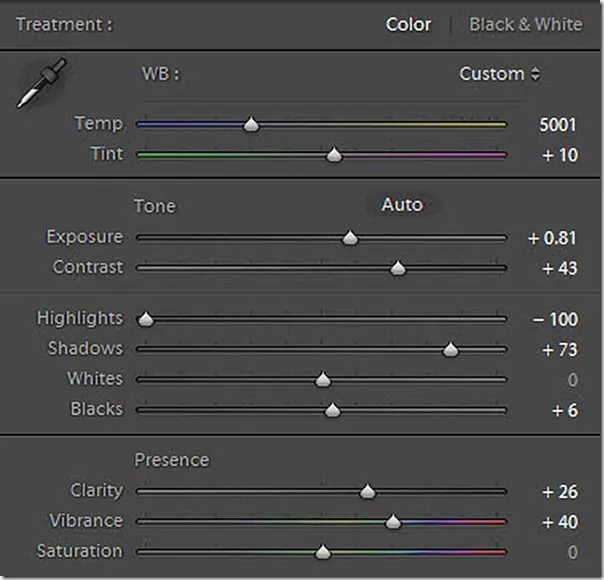
Step 3: Setting Color Temperature
Evaluate the color adjustment of the image, considering saturation, brightness, and contrast levels.
Get to the color grading tools of the editing program, such as hue/saturation alterations, curves, or color balance controls. Higher the saturation of colors to create them more dynamic, imitating the distinctive tones frequently seen in aerial photography.
Tune the contrast levels to improve the visual effect of the photo, emphasizing details and including depth to the scene.
Adjust the color temperature to attain the specified vibe and temperament so that the colors precisely reflect the lighting conditions of an aerial perspective.
Preview the color by evaluating alterations in real-time, comparing the altered picture to the initial to evaluate the effectiveness of the enhancements.
Make gradual alterations to the color evaluating settings, refining the adjustment of hues, saturation, and contrast until the specified aerial view effect is accomplished.
Step 4: Applying Atmospheric Effects
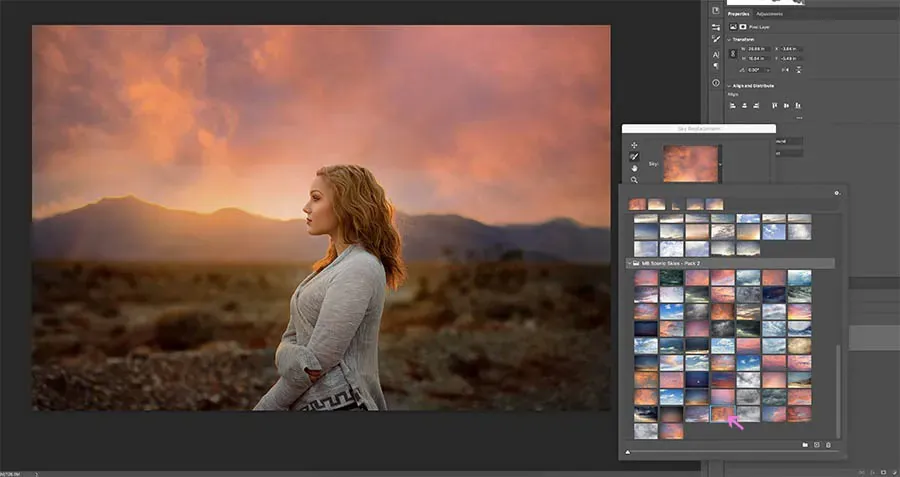
Attend to the atmospheric conditions often noticed in aerial photography, such as clouds, haze, or atmospheric perspective.
Browse for the atmospheric effects tools inside the software, like cloud overlays, haze filters, or atmospheric blur alternatives.
Overlay the photo with cloud formations to reenact the high-altitude perspective regularly captured in aerial photography, including depth and dimension to the scene.
Include atmospheric haze channels or blur impacts to imitate the atmospheric conditions experienced at higher altitudes, softening distant components and upgrading the sense of profundity.
Regulate the opacity and blend modes of the atmospheric effects layers to attain a consistent integration with the fundamental photo, keeping up authenticity and coherence.
See the atmospheric recreation effects in real-time, adjusting settings to attain the specified atmospheric vibe.
Make iterative alterations to the atmospheric reenactment settings, testing with distinctive overlays and blending strategies to upgrade the overall aerial view appearance.
Save the atmospheric simulation alterations before continuing to the following steps, protecting the atmospheric ambiance of the image.
Step 5: Focusing on Leading Patterns
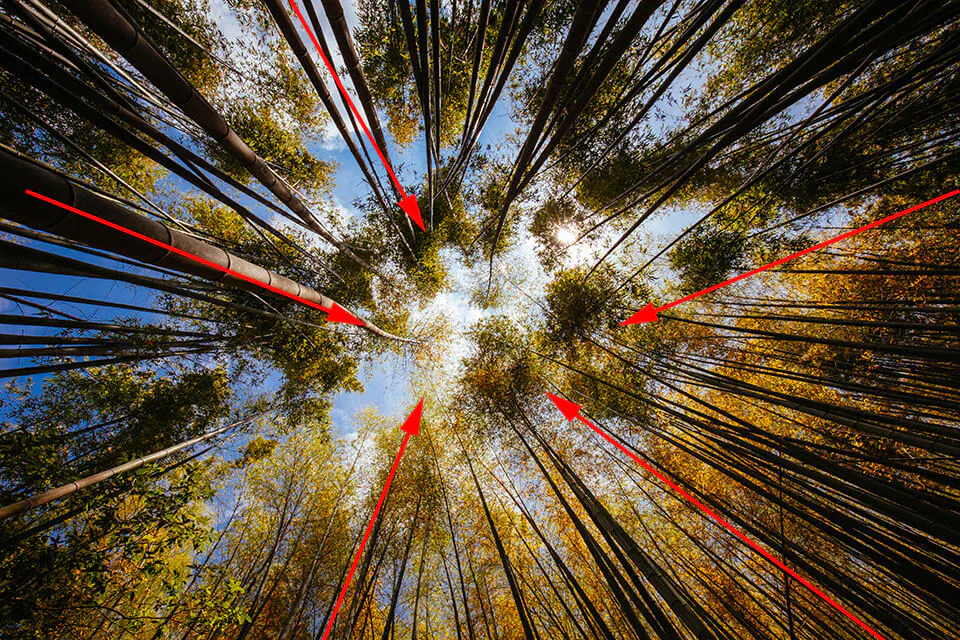
Evaluate the photo’s composition, considering components such as leading lines, framing, and visual adjustment.
Recognize noticeable lines or shapes inside the composition that can direct the viewer’s eyes and fortify the sense of perspective.
Utilize framing strategies to highlight the subject or focal point, drawing consideration to critical components inside the scene.
Join elements that pass on magnitude and dimension, such as frontal area objects, mid-ground details, and far-off horizons.
Investigate diverse perspectives and angles to inspire the sensation of seeing the scene from a higher altitude, maximizing the influence of the aerial view effect.
Bring a cohesive adjustment of visual components throughout the composition, keeping up coherence and visual interest.
Tune the composition by altering the arrangement and scale of objects inside the frame, optimizing the general visual effect.
Play with different composition and framing procedures, iteratively refining the structure and order of elements until the required aerial viewpoint is accomplished.
Step 6: Including Selective Blurs
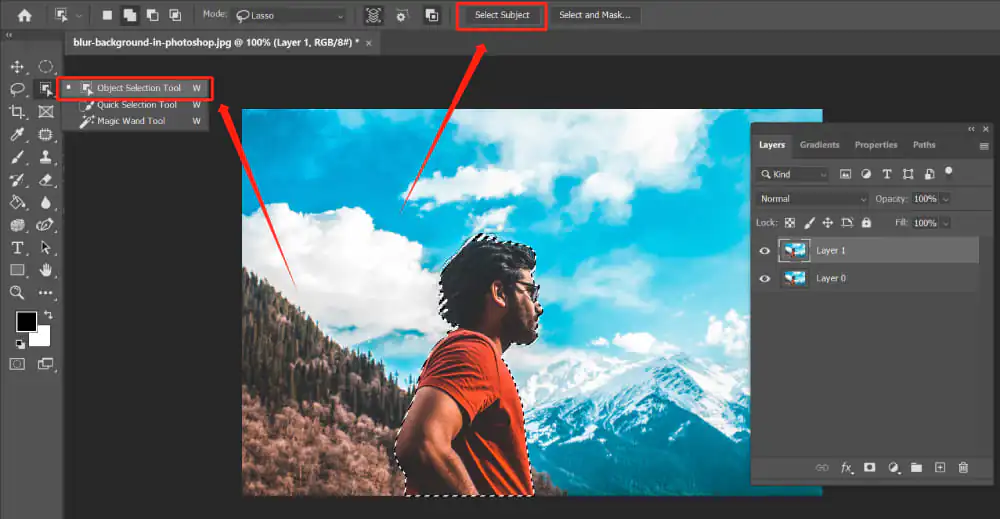
Decide the central points of the picture that should stay sharp and focused.
Locate the blurring tools accessible within the program, such as Gaussian blur or focal point blur filters.
Access the selection tools or masks to define the ranges of the foreground and foundation that require blurring.
Carefully apply the blur effect to the backdrop elements, recreating the shallow profundity of field characteristic of aerial photography.
Recheck the blending between the sharp focal points and the blurred background, creating a smooth move between the two.
Fine-tune the strength of the blur effect to get the specified level of profundity and partition between foreground and background elements.
Check out the blurring outcomes in real time, comparing the edited image to the initial one to evaluate the adequacy of the depth modification.
To accomplish the specified aerial view impact, fine-tune the blurring settings iteratively by altering the sharpness-to-blur ratio.
Step 7: Adapting Lighting Effects
Assess the lighting conditions inside the composition, noticing ranges of highlight and shadow.
Find the lighting adjustment tools within your software, such as exposure, highlights, and shadow settings.
Increment the brightness and intensity of highlights within the picture to mimic the expected lighting effects watched in aerial photography.
Alter the shadow levels to guarantee a balanced dispersion of light and shadow throughout the scene, improving visual profundity and dimensionality.
Alter the overall exposure settings, getting an ideal brightness and contrast, increasing the clarity and dynamic quality of the image.
See the lighting alterations in real-time, comparing the edited image to the initial one to evaluate the adequacy of the upgrades.
To induce the specified aerial perspective, play with distinctive exposure levels and highlight/shadow adjustments while iteratively altering the lighting settings.
Step 8: The Final Edits
Conduct a careful audit of the edited photograph, paying attention to subtle elements, composition, and overall style.
Assess the authenticity and coherence of the aerial view effect, checking that the edited image convincingly recreates the viewpoint of seeing from a high altitude.
Tune any remaining details or alterations to raise the image’s overall quality and visual effect.
Keep consistency in color reviewing, lighting, and composition all through the photograph, keeping up visual coherence and concordance.
Think about how the picture communicates the aiming temperament, climate, and narrative by putting yourself within the viewer’s position and assessing it from their point of view.
Look for input from colleagues, peers, or individual specialists to pick up bits of knowledge and points of view on the viability of the aerial view composition.
Consolidate any feedback received and make ultimate alterations to the image to address any remaining concerns or ranges for advancement.
Conclusion
In summary, the aerial view effect is a revolutionary addition to image manipulation and enhancement scopes. The majestic appearance that the image embraces after aerial view edits make it more atmospherically profound and dimensional, directing to realistic outcomes. Besides, the approach can underline leading lines, geometric designs, and broad scenes to bring out the sensation of taking off over the territory, directing the viewer’s glance and intensifying the illusion of height. Conclusively, you can make the ordinary shots extraordinary, as if they got professional consideration, like that of drone shots associated with lavish celebrations.
