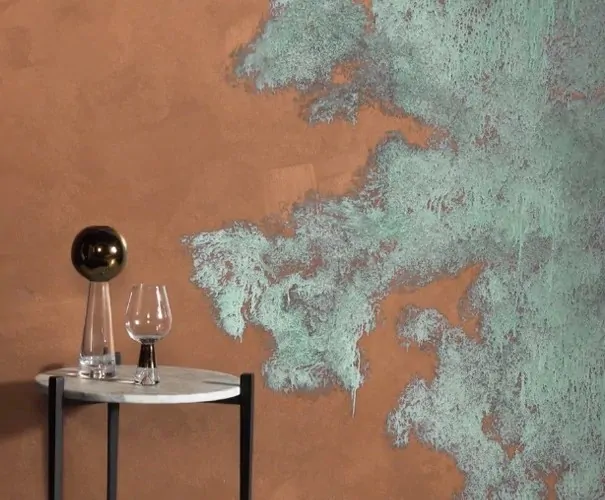
How To Create A Patina Effect
Metals naturally develop a patina over time. Patina doesn’t flake on metal and is mostly a colour shift, such as bronze to green. It can be caused by oxidation, weathering, or both. A patina tan can also be caused by ageing, wear and tear, or even polishing repeatedly. Materials like metals, stones, and wooden things naturally acquire patina to stop deterioration. Materials exposed to weathering agents and left out in the open undergo this spontaneous alchemical process over time. Patina can be produced intentionally by using chemicals, or it can occur naturally as a result of oxidation caused by the atmosphere or weather. Unlike the synthetic coatings and paints used to protect surfaces, the patina has an inherent charm, which makes it take part in visual art and image enhancement as an integral approach. It adds a unique wear and tear as well as an antique touch to compositions. Various tools including colour grading, textures, blur techniques, light leaks and flares with different artistic filters and effects are employed for it. This blog will go on with a step-by-step process of applying a patina effect to an image turning it into a nostalgic antique piece.
Step 1: Decreasing The Saturation
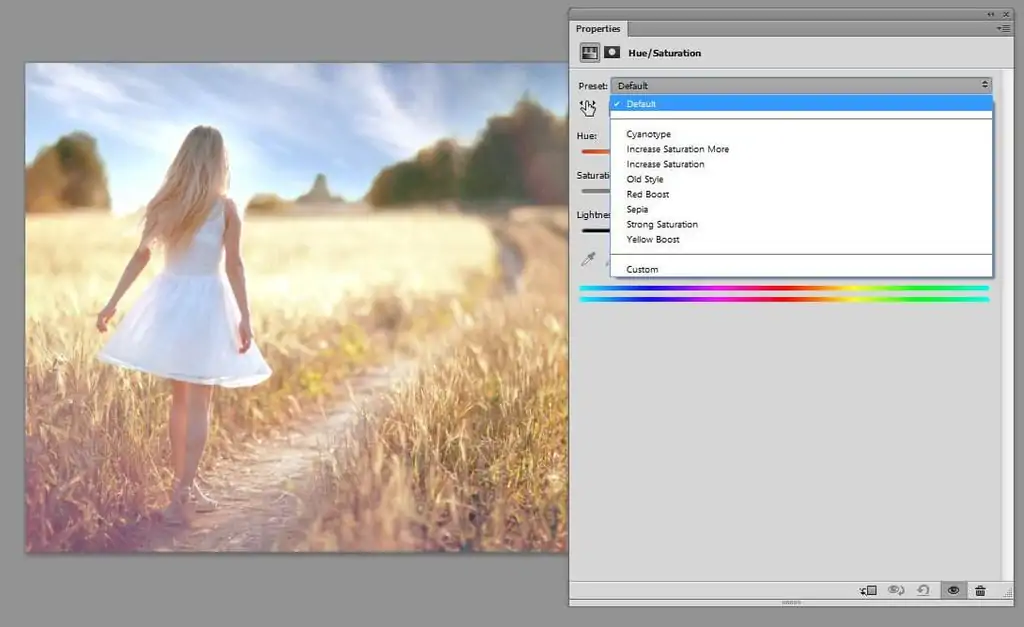
Open your chosen photo in your editing app and start the editing process by decreasing the saturation slightly to tone down dynamic shades. It is to make an aged, muted appearance that corresponds to naturally worn surfaces. Utilize the Hue/Saturation adjustment layer and maintain the effect’s nuanced.
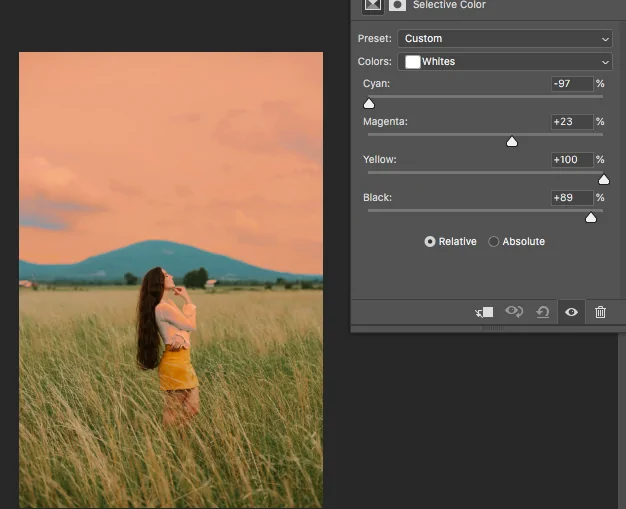
Alter the colour harmony by including warm browns, blurred greens, or delicate blues. These shades imitate the natural oxidation and maturing process caught in metals, wood, and vintage photographs. The Selective Color tool can help polish these adjustments.
Add a delicate sepia or cool greenish-blue tint, based on the patina style you need. Utilize a Photo Filter adjustment layer or manually change colour grading to imitate oxidation or weathering.
Decrease contrast marginally to form a gentler, more seasoned see. Decrease brightness a little but be sure that details remain obvious. As vital, set the Curves tool to form a slightly washed-out formation.
Ease the shadows and decrease excessively bright highlights. It helps prevent the picture from looking too contemporary and keeps up a naturally aged impression.
Step 2: Applying A Texture Overlay
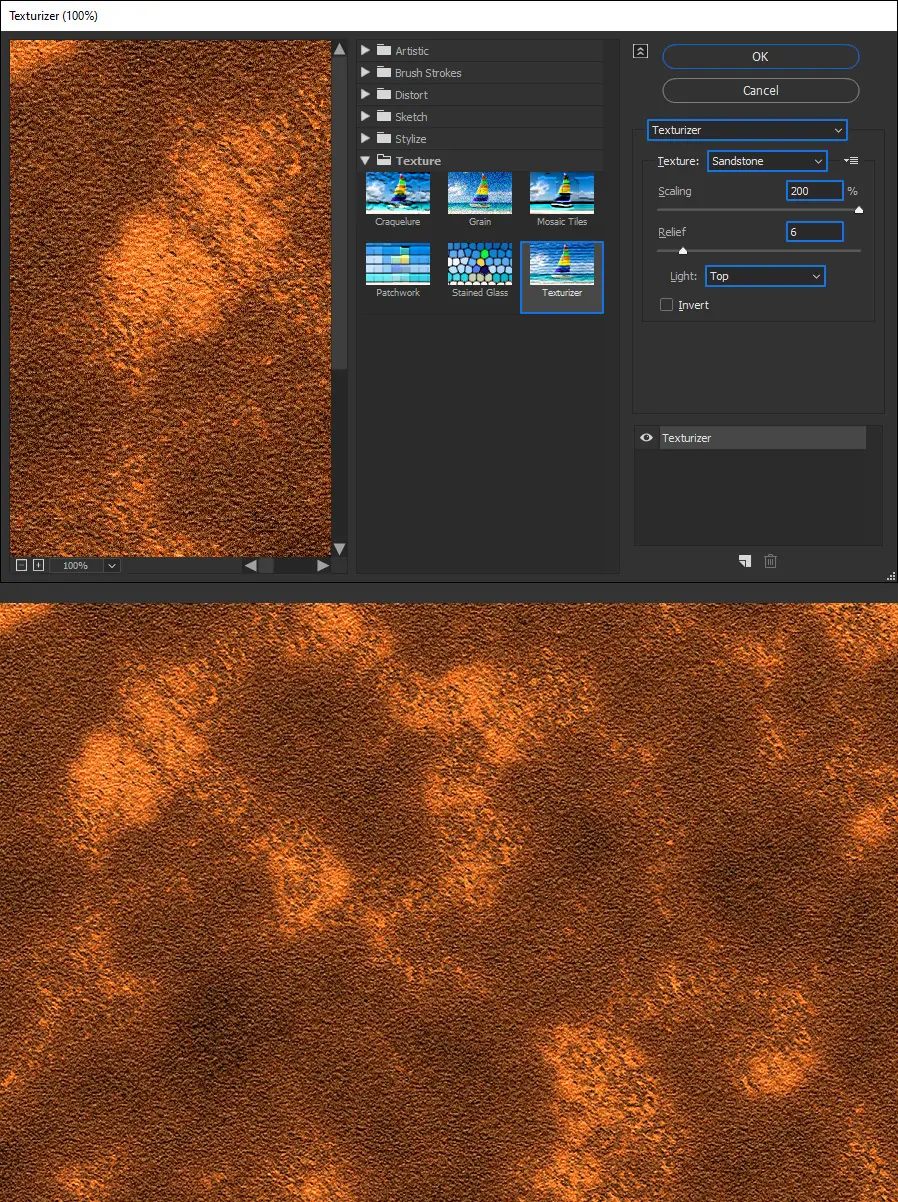
Choose a high-resolution surface that corresponds to aged textures, like rust, ancient paper, cracked paint, or scratched metal. You can find free surfaces on stock picture websites or make your own by photographing matured materials.
Load your selected texture in Photoshop and put it as a new layer over your picture. Resize and position it to cover the whole photo, guaranteeing it integrates nicely with the composition.
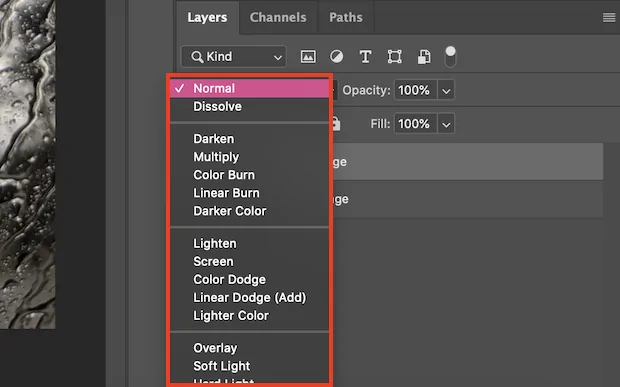
Alter the Blending Mode of the surface layer to Overlay, Soft Light, or Multiply, per the specified effect. Alter the Opacity to oversee the surface intensity.

Utilize a layer mask or the Eraser Tool with a delicate brush to remove surfaces from ranges where it looks fake, like faces or key focal points. It will keep the effect natural.
Use Gaussian Blur in case the texture looks too sharp, or modify contrast and brightness to make it blend more consistently along with your picture.
Step 3: Modifying Blending And Opacity
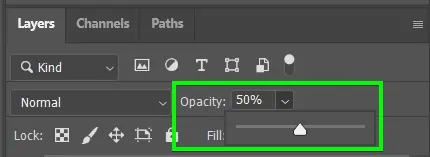
Once you have added the surface, decrease its opacity to blend naturally with the photograph. Begin around 40 to 70% and alter according to the desired strength or subtlety in the patina effect.
If you feel that the texture still looks too harsh or unnatural, try different Blending Modes like Overlay, Soft Light, Multiply, and Darken to see which one incorporates most pleasing with the base photo.
Add a layer mask to the surface and utilize a soft black brush to erase or fade ranges where the effect is too solid. It can be valuable for maintaining the clarity of vital details.
As required, stack different surfaces at shifting opacities to construct a more natural, multi-layered patina effect. Alter the opacity of each texture and blending mode independently for the finest results.

If the surface edges look too sharp or fake, add a slight Gaussian Blur or Feather the layer mask to incorporate it more smoothly with the picture.
Step 4: Adding Noise
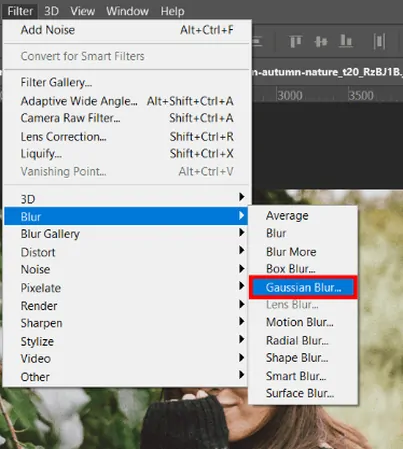
Proceed to Filter and choose Noise then click Add Noise. Use a small amount of uniform or Gaussian noise around 5 to 15 percent to provide the photograph a somewhat gritty, film-like surface. It can help mimic natural wear and ageing.
If you find that the noise is overly harsh, decrease the layer’s opacity or utilize Gaussian Blur to relax it barely. If you want a fine and natural look, too much noise can make the photograph look pixelated instead of vintage.
Make a new grey layer, fill it with 50 per cent grey, and put the blending mode to Overlay. Then apply the Noise Filter to this layer. It permits superior control over the grain effect without influencing the initial photograph.
To get a more lifelike aged appearance, you will overlay film grain or dust textures on a new layer. Utilize Soft Light or Overlay blending modes and alter opacity as required.

In case the grain effect is too solid in certain regions, utilize a layer cover to eradicate or decrease it in specific regions of the picture, confirming a proportional, natural feel.
Step 5: Using Vignette Effect
Applying a vignetting helps in directing focus to the centre of the picture including an aged, vintage feel. Proceed to Filter then click Lens Correction then Custom and alter the Vignette Amount to darken the edges slightly.
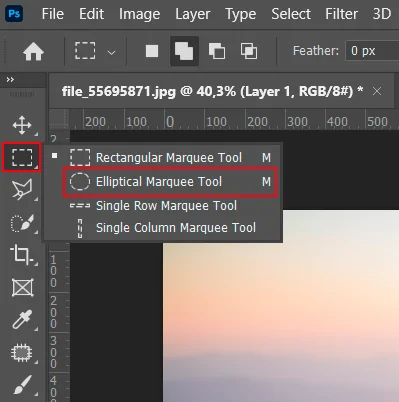
Make a new layer, choose the Elliptical Marquee Tool, and draw an oval covering the central portion of the image. Rearrange the selection and fill it with black or dull brown. Lay a Gaussian Blur to relax the transition. Decrease Opacity to keep the effect unobtrusive.
Specify the vignette layer to Multiply or Soft Light blend mode to mix it naturally with the photograph. Alter the opacity to avoid an excessively emotional effect.
In case the vignette seems too intense, decrease the opacity or utilize a layer mask to erase regions where you need more brightness.
To get a more aged, cinematic appearance, make a soft, warm-toned glow within the centre of the photograph by including a radial gradient with a low-opacity Screen or Overlay blend mode.
Step 6: Adding Light Leaks
Include a new layer over your picture and put its blending mode to Screen or Overlay. It will permit the light effects to blend naturally without overwhelming the picture.
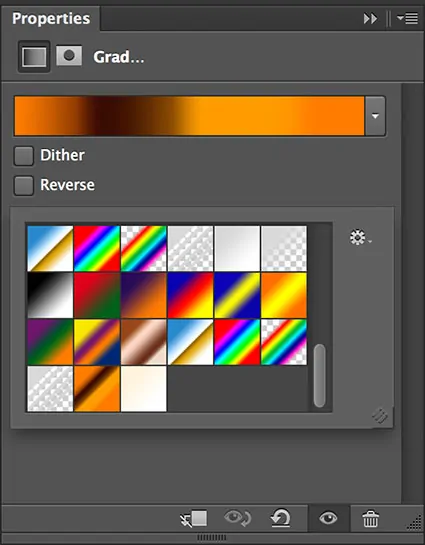
Utilize the Gradient Tool with warm tones like orange, yellow, and red to make a delicate gleam in one corner of the photograph. It recreates the effect of light leaking into an ancient camera. Decrease opacity to make the impact nuanced.
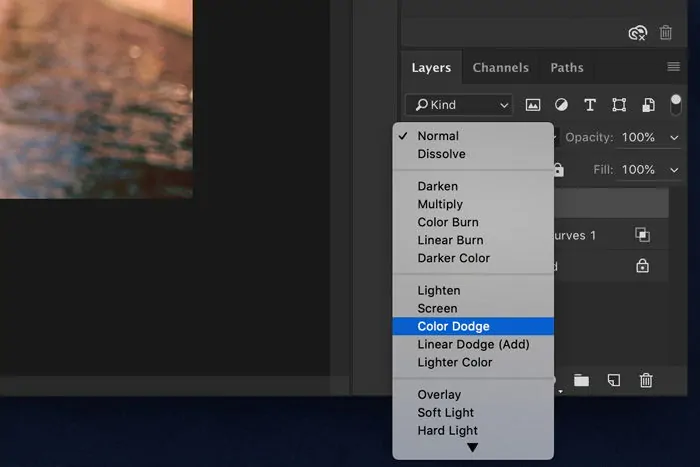
Explore online light leak surfaces or utilize a delicate, round brush with a low opacity to paint discreet light spots. Alter the blending mode to Color Dodge or Soft Light for a more natural appearance.
Put the light leak where natural light rays would strike such as along the edges or corners. Alter the size and blur utilizing Gaussian Blur to get a smooth effect.
In case the light leaks are too strong, decrease the opacity or utilize a layer mask to erase parts that don’t blend sufficiently. Keep the effect inconspicuous to preserve realism.
Step 7: Polishing The Effect
Once you have applied all the effects, return to the Brightness/Contrast or Curves tool to be sure that the image has a proportional development. Moderately decrease the contrast to get a more blurred, vintage effect, or alter highlights and shadows to upgrade depth and realism.
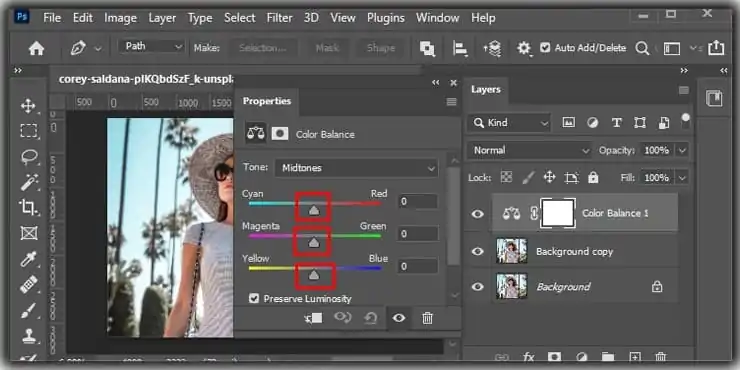
Utilize Color Balance or Selective Colors to polish the general tone. Minute modifications in reds, yellows, or blues can enhance the patina impact. To get a classic aged look, add a warm tint within the highlights and a cooler tone in the shadows.
In case the surfaces and grain have buffered vital subtle elements, consider applying an Unsharp Mask or High Pass Filter on a duplicate layer with Overlay blend mode to get back clarity as required.
Decrease the opacity of the surface and light leak layers on the off chance that they seem too strong. Opt for a natural, organic aged appearance, not an over-processed one.
Save the ultimate composition in high resolution, ideally in PNG or TIFF format for quality maintenance, or JPEG to share easily.
Conclusion
In conclusion, applying a patina effect to photos creates a historic appearance that skillfully combines painterly strokes with rich, aged textures, fusing the delicate worlds of high art and roughness. This effect is the ideal tool for anybody wishing to give their photos a unique, aged elegance since it produces a rough, gritty style with layers of creative depth. It also imparts a touch of vintage, which is coveted since it shows antiquity and authenticity. The patina effect can be attributed to any ageing process that imparts character to an object in a photograph, increasing its worth or relevance.
