How To Create A Dystopian Effect
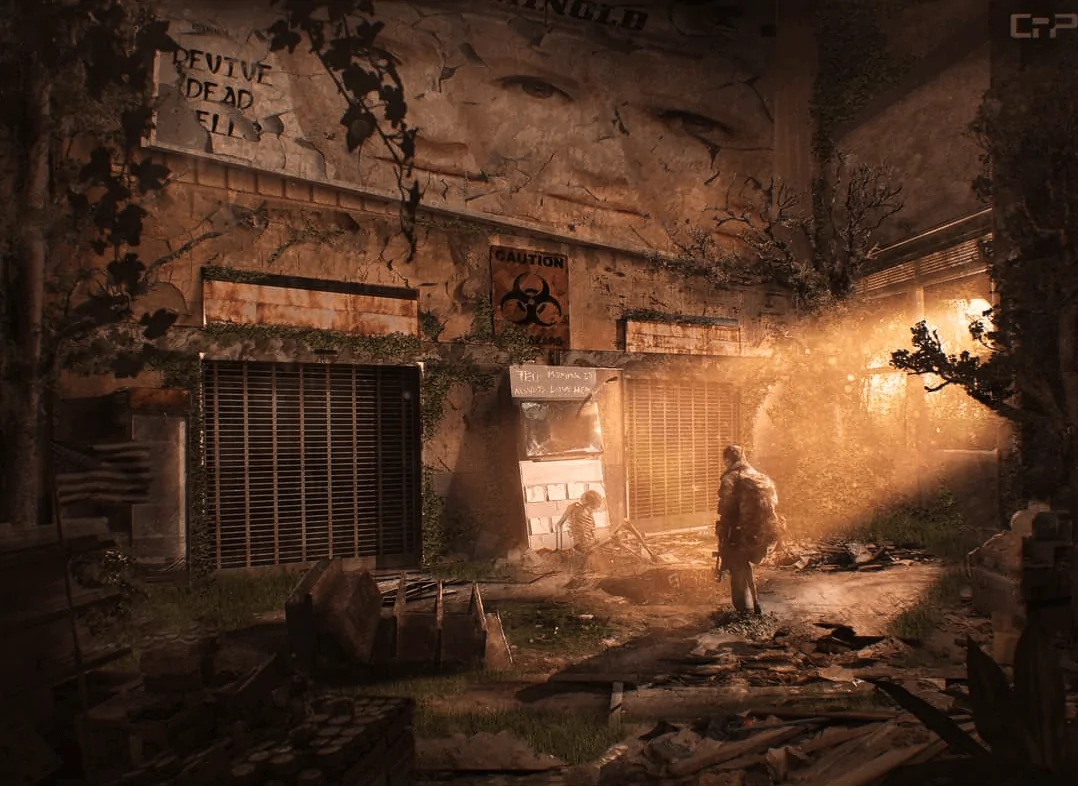
Dystopias are fictional works in which we consider the future from a bleak perspective. Dystopian themes have long been present in music, art, and literature. There are political undertones to this genre that stretch back to the 1940s. At that time, to better manage the populace, dystopian imagery was employed to incite fear about the future. It wasn’t too difficult because the advanced state of technology led to many unanswered questions about what the future may hold. In general, an aloof populace bound by an unwritten set of laws regulating what they must do or not do is a common feature of dystopian societies, especially those centered around brutal societal orders. The desperation highlighted through a dystopian atmosphere is, though, less tending to get a place in visual art, which is meant to be more and more aesthetically pleasing, yet the unusual idea inspires various artist to induce that futuristic environment into their compositions, especially for bizarre narrations. This blog will proceed with digital techniques to adorn modern images and compositions with dystopian elements.
Step 1: Image Desaturation
Start your picture editing application like Photoshop, GIMP, or any of your choice, and open the photograph you need to edit.
Make sure the layer containing your image is dynamic within the Layers panel.
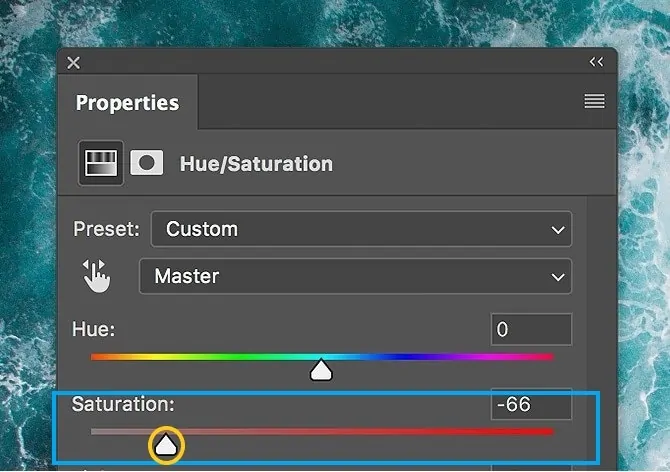
Move to the menu for color adjustments. In case you are using Photoshop, proceed to Image > Adjustments > Hue/Saturation. If using GIMP, utilize Colors > Hue-Saturation.
Find the saturation slider within the Hue/Saturation dialog box. Move it to the left side to diminish saturation. A value of approximately -50 to -100 can make a discernible desaturation effect.
Look at the live preview of the changes you made. Ensure the image appears softened and lacks color vibrancy.
Vary the slider gradually to attain the specified grade of desaturation.
Affirm the changes and save your altered picture. This step will spread the foundation for a more melancholy and dystopian development.
Step 2: Contrast Adjustment
Recheck that your picture is open and in action in your editing program.
Be confirmed that the right layer is chosen within the Layers panel.
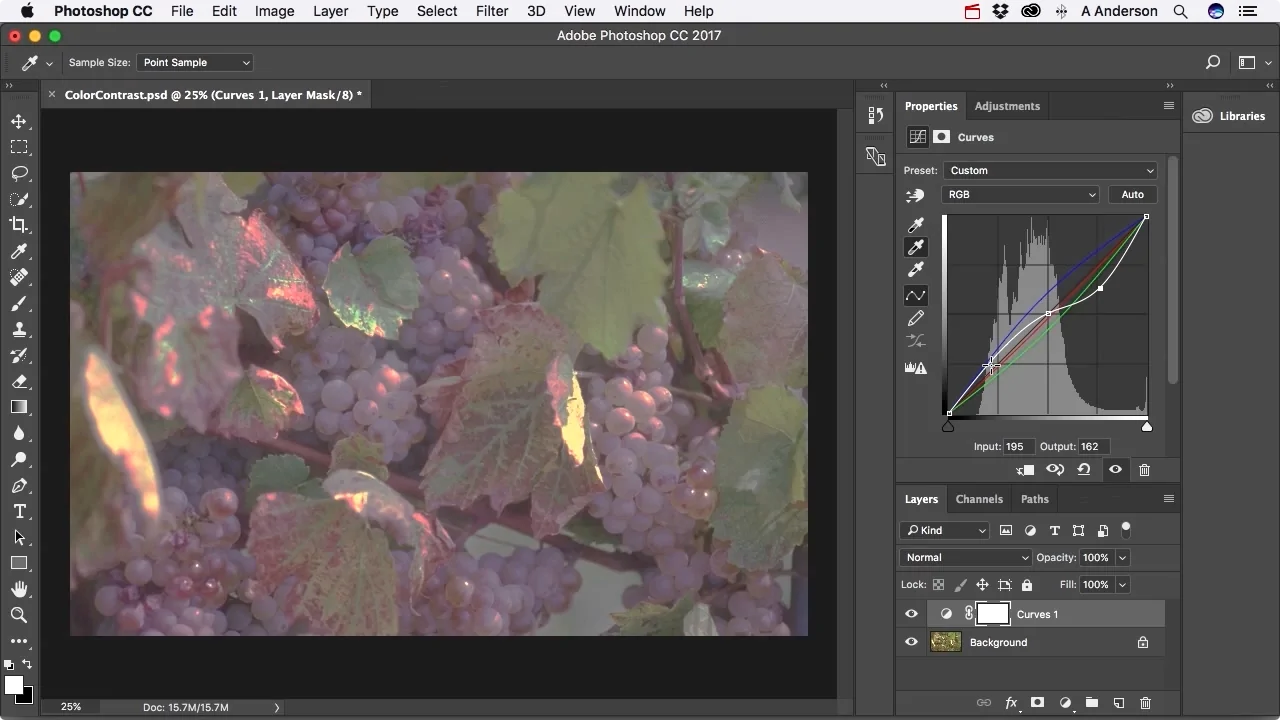
Locate the contrast adjustment instrument by using Image > Adjustments > Levels or Curves in Photoshop, while for GIMP, follow the Colors > Levels or Curves operation.
Within the Levels dialog, alter the black-and-white point sliders to extend contrast. In Curves, pull the curve upwards within the highlights and downwards within the shadows to exalt contrast.
Review the live preview to witness the effect of your alterations. The picture ought to have more articulated shadows and highlights.
Gradual modifications should be made to the contrast sliders or curve until the specified emotional outcome is accomplished.
Apply the changes and save your altered picture. It will upgrade the image’s disposition and add to the dystopian effect.
Step 3: Texture Inclusion
Choose a texture that suits the dystopian theme, like grime, breaks, or rust. You’ll be able to find textures online or make your own.
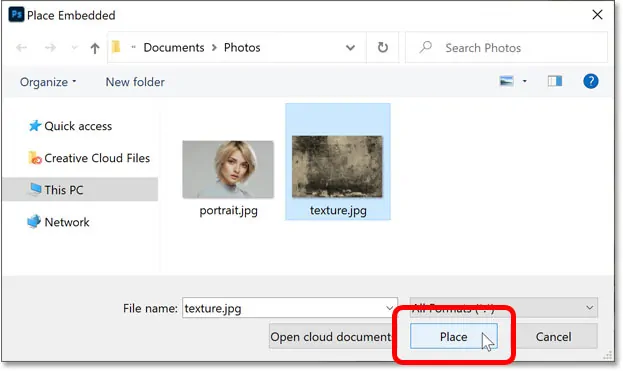
Get the texture into your editing app utilizing File > Place Embedded or pulling the surface file into your canvas.
Make changes to the size and position of the imported texture layer to spread it onto your photo properly. Operate the transform tools and revise the size and orientation.
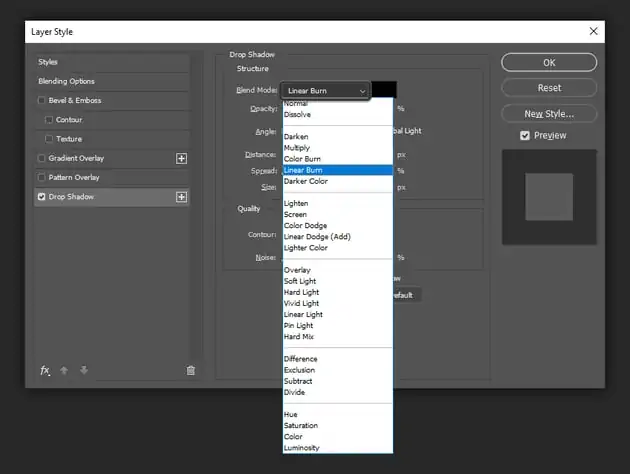
Alter the blending mode of the texture layer to fuse it along with your image. Standard modes for dystopian impacts include Overlay, Multiply, or Screen. These modes enable an ideal fusion of the texture with the basic picture.
Set the opacity of the surface layer to attain the wanted impact. More down opacity is for an inconspicuous texture, and higher opacity values are if you wish for a more evident appearance.
As required, utilize a layer mask to specifically remove parts of the texture or apply the surface as it were to particular zones.
Secure the changes by saving your image. The surface overlay will include profundity and a sense of rot, improving the dystopian environment.
Step 4: Color Adjustments
Ensure your image is dynamic in your editing software.
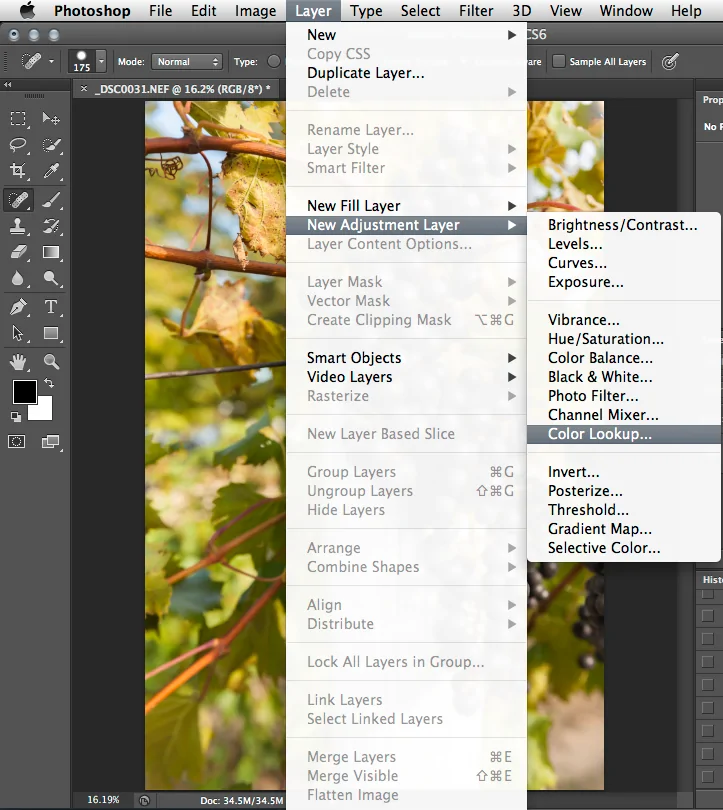
Move to Image > Adjustments > Color Lookup or Gradient Map or utilize the Color Grading panel depending upon the software you employed.
In case utilizing Color Lookup, select a LUT that conforms to a dystopian look, like a cold or hushed tone. Well-known choices include Faded Film and Cinematic.
In the case of a Gradient Map, use a gradient with cooler colors or muted tints. Press on the gradient bar to alter colors to shades like blue, grey, or green.
Alter the proportion of shadows, midtones, and highlights to heighten the color effect.
See the live preview to guarantee the color grading improves the dystopian disposition. Make alterations as vital to regulate the look.
Add the color grading and save your picture. This action will set the dystopian perspective by adjusting the general color tone and temperament.
Step 5: Using Atmospheric Elements
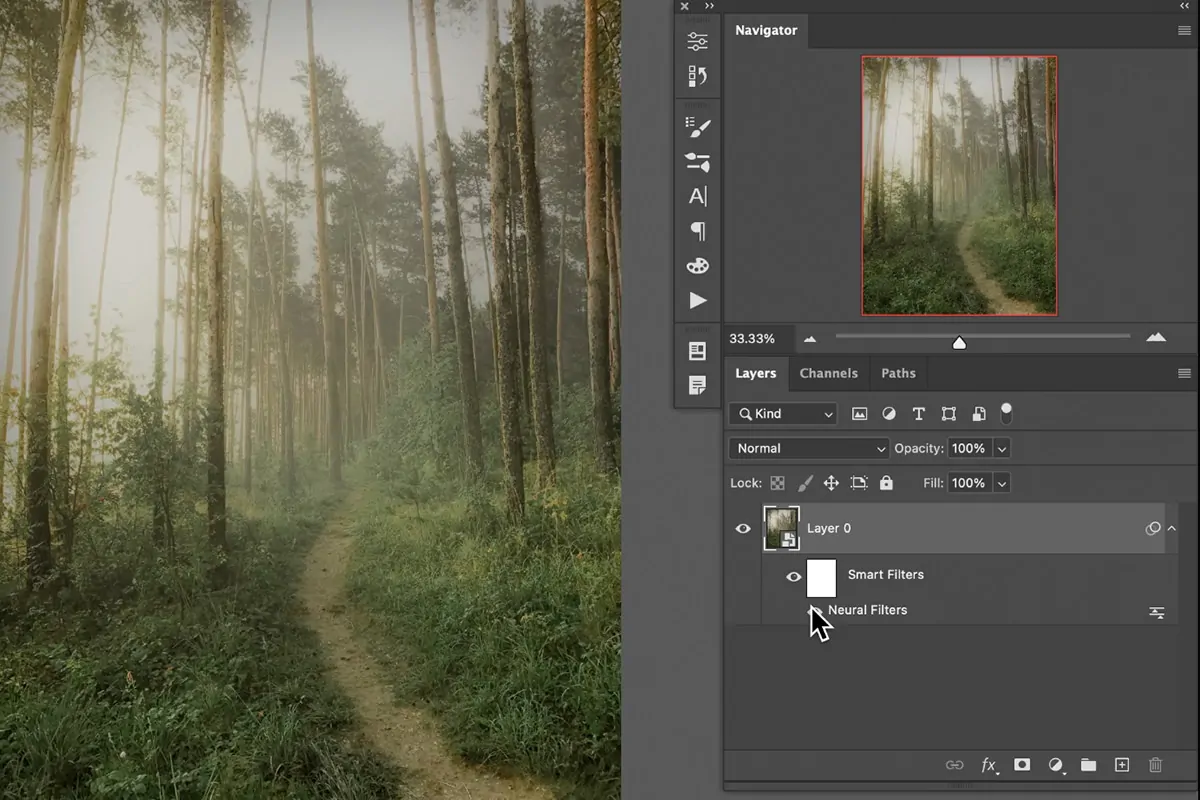
Pick images or brushes for effects such as haze, cloudiness, or smoke. You’ll be able to discover these online or make your own.
Guarantee your primary picture is open in your editing program.
Shift the fog or haze picture as a new layer into it. Utilize File > Place Embedded in Photoshop or haul the file into your image.
Establish the layer’s blending mode into Screen or Soft Light to mix the atmospheric impact together with your picture. It permits the effect to be coordinated smoothly without clouding the particulars.
Alter the layer’s opacity to maintain the intensity of the atmospheric impact. Descending opacity for a subtle impact or higher for a more pronounced view.
Include a layer mask to the atmospheric effect layer. Utilize a soft brush to paint with black on ranges where you need to diminish the effect or reveal more of the fundamental image.
Review the image to guarantee the atmospheric effect improves the dystopian theme. Alter as required and save your final picture. This step includes profundity and strengthens the bleak temperament of the scene.
Step 6: Warping Specific Elements
Recheck that your picture is open and active in your editing app.
Utilize selection instruments like the Lasso or Marquee option to separate the components you need to warp. On the other hand, work on the complete picture if preferred.
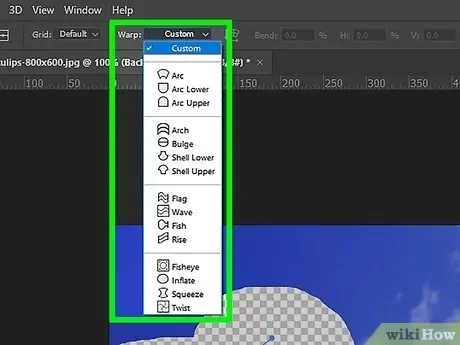
Reach to Edit > Transform > Warp or utilize the Liquify filter under Filter > Liquify to get distortions.
Utilize the Warp tool to warp and misshape the chosen region. Drag and push points to form bizarre or troubling shapes, improving the dystopian atmosphere.
Within the Liquify tool, utilize options like Forward Warp, Pucker, or Bloat to alter and misshape particular areas of the image for a more sensational impact.
See the live preview to guarantee the distortions accomplish the required unsettling impression. Make incremental alterations to settle the effect.
Execute the distortions and save your edited picture. The distortion includes an unorthodox and disturbing quality to the picture, fortifying the dystopian environment.
Step 7: Dystopian Motifs Addition
Select or create symbols related to a dystopian composition, such as surveillance cameras, thorned wire, or propaganda signs. Discover these components online or lay out your own.
Get the symbol pictures into your editing program. Utilize File > Place Embedded or drag the files into your workspace.
Set the symbols within the wanted areas on your picture. Utilize transform options and resize and position them suitably.
Alter the blending mode of each symbol layer to set it with the backdrop. Using overlay, Multiply, or Soft Light modes can assist in the symbols blending naturally.
Utilize layer styles, including Drop Shadow or Outer Glow, to make the symbols voiced or blend with the image’s lighting and texture.
Include a layer mask to each image layer if required. Utilize a delicate brush to veil out regions where the symbol ought to be less noticeable or blend into the scene.
Audit the general composition to guarantee the symbols upgrade the dystopian subject without overwhelming the picture. Make final alterations and save your edited image in a suitable format.
Conclusion
In closing, dystopian art is a means of communicating our concerns and expressing ourselves in this age of self-expression, including our fears for the future. It provides relief from the emotional burden of our fear of the unknown when we use art to express our anxieties. From this perspective, dystopian art can be a worthwhile tool for attaining catharsis through art. As these ideas are more closely bonded to our day-to-day lives, we can now relate to them more. Ultimately, we can implant our images and artworks with a phenomenal vibe that can evoke the viewer’s imagination, triggering them to imagine what is unimaginable.


