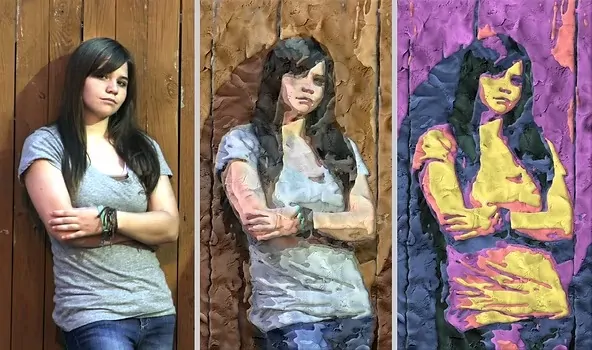
How To Create A Claymation Effect
Claymation is a type of animation that combines stop-motion filming with movable clay figures. This type of video is frequently found in cartoons and children’s movies. Some feature-length films take months or even years to shoot, demonstrating how careful the process is. The clay figurines are repositioned and placed in between takes to provide the illusion of movement while the movie is filmed frame by frame. Each slightly changed frame, when combined, conveys the tale of the work and gives the impression of motion. In fact, claymation films are quite new when compared to other forms of animation. Beyond movies and animation, image editors and digital artists are also using this effect to enrich their photos by giving them a lively, animated touch. Various tools, including Adobe Photoshop, Adobe After Effects and Lightroom, are employed for this purpose. The advanced image enhancement techniques facilitate everyone even without any technical expertise, to edit images with interesting effects. The following steps will further elaborate on the process of adding claymation effects into images.
Step 1: Smoothing Out The Texture
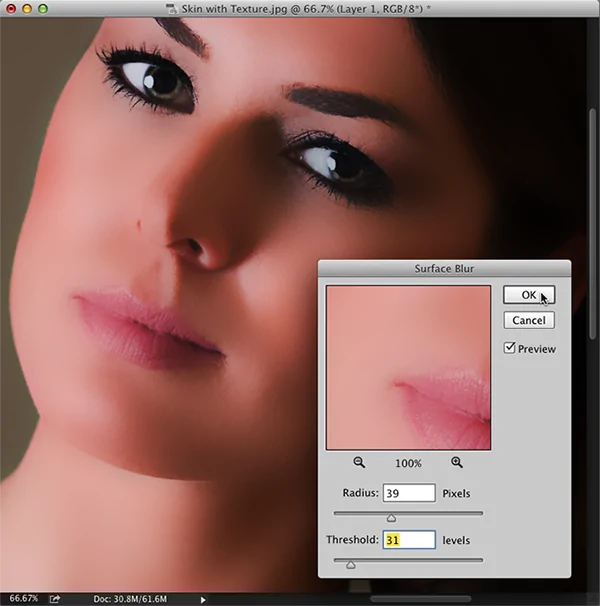
To attain a claymation effect, the primary phase is to smooth out adequate details within the photo, making the surface look delicate and sculpted like clay.
Before making any alterations, make a copy of the initial picture layer in Photoshop using Ctrl + J.
Proceed to Filter, choose Blur and Surface Blur and alter the Radius and Threshold sliders. A better radius of around 10 to 20 px smooths details while keeping edges intact. Play with values to hold some definition while eradicating fine surfaces.
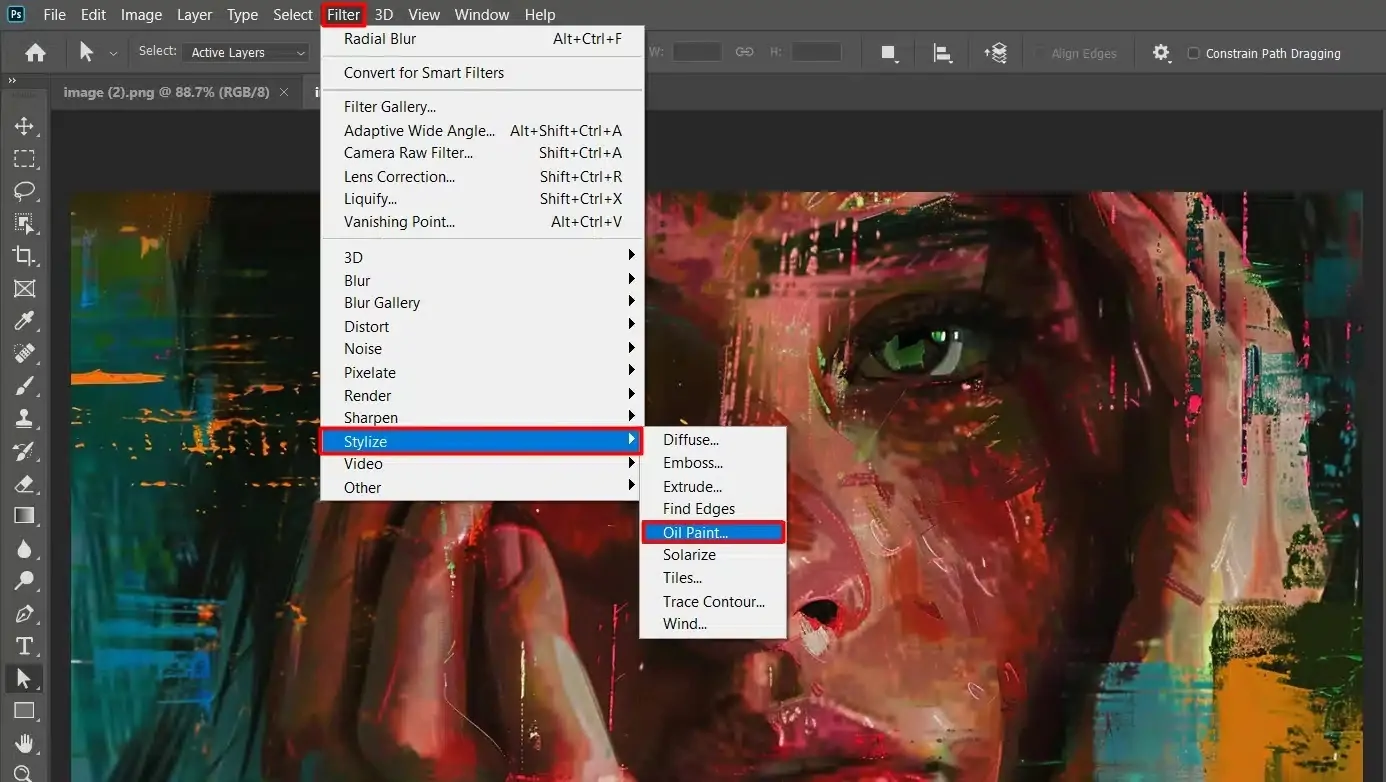
To get a more molded, plasticky effect, add Filter then Stylize and Oil Paint with negligible sparkle. Put the Stylization to around 2-3 and Cleanliness to 4-5 to attain a smoother impression.
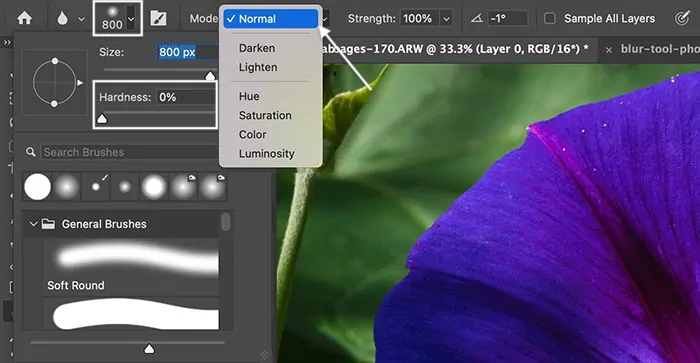
Utilize the Smudge Tool with 10-20% strength to polish any uneven ranges and conform sharp details.
In case some regions still have over-the-top detail, delicately apply Gaussian Blur to get a uniform, clay-like texture.
Step 2: Enhancing The Colors
To imitate the dynamic, uniform look of claymation, colours have to be striking, saturated, and evenly distributed over the photograph.
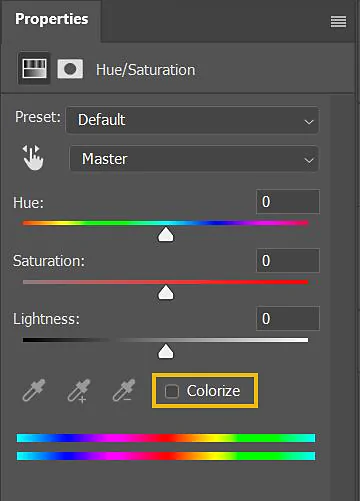
Move to Image, choose Adjustments, then Hue/Saturation. Increment Saturation by 20-50 points, per the required intensity. Maintain a strategic distance from over-saturation as it can cause deviant color bleeding.
Redirect the Hue slider marginally to make a more playful, overstated tone. It is particularly valuable for skin tones, making them seem more manufactured and clay-like.
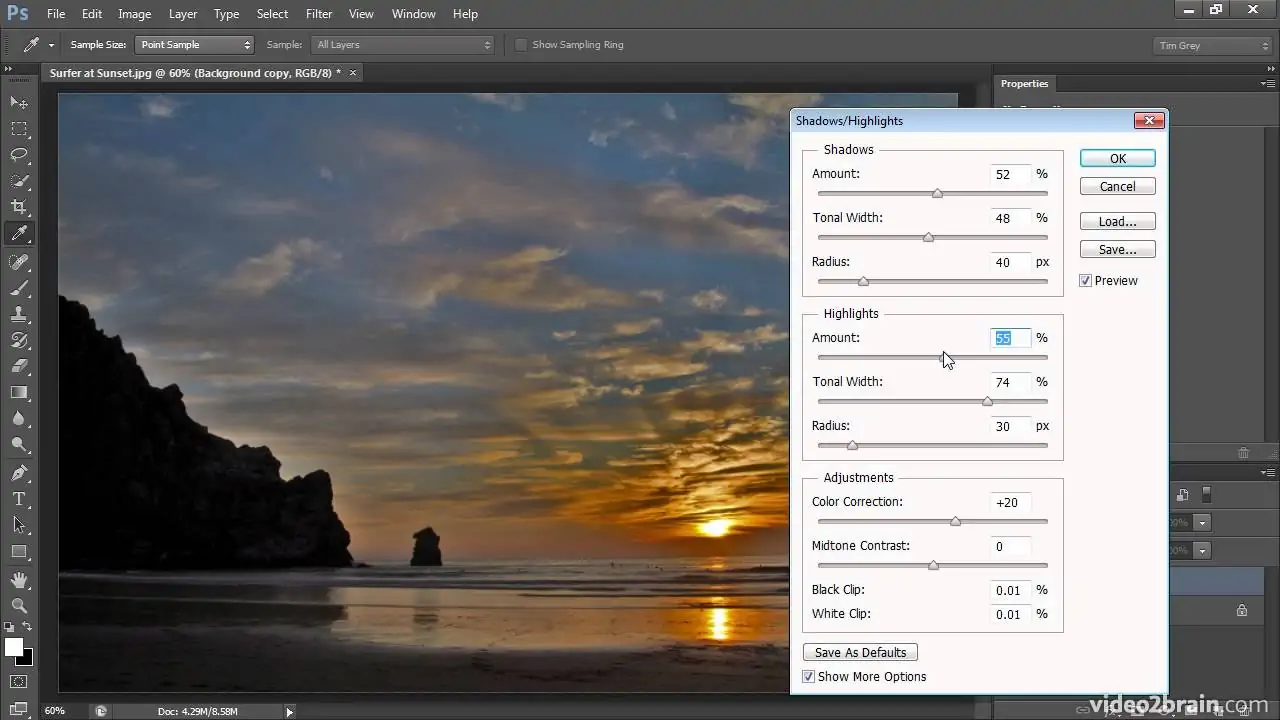
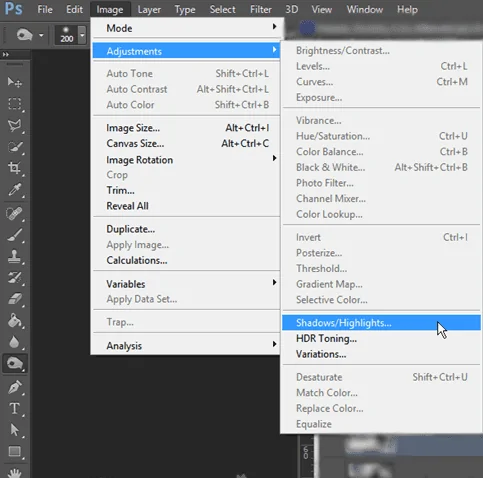
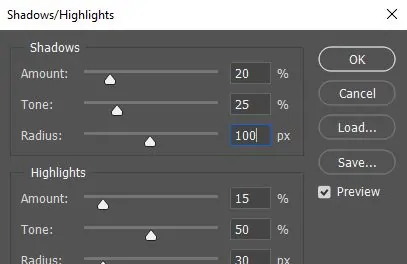
Utilize Image, then choose Adjustments and Shadows/Highlights to decrease profound shadows and bright highlights. It helps in creating a flatter, more sculpted colour formation, just like a hand-moulded clay.
Include a new layer, fill it with delicate, warm colour, and specify the blending mode to Soft Light or Overlay. Decrease the opacity to 10 to 30 per cent to harmonize colours and provide a plasticine appearance.
Move to Image, choose Adjustments and Selective Color to polish individual colors, making them pop or show up more artificially, akin to painted clay.
Step 3: Distorting The Features
It is often observed that claymation-style characters regularly have overstated, rounded, or somewhat distorted features, offering them a handcrafted, animated look. This step includes reshaping elements within the photograph to enrich the sculpted look.
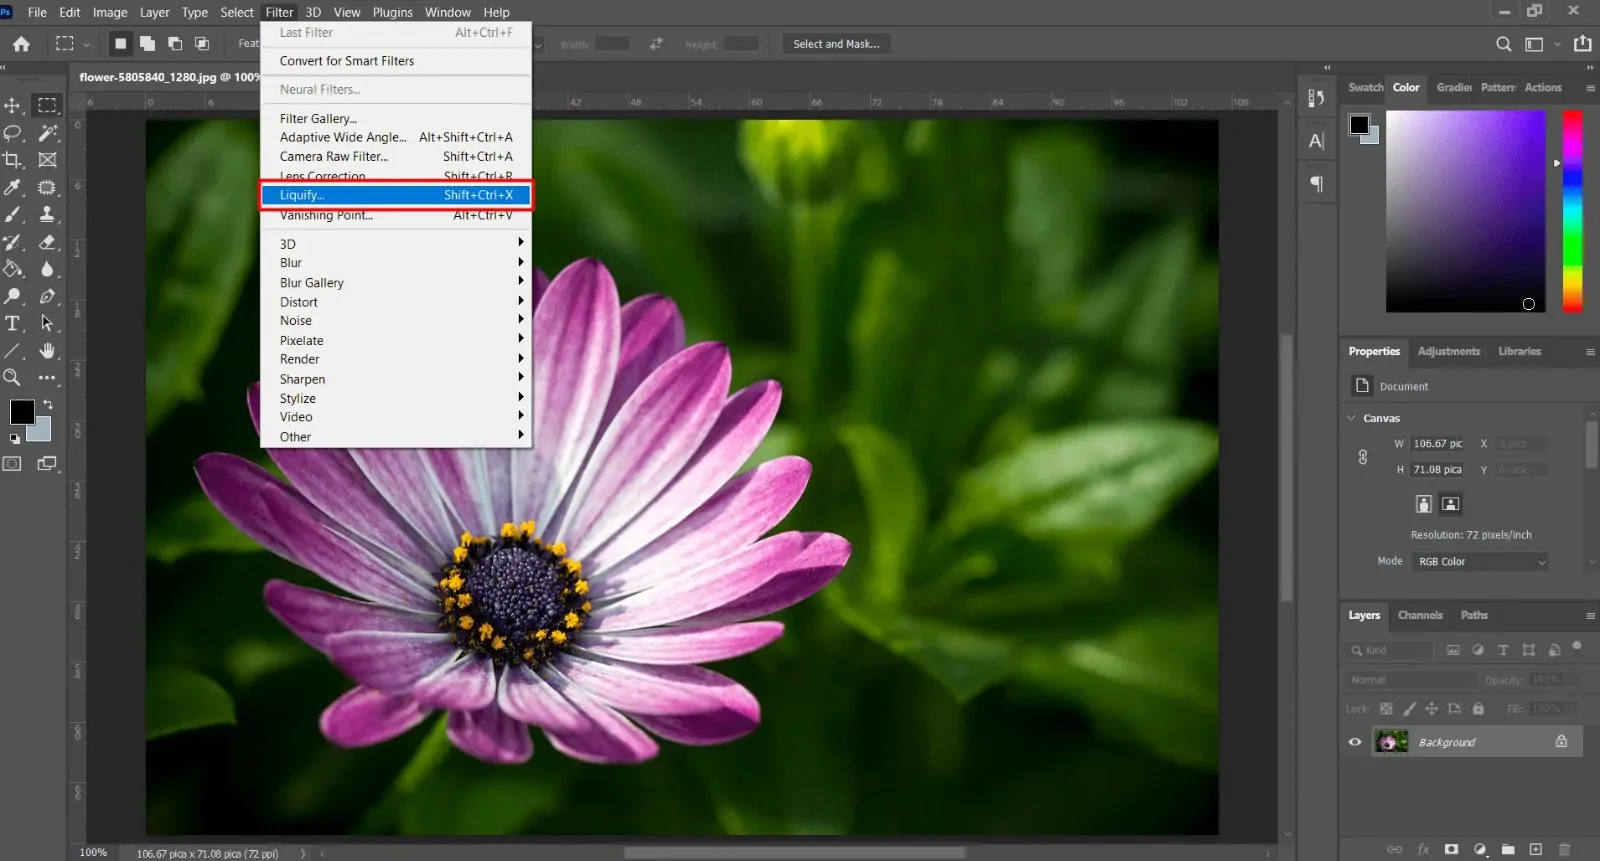
Head to Filter and choose Liquify. Choose the Forward Warp Tool and delicately push facial or object highlights to make them more rounded or exaggerated. Typical alterations incorporate the enlargement, softened jawlines or edges and slightly warped lips or noses to include a handcrafted formation.
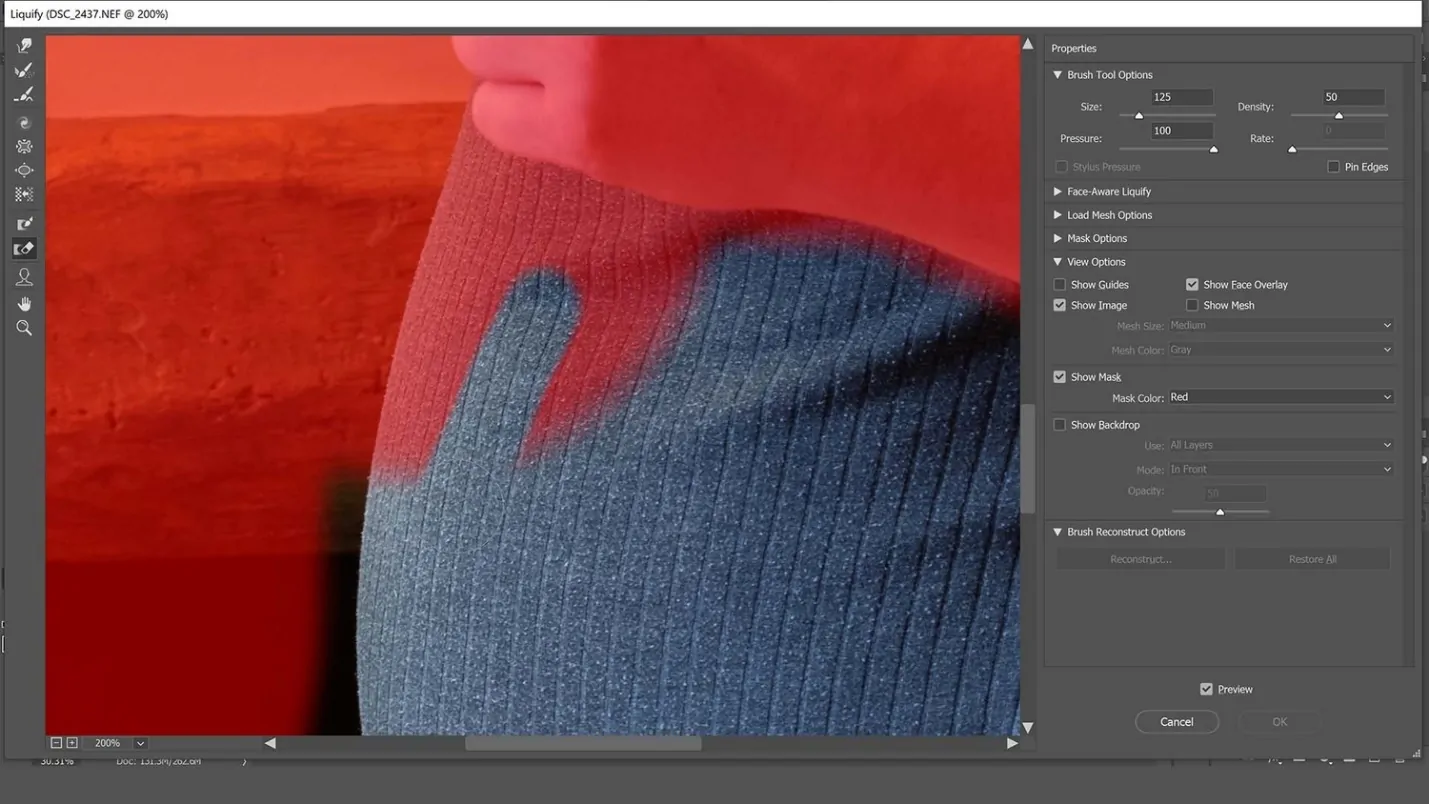
Utilize the Bloat Tool from the liquify panel to slightly grow regions such as cheeks, fingers, or hair.
Also, utilize the Pucker Tool to subtly shrink sharp or excessively detailed elements for a smoother appearance.
Pick the Smudge Tool of strength 10 to 20% and tenderly drag along edges to relax any harsh lines or unnatural distortions. It will help to blend reshaped highlights smoothly.
Utilize the Blur Tool or a delicate brush to delicately smooth out any remaining sharp rims, making them seem more natural.
Clay figures regularly have slight flaws. Utilize Liquify or Warp Transform to present minor asymmetries within the face or objects, making them seem more hand-moulded.
Step 4: Adding The Soft Shadows
Claymation figures have a unique lighting style, where shadows show up soft and slightly painted-on, instead of harsh and practical. This phase can help mirror that effect by altering the shadows to seem more handcrafted.
Move to Image, choose Adjustments, then Shadows/Highlights, and marginally extend the Shadows slider to lift dark ranges, making a flatter, more uniform appearance. It helps avoid deep contrast and makes the picture resemble delicate clay.
Make a new layer and put it into Multiply blending mode. Utilize a delicate round brush of 10-20 opacity with a neutral grey or warm brown to manually paint tender shadows beneath the chin, around the nose, or where natural shadows would drop. It will give a subtle sculpted impact.
Once the shadows are painted, head to Filter, choose Blur and Gaussian Blur and put the radius to 5-10 pixels to soften the edges, guaranteeing they blend smoothly, similar to the molded clay.
Rather than utilizing pure black shadows, utilize slightly warm or pastel colours to coordinate the clay-like aesthetic. Alter with Hue/Saturation as required.
Add a new layer and use Overlay or Soft Light modes on it. Utilize a soft brush with a light pastel color like off-white or pale yellow to include highlights on rounded zones such as cheeks, noses, or objects. It will upgrade the sculpted appearance.
Step 5: Reducing The Gloss
The genuine clay figures have a matte, slightly uneven surface instead of shiny or highly detailed skin. This phase guarantees the picture features a delicate, handcrafted wrap-up by lessening glossiness and including a subtle surface.
Proceed to Image, choose Adjustments, then Highlights/Shadows and decrease the Highlights slider to soften glossy zones. It will avert the picture from looking too gleaming or plastic-like.
Go to Filter, choose Stylize, then Oil Paint, and set the Stylization to 2-4, Cleanliness to 3-5 and Shine to 0. It will help make the specific handcrafted clay formation.
Make a new layer, fill it with 50% grey, and move to Filter, choose Noise and Add Noise around 2 to 4%. Modify the blending mode to Soft Light and diminish opacity, creating a fine, clay-like surface.
Pick the Blur Tool of strength 20 to 30 per cent and delicately brush over any zones that still look too sharp or detailed, particularly on the skin, clothing, or background.
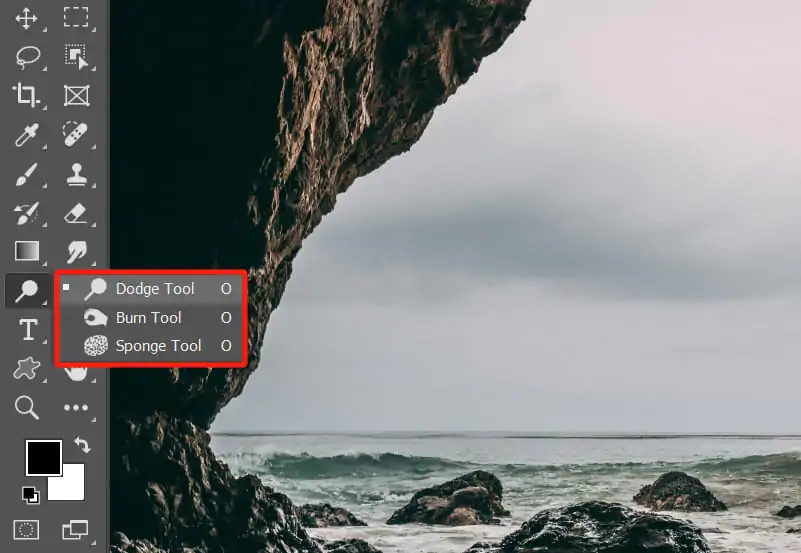
Utilize the Burn Tool, setting it to midtones and low exposure and mildly darken edges, making objects show up more sculpted.
Utilize the Dodge Tool with low exposure to lighten raised regions, mirroring the way light falls on genuine clay.
Step 6: Adjusting The Edges
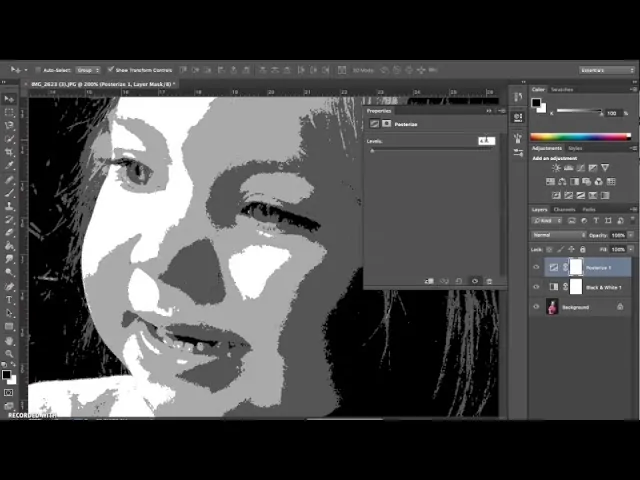
Move to Image, choose Adjustments, then Posterize and place the levels between 3-5. it can decrease colour gradients and make a more fragmented, painted look, comparable to how clay figures mirror light.
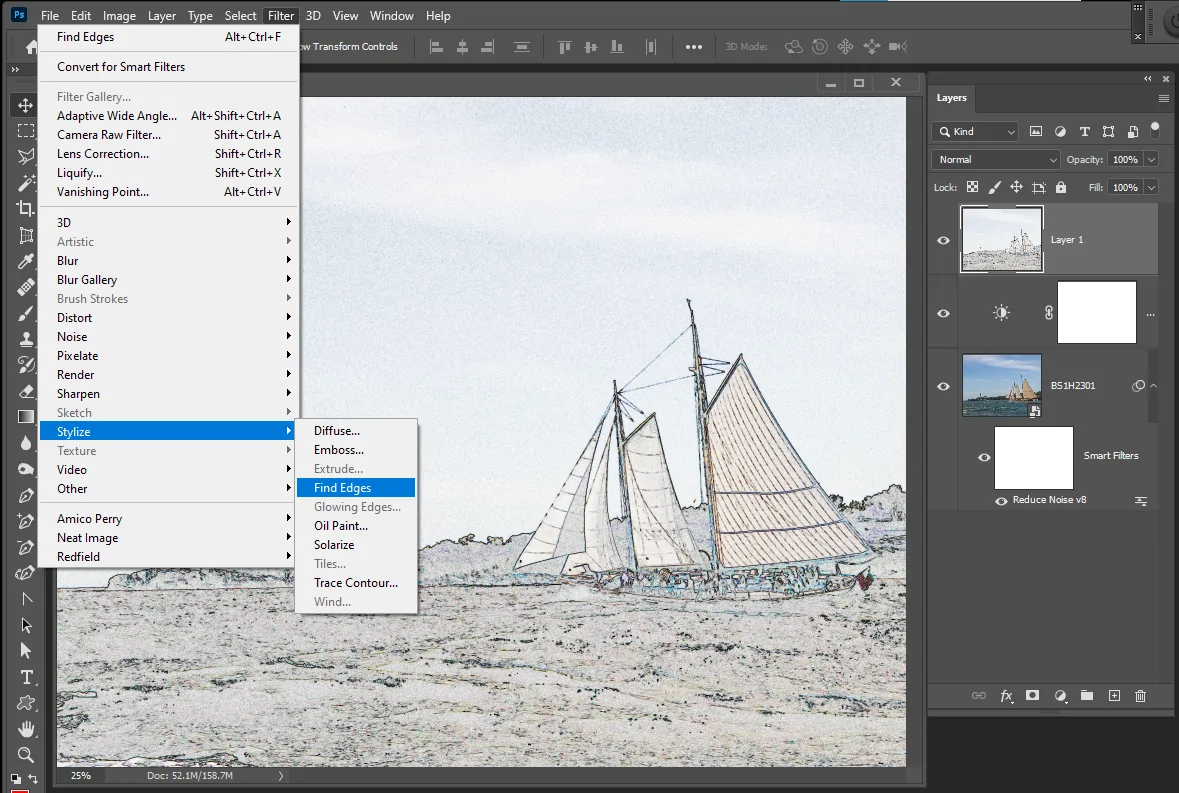
Make a copy of the photo and move to Filter, choose Stylize and Find Edges. It is to create an outline around the critical details.
Put the layer blending mode to Soft Light or Overlay to mix it naturally.
Also decrease the opacity around 30-50 percent to keep the effect indistinct.
Make a new layer and utilize a soft round brush to delicately paint over the edges with a marginally darker colour. It will give the figment of hand-painted shadows and definition.
Tap twice on the photo layer and activate Inner Shadow with the settings including Multiply Mode, Opacity 30-50 and Size 5- 10px.
It will make subtle shading along the edges, making them seem more moulded.
Utilize Gaussian Blur on the foundation layer to form a slight depth-of-field impact, so that the subject stands out like a claymation figure.
Step 7: Finalizing The Effect
After the composition has achieved the fundamental claymation look, the ultimate step includes polishing details, altering colours, and adding wrapping touches to make the effect more convincing.
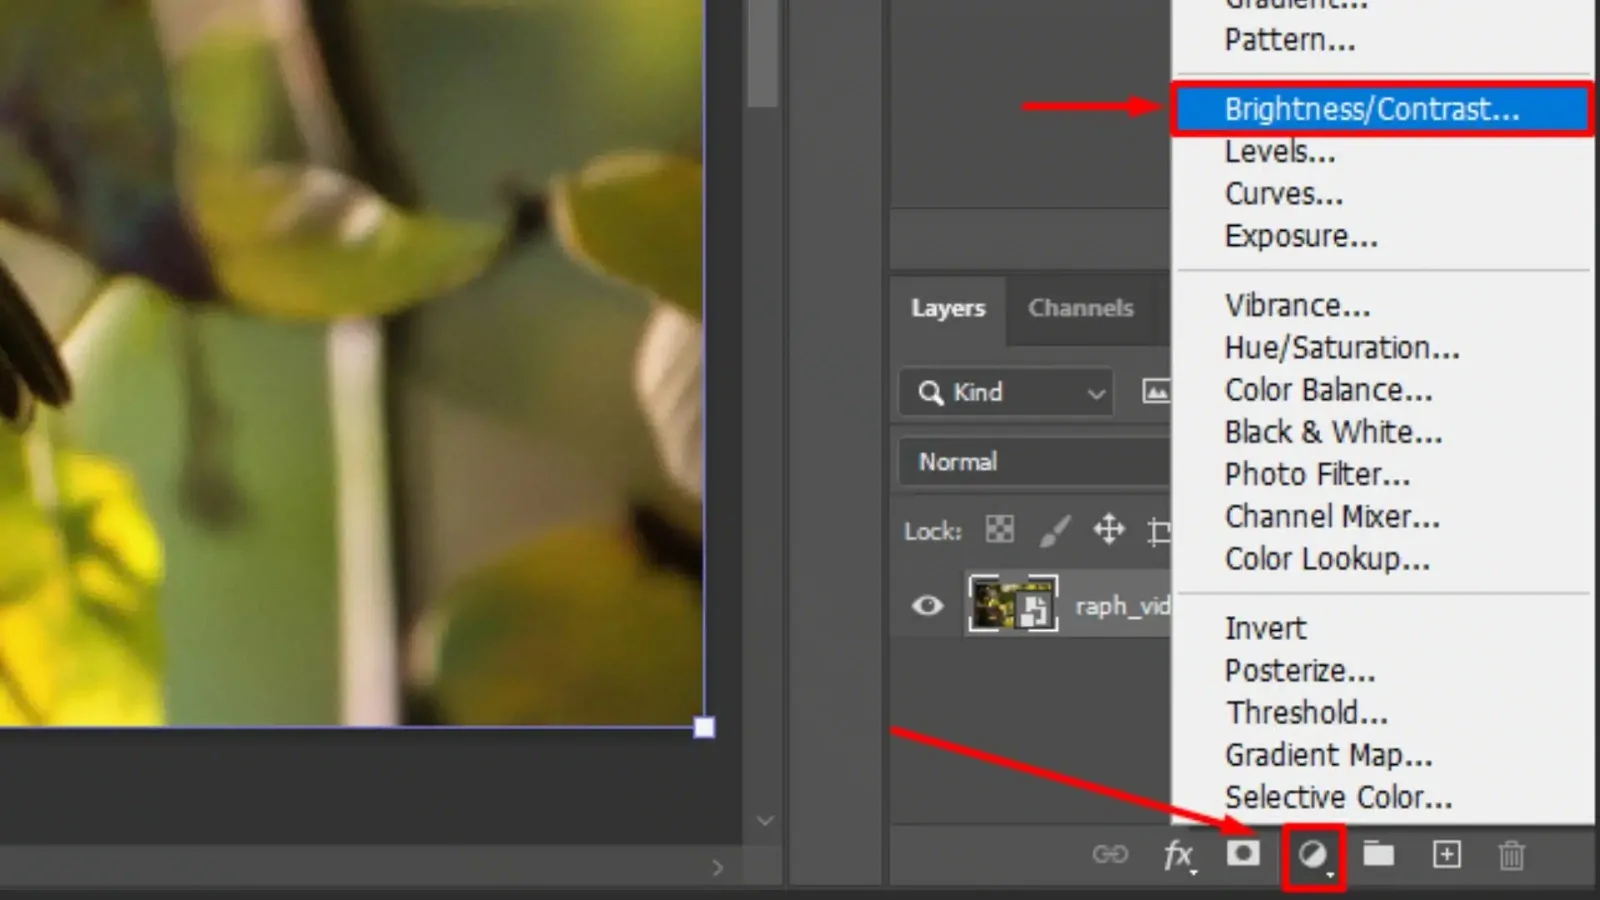
Move to the Image option, and choose Adjustments and Brightness/Contrast.
Marginally increase the brightness to deliver a delicate, even-lit formation.
Minimize the contrast to decrease harsh shadows and highlights, making the photograph seem more like handcrafted clay.
Utilize Selective Color to fine-tune particular colors, so that they seem smooth and marginally artificial, like painted clay. Alter skin tones, clothing, and foundations for a more consistent palette.
Make a duplicate of the picture, and add Gaussian Blur with a radius of 10-15px to that layer.
Put blending mode to Soft Light and decrease the opacity around 10 to 30 percent to form a unobtrusive, diffused shine.
Move to Filter, pick Lens Correction, then Vignette, and marginally darken the edges to bring attention to the subject, upgrading the claymation feel.
Finally, save the composition, and select PNG or TIFF format to protect quality and prevent compression issues.
Once done with these final changes, the picture ought to now have a fully acknowledged claymation effect, showing up as if it were created from genuine clay and was animated frame-by-frame.
Conclusion
To sum up claymation is a distinct organic type of effect in which human expertise is used to spotlight the essential elements of visuals. Through Claymation, feelings and emotions grow increasingly apparent, making viewers feel joyful, sad, nostalgic, and even eerie. Perhaps an even more fascinating aspect that deserves attention is Claymation’s psychological component. The amazing thing that these movies and shorts do for us, whether we watch them or make them, is that we use them inadvertently when we compose. Finally, by following the above guidelines, you can transform your images into textured, sculpture-like pieces of art that resemble claymation animations.
