How To Automate Data Entry Into Salesforce Using Apex Data Loader
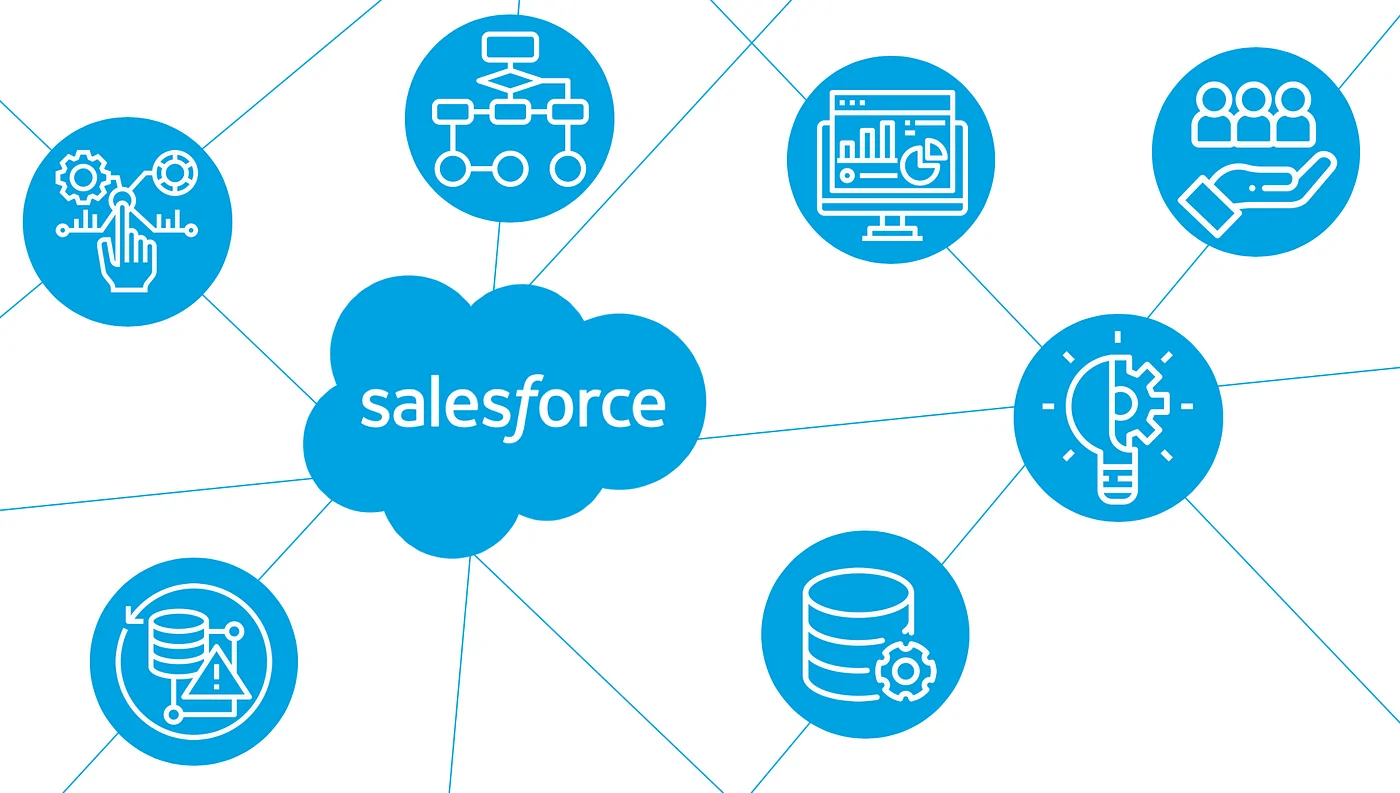
Automating data entry expands the efficiency of the process, saves time, and is less prone to errors, which often happen when entering the data manually. Data automation employs various tools and methods that help streamline the information flow into digital systems. One such tool is Apex Data Loader combined with Salesforce, which is a widely used CRM platform. Automating data entry into Salesforce not only speeds up the process but also lowers the risk of mortal errors. Its integration with Apex Data Loader further enhances efficiency, especially for large-scale data importing, updating, and handling. Using the powerful APIs of Apex Data Loader data modification, which is usually more tedious than entering new data, becomes more manageable than before. Automating data entry into Salesforce with Apex Data Loader favourably benefits organizations, keeping their CRMs up-to-date and optimizing workflows.
Step 1: Organizing The Data To Import
The primary step of the process of data entry automation into Salesforce is to make sure that your data is clean, organized, and prepared for import. Compile the information in a structured format, typically employing a spreadsheet or CSV file.
Confirm that your file incorporates all vital fields, like the contact names, e-mail addresses, or other required information points indicated by your Salesforce environment.
Regulate the information by organizing it accurately. For instance, dates are supposed to be in a proper format like YYYY-MM-DD, and dropdown or picklist values should adapt with Salesforce field alternatives. Avert from duplicate records by utilizing tools to determine and clean pointless entries to make sure that you go through a smooth import process without repetitive information.
Approve the data against your Salesforce schema. Also, verify field titles in your file with those in Salesforce to affirm uniformity and avoid blunders as you import. After it is ready, preserve your file in CSV format, as Apex Data Loader essentially supports this file sort. A well-set dataset minimizes blunders and proves to be time-saving during automation.
Step 2: Establishing Your Salesforce Environment
The second step of automating data entry involves configuring your Salesforce environment to confirm compatibility with Apex Data Loader and your import operation. Start by defining the suitable object(s) where the information will be imported, like Leads, Accounts, or Opportunities. Confirm that these objects have the specified fields, relationships, and permissions enabled.
Audit and upgrade field-level security and user consent. Be sure that the profile or user executing the import bears access to creating, reading, and upgrading the pertinent records. Moreover, assign APIs in your Salesforce environment since Apex Data Loader depends on API calls for data transfer.
Initiate a sandbox or testing environment to reduce hazards. Bringing in data specifically into production before testing can result in blunders. Utilize the sandbox to drive test imports, fix any issues, and validate mapping precision.
Create security credentials like the username, password, and security token required for Apex Data Loader to connect.
Appropriately building your Salesforce environment ensures a consistent and secure information entry process.
Step 3: Downloading And Configuring Apex Data Loader
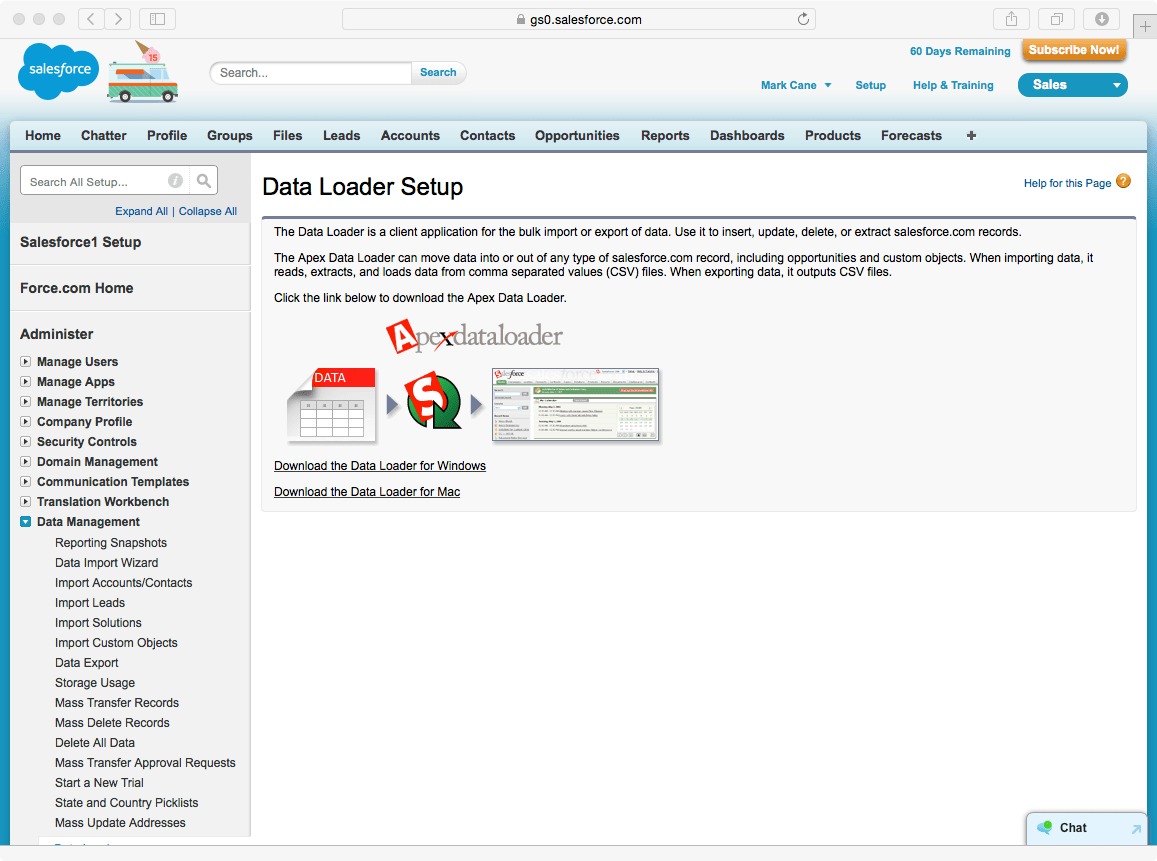
The third step is to download and install Apex Data Loader, the tool you will be utilizing for data entry automation in Salesforce. Start by navigating to Salesforce’s official site or AppExchange and finding the Data Loader download. Be sure that your framework satisfies the compatibility necessities before you install it.
Once you are done with the installation phase, you will launch Apex Data Loader and organize it for your Salesforce instance. You will require your Salesforce username, password, and security token to confirm the association. Input these credentials during the setup operation to permit Data Loader to get to your Salesforce setting.
Once connected, survey the tool’s settings. Modify choices like batch sizes and success/error log file locations for immaculate execution during the import process. Empower logging to track exercises and distinguish any issues afterwards.
Acquaint yourself with the Data Loader interface, which usually provides Insert, Update, Upsert, Delete, and Export functions. Test the connection by committing a small export to confirm that the tool corresponds appropriately with your Salesforce environment. A suitable setup guarantees the smooth handling of data during mechanization.
Step 4: Using Field Mapping For Data Import
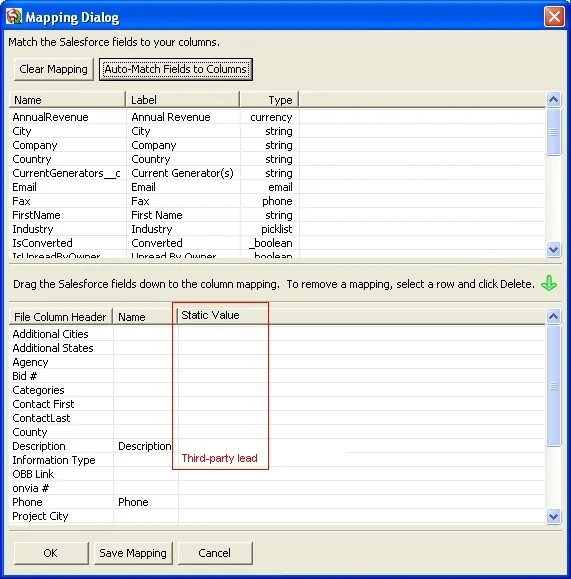
The fourth step is field mapping, which is pivotal to make sure that the data is accommodated accurately with Salesforce records. Start by loading your prepared CSV file into Apex Data Loader. That tool can automatically indicate the headers from your file to map to Salesforce fields.
Audit the accessible Salesforce fields inside the target object, guaranteeing every field from your CSV fits the suitable field in Salesforce. For example, map your First Name and Last Name columns to the related fields within the Contacts object.
Give regard to case sensitivity and field types like numeric, text, or picklist to prevent validation blunders.
If you have custom fields in Salesforce, confirm that they are also mapped correctly. Utilize the Save Mapping choice in Data Loader to save your arrangement for future usefulness, lowering the necessity for redundant setup.
Lastly, verify your mappings for precision, particularly for required fields, as improper mapping can result in failed records. Accurate mapping confirms that your data is imported consistently into the right Salesforce locations.
Step 5: Running The Data Import Process
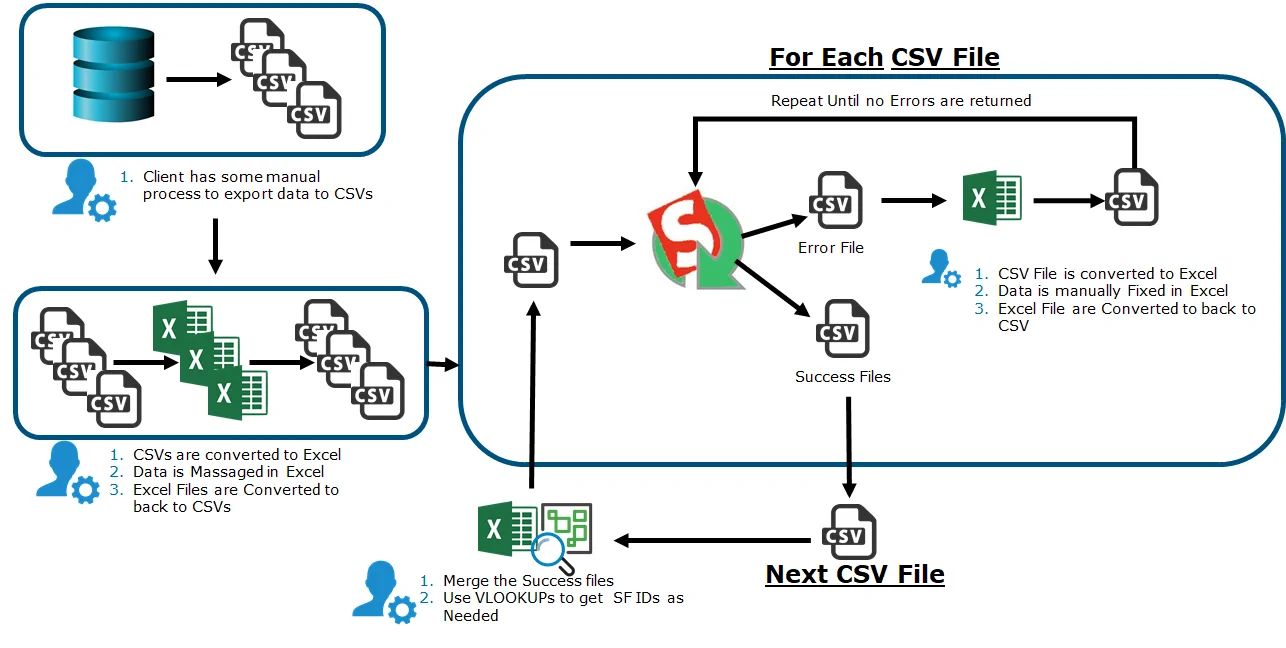
Once you have set up field mappings, you can move on to running the data import operation utilizing Apex Data Loader. Pick the suitable operation for your task, such as Insert, Update, or Upsert, depending on whether you’re making new records, revising existing ones, or performing both in unison.
Open your scheduled CSV file in Data Loader and go through the record count to guarantee all entries are added. Start by running a small test import like 5–10 records in your sandbox or non-production environment. That will permit you to affirm that field mappings are accurate and identify any errors before driving the whole operation.
Once you are all okay with the test run, continue to import the whole dataset. Watch the operation through the progress bar of Apex Data Loader or the logs. Once completed, check the success and error log files created by the tool to confirm successful entries and troubleshoot any went-wrong records.
Performing the adequate operation guarantees that data is precisely input, diminishing mistakes and minimizing disturbances to Salesforce workflows.
Step 6: Data Validation And Verification
Once you are done with the data import, you need to validate and verify that the records were precisely created or updated in Salesforce. Begin by proceeding to the target object like Accounts, Leads, or Contacts and reviewing a sample of the imported records to affirm field-level precision and data virtue.
Inspect for duplicate entries, missing areas, or formatting irregularities that might have happened during the import. Utilize Salesforce’s built-in apparatuses, such as reports or dashboards, to cross-check the imported data against your initial CSV file.
Survey the error log produced by Apex Data Loader for detecting failed entries and their related reasons, like mismatched field types or invalid picklist values. Handle these points by adjusting your data and re-importing the failed records as fundamental.
Finally, convey the import results to your team and report any modifications that have been made. Perform a final comparison with your initial data to affirm the import was thorough and adapts to business prerequisites.
Conclusion
All things considered, automating repetitive data input operations and processes with automation tools and techniques optimizes countless activities and saves time for everyone in the organization. By automating data entry and other scheduled operations, Salesforce’s integration with Apex Data Loader further ensures data’s correctness and up-to-dateness. Given that they have access to trustworthy data, management is able to make more informed decisions. This pair is essentially required for all the firms to add, remove, edit, import and export extensive data in no time with no room for errors. Following a practical approach like the one highlighted in this blog, automating data entry into Salesforce using Apex Data Loader is as easy as pie.
