How To Apply The Dutch Master Art Style To Images
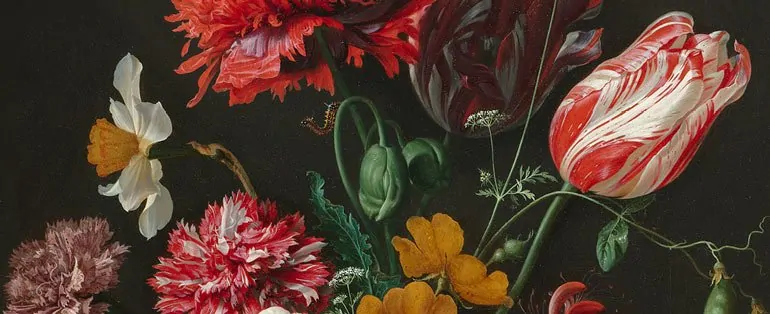
The phrase “Dutch master” describes a small group of European artists who reached the height of their artistic skill throughout the Baroque and Renaissance eras, which approximately correspond to the 14th through the 18th centuries. Old Master paintings, renowned for their extraordinary technical mastery, creative inventiveness, and significant impact on the development of art, remain standards of excellence and provide priceless windows into the social, cultural, and artistic contexts of their times. The traits of Dutch Golden Age painting are frequently compared to those of Baroque painting in general, which is characterized by grandeur, richness, drama, movement, and intensity. Dutch Golden Age artworks, on the other hand, are distinguished by their meticulous realism rather than their ostentatious beauty. The wide range of genres resulting from the change in subject matter was broken down into specific categories, including still lives of various kinds, flower paintings, townscapes, landscapes with animals, and landscapes. Moving to the present, contemporary artists have been likewise influenced by the Dutch master art style’s emphasized realism, intricate textures, shadows, and lighting. Furthermore, with the development of digital art tools and techniques, antique art styles are now also applied to images to add a classic vibe to them. The following steps will highlight the process of enhancing images with the Dutch master art style.
Step 1: Selecting The Base Image
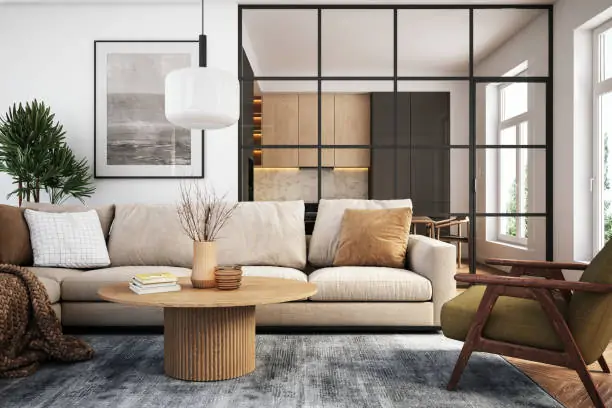
Select an image that highlights a clear subject, like in the form as a portrait, still life, or any interior scene. Dutch Master canvases frequently centred on detailed, realistic depictions of individuals, objects, or situations.
The lighting within the picture ought to mirror natural light sources, comparable to the way Dutch Masters captured realistic light in their works. Soft, diffused light can make the depth and contrast required to imitate this style.
Utilize a high-resolution photo for clarity. The more details your base photograph contains, the better you’ll add intricate surfaces and nuanced lighting impacts, which are fundamental within the Dutch Master style.
Be sure that the picture is not too bright or too dark. Both light and shadow ought to be harmonious, as you will upgrade these components in later phases to include profundity and drama.
Guarantee the composition of the picture has focus. The Dutch Masters frequently utilized solid focal points, whether through a subject’s stare or carefully orchestrated still-life objects, directing the viewer’s eye to the primary components.
Step 2: Modifying The Light Source
Identify the zone from which your light source is coming. Dutch Masters frequently utilized a single, strong light source, usually from the side or overhead. Set your light source so that it makes apparent contrasts between lit-up and shadowed ranges.
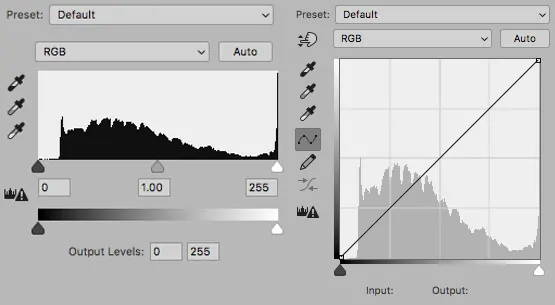
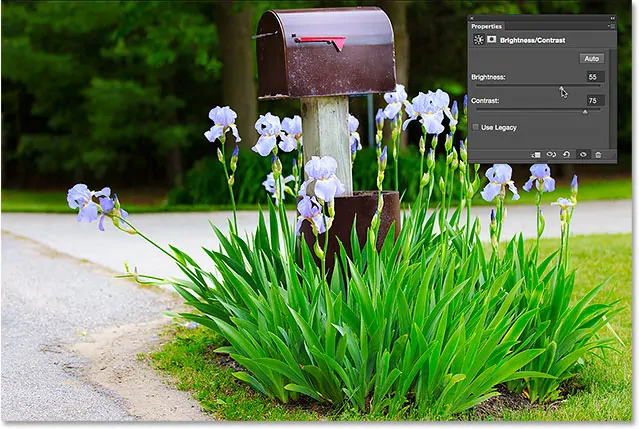
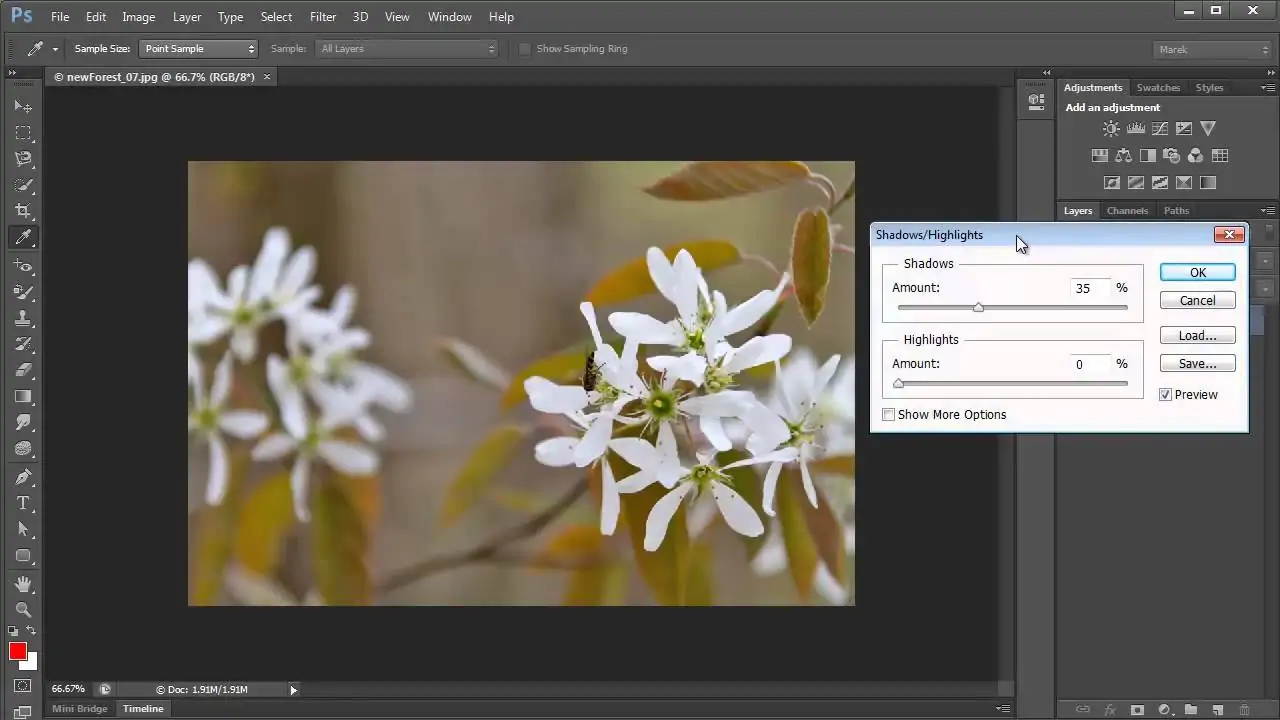
In your editing program, alter the curves or levels to upgrade the contrast. Darken the shadows and brighten the highlights to form a more sensational effect. Concentrate on ranges like the face or objects where light rays normally strike.

Extend the shadows in ranges that should not be completely visible. Utilize a brush or a layer mask to paint in darker shadows where light does not reach, like beneath the chin or along the borders of objects.
Maximize the brightness on zones where the light directly hits, like the cheekbones, glass exteriors, or edges of objects.
To imitate the smooth moves in Dutch Master works, utilize gradient tools or delicate brushes to make gradual transitions between light and dark ranges. Prevent harsh lines; instead, focus on making natural gradation.
Step 3: Enriching The Textures
Begin by zooming in on key zones of your photograph where texture is most vital, like fabrics, skin, and objects. Dutch Masters constantly captured the finest textures, so this step is basic for realism.
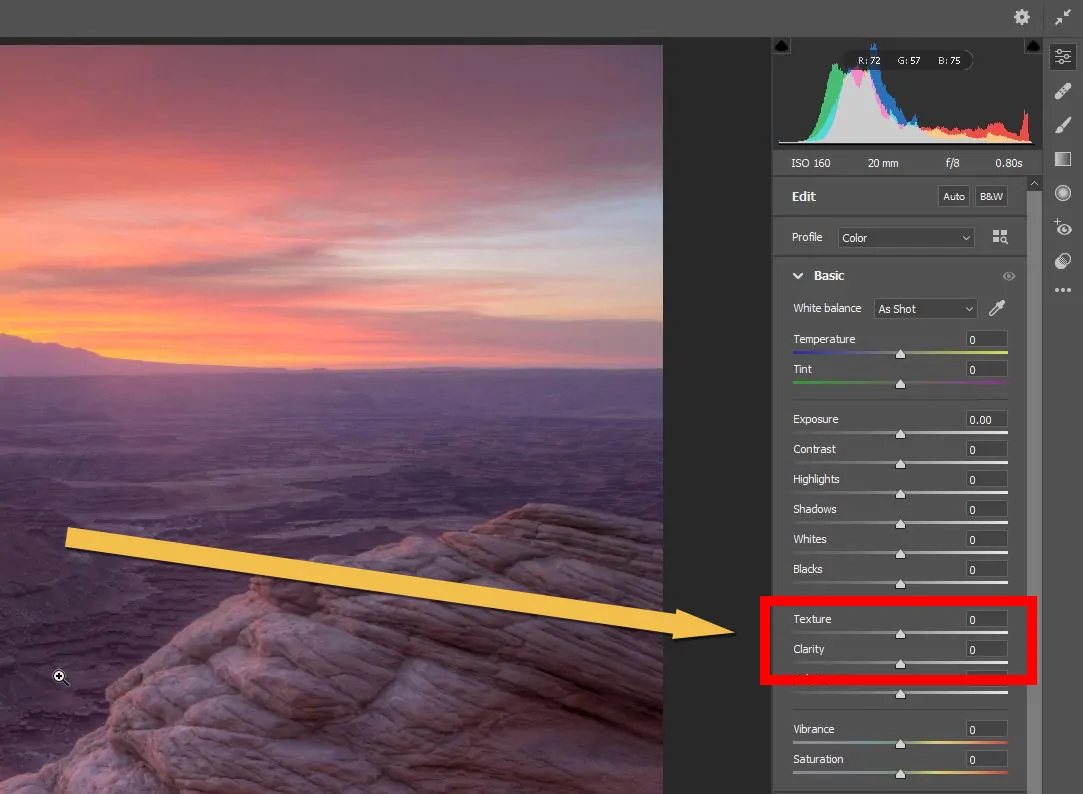
Utilize the clarity or sharpness tool to bring out fine details. Improve surfaces like the weave of fabrics, skin pores, or the surface of objects. Do not exaggerate it; subtlety is key to natural appearance.
In case you are working with digital painting or manipulating the picture, you can utilize texture brushes to include realistic, subtle elements to surfaces, like simulating the look of fabric, wood grain, or glass glint.
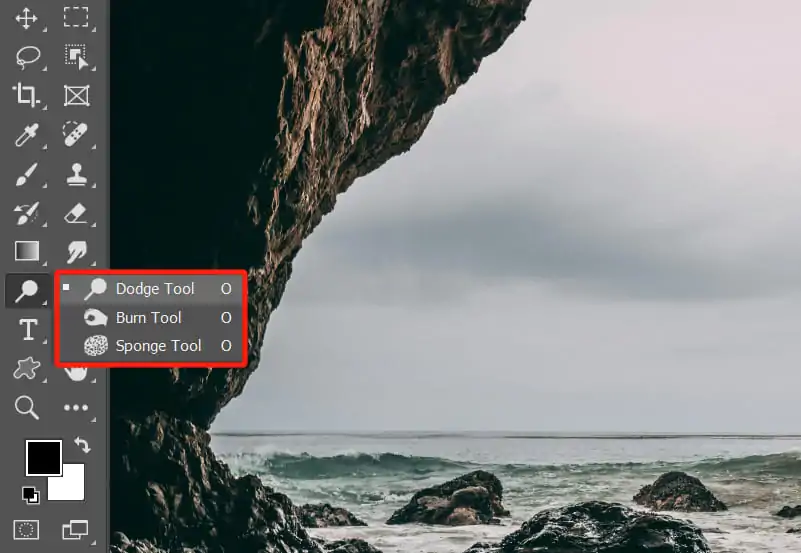
Utilize dodge and burn strategies to emphasise raised surfaces and include profundity to skin textures. Soften the regions where light hits, and darken those where shadows fall.
Polish reflections on reflective surfaces like glass, metal, or water. Dutch Masters frequently paid extra attention to the way light interacted with these surfaces, so be sure that you reflect this aspect in your enhancements.
Step 4: Desaturating The Image
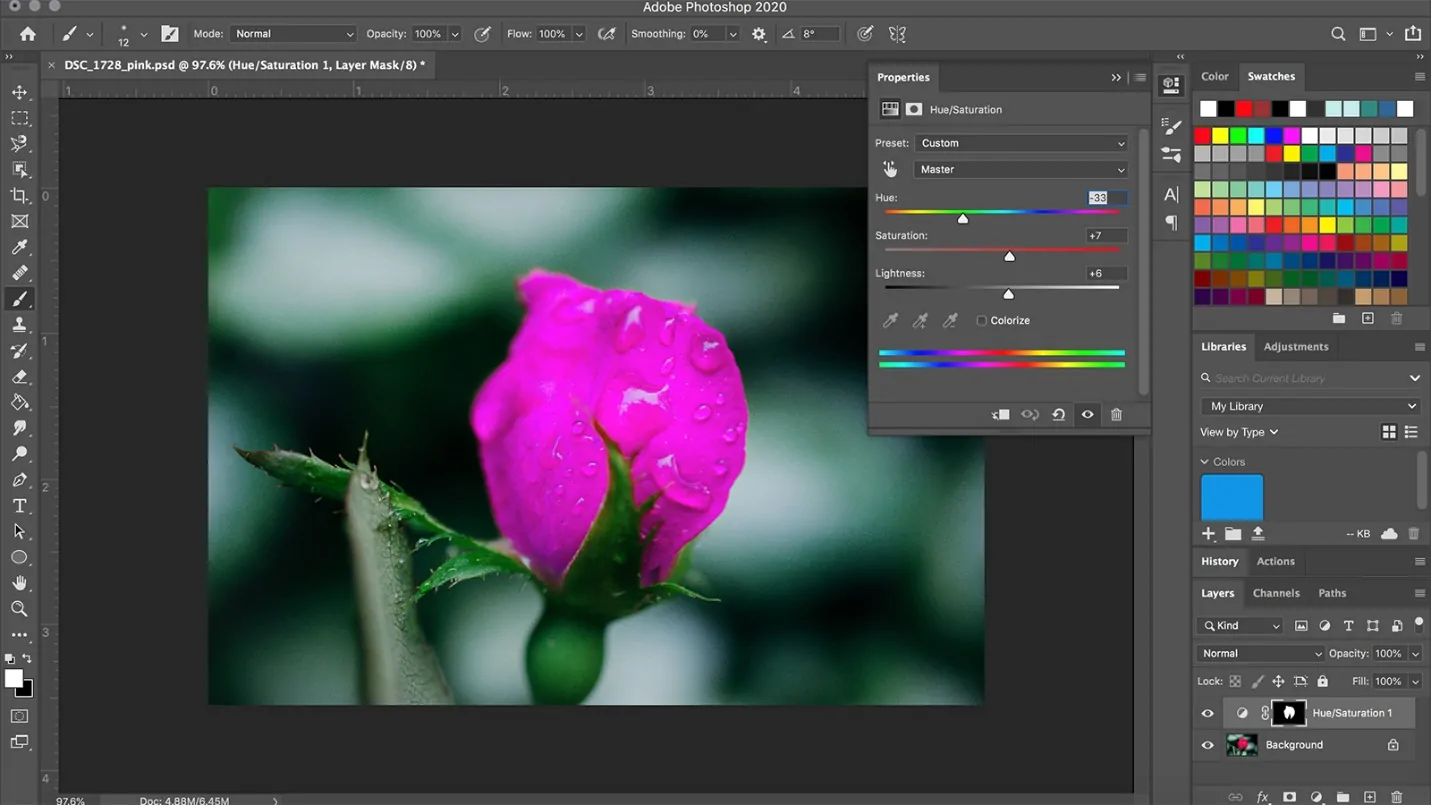
Start by slightly reducing the saturation of your picture to remove excessively vibrant colours. More natural and realistic formation.
Highlight warm tones such as yellow ochre, brown, red, and gold, which are typically seen in Dutch Master works of art. Alter the individual colour channels to subtly upgrade these warm tones and decrease the strength of cooler colours, including blue or green.
As you are desaturating, guarantee the colours stay balanced. Prevent making the picture too grey or dull; point for a balanced tone that reflects the warm, natural feel of Dutch art.
In case particular areas within the photograph ought to retain energy, apply particular colour alterations to only those parts. For instance, you will need to keep some colours striking within the subject’s attire or a specific object.
By using the desaturation technique, you can develop the depth in shadows and highlights. While you decrease saturation, center on ranges where light and shadow interact, letting those contrasts stand out more distinctly.
Step 5: Blurring The Background
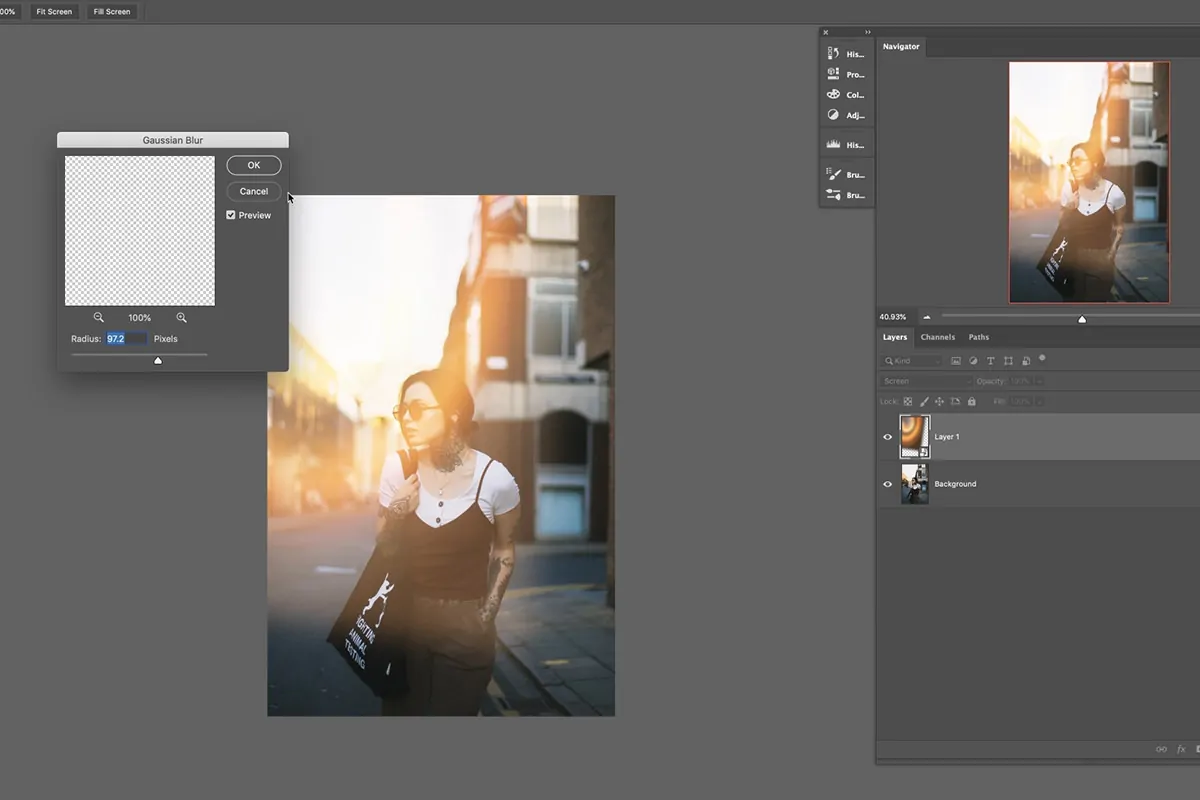
Decide which portion of the photograph ought to be the central point. Dutch Masters frequently highlighted their subject by making a delicate, blurred foundation. Distinguish the primary subject and make sure the foundation does not distract from it.
Utilize a blur tool or Gaussian blur on the foundation to make a smooth transition from sharp to soft focus. Maintain the subtlety in the blur, as too much blurring results in an unnatural look.
Add the blur effect employing a layer mask to regulate the zone being softened with accuracy. Center only on the background and leave the subject sharp, so that there is no undesirable blur spilling onto the main components.
Darken the foundation barely to expand contrast and profundity. It will make the subject more distinct while including an insight into realism.
Be sure that the lighting on the foundation corresponds to the overall light source of the picture. Softening the foundation does not imply altering the light entirely. So just minimize the sharpness to preserve consistency.
Step 6: Adding Highlights And Reflection
Centre on zones where light naturally hits objects, such as the tops of faces, hands, or reflective surfaces. In Dutch Master paintings, these features often highlight the surface and form of the subject, so select where the light interacts the most.
Utilize the dodge tool with a soft brush to tenderly paint in highlights. Add this technique sparingly on key ranges, like the cheekbones or edges of glassware, where light would realistically strike.
In case your picture incorporates reflective surfaces, including glass, metal, or water, include faint reflections of light. Utilize soft brush strokes or layer impacts to imitate how light bounces off these surfaces, giving them a similar shine.
Add highlights to key highlights that create volume and profundity, like folds in texture or curved surfaces. It includes the realistic, 3d impression on the picture, mirroring the Dutch Master method.
Be sure that the included highlights are balanced with the shadows. Over-highlighting can disrupt the chiaroscuro effect, so alter the intensity of the highlights to preserve a harmonious light and dark adjustment within the photograph.
Step 7: Polishing The Artwork
Adjust the overall contrast of the composition. Uplift the contrast to let the light ranges pop and the shadowed ranges deepen, but prevent over-the-top contrast that will make the picture look too harsh. Point for a balanced, rich look that highlights details.
Centre on enhancing shadowed regions, especially in ranges such as under the chin, beneath objects, and around edges. Utilize the burn tool or adjustment layers to darken these zones and make a sense of depth, imitating the dramatic light contrasts in Dutch Master paintings.
Whereas shadows and highlights are fundamental, midtones also play a pivotal part within the overall profundity. Utilize a soft adjustment brush to quietly increase or decrease the midtone zones to preserve a smooth, natural transition between light and dark.
To attain more control, apply contrast and shadow adjustments utilizing layer masks. It will permit you to alter particular parts of the image without influencing the complete composition, guaranteeing accuracy.
Once you are done fine-tuning contrast and shadows, you can survey the overall balance of the picture. Guarantee that no area is too dark or too shining. The point is to have a balanced blend.
Tune contrast and shadows, to provide your photograph the profundity and drama typical of Dutch Master art, making the subject stand out and keeping up natural lighting effects.
Once you are satisfied with the final look, you can save and export the final image.
Conclusion
In summary, the Dutch master artworks are approachable because of their realism, which emphasizes stuff from the masses’ lives. Artists and image editors can beautifully portray this art form’s central theme, which is the impermanence of worldly things, by employing a realistic approach. This art style’s genuine dimension can be ascribed to a variety of compositions that include portraits, landscapes, and common house interiors, frequently highlighting actuality and real-world scenarios. Eventually, the images enhanced with the Dutch master style can grow endorsement and authenticity on an immense level within the onlookers’ perceptions.
