How to Automate Material Assignment for Large Product Catalogs
Handling material assignments in extensive 3D product catalogs is among the most prevalent issues faced by designers and technical artists. Picking objects and adding materials by hand is slow, error-prone, labor-intensive, and it can produce mis-matched surfaces between environments (due to missed objects), corrupted exports/imports of data, or other issues. Novices become lost in the maze of material logic vs. which parts go with which assets, and pros find their eyes turning to dust as thousands of asset workflows need to be duplicated, extended and expanded on without introducing errors. Automated Material Assigning in Blender solves all these issues by making sure your materials are applied accurately, consistently and at scale while minimizing human mistakes and optimizing your 3D asset pipeline.
In this guide, you will find out how to automate material assignments step by step, from cleaning up object organization and slotting pattern in a way that applies to any model scenario, like every other collection can be employed for it or custom Python scripting so everything comes ready for Exporting into rendering software, game engines or the e-commerce.
Step 1: Switch to Object Mode and Apply Transforms
To assign the materials, you should make sure your objects are in Object mode and their transforms are applied. That way you won’t experience shadowing errors, export trouble or conflicts with materials.
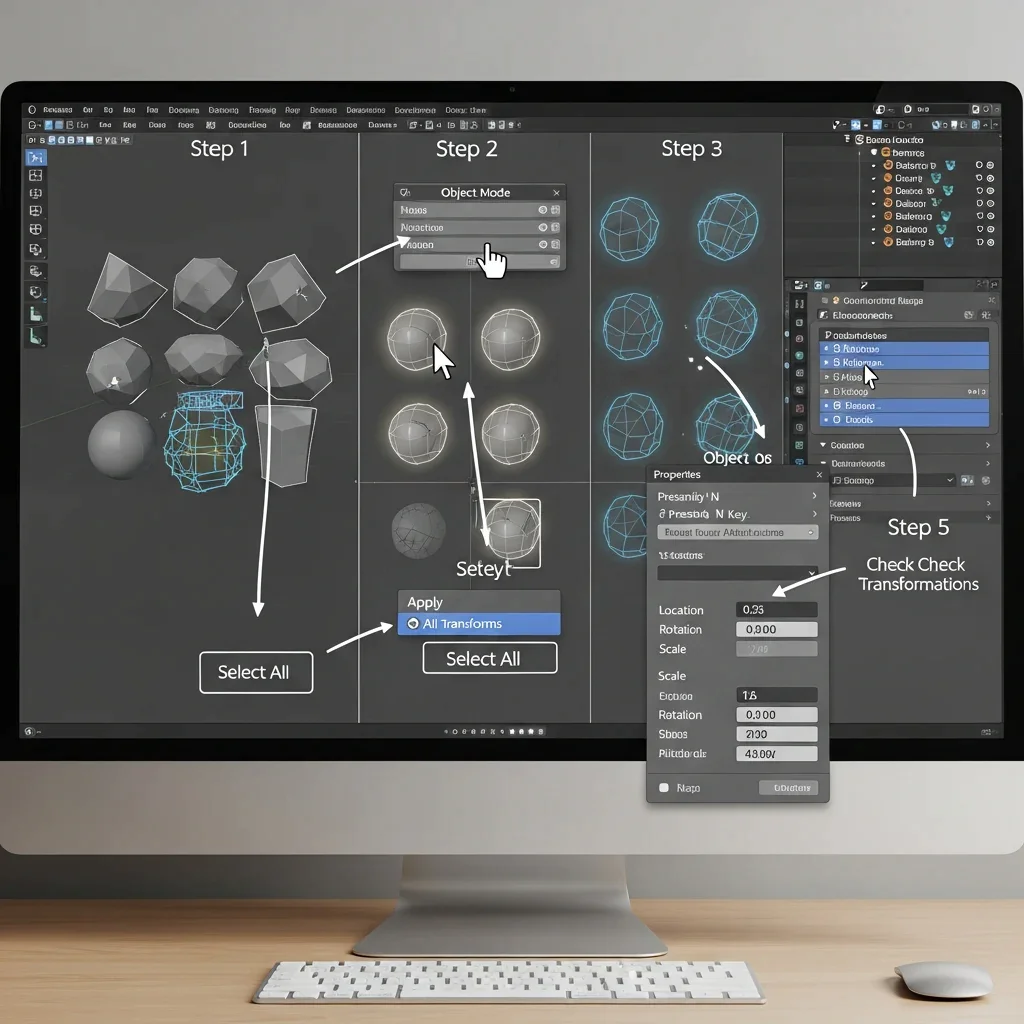
First, open your Blender project by launching Blender and opening the .blend file that contains your product database, making sure all items you want to automate material assignment for are visible in the scene browser. Next, switch to Object Mode from the top-left of the 3D Viewport; if it is not already active, use the dropdown to select it, or press Tab to toggle between Edit Mode and Object Mode.
Then, select all objects in the scene by ensuring your cursor is inside the 3D Viewport, pressing A on the keyboard; if some objects are already selected, press A to deselect and press A again to select all, and double-check in the Outliner that everything is selected. After that, apply transforms to all objects by pressing Ctrl + A to open the Apply menu and choosing All Transforms, which applies position, rotation, and scale to each object and prevents materials from displaying incorrectly or fragmenting during export to a game engine or renderer. Finally, optionally verify the results by inspecting any object in the 3D Viewport, pressing N to open the Properties Area, navigating to the Item tab, and confirming that the Location values are as expected (typically 0,0,0), the Rotation is correct, and the Scale on all axes is set to 1.0.
Step 2: Clean Material Slots and Prepare Objects for Assignment
Once verify that all objects are in Object Mode and transforms are applied, the clean up would begin with material slots. It is to ensure that no conflicts, duplicate materials, or page missing while automating.
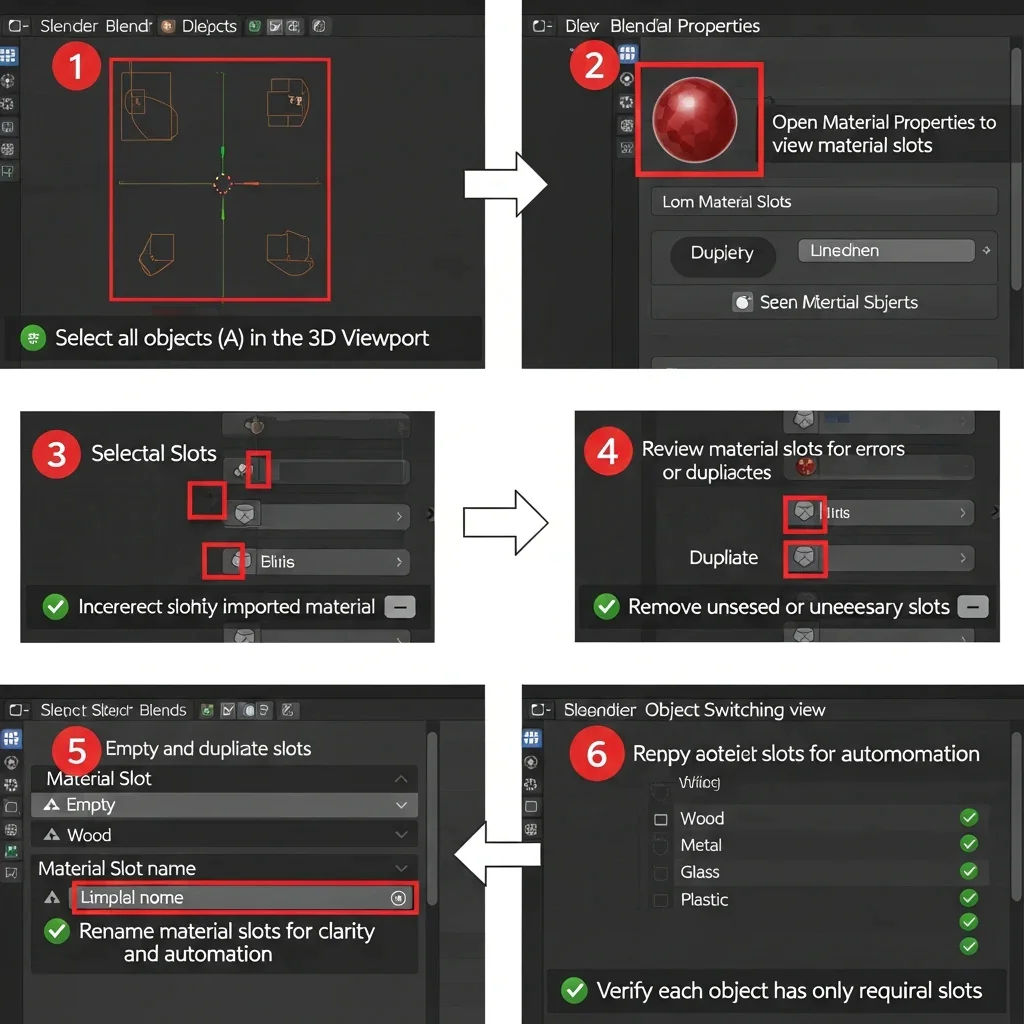
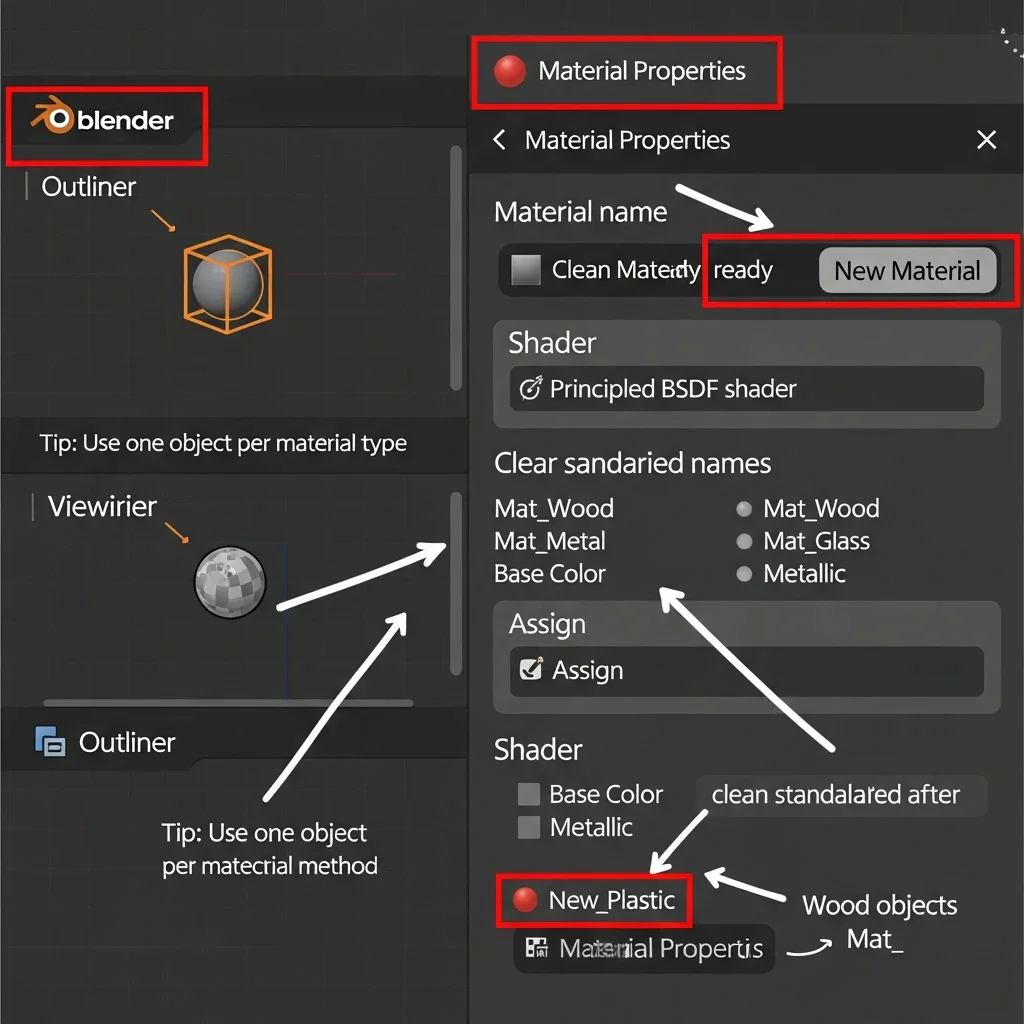
First, select all objects again if they were deselected by clicking inside the 3D Viewport and pressing A to select everything, ensuring you are ready to review material slots across the entire catalog. Next, open the Material Properties panel from the right-side toolbar by clicking the red sphere icon, which displays the material slots for the selected object. Then, review the material slots for each object, checking for empty slots with no material assigned, duplicate materials, or incorrect materials that may have come from imported assets, and click on each slot to view the assigned material. After that, remove any unnecessary or empty slots by clicking the minus (–) icon next to unused or duplicate slots, keeping only the slots you actually plan to use.
Optionally, rename the remaining slots for clarity by double-clicking a material slot and renaming it according to its type, such as Wood, Metal, Glass, or Plastic, which makes automation easier later in the workflow. Finally, verify the cleanup by briefly checking each item to ensure it contains only the required material slots, as empty slots can cause issues when materials are reused automatically.
Step 3: Standardize Object Names
After purging, the next important thing is to make sure all of your junk actually has keyword (style) names. Materials are assigned according to object names (“Automation”), so this is also a step that canπt be skipped without errors.
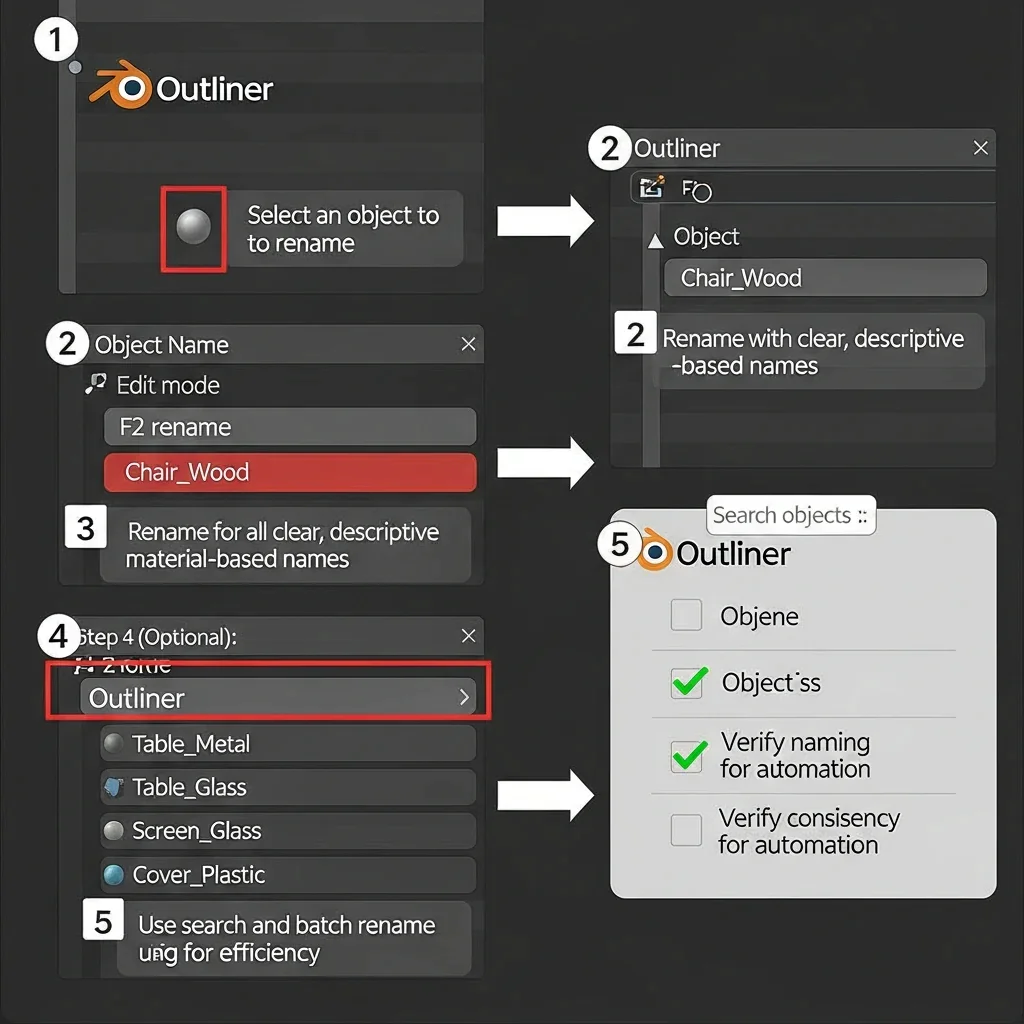
First, select an object that you want to rename in the scene. Then, rename the object by pressing F2, which is the shortcut for renaming, and type a clear and descriptive name that includes the material type, such as Chair_Wood, Table_Metal, Screen_Glass, or Cover_Plastic.
Repeat this process for all objects in the catalogue, applying the same naming pattern consistently, and work methodically in the Outliner to avoid overlooking any items. Optionally, you can use search and batch renaming by pressing Shift + F3 or using the Outliner search field to filter objects by type or material keyword and make changes in groups for better efficiency. Finally, verify consistency by ensuring every object has a name that clearly identifies the material it should receive, with no blank spaces, non-alphabetic characters, or misspellings, since the automation relies on exact name matching.
Step 4: Create Standard Materials
If you have gone through Steps 1 (applying transforms), Step 2 (cleaning/joining material slots and removing unused ones) and finally step 3.was to understand how to standardize your object names, then we are ready for the material creation and assignment. This step will make sure that everything in your catalog, using materials for automation, works as expected.
First, select any object in your scene by left-clicking it in the 3D Viewport or the Outliner, ideally choosing one object per material type. Next, open the Material Properties panel by clicking the red orb icon on the right-hand toolbar. Check whether the correct material already exists on the object; if it does, you can skip creating a new one, but if not, press New to create a new material. Then, name the material clearly using a simple and consistent pattern such as Mat_Wood, Mat_Metal, Mat_Glass, or Mat_Plastic.
At this stage, you can leave the Principled BSDF shader at its default settings if you are new, or, if you are more experienced, adjust values like Base Color, Roughness, or Metallic as needed. After that, assign the material to the object by selecting it in a clean slot and clicking Assign, using standardized and shareable materials suitable for automation. Finally, repeat this process for all material types, assigning Mat_Wood to wood objects, Mat_Metal to metal objects, Mat_Glass to glass objects, and Mat_Plastic to plastic objects.
Step 5: Assign Materials Automatically Using Selection by Name

So now you have clean transforms, clean material slots, nice names and materials created, you could assign the correct materials to lots of objects automatically based on their names. This shortens the amount of time you need and keeps the catalog as a whole consistent.
First, open the Search Menu for Select Pattern by pressing Shift + F in the 3D Viewport, then type Select Pattern in the search box and click on it. Next, select objects by keyword; for example, if you want to assign Mat_Wood, type “Wood”, which will select all objects whose names contain the word “Wood”. With those objects selected, go to the Material Properties panel by clicking the red sphere icon, choose Mat_Wood from the material list, and click Assign.
Repeat the same process for other materials by typing “Metal” to assign Mat_Metal, “Glass” to assign Mat_Glass, and “Plastic” to assign Mat_Plastic; if an object does not need to be rendered, such as a rig or light, you can exclude or include it from rendering as needed when it is highlighted. As a tip, if some objects already have materials assigned, override them to maintain consistency, and always double-check the result in Material Preview mode.
Step 6: Organize Objects into Collections for Large Catalogs
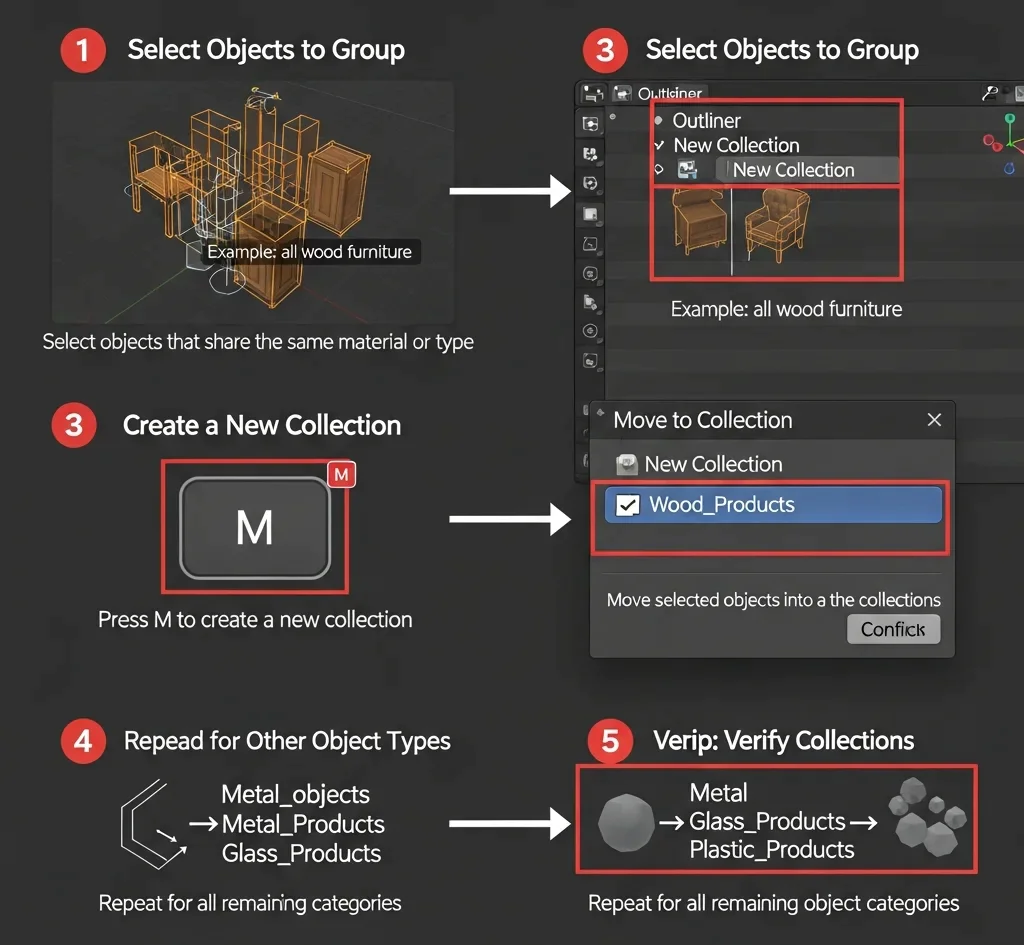
First, select the objects you want to group by toggling them in the 3D Viewport or the Outliner that share the same material or type, such as all wood furniture, and then create a new collection by pressing M on your keyboard. Next, move the selected objects into the collection;
If you previously used keyword-based material assignment, you can select objects again by keyword to gather all items with the same material, then press M, choose an appropriate existing collection, and confirm. Repeat this process for other object types by organizing metal objects into a Metal_Products collection, glass objects into Glass_Products, and plastic objects into Plastic_Products. Finally, verify the collections by expanding each one in the Outliner and ensuring all objects are correctly grouped and none are missed.
Step 7: Optional Python Automation for Large Catalogs

First, open the Scripting workspace by clicking the Scripting button at the top of Blender, where the Text Editor, Python Console, and Python Output are visible. Next, create a new script in the Text Editor by clicking New and name it Material_Automation.py. Then, set up the material mapping by specifying which material should be used for each object name keyword, as shown below:
for obj in bpy.data.objects:
if obj.type == ‘MESH’: # Only assign to mesh objects
for keyword, mat_name in material_map.items():
if keyword in obj.name:
mat = bpy.data.materials.get(mat_name)
if mat:
# If object has no material slots, create one
if len(obj.material_slots) == 0:
obj.data.materials.append(mat)
else:
# Assign material to all slots (handles multi-material objects)
for i in range(len(obj.material_slots)):
obj.material_slots[i].material = mat
break # Stop checking other keywords once matched
Finally, run the script by pressing Run Script in the top-right of the Text Editor, after which Blender will automatically assign materials to all objects whose names match the defined keywords. To verify the results, switch to Material Preview mode and check that each object has the correct material, multi-slot objects are fully assigned, and linked copies behave as expected; if you need separate materials per instance, make the object single user before running the script by going to Object → Make Single User → Object & Data.
Step 8: Validate Material Assignment

Once you’ve assigned materials out (either manually through the selection patterns of Step 5, or via Python automation in Step 7), it’s vital to verify that every object actually has the correct material. Confirmation that groups are well-formed, avoiding any corruption during To prepare everything for export or rendering while maintaining a professional workflow, first switch to Material Preview Mode by clicking the viewport shading sphere icon with the checkerboard pattern in the top-right of the 3D Viewport, which previews all materials applied to items in real time.
Then perform a quick visual scan by rotating around the scene and checking that wood objects use Mat_Wood, metal objects use Mat_Metal, glass objects use Mat_Glass, and plastic objects use Mat_Plastic. After that, check any multi-material objects by selecting them and reviewing their material slots in Material Properties to ensure each slot has the correct material assigned.
Optionally, if you organized objects into collections earlier, use the Outliner (and tools like Outliner Expansion Pack if installed) to verify that every item within each collection has the correct material, which is especially useful for large catalogs with hundreds of objects. Finally, fix any issues immediately by selecting the object with the wrong material, opening Material Properties, and either manually assigning the correct material or regenerating the assignment using the Python script.
Step 9: Prepare for Export
So your hardware, assets and renders will always be consistent in any app-renderer-game too – this is compatibility
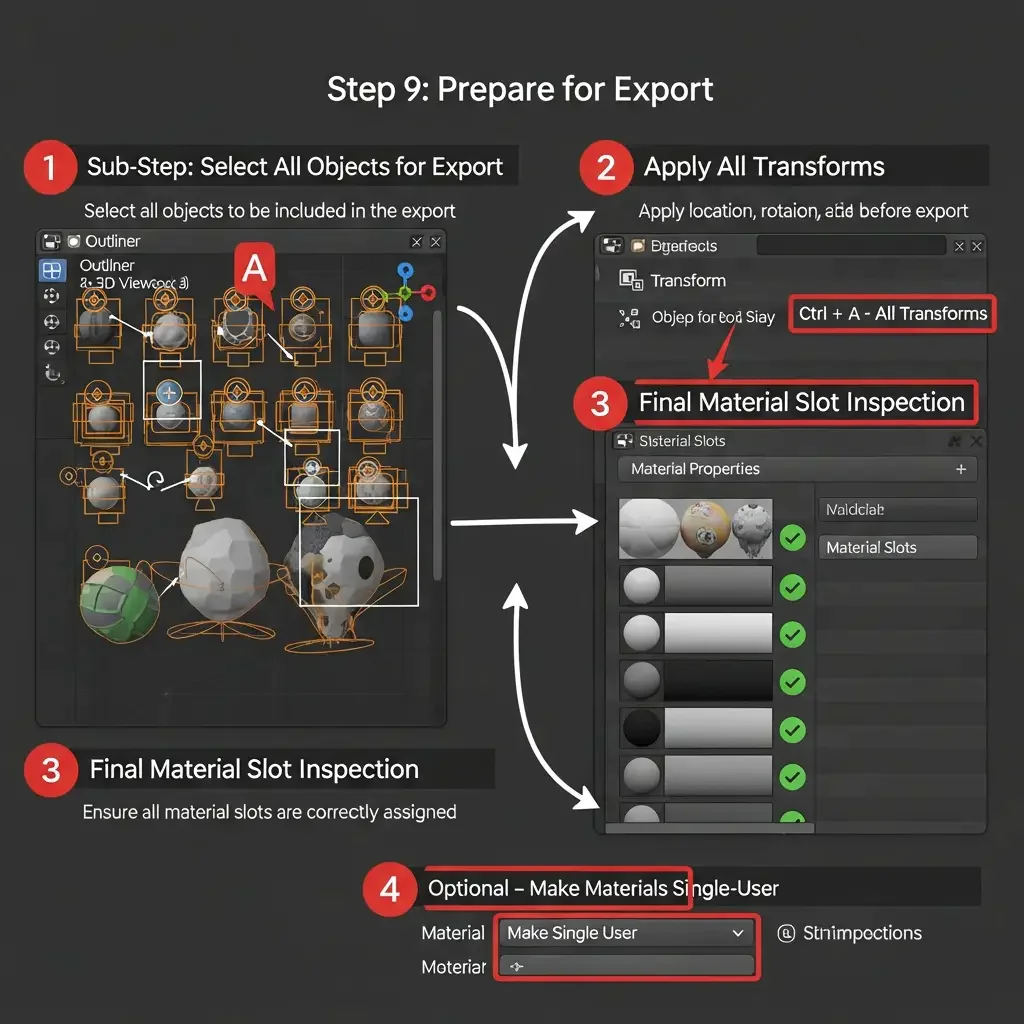
First, select all objects you want to export by pressing A in the 3D Viewport and confirming in the Outliner that everything needed is selected. Next, apply all transforms again if necessary by pressing Ctrl + A → All Transforms, ensuring that locations, rotations, and scales are correct for export, and take a moment to inspect your material slots one final time. Then, randomly select a few objects and check in Material Properties that all slots are correctly assigned and no empty slots remain. Optionally, make materials single-user for engines like Unity, Unreal, or GLB exports by selecting an object, opening the materials tab, clicking the dropdown next to the slot, and choosing Make Single User to prevent shared material conflicts upon import.
You can also organize collections for export to include or exclude specific object groups, which is useful for batch exporting large catalogs. When ready, export the catalog via File → Export, choosing the appropriate format—FBX for game engines, GLB/GLTF for web or e-commerce, or OBJ for general 3D use—and in the export settings, check Selected Objects if exporting a subset, Apply Transform, and Include Materials / Textures, then click Export. Finally, verify the export by opening the content in your target engine, renderer, or viewer, ensuring all items have the correct materials and appear as expected.
How to Make a Product Catalog
After you have finished all of this in steps 1 to 9 (getting objects ready, cleaning the slot data, processing names, authoring material colors, then applying them (either manually or through python), and going through collections to make sure your work is sound) — you are now ready to create the assembly for your 3D product catalogue. This guarantees that your catalog is well-structured, extendable plus export-ready to any pipeline.
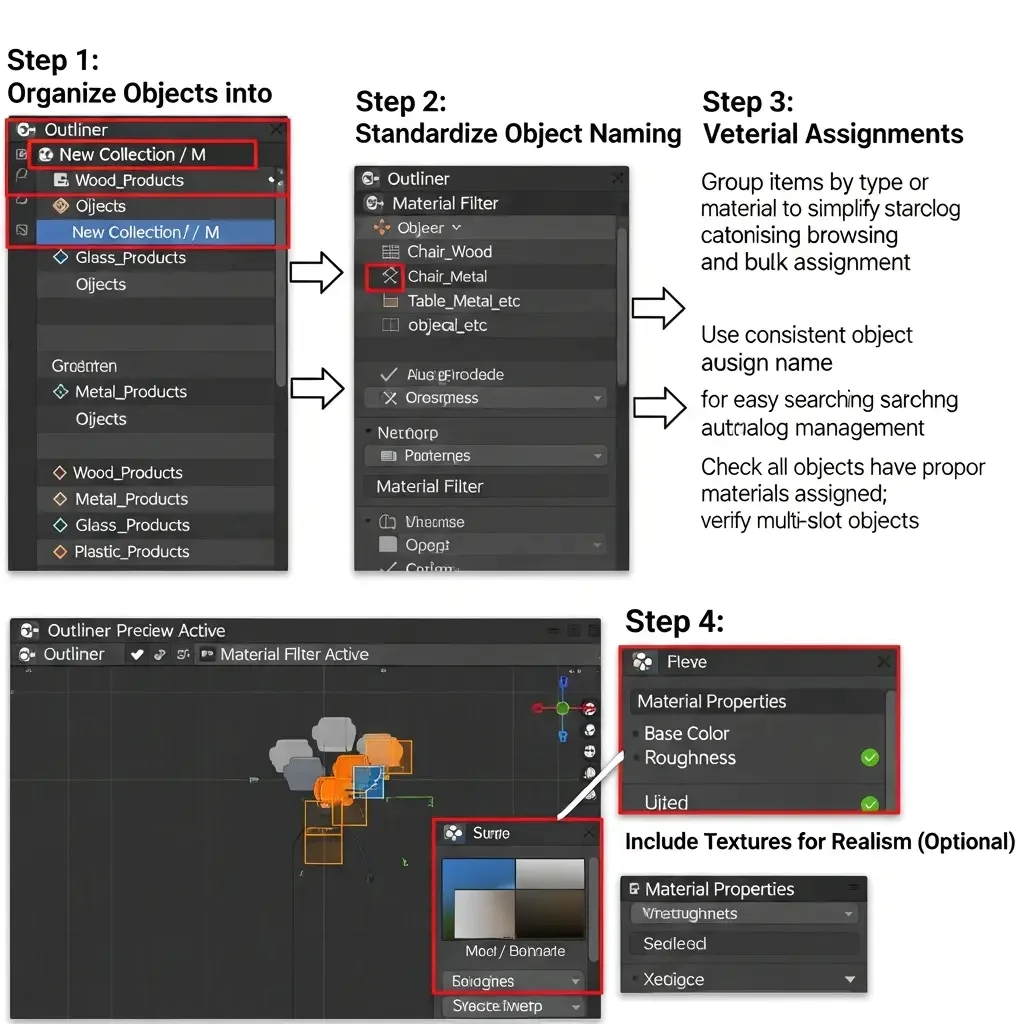
First, organize your objects into logical collections by grouping items based on type or material, as done in Step 6, for example: Wood_Products, Metal_Products, Glass_Products, and Plastic_Products. This makes it easier to browse materials in the catalog and assign them in bulk if needed later. Next, standardize object naming across the catalog using the nomenclature from Step 3, such as Chair_Wood or Table_Metal, which allows for easy searching, automated scripts, and better catalog management. Then, verify material assignments using Step 8 validation methods: switch to Material Preview, use the Outliner’s material filter, and check multi-slot objects to ensure every product has the proper material assigned. Optionally, include textures for realism by confirming that each PBR material has its base color, roughness, and normal maps correctly set, enhancing the visual quality of the catalog.
If the catalog is intended for e-commerce or a visualization engine, prepare metadata by adding properties like product name, material type, and category to each object via Properties → Object Properties → Custom Properties → Add. Next, pack and clean the project by going to File → External Data → Pack All to include textures and removing unused assets via Outliner → Filter → Orphan Data → Delete. Then, export your catalog through File → Export, choosing FBX, GLB, or OBJ, ensuring Objects and Selected Objects (if exporting subsets), Apply Transform, and Include Materials and Textures are checked, creating a ready-to-use product catalog for game engines, visualization software, or e-commerce. Finally, optionally create multiple variations or catalogs with color or material variants by duplicating and renaming objects, assigning different materials, and grouping them into separate collections, resulting in a flexible and modular catalog.
Benefits of Automating Material Assignment
Automation in material assignment offers several key benefits. First, it saves time applying materials manually to hundreds or thousands of objects would be extremely slow, whereas using object naming or batch assignment applies materials in seconds, freeing up time for more creative work. Second, it reduces human error; manual clicks can lead to mismatched materials, missing slots, or duplicates, but automated workflows provide accurate, error-free assignments that prevent rendering or export issues. Third, it scales easily for large catalogs: whether you have 20, 100, or thousands of products, batch assignments and keyword-based naming make managing large collections practical and efficient.
Fourth, it produces professional, export-ready assets. Automatic material mapping with multi-slot support, PBR textures, and standardized naming ensures clean, production-quality models that are game-ready or suitable for real-time rendering and e-commerce use. Fifth, the workflow is flexible and extendable: new parts or materials can be added in seconds, multiple material or color variations can be created without repeating steps, and Python scripting can handle complex or repetitive projects. Finally, it improves organization and pipeline efficiency. Standardized naming, collections, and material slots make searching, validating, and batch processing straightforward, while enabling team members to work collaboratively.
Conclusion
By automatically determining which material should be applied to Blender product catalogs of significant sizes, an error prone and arduous procedure becomes a fast, exact and scalable workflow. By completing Steps 1-9 preparing objects, cleaning up material slots, normalizing names, creating assigning materials, checking assignments and organising collections your 3D files will be consistent across the board ready for rendering, game engines or e-commerce platforms.
Some common mistakes such as material swaps between another object, empty slots or double names are avoided. With optional Python automation, PBR textures and correct collection handling your catalog is ready to be as flexible, modular or professional while staying consistent and saving hundreds of hours of repetitive tasks.
This way, your product catalog will be extensible and scalable while production ready – rather than fiddling with boring repeated work.
