How To Create A Flux Effect
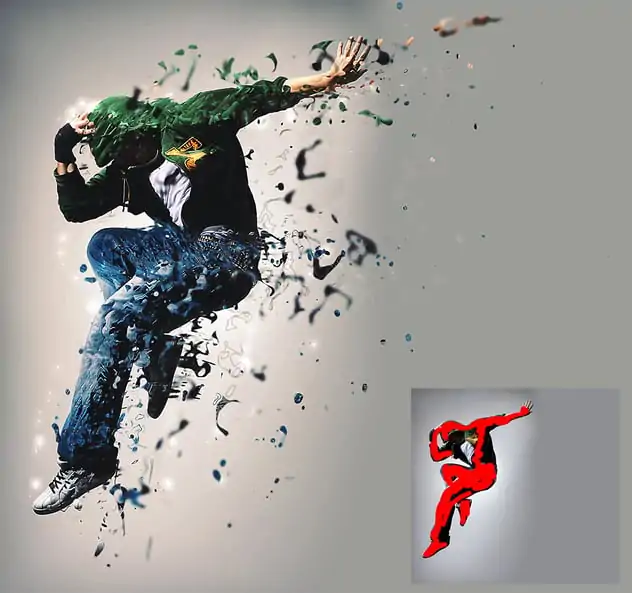
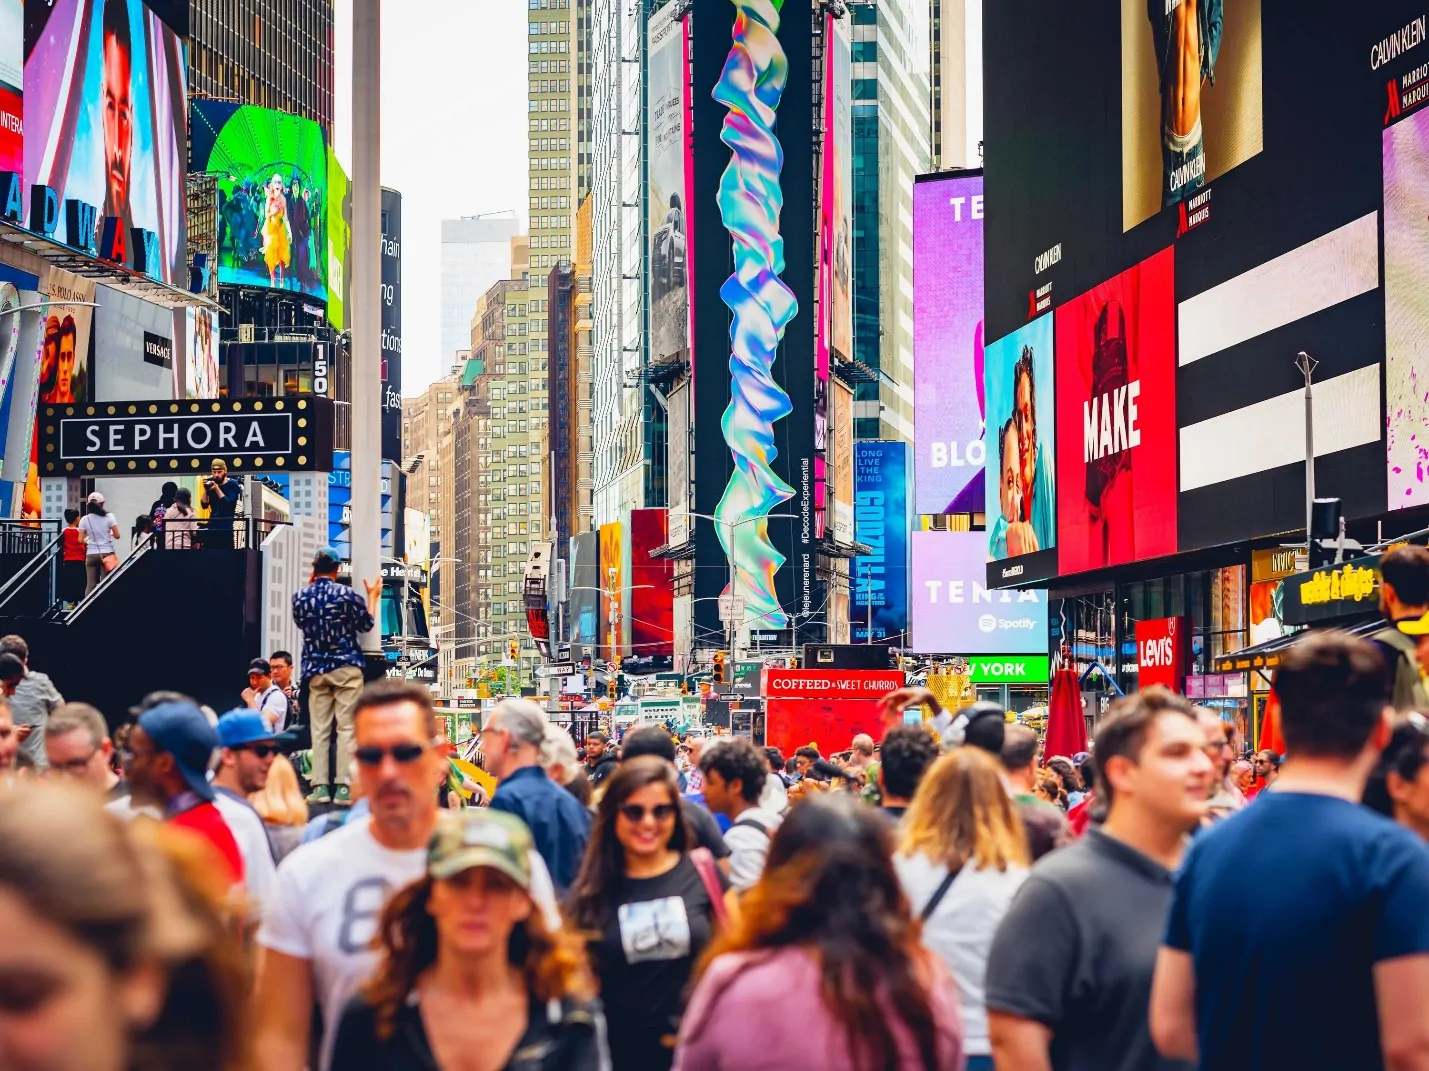
The flux effect indicates vibrant visual scenes that include light variations and the motion of objects in relation to time. It represents the aspects of fluidity and transformation within a photograph. This effect stimulates constant change and movement, highlighting the transforming aspect of life. Whether there are transport hubs, marketplaces, social hubs, or any ceremonial gatherings, the flux effect’s main focus is on capturing these areas where people gather and move across space. A flux effect will give your image a sense of surprise and more vitality, which will help you convey the dynamic idea you wish to convey. In photography, the flux effect is presented using approaches like long exposure, multiple exposure, ICM and some other shooting techniques. Nevertheless, the photographs captured in normal settings can also be modified with the flux effect using advanced image manipulation tools and strategies. The following steps of this blog post will present a practical approach to enhancing images with a flux effect.
Step 1: Selecting A Suitable Image
Select a photograph that has features of motion, such as flowing water, moving cars, individuals strolling, or even clouds floating. These sorts of scenes naturally accommodate themselves to the flux effect, where development and time are key elements of the visual narrative.
Preferably, choose a shot with shifted light conditions or colour contrasts. The shift between bright and dark ranges can upgrade the effect, making it more energetic when you incorporate motion or light manipulation afterwards.
Look into the story or emotion you need the picture to communicate. A flux effect can bring out sentiments of transition, change, or jumble. Therefore, select a subject matter that can successfully speak to this, whether you opt for the serenity of water or the vitality of city life.
Select a photograph with sufficient negative space or open zones where you’ll apply blur, colour shifts, or other flux effects without crowding the composition.
To attain the most excellent results, be sure that your image has high resolution to confirm that the details are sharp enough to handle the manipulation.
Step 2: Creating A Duplicate
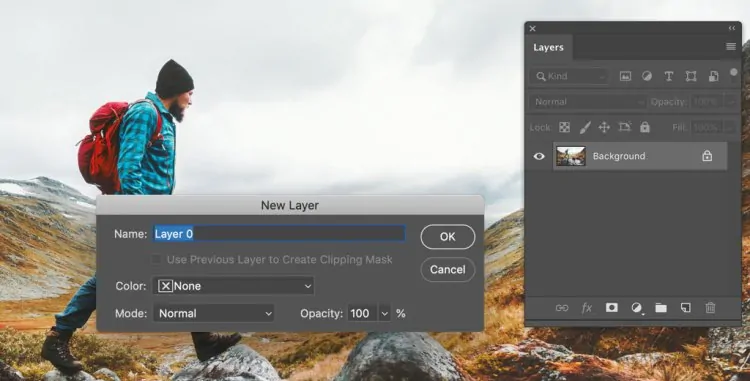
Begin by copying the initial photo layer. In Photoshop, you can do this rapidly by tapping on Ctrl + J, securing the initial shot.
To preserve the reorganization of your workflow, title your layers suitably. For instance, you’ll name the initial layer as Background and the duplicated layer as Flux Effect Layer.
After you have duplicated the layer, hide the initial foundation layer by clicking the eye icon next to it within the Layers panel.
Make sure that the duplicated layer stays editable so you can apply different effects, like blurring or smudging, without changing the base photograph.
That duplicated layer will act as your canvas for the flux effect, allowing you to apply motion or light changes without harming the initial photo.
Step 3: Applying Motion Blur Effect
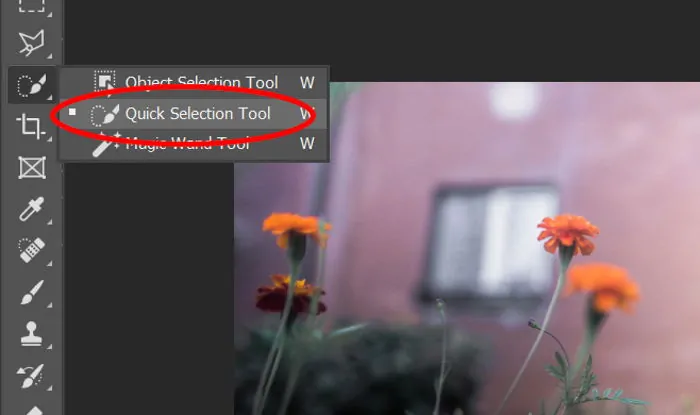
Begin by selecting the portion of the image that you just want to apply the motion blur to. It can be any moving component, including water, vehicles, or people strolling. You can utilize the Lasso Tool or Quick Selection Tool to choose the particular regions you need to affect, guaranteeing that the rest of the picture stays sharp.
Proceed to the Filter menu at the top of the screen, at that point choose Blur and select Motion Blur.

In the Motion Blur settings, alter the Angle to coordinate the heading of the movement in the image. For instance, on the off chance that you are blurring the water flow evenly, you will put the angle between 0 to 180.
Alter the Distance slider to regulate the intensity of the blur. A better distance value will result in a stronger blur, whereas a lower one will allow a more nuanced effect. Try to discover the proper balance for your picture.
Once you are done applying the motion blur, polish the selection as required. You can utilize a soft Eraser Tool or Layer Mask to tend up any blur that will have influenced ranges you did not need to change. It will guarantee a natural, flowing movement without abrupt lines.
Step 4: Creating Fluid Movements
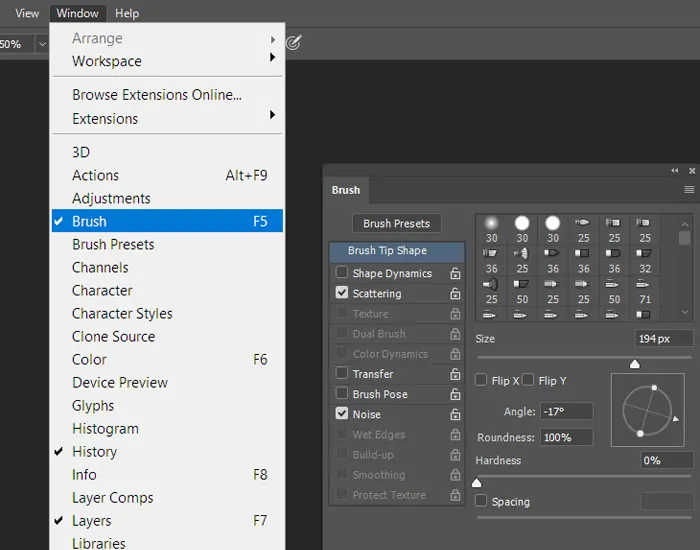
Activate the Smudge Tool from the toolbar. You can easily locate it by clicking and holding the Blur Tool or Sharpen Tool, then choosing the Smudge option from the dropdown menu. That tool permits you to push pixels around to make fluid, energetic movements, perfect for upgrading the flux effect.
Put the brush size and strength based on the ranges you need to manipulate. A gentler, lower-quality brush works nicely for subtle development, while a stronger setting is suitable for more sensational effects.
Delicately drag the brush along the regions that require fluidity, like moving water, smoke, or hair blowing within the wind. The smudge tool will extend pixels, making a smooth, streaming transition. Concentrate on making a motion that feels natural and continuous.
Utilize the smudge tool to consistently blend the manipulated zones with the rest of the picture.
Use the Zoom in to polish any regions which will look excessively distorted. You can alter the brush size or strength as required to make the development more modest or pronounced.
Step 5: Presenting Multiple Exposures
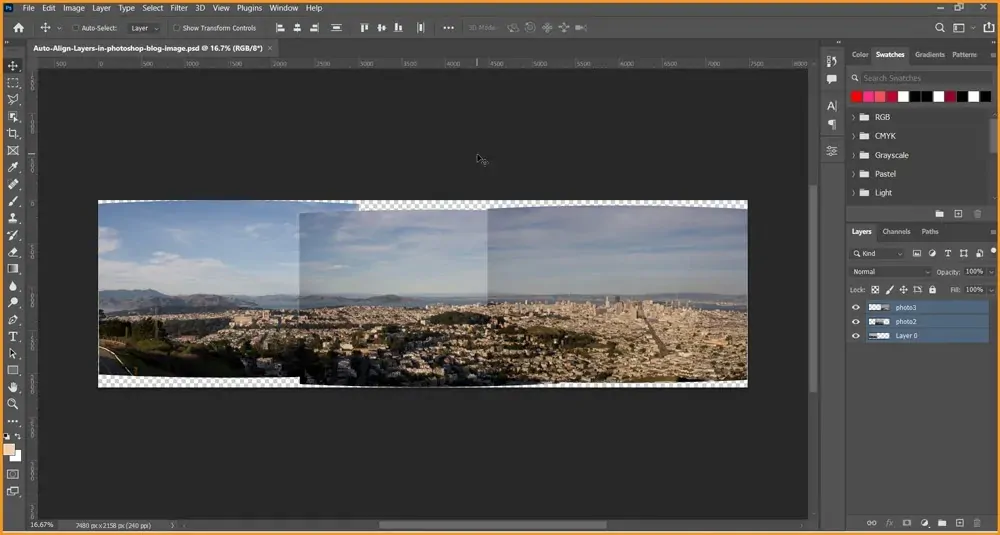
To include a sense of time or evolving motion, make a duplicate of your picture multiple times. Each duplicate will depict a different moment or stage of movement. For example, you can catch the movement of an individual in different stages of the varying light in a scene.
Set the different layers so that they adjust suitably. You can utilize the Auto-Align Layers feature via Edit > Auto-Align Layers on the off chance that the photographs were captured from the same perspective. It can confirm that you get a smooth transition between layers.
Decrease the opacity of each extra exposure layer to form a ghost-like impact. By bringing down the opacity, each layer will mostly uncover the one below it, making sense of development and transition.
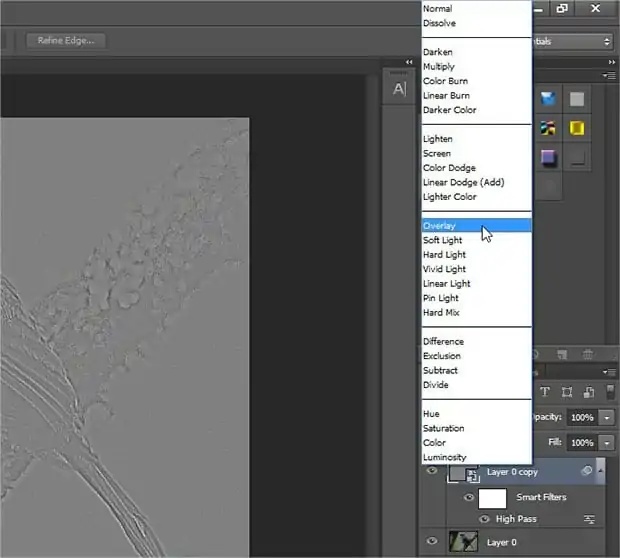
Play with diverse blending modes such as Overlay or Soft Light to attain different effects. These modes help the exposures merge in inventive ways, including profundity and complexity in the final photograph.
Utilize layer masks to specifically reveal or cover up elements of the exposures. It helps polish where you need the flux effect to seem, guaranteeing that certain ranges of the photograph stay sharp while others blur or transition.
Step 6: Introducing Color Variations
Begin by utilizing the Brightness/Contrast adjustment layer to manipulate the overall light within the photograph. Expanding contrast can aid in emphasizing areas of motion or boost dynamic changes within the image, while modifying brightness can mimic varying light conditions over time.
To form smooth moves in the light, utilize Gradient Maps. Select gradients that recreate lighting changes like a warm-to-cool gradient or a day-to-night transition.

Utilize the Hue/Saturation adjustment layer to redirect the colours within the picture. Play with small changes in hue to recreate changes in lighting or time of day. For instance, small transitions towards cooler tones can inspire dusk, whereas warmer tones propose the golden hour.
Utilize soft gradient overlays to present gradual colour changes, which can advance and intensify the feeling of time or movement. These overlays can make a more ethereal, flowing appearance.
Utilize the Dodge Tool and Burn Tool in particular zones to improve the highlights and shadows.
Step 7: Polishing The Composition
Audit your photograph and alter the opacity of each layer to guarantee a natural blend. Sometimes, a slight reduction in opacity can smooth out fierce moves and let the flux effect look more unified and fluid.
On the off chance that certain ranges seem too blurred or harsh, utilize a soft eraser having low opacity to tenderly remove extra blur or flux effects. On the other hand, utilize layer masks to hide or uncover details of the effect, giving you more dominion over the areas of movement or transition.
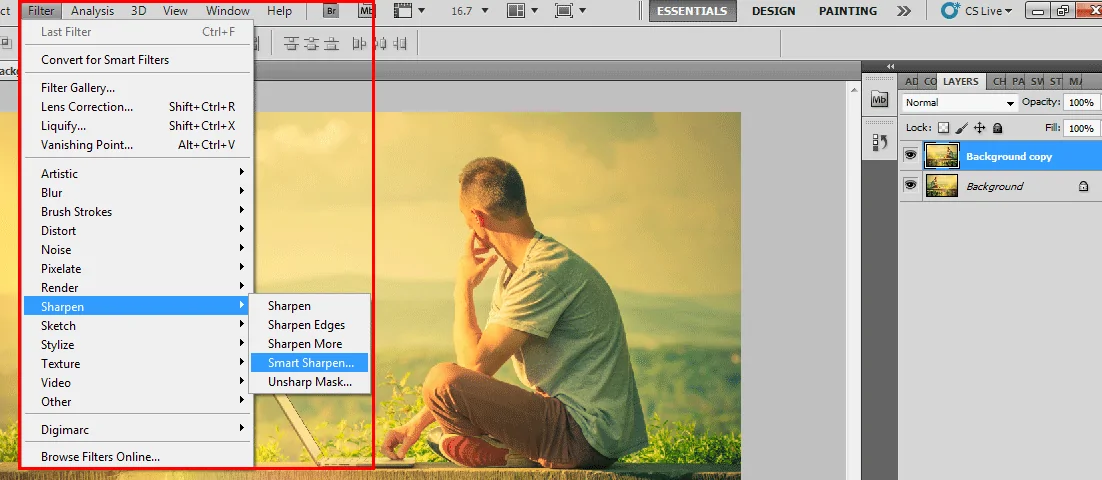
Once you have accomplished the specified flux effect, utilize a subtle sharpening filter to enrich particular focal points within the image, such as stationary components. That contrast between sharp and blurred regions includes depth and highlights the motion or time-lapse.
Audit the photograph as a whole, making sure that the flux effect does not overpower the composition. Modify the positioning, contrast, or brightness of certain components to preserve, adjust and focus.
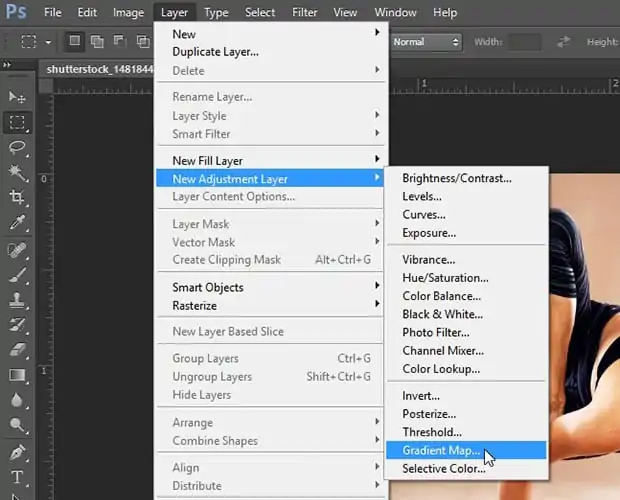
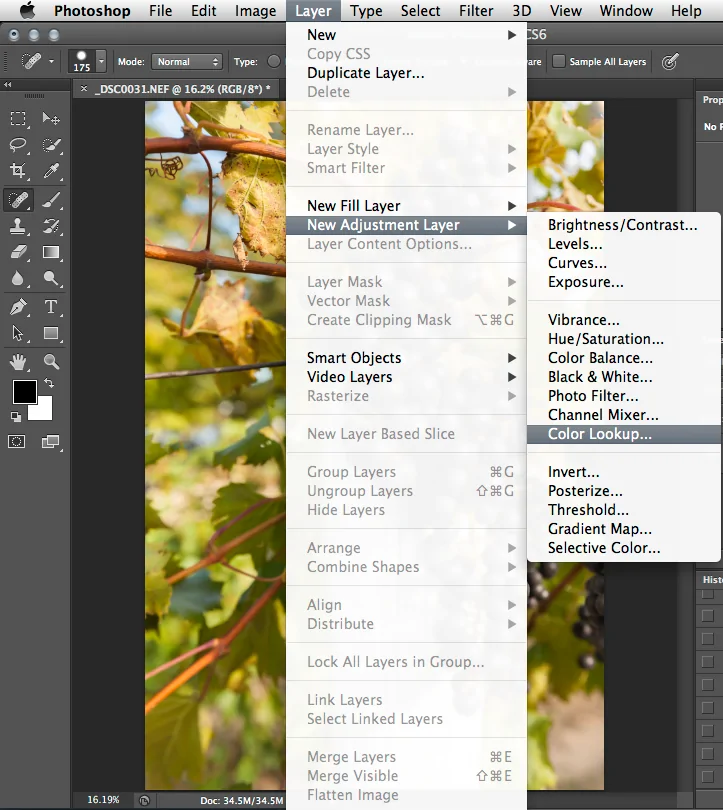
Utilize Color Lookup Tables or Selective Color Alterations to include a conclusive tonal shift to the picture. That could harmonize the lighting, colour, and flux effects, improving the disposition or story you are opting for.
In the end, you can save and export the final composition within suitable settings.
Conclusion
In summary, the application of the flux effect to your common images will add a sense of blended motion, often exhibiting trails of movement. Also, the shift of colour tones adds to the image’s narrative, emphasizing the transient nature of life. The utilization of different lighting enhancement techniques, including dodge and burn and colour gradient settings, can enrich shadows and highlights to direct the onlooker across multiple zones. With the immobilized objects kept sharp, the movable ones are blurred to add more energy and animation within the portrayed scene, thus adding to the overall dynamism.
