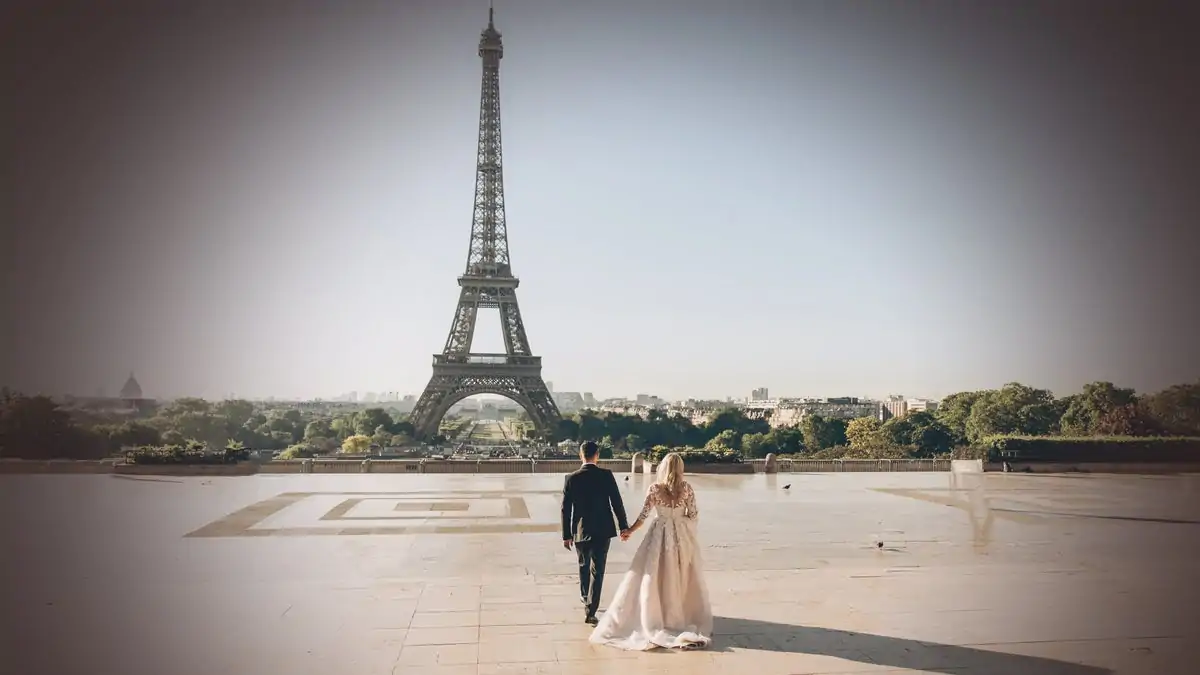
How To Create An Oculus Effect
The oculus effect often indicates a remarkable photographic technique in which a circular frame surrounds the main subject or the central zone of the image. Just like creating a vignetting, the surrounding areas of the circular frame are darkened or blurred, often mimicking the way we see things through a telescope or peephole. It adds a sense of isolation as well as emphasis to the photographs. To capture these shots, special photographic equipment, including fisheye and tilt-shift lenses and circular frames, are utilized with some additional arrangements. Nevertheless, advanced image manipulation tools like Photoshop, Lightroom, GIMP and many more make it accessible for everyone to add intriguing effects like the Oculus into their images. The main techniques involve blurring, feathering, use of the elliptical marquee tool, shadows and highlights adjustments, curves and levels, and colour grading with some other basic adjustments like brightness and contrast. The following steps of this blog post will further elaborate on the process of adding an Oculus effect to an image.
Step 1: Uploading The Image
Initiate Photoshop on your PC and wait for the workspace to load.
Tap on File, then Open, and select the photograph you need to alter from your image files. Alternatively, you can drag and drop the picture straightforwardly into the Photoshop workspace.
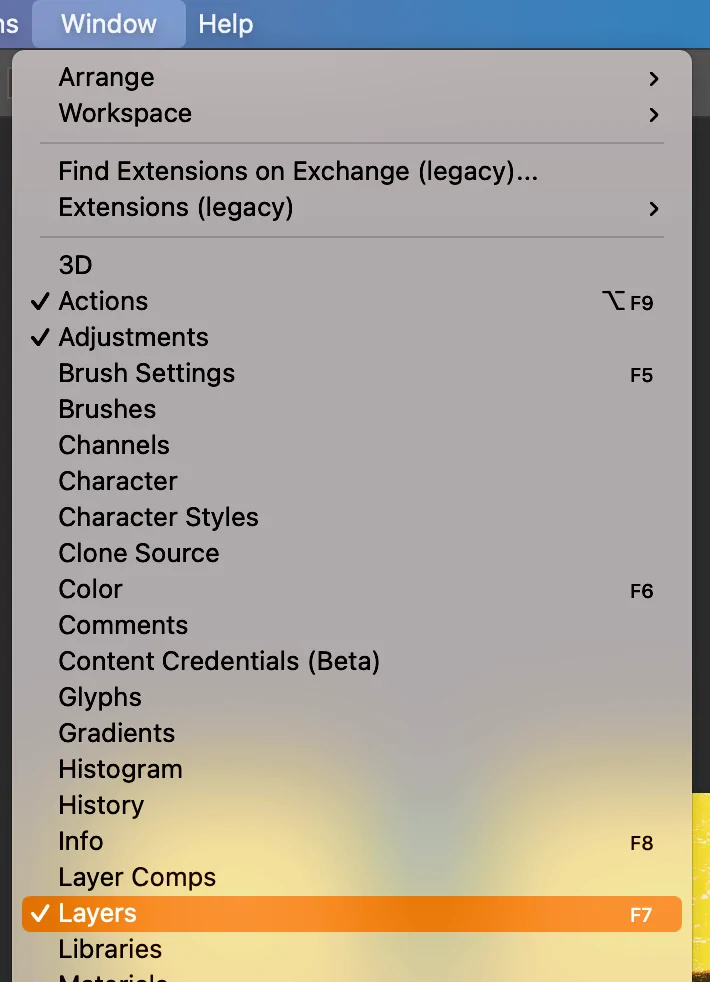
After the chosen picture loads, head to the Layers Panel or use F7 if not visible and right-tap on the Background layer. Select the Duplicate Layer option to work on a duplicate without influencing the initial form.
As required, proceed to Image and choose Adjustments and Brightness/Contrast or Levels to moderately upgrade the picture before proceeding to apply the Oculus effect.
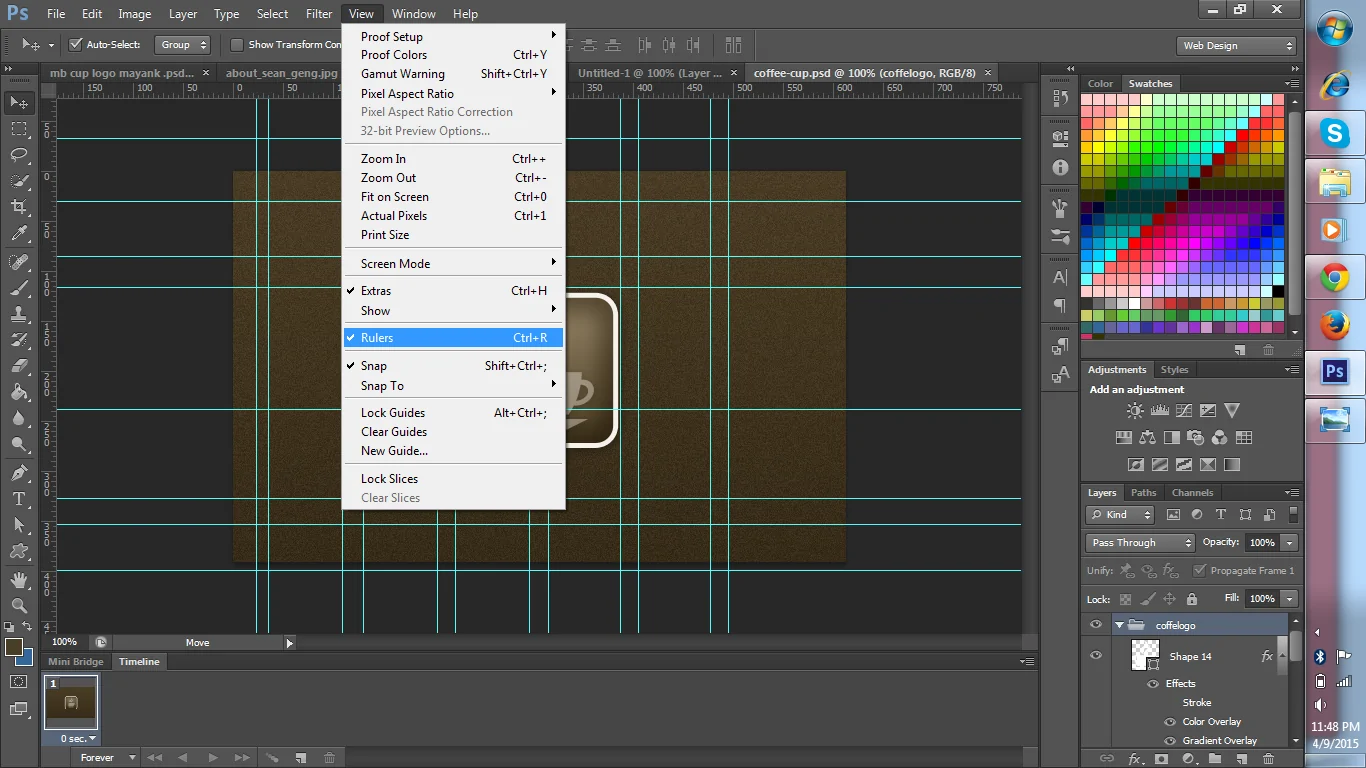
Tap on Ctrl + R to activate rulers. Pull guides from the top and side rulers to help in positioning your circular selection within the following phase.
Step 2: Selecting The Central Zone
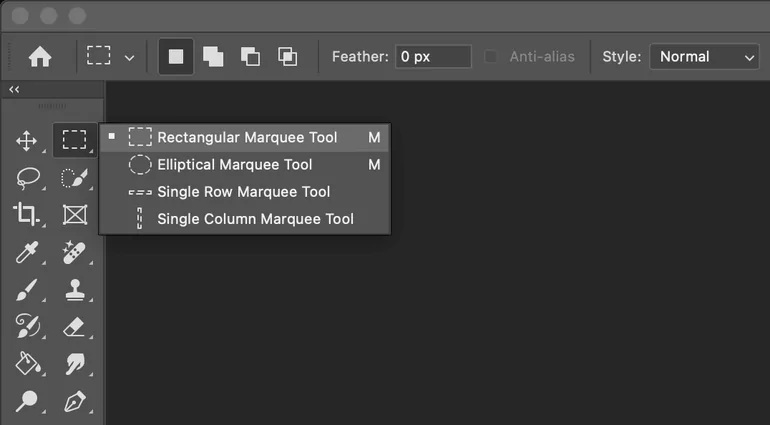
Within the Tools Panel, find and choose the Elliptical Marquee Tool. On the off chance that you can’t find it, right tap on the Rectangular Marquee Tool and select the elliptical option.
Tap and drag on the picture while holding Shift to form a flawless circle. In case you need an oval form instead, release Shift while dragging.
On the off chance that the circle is not centred accurately, tap on Spacebar while dragging to reposition it. After releasing the mouse, you’ll need to utilize the Arrow Keys for small alterations.
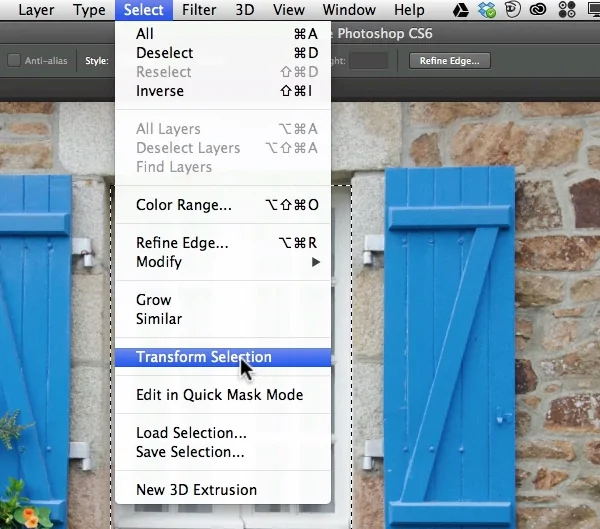
Move to Select > Transform Selection to resize or move the selection accurately. Use Shift + Alt with scaling to preserve proportions from the centre.
In case you need smoother blending, go to select > Modify > Feather, set it to 50-100 pixels, and press Ok. It will soften the transition between the chosen and unselected ranges.
Step 3: Applying Feathering Technique
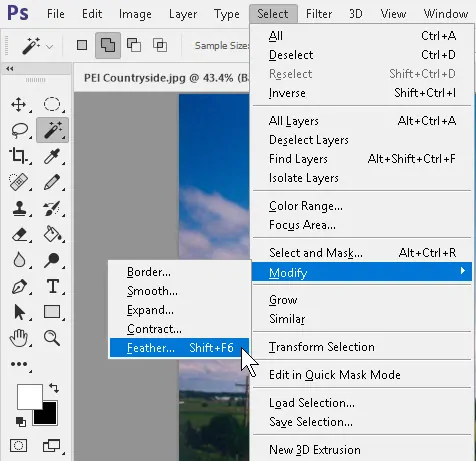
Along with your circular selection active, proceed to the top menu and tap Select, choose Modify, then Feather. It will soften the edges of the selection to provide a smoother transition.
A dialogue box will show up asking for the feather radius. Input a value between 50 to 100 pixels. A higher radius value makes a softer transition, while a lower one keeps the edge more defined.
On the off chance that you are unsure about the feather radius, tap on Ctrl + H to cover up the selection and note how it blends. As required, undo using Ctrl + Z and reapply a different feather value.

The application of a well-feathered selection prevents abrupt edges when applying blurring or darkening in later phases, making the Oculus effect seem more natural.
Presently, the selection has a soft edge, you are prepared for the next step of inverting it and applying effects outside the circle.
Step 4: Inverting The Selection
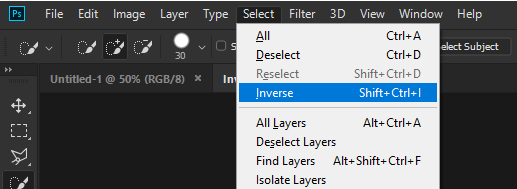
Make the circular selection active, proceed to the top menu and press Select > Inverse or tap on Shift + Ctrl + I. It will invert the selection, so the external zone of the photo is now selected rather than the circle.
You will observe the marching ants around the edges of the shot, not the circle any longer. It can make sure that the external area is now chosen.
The center circle is now not selected, permitting you to apply alterations and effects to the external region. Make sure to keep this selection active to apply adjustments to the proper portion of the picture.

To confirm that the selection is correct, you can use Ctrl + H, hiding the selection lines. It will help you view the picture without distractions during your work on effects.
Presently, the external region is chosen, and you are now prepared for darkening or blurring the outer region to start making the Oculus effect.
Step 5: Darkening The Exterior
To form the Oculus effect, begin by darkening the external area. Include a Curves or Levels adjustment layer from the Layers Board.

After the adjustment layer is chosen, keep the mid-tones slider towards the left to decrease brightness, making a vignette around the outer selection.
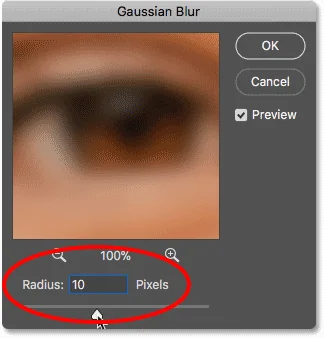
On the off chance that you prefer a blurred outer edge, proceed to Filter Blur and Gaussian Blur. Adjust the Radius slider to direct the strength of the blur. A small radius value makes a subtle blur, whereas a bigger radius results in a more sensational effect.
As you feathered the selection prior, the transition from the darker or blurred region to the centre ought to feel consistent. On the off chance that the edges seem too harsh, you’ll increase the feathering radius within the Feather setting once more.
In the event that the effect looks too solid, lower the opacity of the adjustment layer to regulate the intensity of the vignette or blur.
For now, hide the adjustment layers to examine the before and after effects. Alter as required to induce the required strength of darkening or blurring.
Presently, the external range is balanced, you are all set to include colour grading to give the picture the final Oculus appearance.
Step 6: Using Color Grading
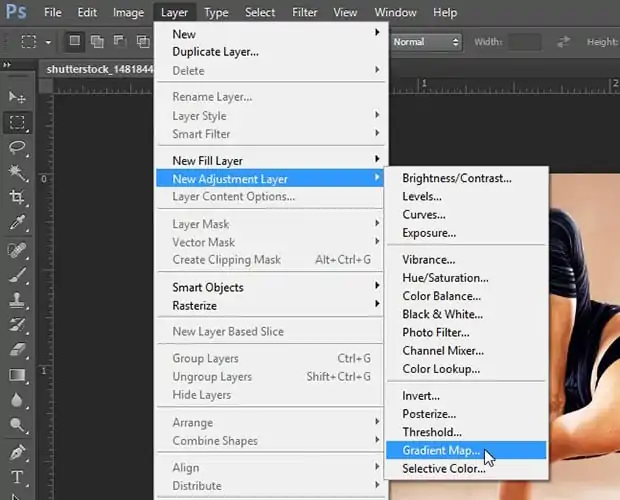
Include colour grading by moving to the Layers Panel and tapping the Adjustment Layer symbol that looks like a half-filled circle. Select Color Balance, Hue/Saturation, or Gradient Map depending on the specified effect.
Utilize the sliders to adjust Shadows, Midtones, and Highlights. Include reds, oranges, or yellows for warm tones, or blues and cyans for cool tones.
Alter the Hue to move colours over the spectrum or alter Saturation to heighten or mute particular colours.
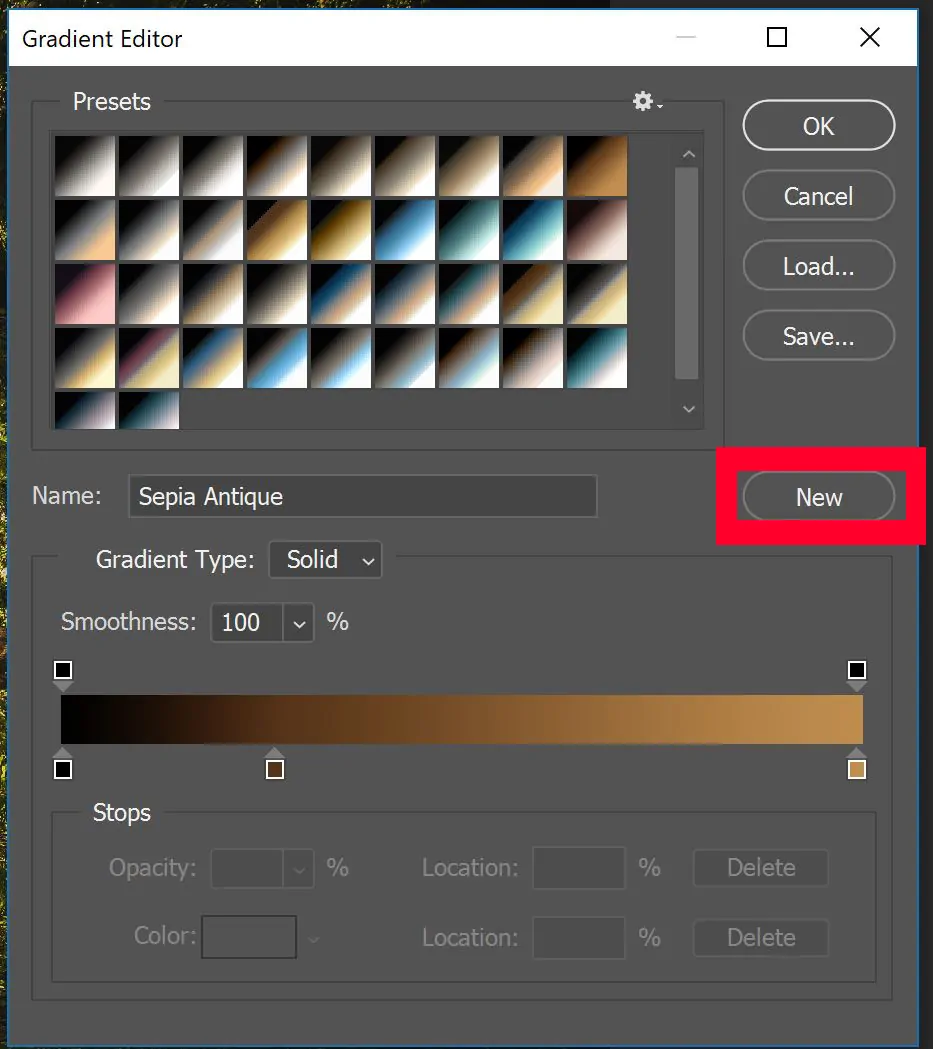
Add a gradient map to introduce a coloured overlay that redirects the whole tone of the picture. You’ll use preset gradients or make a custom one that accommodates the temperament you need.
Once you have applied a colour adjustment, alter the Opacity of the adjustment layer to make the colour grading subtle or dramatic.
Experiment with changing the blending mode of your colour adjustment layer to modes such as Overlay, Soft Light, or Multiply for diverse effects. That can upgrade the colours without overwhelming the picture.
Toggle the visibility of the adjustment layer on and off to compare the altered and original picture. Perform any needed final tweaks to the colours till you are happy with the overall appearance.
Step 7: Finalizing The Image
Survey the entire composition to be sure that the Oculus effect looks natural. Use the Zoom in to review the edges and in general balance of light, blur, and color grading. Be sure that the focus is on the centre, and that the external zones have a smooth transition.
In the event that the effect feels too strong, alter the opacity of your alteration layers or change the layer blending modes. Lessening opacity can make the effect more moderate and harmonious.
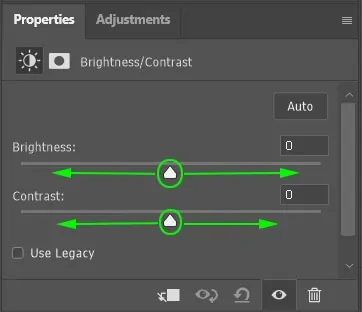
As required, you’ll tweak the brightness or contrast of the centre circle to improve focus. That can be done by selecting the inward zone with a Feathered Elliptical Marquee Tool and employing Curves or Levels to lighten it.
After you are satisfied with the effect, you can flatten the layers to streamline the file. Move to Layer and click Flatten Image. Ensure to save a duplicate with layers intact in case you might need to alter it afterwards.
Proceed to File and click Save As to save your work. Decide on the file format you prefer, like JPEG for web use or PNG for high-quality yield. Be sure to title your file in like manner and select the correct settings for export.
Conclusion
To sum up, the addition of an oculus in image editing serves multiple goals, from creating a spotlight effect to enhancing the critical objects within photographs. It aids in minimizing the distracting elements from the visual scene and smoothly directs the viewers’ attention towards the central subject or theme. For digital artists, this technique is truly a useful tool in highlighting particular aspects of the images and artworks or enriching the overall aura. It provides the visuals with depth and drama while making the subject matter stand out, often simulating looking at something through a telescope or similar tools.
