How To Create A Decoupage Effect
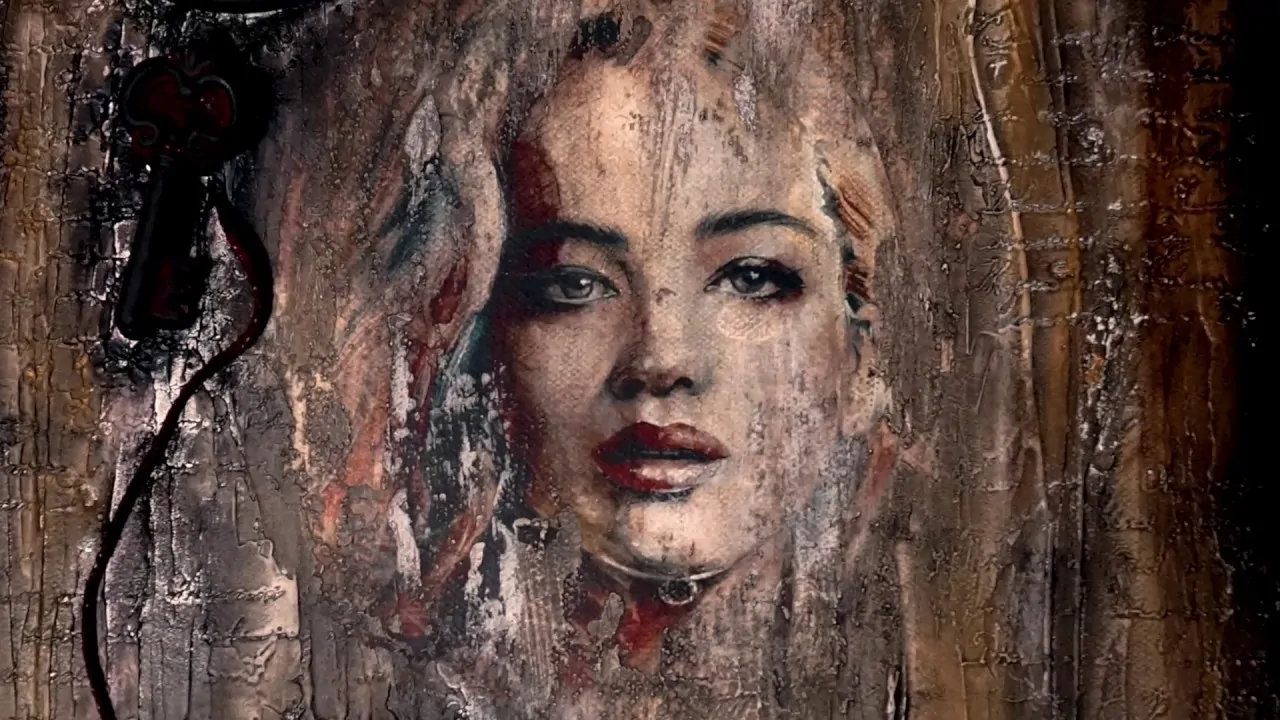
Decoupage has a rich and lengthy history that dates back to many different styles from far-off nations. Chinese peasants began making colourful paper cutouts to adorn windows, lanterns, gift boxes, and other items as early as the 12th century. It is believed that the Chinese habit and proficiency with scissors originated in Eastern Siberia when Siberian nomads’ tombs were adorned with cutout felt figures and decorations. The tombs are older than Christ. Cut paper has also been used for decorating by Polish and German craftspeople for many years. Polish women and children, in particular, became extremely skilled at cutting folded coloured paper into geometric patterns and stylizing flowers, animals, and birds by hand. Now it has become a common approach in contemporary art which involves cutting and pasting cutouts to provide a painting impression of wood, metal, or glass. Beginners can easily master this skill. It also has the capacity to reach new creative heights. Decoupeurs are fine artists who work in this field. This art can be done on any surface, but the most popular ones are wall art, furniture, wooden boxes, trays, metal, clear glass, and clay pots. Moreover, modern artists keep on reviving this art form to make unique handmade crafts. Also, the handmade layered feel of decoupage pieces also inspires digital artist to enhance their artworks and images. This blog will further proceed with a step-by-step process of introducing a digital decoupage effect into an image.
Step 1: Choosing The Base Image

Begin with a high-resolution photograph as your fundamental subject. that might be a portrait, a scene, or any shot that can act as the establishment for the decoupage effect.
Gather decorative components like botanical designs, vintage paper surfaces, newspaper clippings, or aesthetic shapes that are to be layered onto the image.
Utilize the Lasso Tool, Pen Tool, or Magic Wand in Photoshop to deliberately cut out regions of the picture or chosen decorations. These cutouts will be the layered pieces within the decoupage tone.
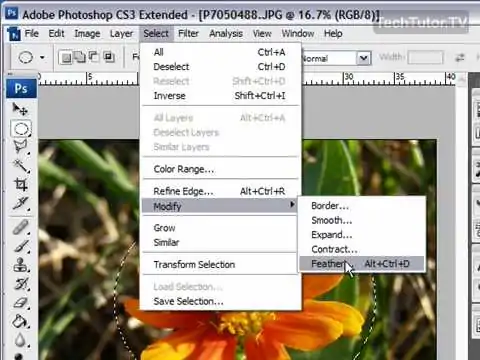
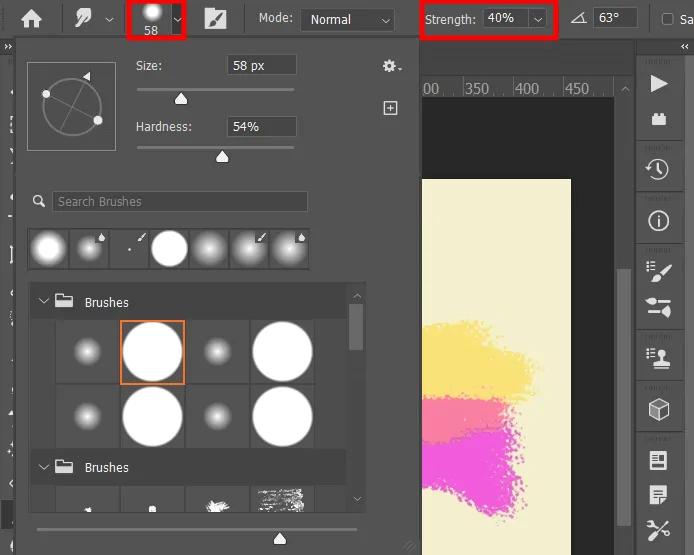
Make the edges smooth and feather the cutouts’ rims to evade harsh divisions. Utilize the Eraser Tool or Layer Mask to remove undesirable parts and make a natural blend.
Put each cutout on a different layer so they can be balanced, resized, or repositioned without influencing the initial image.
Decrease opacity or utilize blending modes such as Multiply or Overlay to blend the cutouts consistently into the image.
This step will establish the composition, and help for a realistic decoupage effect when layering and texturing the photograph further.
Step 2: Layering The Elements
Set the cutouts over the base image in a way that upgrades the composition. Covering and layering components can create profundity and a handcrafted development.
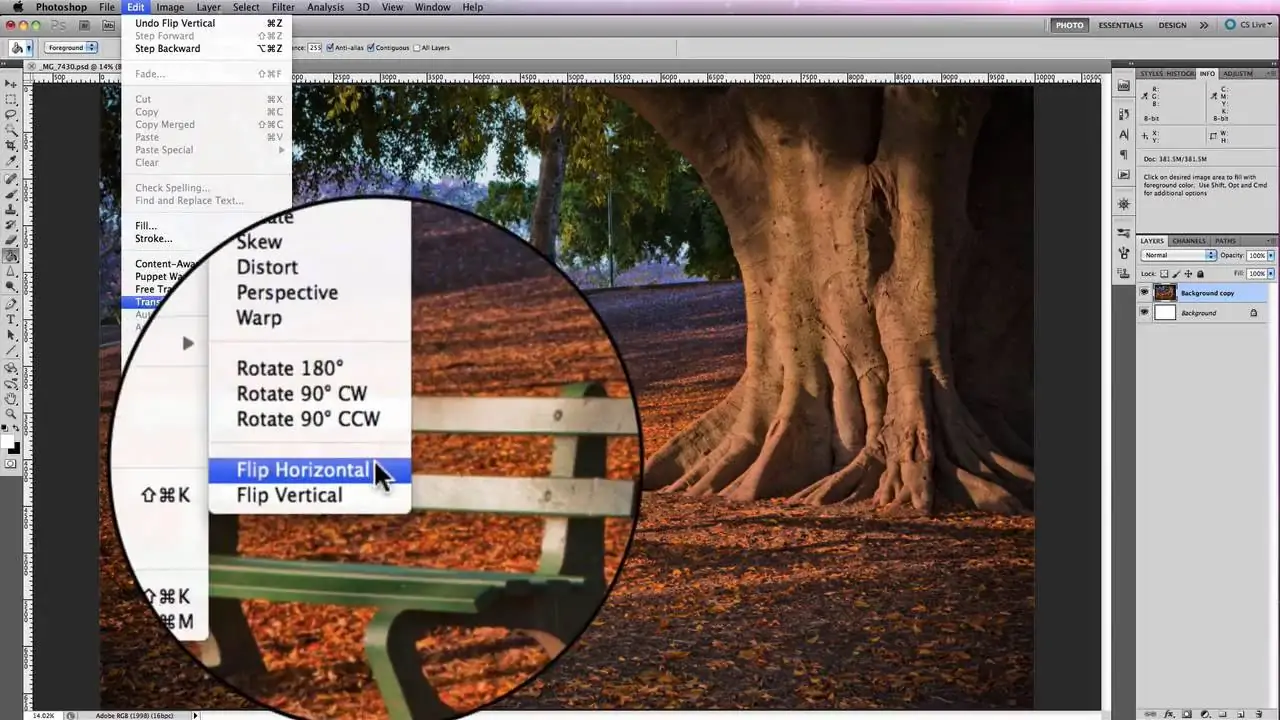
Alter the size and orientation of each cutout to accommodate the picture. Small rotations and scaling shifts help in accomplishing a genuine, collage-style effect.
Put some components behind and others before the leading subject to form a multi-dimensional formation imitating real paper layering in conventional decoupage.
Name and group comparable components to make the workspace organized. It can make it more straightforward to alter or modify pieces later.
Play with distinctive placements, guaranteeing balance and visual charm. Prevent messy arrangements; leave some negative space to preserve a raw aesthetic.
Choose a primary area of centre within the photograph where the eye naturally directs, making sure that the layered elements enhance instead of distracting from it.
This step will assemble the foundation for a visually engaging decoupage impact, making the composition seem creative and balanced.
Step 3: Adding Paper Textures
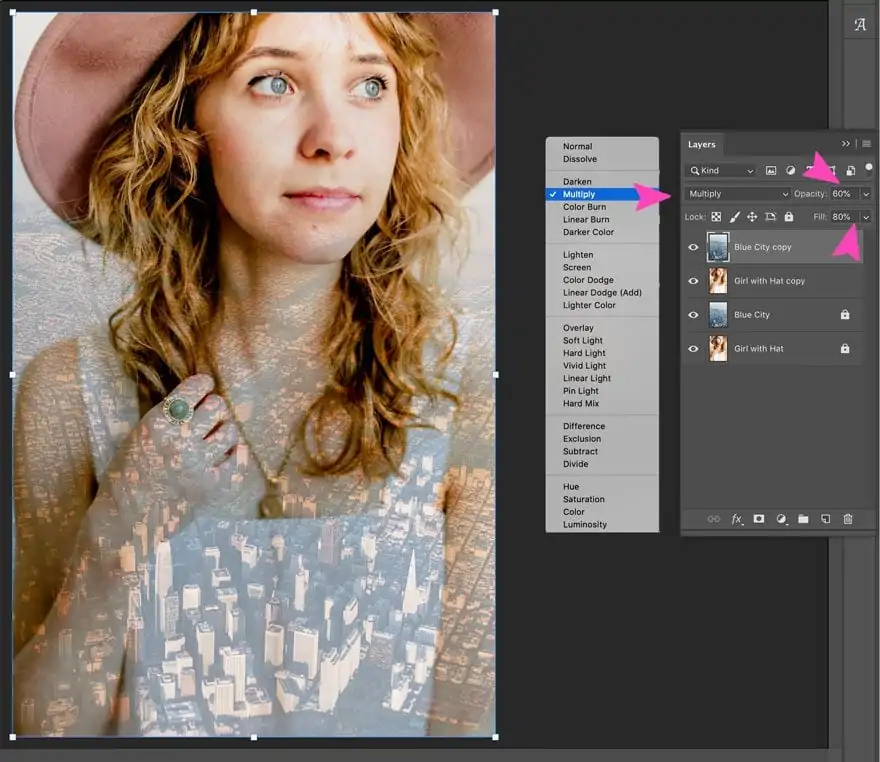
Utilize blending modes such as Multiply, Overlay, Soft Light, or Screen to integrate cutout elements organically into the base photograph. It will help make a consistent, layered feel.
Decrease the opacity of a few cutouts to let them show up more translucent as if they are delicately pasted onto the surface instead of pasted on top in an unnatural way.
Layer surfaces like crumpled paper, canvas, or aged material to replicate the handcrafted impression of a conventional decoupage. Employ Layer Masks to apply textures specifically.
Utilize the Eraser Tool, Blur Tool, or Layer Masks to ease harsh edges and make the paper pieces show up naturally inserted into the photograph.
Include subtle shadows beneath some cutouts utilizing the Drop Shadow effect or a delicate brush to allow a slightly raised, natural paper effect.
Utilize Hue/Saturation, Curves, or Gradient Maps to alter tones and coordinate all components, guaranteeing a harmonious, vintage, or aesthetic appearance.
It improves realism by making the decoupage layers integrate easily with the photo, mirroring a genuine paper collage effect.
Step 4: Adding Depth And Shadows
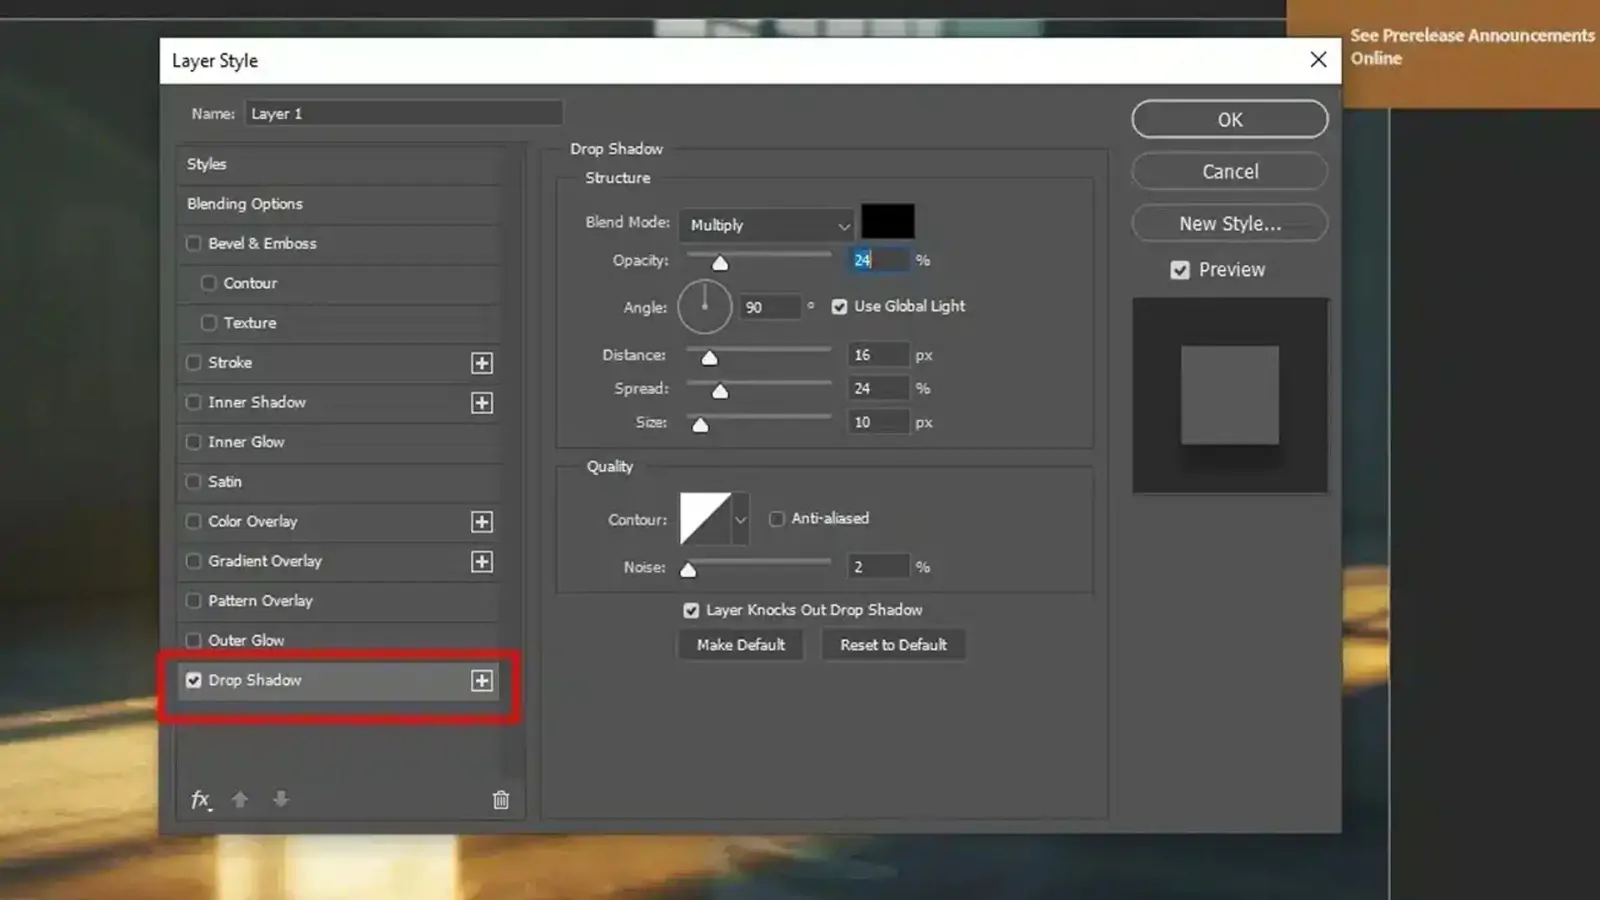
Include subtle Drop Shadows to the cutout layers utilizing Photoshop’s Layer Style panel. Alter opacity, blur, and angle to make a naturalistic lifted-paper effect.
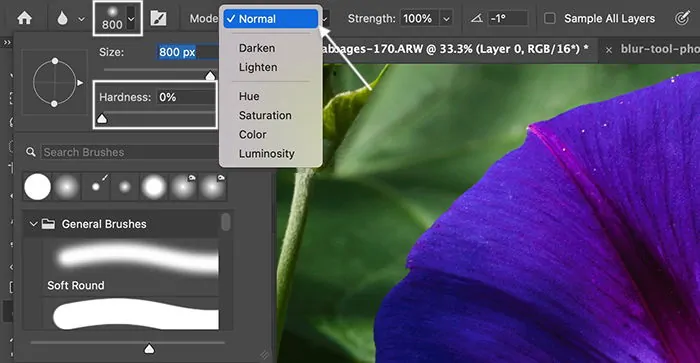
To get a more natural appearance utilize a soft round brush on a new layer to paint tender shadows beneath particular cutouts, making them show up somewhat raised.
Drive certain components forward or backwards by revising shadow intensity. More extensive, gentler shadows propose a higher lift, while smaller, sharper shadows make a close-to-surface impression.
Decrease harsh edges in shadows utilizing the Blur Tool or Gaussian Blur, so that they fade naturally into the foundation.
Include nuanced highlights along the edges of some cutouts employing a delicate white brush on low opacity, upgrading the illusion of layered paper.
Make shadows steady with the image’s natural light source to preserve authenticity. Alter angles as required to correspond to the general lighting.
At the end of this step, the decoupage effect will be deepened, making the cutouts look physically layered, including authenticity and dimension to the image.
Step 5: Softening The Edges
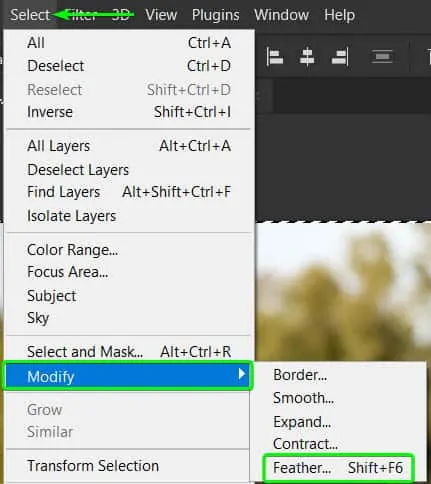
Utilize the Feather option within the selection tool or apply a delicate Eraser Brush to nuancedly fade sharp edges, making the cutouts mix easily into the composition.
Pick a textured Eraser Brush to tenderly erase parts of the edges, imitating the worn, torn appearance of genuine paper cutouts.
Instep of erasing directly, utilize a Layer Mask and paint with a soft black brush to blur or distress edges without forever modifying the photograph.
Spread a cracked paper or torn-edge surface and integrate it with Multiply or Soft Light mode to form a natural, handmade effect.
Gently drag the Smudge Tool along the edges to form a slightly ragged, hand-cut formation instead of flawlessly smooth lines.
The use of a low-opacity noise filter can include a classic, aged-paper feel, making the decoupage components show up more authentic.
This step enriches realism by breaking the digital sharpness, making the cutouts seem inherently aged and blended into the image.
Step 6: Applying A Gloss Effect
Make a new layer, fill it with white or light beige, specify its blending mode as Soft Light or Overlay, and decrease the opacity to provide a modest varnished appearance.
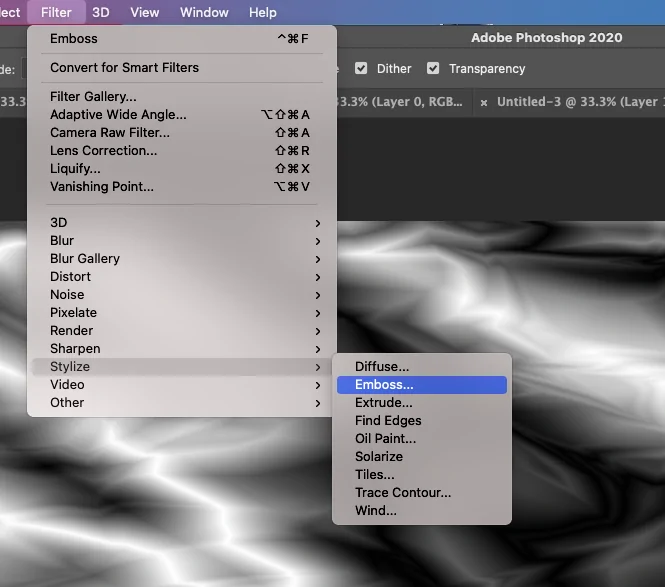
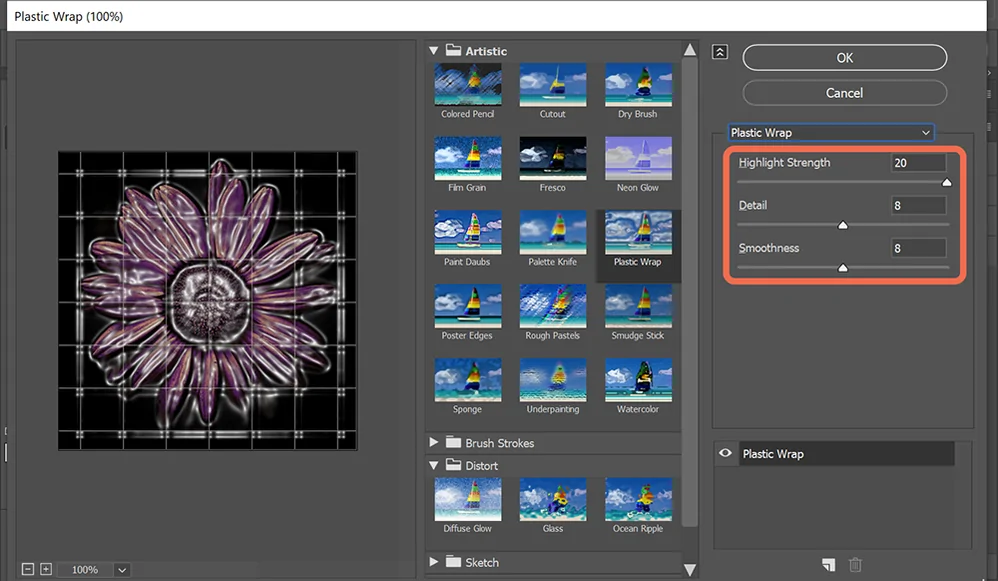
Add the Plastic Wrap filter via Filter > Artistic > Plastic Wrap or a nuanced Gaussian Blur to form the impression of a smooth, fixed surface.
Utilize a delicate white brush to paint thin highlights along the borders of some cutouts, making them gently coated with varnish.
Lay a canvas or brushstroke surface, putting it to Overlay or Multiply, to duplicate the look of glue-brushed paper with a slight luster.
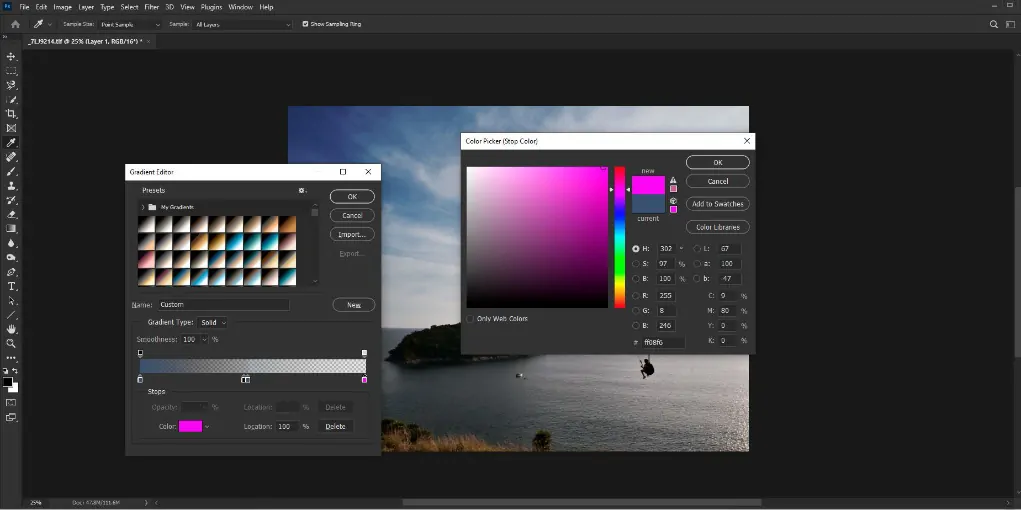
Utilize a Gradient Tool to include delicate, diffused lighting, mirroring the shiny, multi-layered finish of conventional decoupage.
Polish the strength of the gloss effect to prevent making the photograph look excessively artificial, keeping up a suitable handcrafted look.
This step provides the decoupage effect a cleaned, finished impression making it show up like the layers have been fixed with a shielding glaze.
Step 7: Polishing The Composition
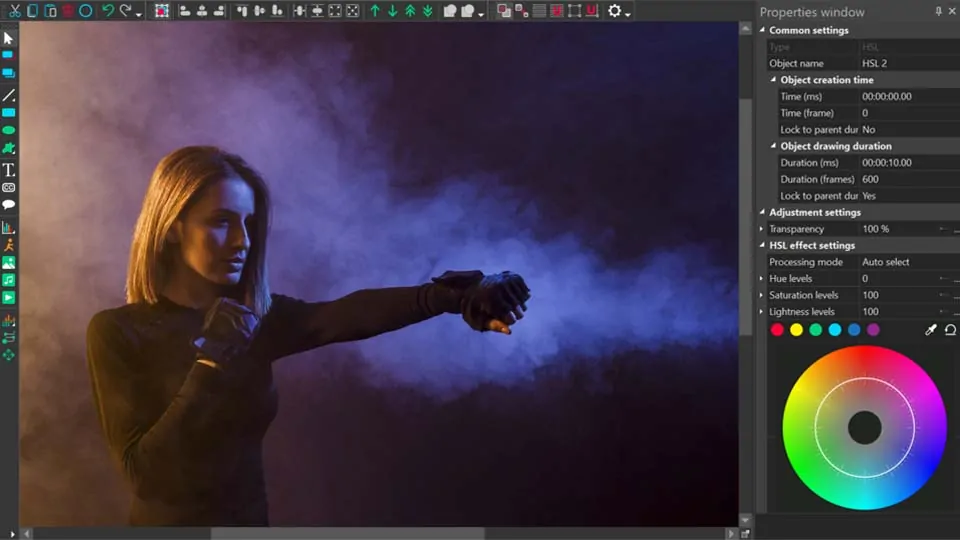
Utilize Hue/Saturation, Curves, or Color Balance to harmonize the tones of the cutouts and the base image, guaranteeing a coherent appearance.
Add a delicate sepia, faded, or warm-toned filter to improve the handmade and aged-paper effect typically seen in decoupage art.
Utilize a subtle paper, canvas, or grunge surface, putting it to Overlay or Soft Light, to improve the natural feel of the layered components.
Utilize the Blur Tool on the edges of cutouts for a true-to-life blend and the Sharpen Tool on key zones to preserve detail.
Polish the contrast, brightness, and vignette effects to improve the depth and highlight details within the composition.
Include a low-opacity white gradient or delicate light layer to give a slightly lit-up, cleaned impression. After that you can save and export the final image within suitable settings.
Conclusion
In conclusion, applying a decoupage effect gives your photos a tactile or vintage sense and adds an aesthetic paper texture. The composition appears well-structured when various paper textures are layered on top of it. You may stack cuts of various components and adhere them to the image to give it a multi-dimensional appearance, much as in genuine decoupage. Last but not least, although the time and effort required to create handcrafted decoupage pieces is valuable in and of itself, the digital decoupage approach makes this art accessible with less time and resources.
